Blood Orange Cheesecake
As an amazon associate I earn from qualifying purchases.
This Blood Orange Cheesecake is one of my favorite winter desserts that can easily become your next dinner's centerpiece. Its bright citrus flavor, homemade filling, and chocolate cookie crust give my classic cheesecake recipe a fresh, delicious update.
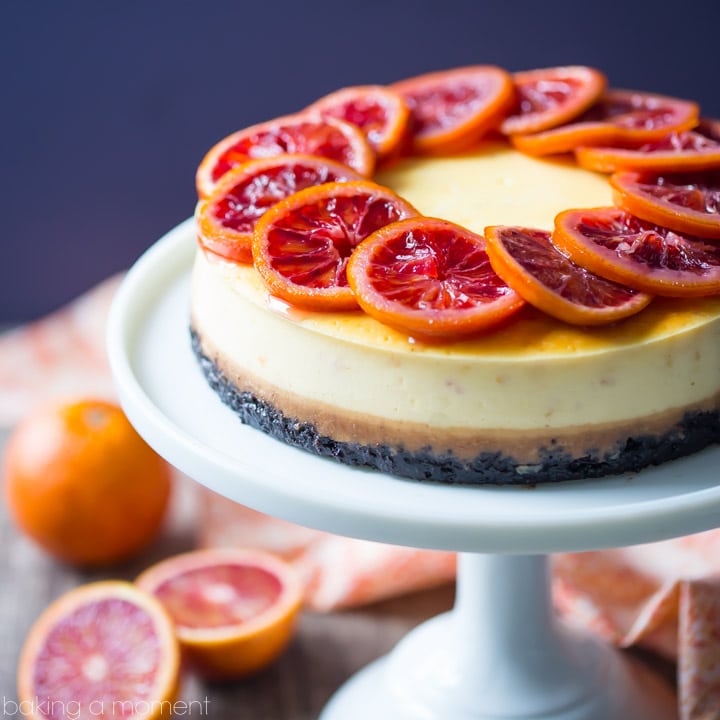
Table of Contents
- Here's Why You'll Love This Recipe
- Ingredients You'll Need
- How To Make Blood Orange Cheesecake
- More Cheesecake Recipes
The minute winter hits, I'm on the hunt for blood oranges. For some reason, they're only available for a hot second where I live, but I just can't get enough. I'm in love with their bright, almost woodsy citrus flavor, and that gorgeous jewel-like red flesh. This year, I decided to show them off, in all their glory, in a dense and creamy blood orange cheesecake with a crunchy chocolate cookie crust.
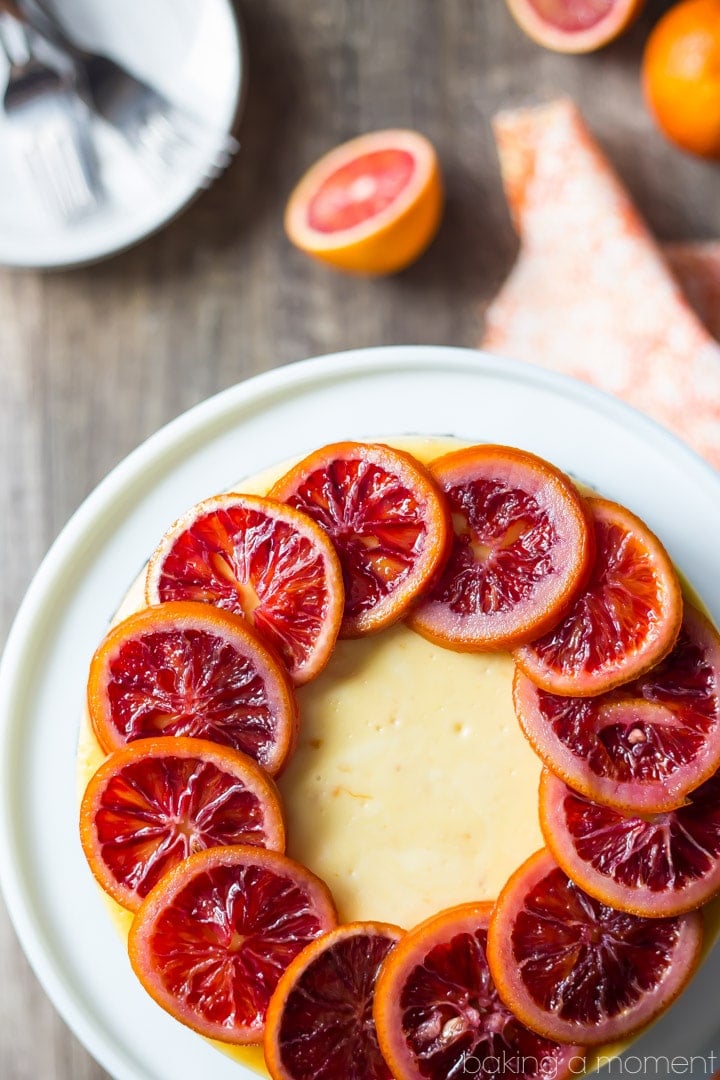
Can you get over those candied blood orange slices? So, so beautiful. They are the crowning touch on this blood orange cheesecake. Just slice your blood oranges and simmer them in a little simple syrup, and they become tender, sweet, and beautifully shiny. They taste like marmalade!
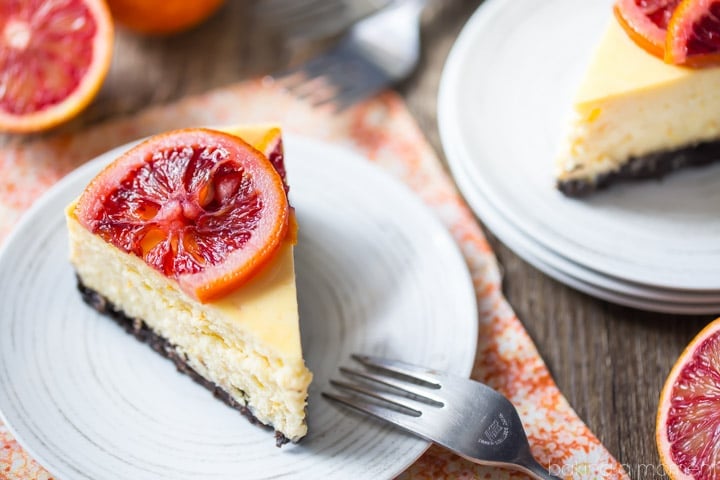
This blood orange cheesecake begins with my favorite cheesecake recipe. It's creamy, a little sweet, and incredibly rich.
To that, we add the zest and juice of one blood orange. The tangy citrus pairs incredibly well with the smooth and creamy cheesecake. A crunchy chocolate cookie crust is the perfect compliment! You could also use graham crackers, or vanilla cookies would work equally well.
Here's Why You'll Love This Recipe
- Bright citrus flavor: Blood orange juice and zest give the cheesecake a unique flavor.
- Ultra-creamy texture: The filling is smooth and rich, but not too heavy.
- Chocolate crust: The deep cocoa flavor pairs well with the tangy citrus.
- Candied orange topping: This adds a beautiful look and a sweet, chewy bite.
Ingredients You'll Need
The recipe card at the bottom of the post contains the full list with all of the amounts. Refer to that when you're cooking.
I like to bake my cheesecakes in a regular 8-inch cake pan. A lot of recipes call for a springform pan, but the minute you put it in a water bath, it just leaks like crazy! A wet cookie crust is the worst kind of disappointment. I find a regular cake pan works way better, and as long as you grease it well, line it with a circle of parchment, and let the cheesecake cool fully, it will slip right out onto your serving platter.
For the crust
- Oreo cookies: Crush them well to make a rich, chocolate base.
- Unsalted butter: Melt it to help hold the crust together and add flavor.
For the cheesecake
- Granulated sugar: Superfine sugar is best, but regular granulated sugar works just fine, too.
- Cornstarch: It thickens the filling and helps maintain a creamy, stable texture.
- Cream cheese: Let it come to room temperature so the batter is smooth and lump-free.
- Eggs and an extra yolk: These give the cheesecake structure and a rich, custard-like texture.
- Heavy cream: This makes the filling silky and light. Don't sub in milk or half-and-half.
- Blood orange zest: It naturally boosts the citrus flavor.
- Blood orange juice: Freshly squeezed juice gives the best flavor and aroma.
For the topping
- Blood oranges: Slice them thinly for a pretty garnish.
- Water: This is used to make the syrup.
- Granulated sugar: It sweetens and thickens the syrup for the candied oranges.
How To Make Blood Orange Cheesecake
Step 1: Make the crust
Mix in the melted butter, then press the mixture firmly into the bottom of the pan.
Spray an 8-inch cake pan with non-stick spray and line the bottom with parchment paper.
Use a food processor to crush the cookies into fine crumbs.
Step 2: Make the cheesecake
Preheat the oven to 400°F.
In a large bowl, whisk together the sugar and cornstarch. Add the cream cheese and beat at medium speed until smooth. Add the eggs and yolk one at a time, scraping the bowl after each addition. Stir in the cream, zest, and juice until well combined. Pour the batter over the crust in your prepared pan.
Set the cake pan inside a larger roasting pan. Pour very hot water into the outer pan until it comes about 1 inch up the sides.
Bake at 400°F for 15 minutes. Lower the heat to 300°F and bake for another 70 to 80 minutes. The edges should be set, and the center should still jiggle a little. Turn off the oven and leave the door slightly open. Let the cheesecake cool slowly inside.
When the cheesecake reaches room temperature, chill it for at least 4 hours or overnight.
Step 3: Make the topping
Put the orange slices, water, and sugar in a small pot. Bring the mixture to a simmer and cook for about 20 minutes, swirling the pot occasionally until it becomes syrupy.
Let the topping cool before placing it on the cheesecake.
Helpful Tips and Tricks
- Let all your ingredients come to room temperature before starting. This is a very important step to prevent lumps.
- Once you add the eggs, mix just until combined. Overmixing can cause the cheesecake to crack.
- Make sure the cheesecake is fully chilled before slicing. This gives you clean, neat pieces. Run the knife under warm water between slices for the best results.
- You can store leftovers in the fridge for up to 5 days.
More Cheesecake Recipes
- Caramel Pecan Cheesecake
- Basque Cheesecake
- Strawberry Cheesecake
- Lemon Cheesecake
- Caramel Cheesecake
- Red Velvet Cheesecake
- Pecan Pie Cheesecake
Ingredients
For the crust
- 24 Oreo cookies
- 4 tablespoons (59.15 g) unsalted butter,, melted
For the cheesecake
- 1 cup (200 g) granulated sugar
- 3 tablespoons cornstarch
- 24 ounces (680.39 g) cream cheese, softened, (3 bricks)
- 4 large eggs
- 1 large egg yolk
- ¼ cup (59.5 ml) heavy cream
- 2 tablespoons blood orange zest, (from 1 blood orange)
- ¼ cup (62 ml) blood orange juice, (from 1 blood orange)
For the topping
- 3 blood oranges, sliced thinly
- ½ cup (125 ml) water
- ¾ cup (150 g) granulated sugar
Instructions
Make the crust:
- Mist an 8-inch cake pan with non-stick spray, and line with a circle cut from parchment paper.
- Place the cookies in a food processor and process finely.
- Stir in the melted butter, and press the mixture into the bottom of the prepared pan.
Make the cheesecake:
- Preheat the oven to 400 degrees F.
- Place the sugar and cornstarch in a large mixing bowl and whisk to combine. /li>
- Add the cream cheese, and beat on medium speed until smooth.
- Mix in the eggs on medium-low speed, one at a time, scraping the bottom and sides of the bowl with a silicone spatula after each addition.
- Stir in the cream, orange zest, and orange juice, and transfer the cheesecake batter to the prepared pan.
- Place the cake pan in a larger baking dish, and fill the larger dish with very hot water, about 1 inch up the sides.
- Bake for 15 minutes at 400 degrees, then lower the oven temperature to 300 degrees and continue baking for 70 to 80 minutes. (The cheesecake should be set around the edges but slightly jiggly towards the center.)
- Cool the cheesecake in the oven, with the door slightly ajar.
- Chill overnight, then transfer to a serving plate and top with candied orange slices.
Make the topping:
- Place the orange slices, water, and sugar in a pot and bring to a low simmer. Continue to cook, swirling the pot occasionally, for about 20 minutes or until the liquid looks thickened and syrupy.


The cheesecake part is good. The topping... I simmered the oranges as directed, i.e. until the liquid was syrupy. Then I put them onto the cake. Colorwise, they were really kind of yukky -- nowhere near as vivid or as pretty as in the picture. And did they ever harden once cooled!!! When it came time to cut the cake, they were like ROCK. I had to keep dipping the knife in boiling water so that I could saw through them. Unfortunately the cake (which hadn't had enough time to chill -- totally my fault) kind of fell apart under the pressure. Next time, I will definitely let it "age" overnight. But as for the topping, I think next time I'll just use fresh fruit.
I discovered a secret to perfect water bath cheesecake. I use ones of those slow cooker liners around the outside my spring form pan then double wrap with foil. It keeps the water out so my cheesecake isn't soggy. This is a delicious and beautiful cheesecake! I am making this for the holidays and can't wait to dig into it.
That's a great tip Roxanne! Thank you so much for sharing. I hope you and your loved ones enjoy this cheesecake!
When you say your crust gets wet in a springform pan, do you wrap the pan in foil before putting it in the water bath? Does it still get wet that way?
For me it does! I can't explain it Dorota- that water is just so sneaky and it somehow finds a way. If you don't have the same problem, then by all means you can use a Springform. Just keep an eye on the bake time, it may need a little less because Springforms tend to be a bit wider.
Thanks for the wonderful recipe. So I just pour the syrup on the cheesecake and design with orange slices as final step? because it doesn't seem there is any syrup in the picture.
Hey Hala! Hope you are well. When I candied my orange slices, there wasn't a whole lot of syrup really. Most of it gets absorbed by the fruit. If you end up having enough, I think it would be lovely to drizzle some on. But if not the juice, zest, and candied fruit will still provide lots of citrus flavor. Good luck and I hope you love it!
February is one of the hardest months for me - spring seems so far away. A sweet treat that tastes like sunshine is just what the doctor ordered!
I couldn't agree more Jessie! I'm so ready for Spring and this recipe felt like a little taste of it. So happy you liked it; thanks so much for the sweet comment!
We're totally in sync, both baking with blood oranges 🙂 Aren't they the best? Your cake looks delicious, I love a good cheesecake, but I've never added blood oranges to it. My birthday is coming soon, so I might make this one, looks refreshing!
Aw happy birthday Anja! I hope you do get a chance to make it. If you like blood oranges I bet you'd love this!
Beautiful!!
Thank you so much!
I love when blood oranges are in season. What a great way to use them in dessert! I'm really not a fan of springform pans either, but I've never make cheesecake in a regular cake pan. I'll definitely try it next time. Beautiful photos as always, Allie!
Thank you so much Natasha! I've been baking my cheesecakes in regular cake pans for decades. It works just fine- just be sure it's fully chilled before turning it out.
Looks gorgeous! Need to try baking it in regular cake pan, I'm not a fan of springform pans either.
Thank you! Definitely give it a try. The crust stays nice and crunchy and as long as it's well-chilled you should have no problem flipping it out. Good luck and thanks for the sweet comment!
This cheesecake is absolutely stunning! I want to run out and buy some blood oranges just to make it! <3
Thank you so much! I hope you are able to snatch a few up before the season is over!