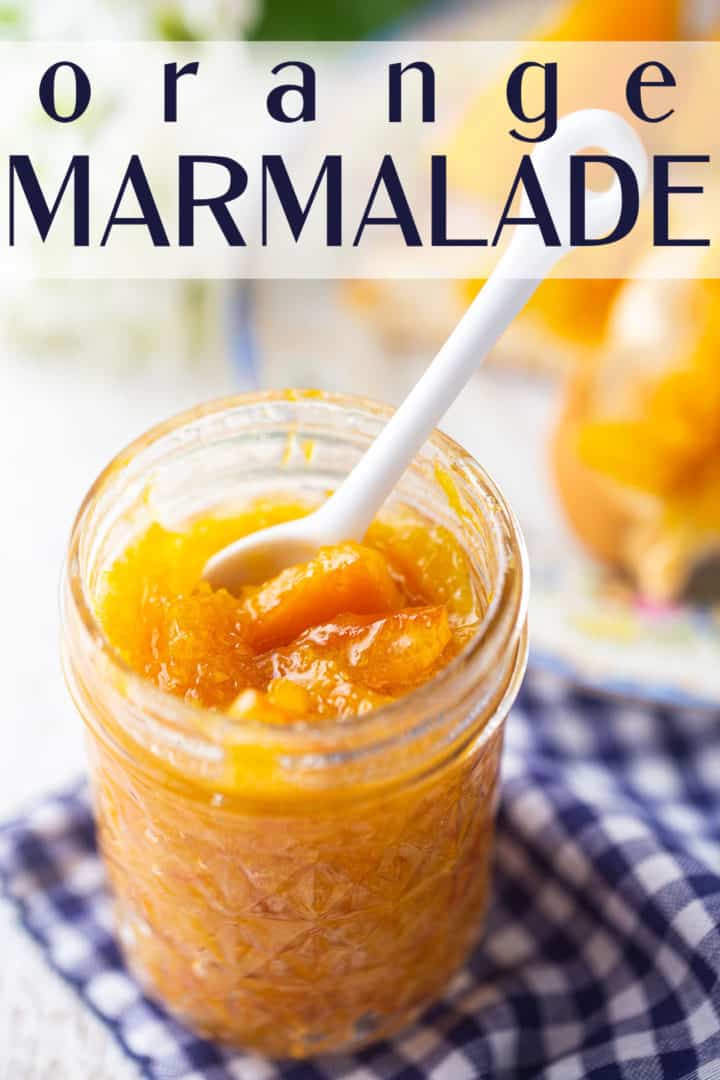
Orange Marmalade
As an amazon associate I earn from qualifying purchases.
Make this easy homemade orange marmalade- you only need 4 simple ingredients, no pectin required! So sunny-sweet and cheerful!
It's a crisp, sunny, gorgeous spring day and I've got citrus on the brain!
Somehow this seems to happen every year, right around this time. I don't know what it is, but all that bright sunshine makes me crave lemon, lime, grapefruit, and orange!
I've been sharing my favorite recipes for lemon curd, key lime pie, and lemon pound cake on Instagram these last few weeks, and they've been getting lots of love! So that tells me that I'm not alone in this citrus love affair, right?
I guess now's the perfect time for me to teach you this easy orange marmalade recipe.
It's easy as you like and you'll only need 4 simple ingredients. And one of them is just plain water!
Most of the time you'll spend on it is hands-off. It's mostly just a matter of soaking and boiling.
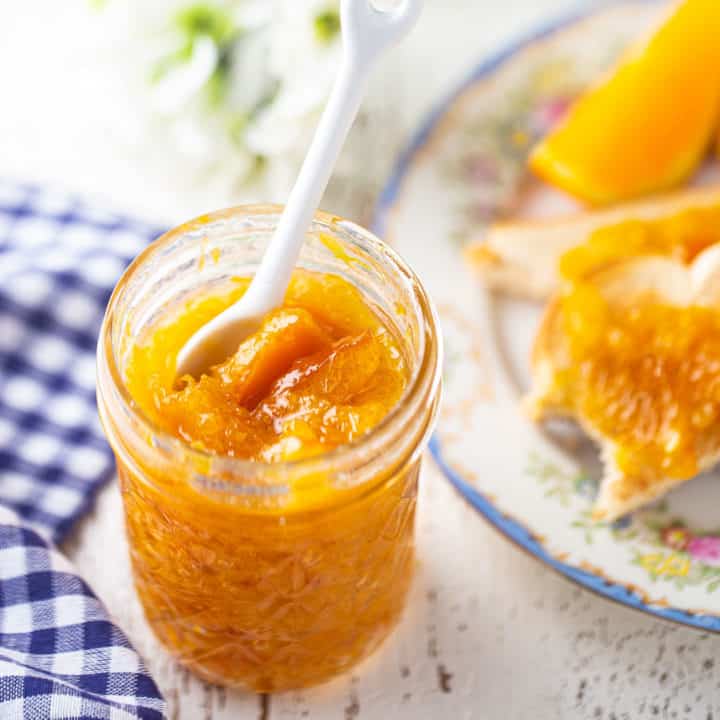
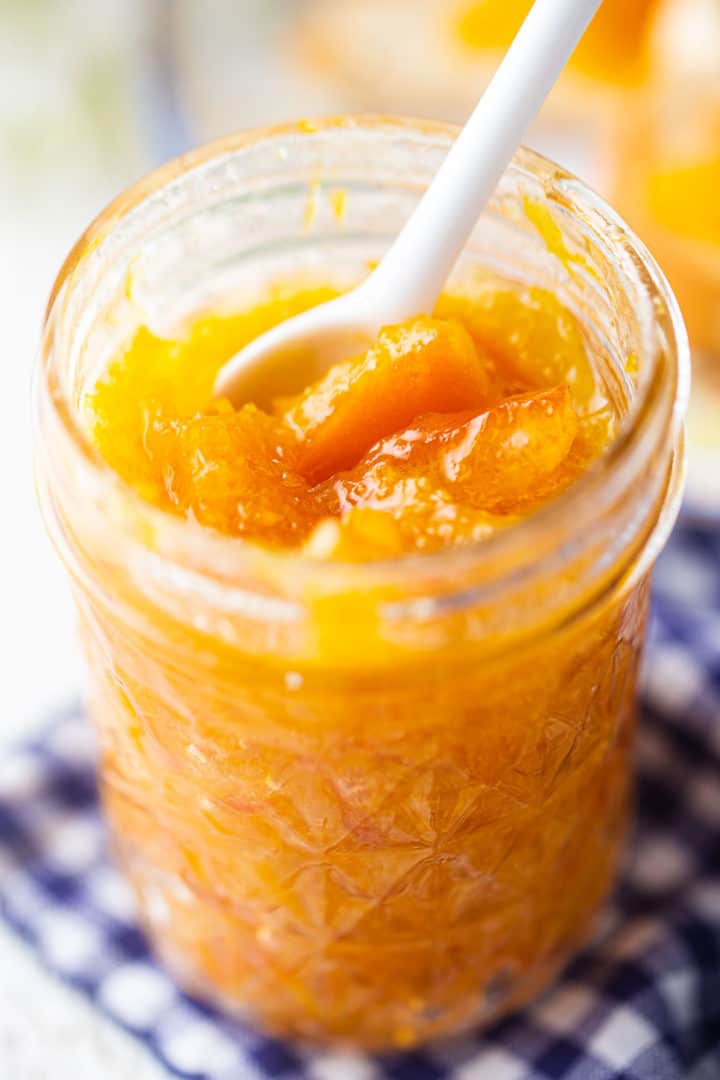
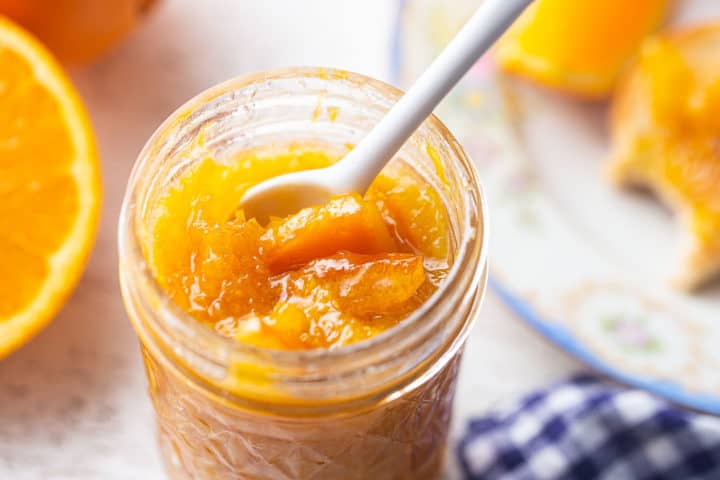
It cooks up thick, sweet, spreadable, and loaded with fruit. Just bursting with sunny orange flavor, with a pleasingly bitter back note. Everything good marmalade should be!
WHAT IS MARMALADE?
Marmalade is basically just the citrus version of fruit preserves.
Simmering fruit and sugar together until it reaches a certain temperature yields a spreadable topping that can be used in all sorts of delicious ways.
With any other kind of preserves, you can use fruit puree or roughly chopped fruit. With marmalade, all of the fruit is used. So it's got bits of orange pulp and candied peel running all throughout, giving it the most intensely concentrated orange flavor!
HOW TO MAKE ORANGE MARMALADE
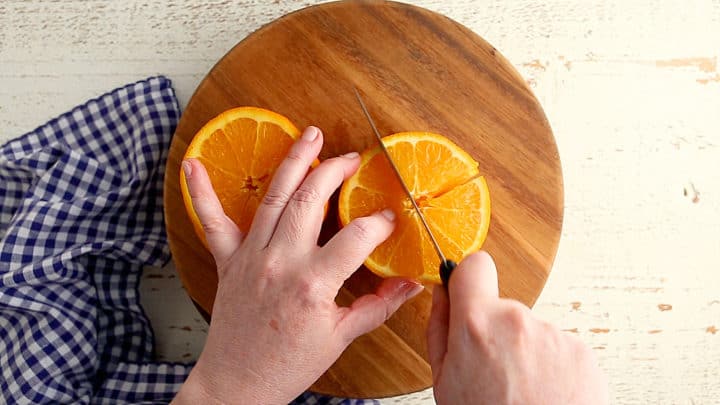
To make this easy recipe, start with the oranges. I used good ol' navel oranges, but there are other options (more on that below).
Slice them as thinly as you can. For what you see in these pics and video, my slices were actually thicker than I liked. Next time I make this, I will use my mandoline slicer so I can get thinner slices. The thinner the better, in my opinion.
Cut the slices into quarters.
Then place them in a large pot and cover them with water. It doesn't matter if the water is hot or cold.
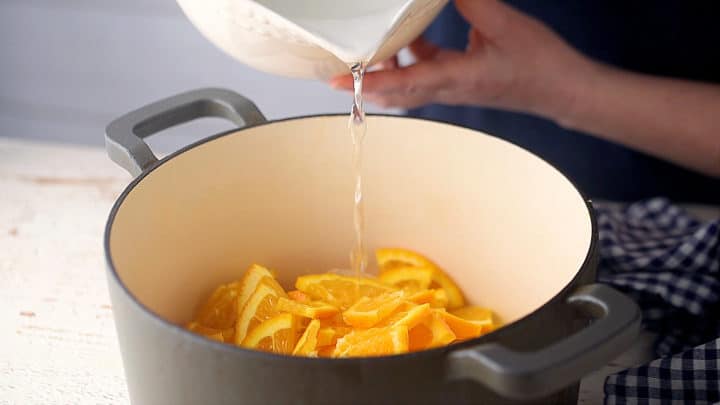
You're going to soak the fruit in the water overnight. This will draw out the natural pectin in the fruit and help your marmalade to cook up nice and thick.
Pectin is an additive you can buy, but many fruits already contain it naturally. It can be found in the peels and seeds.
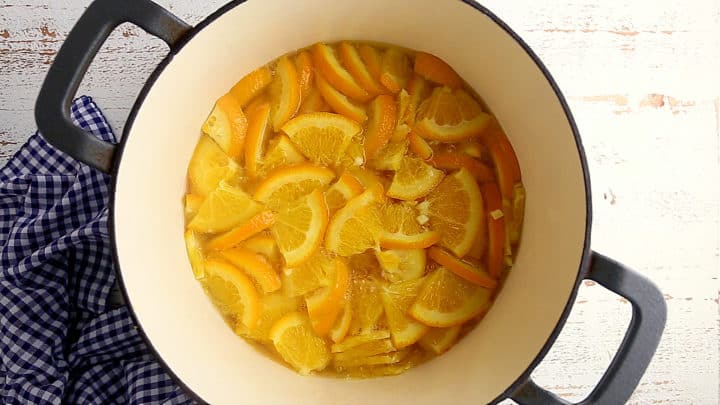
Next morning, boil the fruit in its soaking liquid. This will help the peels to become soft.
I boiled mine for about 30 minutes. When I checked them, the peels were soft enough to cut with the edge of a spoon. This is what you want!
Once the sugar goes in, the peels will become chewy and they will NOT get any softer. So make sure they are good and soft before you go on to the next step. If 30 minutes isn't enough, give them more time!
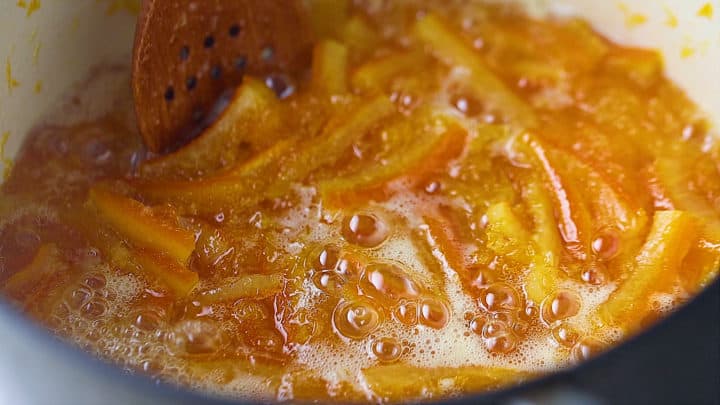
Add in the sugar, let the mixture first simmer for about 30 minutes, then bring it up to a full boil.
Stir it frequently so it doesn't burn on the bottom!
Once it's reached the proper temperature, take it off the heat and stir in a little lemon juice. This is the "seasoning" that will round out the flavors in the most delicious way!
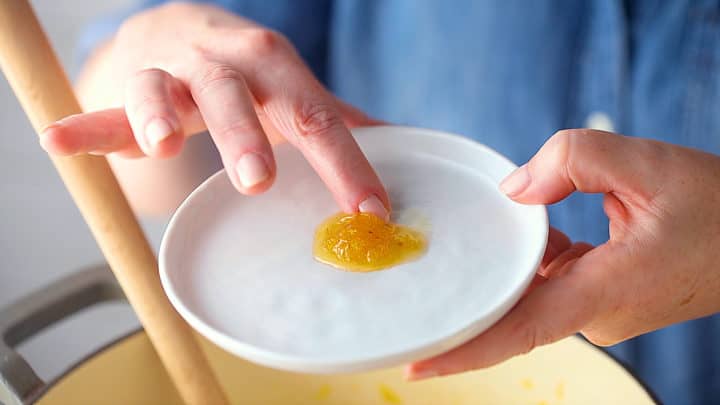
HOW TO KNOW WHEN IT'S DONE COOKING
You'll notice as it boils, the marmalade becomes thicker and more concentrated.
When it reaches the 220 degree F mark, it should be at its gel point. This means that even though it still looks very syrupy and loose in the pot, it will gel up and become the proper spreadable consistency when cooled.
If you don't have a thermometer, you can buy one here for just a few dollars: digital food thermometer. I find this to be such an essential kitchen tool, not just for making preserves but also for candy, some frosting recipes, and for meat especially.
Or you can do things the old-fashioned way and use the wrinkle test. Place a small amount of marmalade on a plate and chill it in the freezer for a few minutes. Then, slide your finger into it and observe. If the surface wrinkles, you are good to go!
If you misjudge and undercook your marmalade, don't worry! Just put it back into the pot and boil it a little more.
If you overcook it and find that it's too stiff in the jar, it's an equally easy fix: just stir in a little water until you get the consistency you prefer.
PRESERVING IN A BOILING WATER CANNER
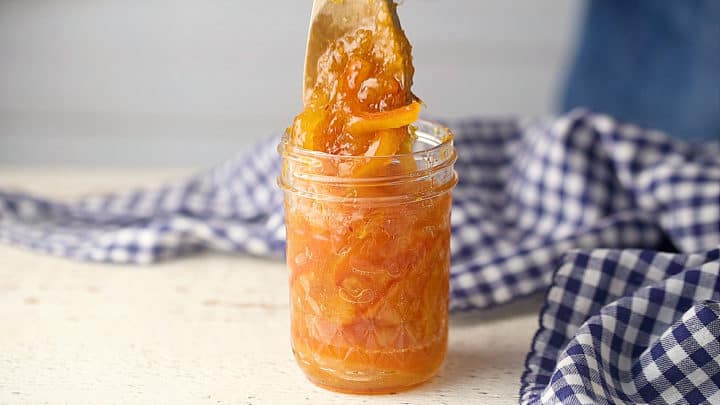
Once the orange marmalade is cooked to the proper consistency, you can spoon it into jars.
I like to process my orange marmalade so I can put it up for months in my cupboard and not have it go bad. This is an optional step, but I feel like the benefits outweigh the minimal effort it requires.
So I sterilize my jars in boiling water before spooning in the marmalade.
Then I wipe the rims with a clean cloth, screw on the lids, and submerge the jars in boiling water for around 10 to 20 minutes.
Once removed from the boiling water, you should notice that the little "button" on the lid has suctioned down. This lets you know that an airtight seal has formed, that won't allow any microbes to grow.
If done properly, your finished product will keep in a cool, dark place for up to one year. If you choose not to process the jars, they will last in the fridge for up to 3 months.
WHAT KIND OF ORANGES TO USE
For what you see here I used what is most readily available in my area: navel oranges.
- Clementines
- Tangerines
- Satsumas
- Blood Oranges
- Seville Oranges (this variety is most traditional!)
You could even use another type of citrus fruit altogether! I think Meyer lemons would be fantastic, as would grapefruit, key lime, or yuzu!
IS THIS GLUTEN-FREE?
Not only is this recipe 100% gluten-free, but it's also dairy-free, vegan, egg-free, and nut-free! Such a nice treat for those with food sensitivities.
HOW TO USE IT
Marmalade can be used in so many different ways. As a pretty, shiny glaze for a fruit tart, as a filling in between layers of cake, or even to jazz up a cocktail.
But I think it's best-loved as a spread. Try spooning it on toasted brioche, biscuits, or scones. It's such a cheerful way to start your day!
A FEW MORE OF MY FAVORITE TOPPING RECIPES:
As an amazon associate I earn from qualifying purchases.

Ingredients
- 3 (393 g) oranges,, medium (I used navel oranges)
- 4 cups (946.35 g) water
- 3 cups (600 g) granulated sugar
- 1 tablespoon (14.79 g) lemon juice
Instructions
- Cut the oranges into thin slices, then cut the slices into quarters.
- Place the oranges in a large pot and add the water.
- Soak the oranges in water overnight.
- Place the pot over high heat and boil the mixture for 30 minutes.
- Turn the heat to low, add the sugar, and simmer for 30 minutes.
- Increase the heat to medium high and boil the marmalade until thickened (220 degrees F).*
- Remove the pot from the heat and stir in the lemon juice.
- Carefully spoon the marmalade into sterilized jars (allowing about ½-inch of head-space), wipe the rims with a clean cloth, add the lids, and submerge in boiling water for 10 to 20 minutes.**

I made this from what they in Thailand called oranges (when I was there) since pectin was not to be found. I actually suspect they were some kind of mandarins since they had a lot of seeds, and were almost green but with orange pulp. Turned out fabulous! However; I wonder if you could substitute the sugar for sugar with pectin to save time? I have found it takes quite a long time for the marmelade to thicken.
Sure, I can't imagine why not! Good luck!
Can you use Munk fruit or sugarless substitute
I haven't tried but I think it could work, so long as it's a substitute that can swap 1:1 for sugar.
Hi, I was wondering approximately how much 3 Oranges is weight wise? I want to make this with my abundance of tangerines my neighbor gave me from his trees, but I wasn't sure what the correct amount would be.
Hey there! I just googled "weight of a navel orange," and here is what I came up with: https://www.google.com/search?q=weight+of+a+navel+orange&rlz=1C1GCEA_enUS832US832&oq=weight+of+a+navel+orange&aqs=chrome..69i57j0i22i30j0i390l3.12664j0j7&sourceid=chrome&ie=UTF-8. I hope this helps! Good luck.
What is the volume of sliced fruit? I have acess to some small tangeriens and want to have the correct ratio,of fruit to sugar.
HELLO ALLIE I AM PLANIBG TO MAKE THE MARMALADE I HAVE ORANGES WITH SEEDS PLEASE LET ME KNOW IF ITS OK TO USE? ALSO IS IT MUST TO SOAK OVER NIGHT?
THANKYOU GOD BLESS YOU AMEEN!
I would remove the seeds if you can and yes I do recommend an overnight soak. Good luck!
Instead of canning, can you freeze?
Yes, absolutely! Good luck & I hope you enjoy!
Is it possible to reduce the amount of sugar? My fruit is very sweet.
I think so, the important thing is just to get it to the right temperature. Good luck!
Thank you for emailing your suggestion. It was too late, though, as I didn't realize I'd overcooked it until it was jarred and cooled. So I just ate it (oh, dear) out of the jar, one spoonful at a time, throughout the week. What a treat; it was like orange-marmalade toffee! I see I neglected to rate it, but would have given it 5 stars even in the circumstances.
I tried again today. The consistency is right, and again it's absolutely delicious! I will be making myself a steady supply.. This is a great recipe, incredibly easy.
For judging the right consistency at Step 6, once it begins to adhere to the side of the pot when stirred, then runs down slowly, it's done (about 20 minutes or so on boil, on my stove). This may help others. Thanks again!!
Just made this. OK, I overcooked it; I'm new to this jam thing. But I can tell that, once I get the consistency right, it will be absolutely delicious!! Very close to Robertson's Thick Cut, which is not always easy to find in supermarkets.
So glad you were happy for the most part! If it's too thick you can stir in a little water to loosen it up. Works like a charm!
How many jars & whst size did you get from making this, please? Want to make some for my sister as a surprise she loves this kind of jam.
Thank you
Makes approx. (3) 8-ounce jars of marmalade. <--That info is in the notes at the bottom of the recipe card. Good luck, I hope your sister loves it!
Easiest marmalade ever! I used 2 naval oranges and a bunch of limequats (cross between lime & kumquat). I’ve tried other recipes over the years without success. This is simple & delicious. Thanks.
Thank you for this recipe. I love how detailed it is so you know exactly how it should look. I also love that you put canning instructions. I have a wonderful broccoli chicken salad that you add orange marmalade to the dressing. I think homemade will take it up a notch!