Homemade Danish Pastry Dough (with Video Tutorial)
Have you ever wanted to make homemade Danish for a special breakfast or brunch? Start with my easy Danish Pastry Dough! I’ve broken the recipe down to be super-simple and there’s even a video tutorial so you can follow along. You’re moments away from the most butter-y, flaky, fruit-filled treat ever!

I am declaring this the summer of bucket-list baking!
Is there something you’ve always wanted to try? But maybe you’ve been a little afraid? Maybe there are a lot of steps, or maybe it’s just a little bit complicated?
I’ve got lots of items like that. Some I’ve yet to tackle and a few that I took the plunge on. Know what I’ve found, most times? It’s not nearly as bad as we build it up in our minds to be.
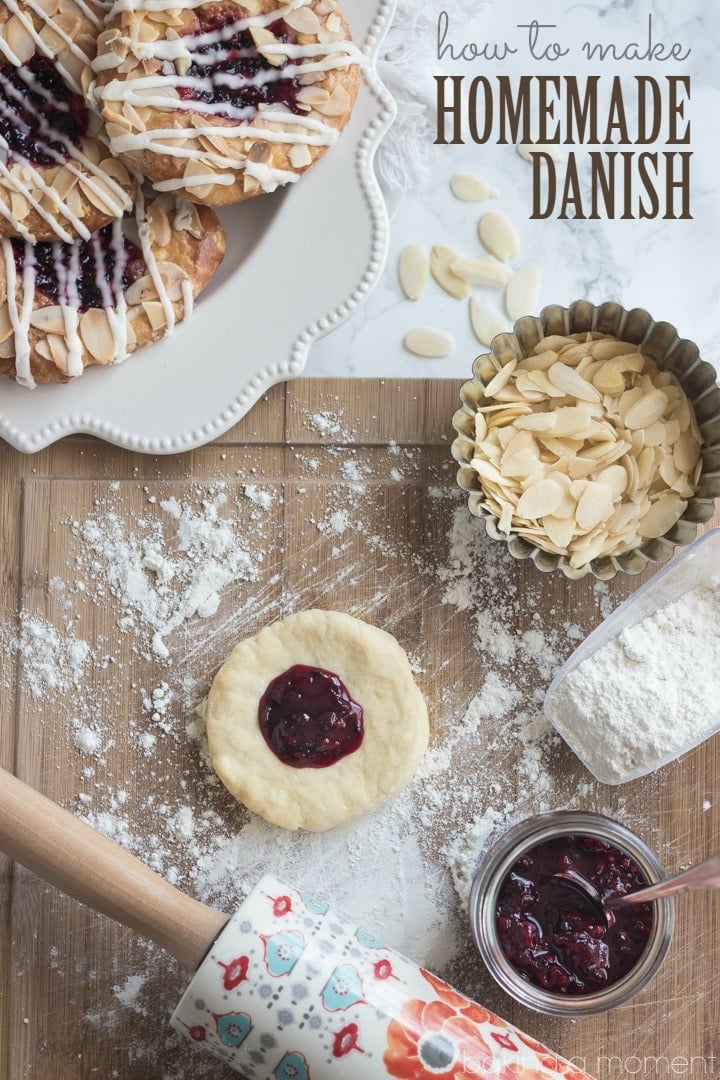
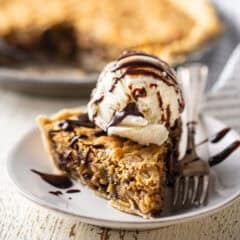
Every time I’ve ever had a Danish at a coffee shop or bakery, I’ve always been a little let down. They always seem to be a bit heavy, and kinda soggy. There’s only one solution, and that’s to make it homemade, from all the best ingredients, and fresh from the oven.
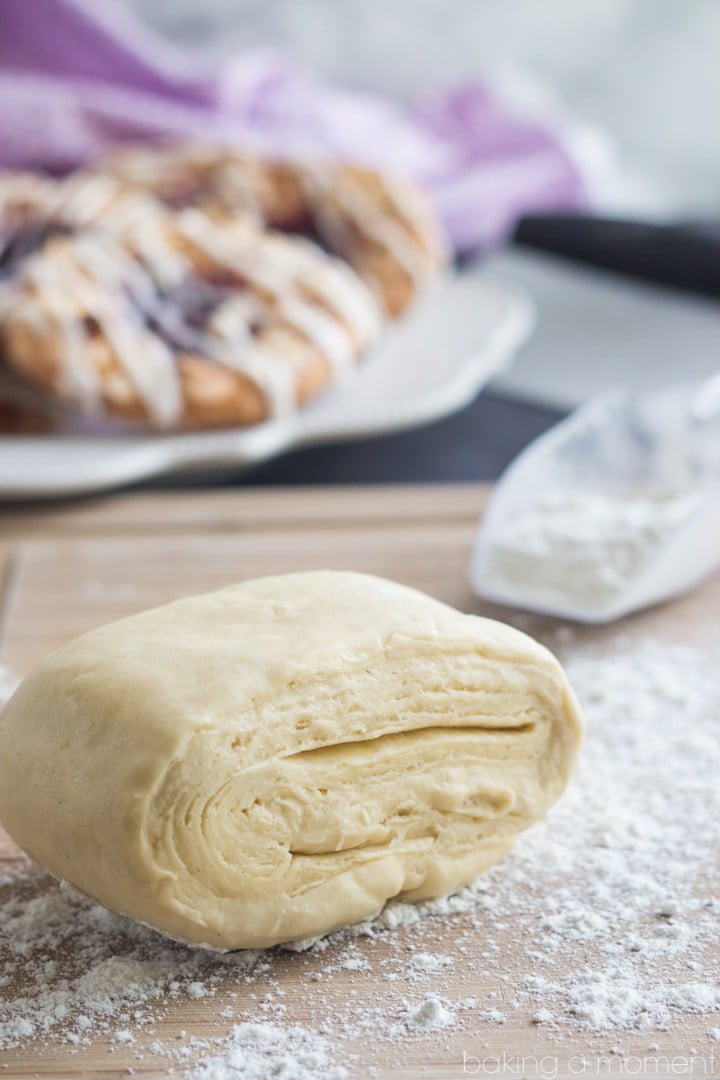
But ugh. I had heard about that butter square. How you have to create a square of butter, encase it within a yeast dough, and roll and fold it over on itself a hundred times to get all those flaky layers. Are you kidding me??? The though of it was exhausting.
Well, I finally just got up and did it. And guess what? It wasn’t hard at all. The dough itself is as simple as mixing dry with wet, and the butter square took me all of about five minutes. Nothin’ to it!
The final product is light as air and super butter-y. I used the best ingredients I could get my hands on, including Irish butter from Kerrygold. What an incredible result! The flaky layers are to-die-for. On Friday I’ll tell you all about the filling and garnishes, so stay tuned!
I do a lot of talking in this video tutorial. I’m not really sure how I feel about that, but rather than typing out the step-by-step, I’m just going to let it speak for itself. I hope you enjoy, and let me know if you give this a try!
This post contains affiliate sales links.

Easy Danish Pastry Dough
Ingredients
- 1 cup (227 g) cold unsalted butter, (2 sticks)
- 2 3/4 cups (343.75 g) all-purpose flour
- 3 tablespoons granulated sugar
- 1 1/4 teaspoons (1.25 teaspoons) kosher salt
- 2 teaspoons dry active yeast
- 1/2 cup (122 ml) milk
- 1/4 cup (62.5 ml) warm water, (like a baby's bath)
- 1 large egg
- 1 teaspoon vanilla bean paste
Instructions
- Cut a half a tablespoon of butter off the ends of each stick of butter, and set aside.
- Cut each stick of butter in half, then cut each half stick lengthwise.
- Line up 4 butter rectangles side by side on a sheet of lightly floured parchment.
- Dust with flour, and fold the parchment up and over the butter.
- Use a rolling pin to lightly pound/roll the butter to a thickness of about 1/4-inch.
- Repeat with the remaining 4 butter rectangles.
- Refrigerate the parchment-wrapped butter squares.
- Place the flour, sugar, salt, and yeast in a large mixing bowl and stir to combine.
- Cut in the reserved tablespoon of cold butter, rubbing between your fingertips to fully incorporate.
- In a large liquid measure, stir the milk, water, egg, and vanilla together.
- Add the liquid ingredients into the dry and stir together.
- Knead the dough for approximately 7 minutes in a stand mixer fitted with the dough hook attachment.
- Turn the dough out onto a lightly floured surface, and roll/pat into a rough rectangle shape. (Ideally, the short side of the rectangle should be about the same length as the long side of the butter square in step 2. The long side should be about 3x the length of the short side of the butter square.)
- Place one of the butter squares in the center of the dough rectangle.
- Fold one side of the dough over the butter, and top with the remaining butter square.
- Fold the other side of the dough over the second butter square.
- Pinch the sides of the dough together to encase the butter within the dough.
- Roll the dough out to a thickness of about 1/2-inch, then fold the dough into thirds, like a letter. Repeat, two more times.
- Wrap loosely with plastic wrap and refrigerate overnight (or for a minimum of 1 hour).


Allie! This is absolutely wonderful. What were you talking about? You are way too modest about your venture into video. GREAT job. And so absolutely lovely to meet you yesterday. Have an awesome summer! 🙂
Oh my goodness, thank you! I’m blushing over here lol. It was so great to meet you too! Hopefully we’ll bump into each other again sometime soon. Glad you’re home safe; thanks so much for the sweet comment; and I hope your summer is lots of fun!
Oh pastry dough! This could be very VERY dangerous! Looks amazing Allie!
Thanks so much Trish! Hope your summer’s off to a great start!
Today’s project….I can’t wait to try this!!!! And as always, love the photos. So stunning. 🙂
Wow! Awesome video! It’s so professional, bright and easy to follow! I’ve been really intimidated by Danish pastry but now I’m totally motivated by that video. On my bucket list- start posting more often, lol
Thank you so much Veronica! I was intimidated too but once I started it surprised me how do-able it really was. I’m so happy you liked the video; thanks so much for the great feedback!
This is one dough I have not yet tried at home. Thanks for the great tutorial and video. U are a pro!!
So are you! I bet you’d really love making Danish. Thanks Zainab!
I’ve considered making pastry dough, especially after reading how stinkin’ easy it is to make.
PS, brownie points to you for using cherry filling for your danish. It’s my favorite danish filling!
I love cherry too! These were actually blackberry but I’d love to do a cream cheese and cherry version at some point. Thanks Julie!
This is seriously SO COOL, Allie! I am totally trying this. I am obsessed with Danishes. Especially ones filled with cream cheese and fruit :).
I know! I need to do a cream cheese one next, right? Thanks Annie!
Oh yes, I COMPLETELY know what you mean, Allie. I feel like that about pasta. Would love to try making it but I feel like feeding it through the pasta machine would just be too much … hahaha! I have never even thought of making any Danish pastries because I just can’t image being able to make them, but after reading this post I feel like I actually could. So thank you!!
Oh, and how on earth do you make even a picture of dough just stunning?? I’m swooning here as usual!
Haha thank you Helen! Before I started, I will admit, I was scratching my head as to how to photograph raw dough! I’m glad to know you think I did ok at it. And PS- I’ve made pasta and it is so much fun! I actually really love doing it, it’s almost meditative!
I had never even thought about making my own Danish pastries, what a great idea! The words “butter square” alone make me drool, going to have to try this! And your rolling pin is adorable!
Haha thanks Nicole! The butter square was so much easier than I expected it to be 😉
Allie – I definitely need to start my summer bucket list. 🙂 I love that you tackled the pastry dough. I’ve always been intimidated by it as well. You convinced me to attempt it.
Yeah, you should totally go for it! There really isn’t that much to it!
Allie,
What an awesome video! Aside from the awesome content, you have a great voice-over voice 🙂 Those laminated layers of dough in the photo are to die for! I love how your recipe has two separate butter squares and three double turns, and it gets done without having to refrigerate the dough between turns. Brilliant!
I use Nigela Lawson’s cheat version of danish dough (It’s made in a food processor and while you have to turn the dough, there are no butter squares!) I’ll definitely try your recipe out – there’s always room for more delicious, flaky danish dough recipes 🙂
That’s really interesting! Before I took this on I was hoping to figure out a cheat version but I ended up giving up on the idea. Good to know that it really can work. Thanks so much Aida!
Thank you for sharing this wonderful tutorial Allie! I’m so making this! You are amazing! and I love your rolling pin, I think I saw a similar one at Anthropologie!
Yes! I bet you did! That’s where my sister-in-law found it. It was a gift from her! Thanks so much Manali and I hope your week is off to a great start!
What a great tutorial! I’ve shied away from danish pastry dough because of the butter square but now I see how easy it is! Can’t wait to finally give it a try!
We have family coming in this weekend and I need something impressive. Done! 🙂
Hooray! Great timing! I hope you and your family enjoy!
Seriously, Allie this is incredible! Making your own danish pastry – wow! Can you imagine whipping these out for a morning tea?! Everyone would be so impressed. Thanks for the fantastic video tutorial. Just another thing to add to my ‘must master’ list! 🙂
Haha well it was on mine for a while, and I have to say it wasn’t at all difficult to master. Thanks so much for the sweet comment Jess!
I love using this recipe whenever I want danishes!
Where did you get the rolling pin!?
Hey Kaylin! The rolling pin was an Anthropologie find. It’s cute right?
Kaylin, the pin is a French rolling pin and you can get them at most bakery supply stores.If there are not any supply stores near your home, then google it on the internet. Amazon has quite a few of the ,”French Rolling Pins” for sale.