Homemade Ladyfingers
As an amazon associate I earn from qualifying purchases.
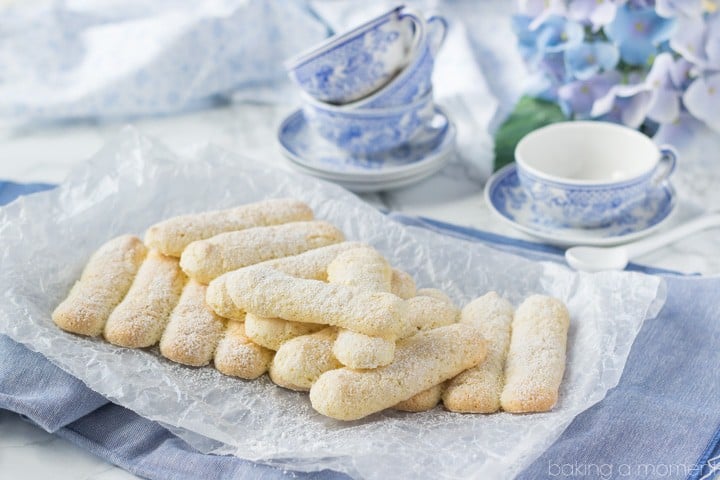
Have you ever wondered how to make homemade ladyfingers? It's really very simple! If you can separate eggs and pipe a straight line, you're just moments away from these light, sweet, and delicate little cakes. They're perfect for your next tiramisu or Charlotte recipe!

Can you believe the week is half over already? Where did it go? Can someone please tell me?
My kids have been in school for three weeks now but they've yet to have an actual 5-day week. And I think they won't for at least a few weeks more. So many fall holidays! And we haven't even gotten close to the major ones yet (I can't wait!).
So, I'm a little behind this week because of the extended weekend and all the festivities that went along with it. I actually made and shot these little lovelies last week, but I wasn't completely happy with them, and wanted an extra day to tweak and test.
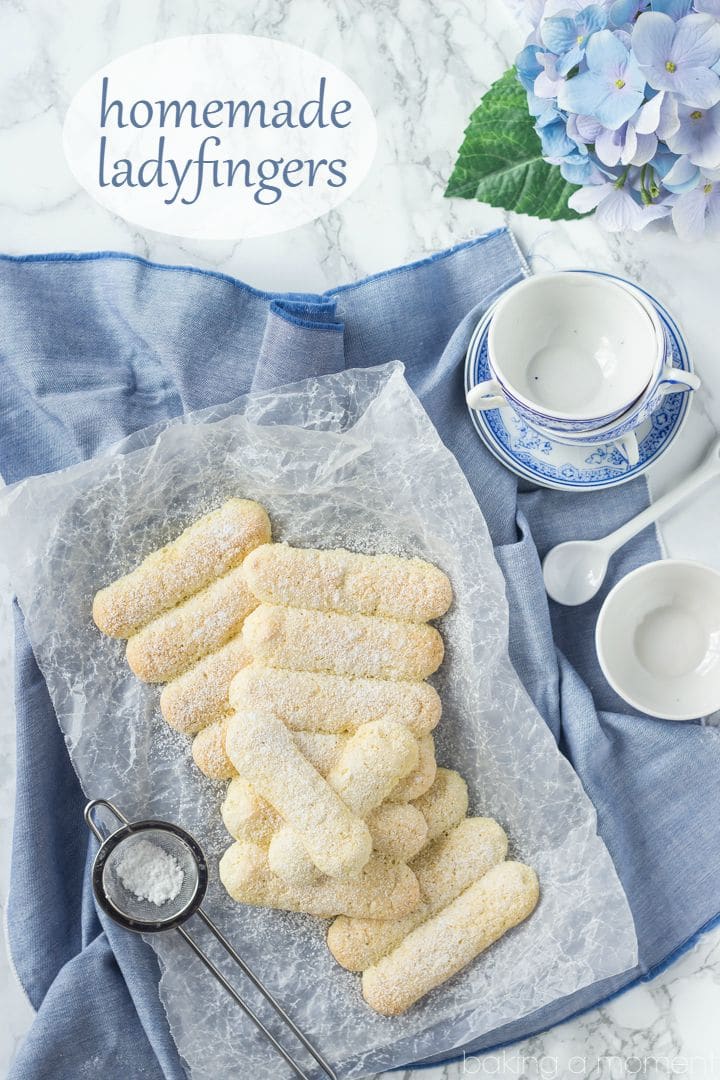
I'm glad I did because the revised recipe is easy as pie and practically fool-proof. I'm telling you, if you can separate and whip eggs, then homemade ladyfingers are nothing to fear. There is no need for you to buy those strange hard things in a cardboard box. I don't know what those have in them, but these are little more than fresh eggs, sugar, and a little flour. I whipped them up in less than an hour, and they are light as air, sponge-y, sweet, and delicate as can be.
- Room temperature eggs are best for this recipe, but I used cold from the fridge and it still worked just fine.
- Crack the eggs gently so as not to break the yolk. If any yolk gets into the white, the whites won't whip up properly. I like to open the egg into my hand so I can gently pull the white away with my fingers. The sharp, jagged edges of the shell make me nervous!
- Add the sugar to the whites slowly. When they are starting to look soft and more white and opaque, you can start adding it in, in a very slow stream, so that it has time to dissolve fully but doesn't deflate or knock the air out of the fluffy whites.
- Whip the bejeezus out of the yolks and sugar. The color should change dramatically from deep, orange-y yellow, to a very pale canary color. They should be really thick too, and fall from the beater in a long ribbon. I flavored mine with vanilla bean paste, but I think they'd be lovely with orange blossom water or lemon zest as well.
- Fold the whites into the yolks carefully. It's ok if the batter looks a little streaky, because it's going to get lots more folds when you add the flour.
- I found it helpful to make myself a little guide before I started piping. I just measured and marked lines, 3-inches apart, on a sheet of parchment paper. Then I marked perpendicular lines, 1-inch apart. You only have to do this one time! Keep that sheet as a guide and slip it between the sheet pan and the parchment you actually pipe the ladyfingers onto. When you are done piping, slip the guide sheet out before popping the ladyfingers into the oven, and you can use it over and over again.
- You'll notice that the powdered sugar melts into the surface of the unbaked ladyfingers pretty quickly. That's ok! It's still useful because it creates a nice crackly crust on the surface. You can dust them a second time for looks, once they are baked and cooled.
- You can make them ahead! I double wrapped mine, loosely, in plastic bags and then popped them in the freezer. They'll keep in the fridge for several days too!

I hope you'll give this recipe a try! It's as simple as a sponge cake, really, and such a fun one to make. So versatile too!
In case you are wondering, here is the kind of pastry bag I like to use, with this tip. And I buy my parchment sheets here. These are the baking sheets I have (and I love them!).
Talk again soon! xo
This post contains affiliate sales links.

Ingredients
- 3 large eggs
- 1 egg white
- ½ cup (100 g) granulated sugar,, divided
- ½ teaspoon (0.5 teaspoon) vanilla bean paste, (extract may be substituted)
- 1 cup (125 g) all-purpose flour
- ⅛ teaspoon (0.13 teaspoon) kosher salt
- powdered sugar, (for dusting)
Instructions
- Preheat the oven to 375 degrees F and line a baking sheet with parchment paper. (It's helpful to place a piping guide under the parchment; see above.)
- Separate the eggs, placing the yolks in a large bowl and the whites in a slightly smaller one.
- Whip the egg whites on medium high speed, until fluffy.
- Add ¼ cup of the sugar, in a slow and steady stream, while whipping.
- Continue to whip until the whites hold stiff peaks. Set aside.
- Whip the egg yolks with the remaining sugar, until pale and thick.
- Stir in the vanilla.
- Use a silicone spatula to gently fold in the whipped whites, taking care not to deflate all the air you have so carefully incorporated.
- Sift the flour over the mixture.
- Add the salt, and carefully fold once more, until well incorporated.
- Pipe the batter in 3-inch long lines, onto the prepared baking sheet. (Each ladyfinger should just barely touch the adjacent one.)
- Dust with powdered sugar and bake for 14-16 minutes, or until just beginning to turn golden around the edges.


It says 1 egg white in the recipe and 3 large eggs. Do I need 3 egg whites from the yokes in addition to the 1 egg white? Or do I need just the 1 egg white and toss the other 2 egg whites down the drain? It also may be helpful to include links to videos for separating egg yokes and whipping egg whites. I’m new to baking and am looking forward to making my favorite dessert myself!
Yes you want to use 3 whole eggs plus one additional egg white. Good luck!
Do you use four egg whites and 3 egg yokes?
Yes, that's correct. Three whole eggs plus one additional white.
I was a little nervous but these turned out great! Thanks for the recipe Allie!
So glad to hear it Ashley! Thanks so much for linking on IG and for the 5-star review!
Hi. I am a little confused. Do you use 3 egg yolks and three egg whites. Thanks
No, you use 3 yolks and 4 whites.