

Crusty French Baguette Recipe
As an amazon associate I earn from qualifying purchases.
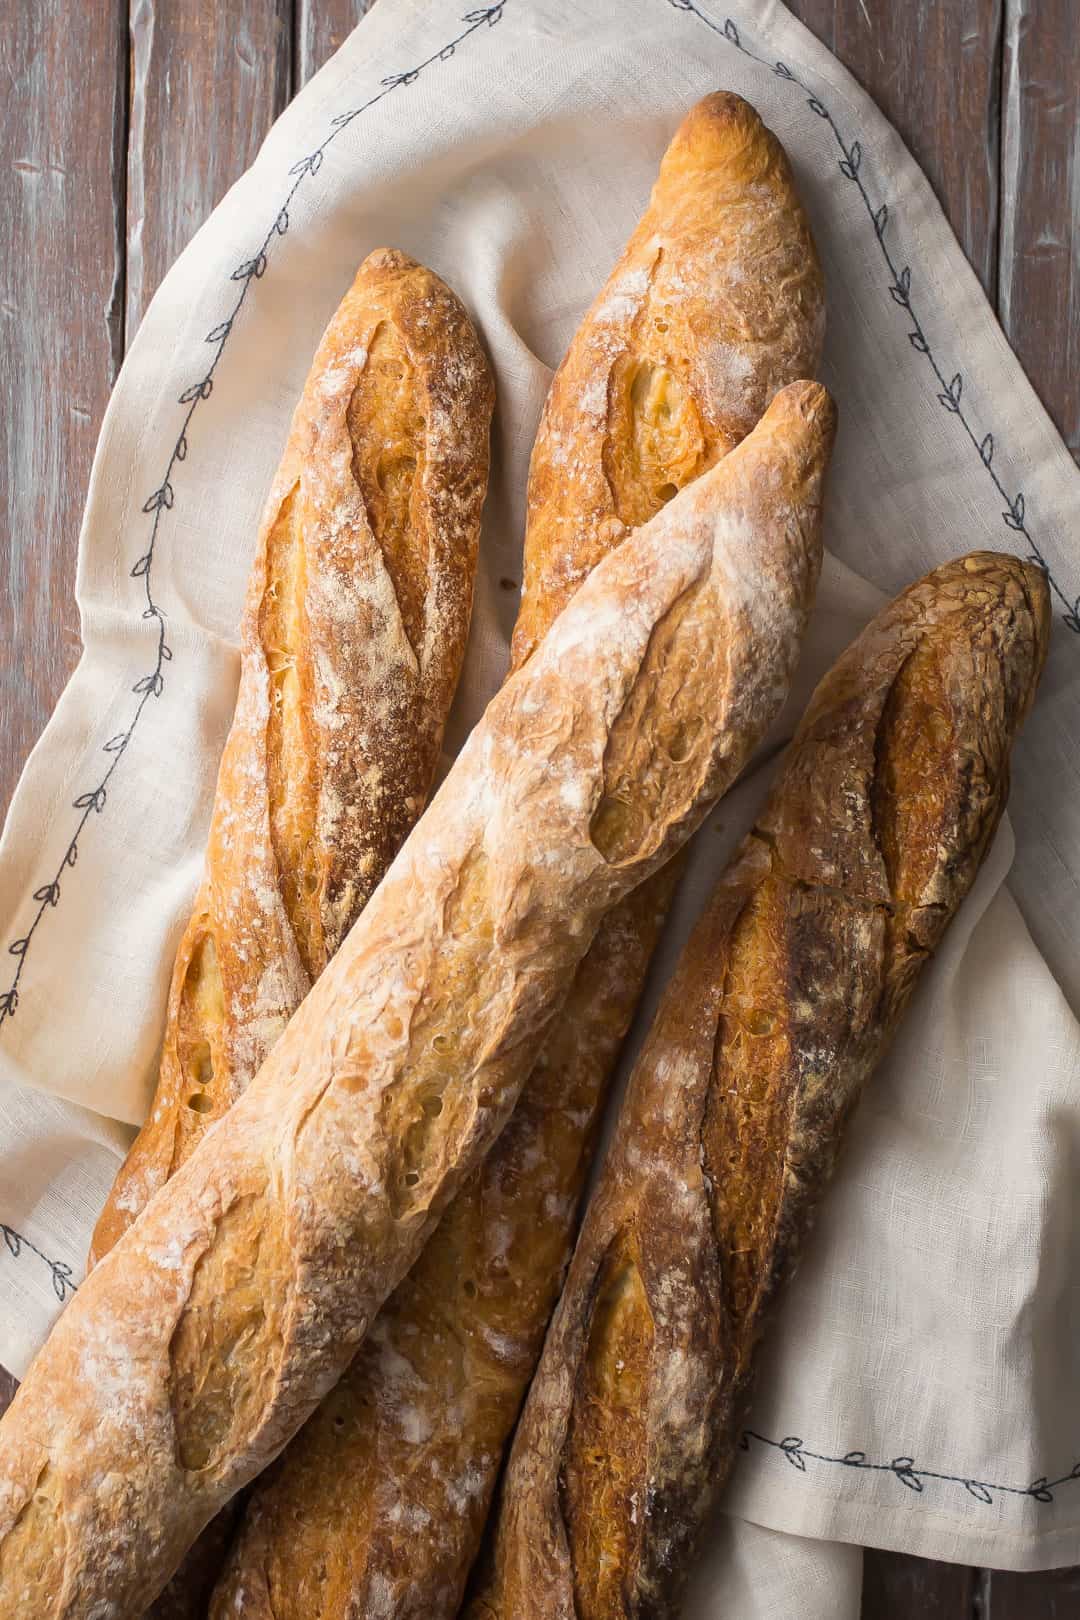
Few things compare to the magic of a crusty French Baguette fresh from the oven. With its golden, crackly crust and tender, airy interior, this bread is irresistible served alongside a bowl of hot soup, piled high with sandwich fillings, or torn off piece by piece to enjoy with butter.
The best part? This recipe is made with just four simple ingredients, and most of the work is hands-off. A little patience goes a long way here, and the results are so worth it.
I am over the moon about that crunchy, splintery outer crust. See how it shatters? And the interior- soft, pillowy, and so airy. It's perfection.
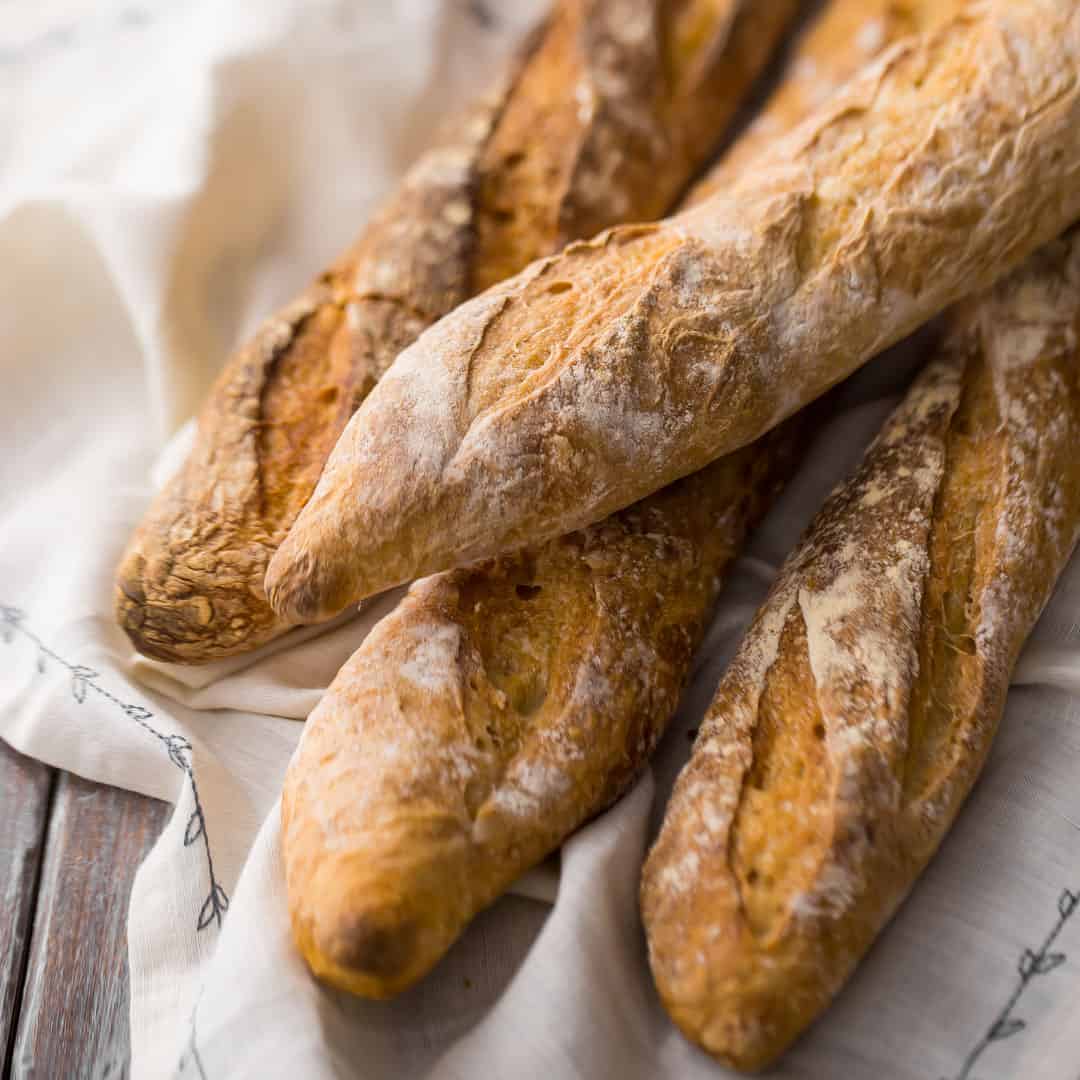
My family loves a good crusty French baguette. We eat this kind of bread with so many things! It's so chewy, yeasty, and good. I've always been a little afraid to try making it myself. Everything you hear suggests it's complicated and fussy, and only a French boulanger could ever get it right.
WRONG! Here's living proof that anyone can make a killer baguette.
Why You'll Love This Baguette
- Bakery-style at home: You don't need fancy equipment to get an artisan-quality loaf.
- Simple ingredients: Just flour, water, yeast, and salt.
- Crispy crust, tender crumb: For the perfect balance of crunch and softness.
- Versatile: Enjoy it as a snack, side dish, or as a base for sandwiches.
Ingredients You'll Need
The recipe card at the bottom of the post contains the full list with all of the amounts. Refer to that when you're cooking.
- Bread flour - Provides the higher protein content needed for that perfect chewy texture and airy interior.
- Kosher salt - Balances flavor and strengthens the gluten structure.
- Active dry yeast - The key to a good rise and light texture. Instant yeast can also be used.
- Water - Warm water helps activate the yeast, while cool water keeps the dough manageable.
- Additional flour - For dusting your work surface and shaping the loaves.
How To Make A Homemade French Baguette
Step 1: Start the Dough
Sprinkle the yeast over the warm water and let it sit until it becomes foamy. This ensures the yeast is active and ready to work.
In a large bowl, combine flour and salt. Make a well in the center and pour in the dissolved yeast. Slowly stir in cool water until you have a shaggy, stiff dough. You may not need all of the water. Cover and let the dough rest for 30 minutes.
Step 2: Fold and Rise
Turn the dough onto a lightly floured surface. Gently press it into a rectangle, then fold the sides into the center and flatten and rotate it. Repeat the process. Place the dough in an oiled bowl, cover it, and let it rise until it has doubled in size (about 1-2 hours).
Step 3: Shape the Loaves
Divide the dough into four equal portions. Shape each into a long, thin loaf, approximately 15 inches long, with tapered ends. Transfer to a parchment-lined baking sheet, cover loosely, and let it rise again until doubled in size (30-45 minutes).
Step 4: Bake with Steam
Preheat your oven to 450°F (230°C). Place a pan of water on the bottom rack to create steam, which helps form that signature crust.
Slash each loaf with a sharp blade, dust lightly with flour, and bake until golden brown and crusty, about 30-40 minutes. The baguettes should sound hollow when tapped.
Helpful Tips and Tricks
- Don't rush the rise: A slower rise develops more flavor and better texture.
- Use steam: That pan of water in the oven is the secret to a crisp, golden crust.
- Slash with confidence: Clean cuts help the bread expand properly in the oven.
- Cool before slicing: As tempting as it may be, let the loaves rest for at least 10 minutes to allow the crumb to set.

Classic French Baguette FAQ
This type of loaf is infinitely versatile! Slice it into ½-inch rounds and it's perfect as a base for bruschetta or crostini. Or it can be used as a dipper for your favorite party dip. And we love it toasted with garlic butter, for garlic bread. So good with a pasta dinner! Or just tear into it and eat it with a hot bowl of soup. So satisfying!
Baguettes are best when they're freshly baked, but they're still pretty darn great after a few days!
To store a French baguette, wrap it loosely and keep it at room temperature for 2 to 3 days. If you notice it's not as crusty after a while, just pop it in a warm oven (around 170 degrees-ish) for 5-10 minutes, and it should come out good as new.
A fancy French boulanger might not agree with me on this one, but I say go for it!
I do this a lot at my house. When the baguette is still fresh, slice it into thin rounds. I'll often cut on the diagonal so there is more surface area to spread yummy things on. Then, just slip the baguette slices into a zip-top freezer bag, and into the freezer they all go.
Whenever we want a slice of crusty French bread, we just pull out what we need.
The baguette slices thaw in just a few minutes at room temp. Alternatively, they can be warmed in the oven or toasted. It's super convenient!
Yes, but the texture won't be quite as chewy or airy. Bread flour is best.
No. A parchment-lined baking sheet works beautifully for this recipe.
This could be due to inactive yeast, cool rising conditions, or using too little water. Ensure your yeast is fresh and allow the dough plenty of time to rise.
Spritz the loaves with water right before baking, in addition to using a steam pan.
More Homemade Bread Recipes

Ingredients
- 3 ½ tablespoons (52.5 g) warm water
- 1 ½ teaspoons (4.67 g) active dry yeast*
- 3 ¾ cups (468.75 g) bread flour
- 2 teaspoons (12 g) kosher salt
- 1 ¼ cup (295.74 g) cool water, (you may not need all of the water)
- additional flour,, for dusting
Instructions
- Place the warm water in a small bowl and sprinkle the yeast on top. Set aside and allow the yeast to dissolve and become foamy.
- Place the bread flour into a large bowl and stir in the salt.
- Make a well in the center of the flour mixture, and stir in the dissolved yeast.
- Add the cool water, a little at a time, while stirring, just until a stiff, shaggy dough (watch the video below to see what this should look like) has formed (you may not need to use all of the water).
- Cover the bowl with plastic wrap and allow it to rest for 30 minutes.
- Transfer the dough to a lightly floured work surface, gently press it into a rectangle, and fold the short sides into the center. Flatten, turn 90 degrees, and repeat.
- Place the dough in a large oiled bowl, and cover with plastic wrap. Allow it to rise in a warm place until doubled in bulk (about 1 to 2 hours).
- Divide the dough into 4 equal portions, and shape each one into a long loaf (about 15-inches long and 1 ½-inches in diameter), with pointed ends.
- Place the loaves on a parchment-lined baking sheet, cover with oiled plastic wrap, and allow to rise until doubled in bulk (about 30 to 45 minutes).
- Preheat the oven to 450 degrees F, and place a pan of water on the bottom rack.
- Bake the breads until crusty and brown (approx. 30 to 40 minutes). The baguettes should give a hollow sound when tapped.
Notes
Author


Have a question about this recipe? Ask AI:
Well I chose this recipe because it said total time 1 hr 10 minutes. NOT! I’ve already got an hour plus into it and I’ve got another 30 minutes plus more time and eventually 30-45 to bake. Drat! It’s already almost 10 p.m.!!
Looking so crunchy and so perfect. It's looking amazing and very tempting. The texture of this bread is so good and just perfectly made. I will definitely try your baguettes at home. Thank you for sharing this recipe and the video. Please do keep sharing.
Thank you so much Supriya! I hope you enjoy as much as we did!
These are great! I've made them a few times now, and it's worked perfectly every time. I'm sure if I worked on my scoring, they'd be even better.
So happy it's been working well for you Kaitlyn! Thanks for the great feedback!
Fantastic and uncomplicated recipe. Absolutely delicious.
So happy you liked it! Thank you for the great feedback!
Hi,
I have live yeast can i use it? And how much of it i need for this recepie please?
Thankd
This recipe looks great and simple! I want to try it but I’m curious, why put a pan with water in the oven? Do you place the bread on top of it?
Thank you!
Hi Hannah! The pan of water is just to create steam. A steamy oven produces a nice, crunchy crust on your bread. The pan of water should go on the bottom of the oven, and the bread should go on a rack above. Good luck!
My go to recipe! Loved it. Ate all of them in one day :(.
Worth it!! I have this bookmarked and make all the time. I find it's a little wet but when you flour to fold it makes up for it.
Great to know Kristen! I'm so glad you've been happy with the recipe!
Perfect recipe. and pretty much what the chef that I worked for as Sous-Chef for many years did. except
25 pounds of flour
2 light handfuls of salt
water to shaggy stage.
let raise for a while in mixing bowl
then form and raise in warmed oven to size
then oven cranked for 25 minutes
perfect every day..
and always people came not just for the food but for the bread and were very vocal about it.
thanks for the reduction in volume... hehe.
You're very welcome Steven! I'm glad to know you approve, sounds like you know what you're talking about!
Nice bread but we found these loaves too salty. (Possibly my error). I’ll try again with 1/3 less salt. The listed baking time would have burned the baguettes very badly at 480°F in my oven. They were crunchy and well browned at 26 minutes. Very important to check the loaves frequently after 20 minutes of baking until they are the way you like them. Most recipes I’ve used suggested about 26 minutes at 450°
Agreed- bake times are meant to be just a rough guideline. It's always best to bake with the oven light on so you can see and judge... I've very glad to know that you were happy with the recipe overall.
My loaves were burned to a crisp! Maybe you should put a note in your recipe about baking times being a rough guideline. Thanks!
Yes, of course baking times are always a rough guideline, for this recipe as for any other recipe. Different ovens can vary greatly, and that is why I always give an approximate time as well as indicators to look for, as I've done here in step number 13: "Bake the breads...until crusty and brown. (The baguettes should give a hollow sound when tapped.)" You should never blindly follow any listed bake times on any recipe without checking your oven.
I agree. My oven cooked these in 15 min.
Mine turned out super salty too and they didn’t really rise much (used dry active yeast). The texture turned out great though. (Baked for only 30min since the loaves were so small).
This was my experience as well, though I used fast-rising yeast (putting directly in with flour per other commenter suggestions). Would try again with proper yeast (finally got some a few days ago) and reducing the salt.
May I ask, in your video did you use all 10 oz of the cool water at step 4. or did you just add a little at a time up to the point you got the proper dough consistency (some water left)? What I got was about halfway between pancake batter and your result. I measured with the digital scale as recommended, and after my questionable result, I weighed 2 fluid oz. of water on the scale as a check and got 2 oz. of weight too. Water is about 1 oz. weight for 1 oz. volume I believe?
Hey Jerry! I'm so sorry for the confusion. You should use just as much water as you need in order to get a shaggy dough. I believe I did need the whole 10 ounces, but depending upon a lot of different factors, you may need slightly more or less than that.
This recipe turned out fantastic! I didn't have bread flour or instant dry yeast, but I used all-purpose flour and mixed instant yeast with the flour instead of in water. Otherwise I followed the rest of the directions and I am so so happy with how they turned out.
Thank you!!!
I'm so happy to hear that Julianna! You're very welcome!
Hi Juliana did you add the instant yeast without the warm water part? That means eliminate the need for warm water? Did u add salt into the flour?
How long do you let the yeast proof for??
Just until foamy- usually takes about 5 minutes.
They came out so well the family want them every day! I baked them on the tea towel, not sure if I was supposed to; They stuck a bit, still delicious though.
Can I make this through step 9 and leave the dough loaves on the floured towel for a more extended period of time (6 hours or so) until I’m ready to bake them so we can eat them fresh from the oven at dinner time?
You can do that but only if you refrigerate them to slow the growth of the yeast. Otherwise they'll be overproofed and flat 🙁 Just allow them to come back up to room temperature and then give them the 30-45 minute rise they need, before baking them off. Good luck!
tried it but dough didn't rise 🙁 I used instant yeast is that the problem maybe ?
Yes you want to use active dry yeast, not instant yeast. Sorry you didn't have better luck.
Did it with instant yeast it worked great but you need to put yeast directly in the flour with the salt and reduce a little bit the amount of water. Delicious baguette!
Thanks for the great tip! Very happy you enjoyed!
Hi Ismael,
How did you use the instant yeast? Did u mix with warm water first then put into flour or mix into flour directly with warm water? I put into flour directly then added warm water, then mixed it then added cool water. My baguette is thin and crusty n crispy. Not much internal Content. Not sure if its due to the instant yeast.
SUSANNA WONG: See my post below on how to use instant yeast. I think the lack of internal content is the use of bread flour, was thinking to use AP flour. Maybe next time, I'm making these again today will stick to bread flour!
Can you use all purpose flour ?
Yes, that's what I use and it works great.
hi, can i use sourdough starter instead of the yeast? and if i can, how much do i use? thanks
Yes you can you sourdough starter. As started is made up of half water and half flour, you subtract the amount of water and the flour from the recipe and triple the prove times. I would use around 8 and a half oz of starter if it was me, so take away around 4 fl oz of water and 4 oz of flour.
The recipe calls for bread flour, not AP flour. Please confirm.
If the bread didn’t rise;
Water needs to be at 100*f much more and it will kill the yeast.
Also if salt comes in direct contact with the yeast it will so the rise
What do I use to measure the temperature of the water to be mixed with the yeast? I think the thermometer I had read just under 100 degrees—is that not warm enough. My bread did not rise.
Aim for around 105 to 110 degrees F.
I used instant yeast. Add that to the bowl, then the flour on top, then the salt so the yeast doesn't directly contact the salt. No warm water, no well. Just whisk those together, then add cool water until the dough is shaggy. The plastic wrap won't stick in the second rise if you oil it as the recipe states. That was probably the hardest thing, I made a mess holding the piece in the air and spraying it! It was hard to fit the 4 logs onto the same sheet, two decided to join so I had to separate them then transferred all 4 to another sheet to cook. They came out great! Next time I will use AP flour, so they will be a bit more dense. These are almost eclair like, mostly air inside. But tasty!
This French baguette looks so perfect! So easy to make!
My mom was taught to make bread by a French chef and he made a well in his flour just like in your recipe. I had to try your baguettes. This bread was marvelous!!!
Hooray! So happy to hear it!
Mmmm mmmm mmmm I've been making artisanal bread for my husband since we can't get fresh bread from the store right now. He's a Frenchie and asked if I could make baguettes instead. I rolled my eyes thinking it would be too complex, until I stumbled across your recipe. All I can say is, best recipe ever. Seems complex initially but the video let's one see just how easy this is. Even I'm in love with the crispy outside and light inside. I make very night so my husband can enjoy in the morning for his pre dawn meal during Ramadan. These are so delicious I do believe I will never buy store bought bread again. ??Thank you thank you.
*PS I struggle with the last transfer as well but who cares about pretty when they taste so good.
So happy it's been working well for you Dee! Thanks for the excellent feedback!
Nothing better than the perfect French baguette! Thanks so much for sharing this recipe!