

How to Bake (Easy! and Delicious!) Cutout Cookies with Neat Edges
As an amazon associate I earn from qualifying purchases.
Learn the secrets to baking cutout cookies with neat edges that won't spread as they bake! You'll fall in love with baking and decorating cutout sugar cookies.
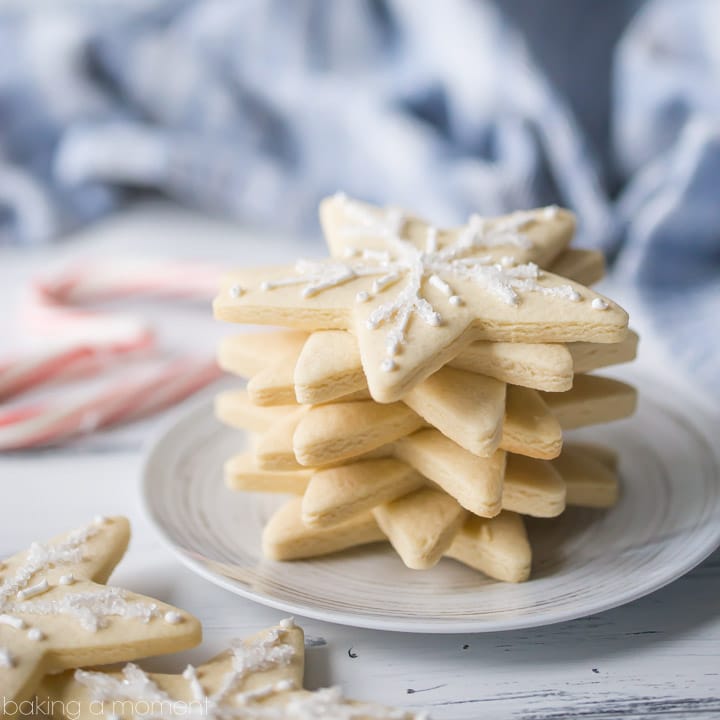
*Original published date: 12/15/2012. Updated: 12/4/2016.*
Jump to RecipeWith less than a few weeks left 'til the most cookie-centric holiday on the calendar, I'm sure all my baking peeps are knee-deep in flour, sugar, and butter right about now!
So in the spirit of giving, I'm spilling all the secrets for my best cut-out sugar cookies recipe!
Almost every baking blog I visit has a post or a FAQ devoted to the subject, "How do you bake cutout cookies that don't spread all over the place in the oven, hold their pretty shape, and have nice, neat edges???"
I searched for the answer to this age-old question not too long ago.
And when I want something, I do not rest until I've nailed it!
After much research and experimentation, I've decided to put everything I've learned on this subject into one comprehensive post.
This easy recipe produces cutout cookies that are soft but a little crunchier around the edges, with a mouthfeel somewhere between a sugar cookie and a shortbread.
They're perfect for decorating!
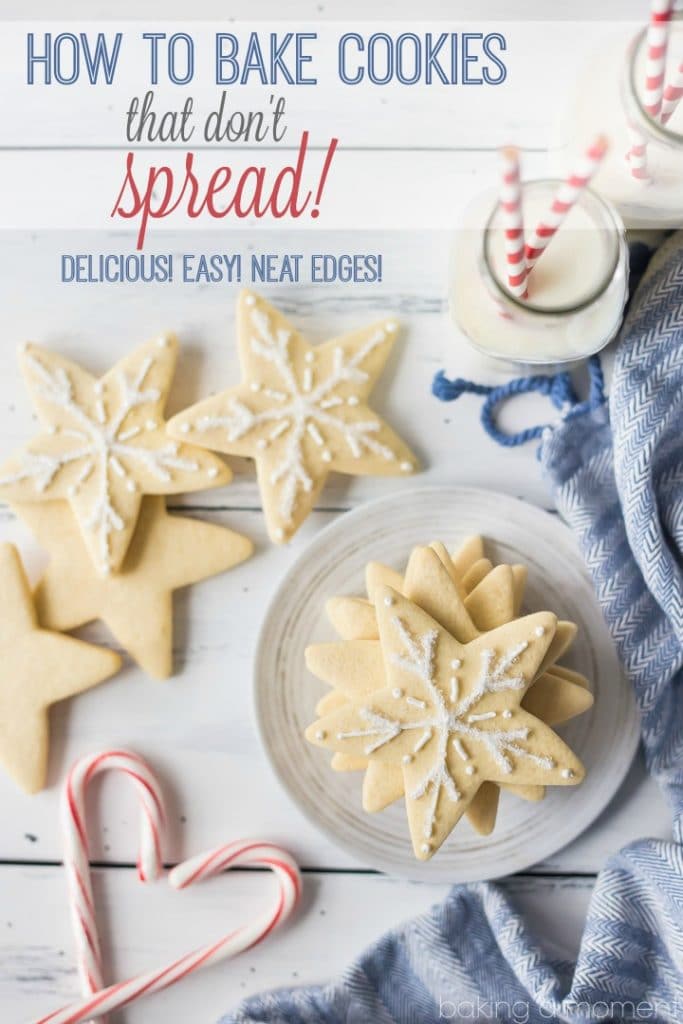
Why you'll love this cutout cookie recipe
Precise shapes: You can create intricate and precise shapes with this no-spread cutout cookie recipe. Whether you're making holiday cookies, special occasion treats, or just fun designs, these cookies will maintain their intended shape during baking with crisp, clean edges.
Beautiful presentation: Cookies that hold their shape offer a visually appealing presentation. This is especially important when decorating with icing, sprinkles, or other embellishments, as the designs stay clear and distinct.
Great for cookie decorating: These cookies are perfect for decorating with royal icing, fondant, or edible markers. Their flat surface is a blank canvas for your creative designs, making them great for cookie decorating parties or edible art projects.
Ideal for gifting: When you're giving cookies as gifts, you want them to look as good as they taste. These cookies retain their shape, making them an excellent choice for packaging and sharing with loved ones.
Balanced flavor: These cookies bake up just sweet enough, with the aromatic fragrance of rich vanilla. They are intentionally a little less sweet, to balance the sugary taste of the royal icing or sparkling sugar they're decorated with.
Ingredients and notes
Butter: I like to use unsalted butter because it lets me control the amount of salt in the dish. Different brands of butter can contain different amounts of salt, so this way you get a more consistent result. Use cubed cold butter to make the dough. This allows you to skip the step of chilling the dough before baking. For a vegan or dairy-free cutout sugar cookie recipe, use a plant-based butter that can substitute for dairy butter 1:1.
Sugar: Sugar adds sweetness (obvs!) but it also aids in browning and keeps things moist, since it's hydrophilic (this means it loves water, in other words, it draws moisture in). Regular white sugar is fine, or sub for another type of sweetener if you like. As long as it swaps 1:1 for granulated sugar it should work.
Eggs: Use large eggs. It's best if they're at room temperature, but I don't find this to be critical. For a vegan cutout sugar cookie recipe, swap in your favorite plant-based egg substitute. As long as it can sub 1:1 for chicken eggs, it should work just fine.
Flour: This is the primary dry ingredient that provides structure to the cookies. All-purpose flour is my go-to, but you can swap it out for any kind of whole-grain option if you like. You may need slightly less if you go that route. A gluten-free flour blend that can sub 1:1 for regular flour should also work just fine, if you'd like to make gluten-free sugar cookies.
Cornstarch: The secret ingredient to achieving cutout cookies that don't spread! It is what creates a really workable cookie dough, and the edges turn out perfectly! Cornstarch is a colorless, odorless, and flavorless starch. Make sure you're using cornstarch, which is white and powdery, and not cornmeal, which is yellow and gritty and tastes like corn chips.
Salt: Salt carries the flavors and intensifies them. The end result won't taste salty, but it will make everything so much more flavorful! I like kosher salt best because it doesn't have any additives (table salt usually contains iodine which can leave a bitter taste), so the flavor is pure. It's also inexpensive and easy to find in a regular grocery store.
Vanilla: Vanilla extract adds a subtly sweet flavor without being at all sugary. For a more pronounced flavor, try using vanilla bean paste. You could also split a vanilla bean down the center lengthwise, scrape out the seeds, and add those.
Or you could try this with an altogether different type of extract or flavoring, such as:
See the recipe card at the bottom of this post for exact measurements.
Variations and substitutions
Different flavoring: You can also use almond extract or citrus zest if desired.
Spices: Add spices like cinnamon, nutmeg, or ginger for different flavor variations.
Food coloring: If you want to color your cookies, food coloring can be added to the dough. I recommend using gel paste color, since you only need a tiny bit to get a vibrant color. But liquid can work in a pinch too.
Tools and equipment
- Measuring cups and spoons: For measuring ingredients accurately. Follow this guide: How to Measure Ingredients for Baking.
- Mixing bowl: In which to mix up the dough.
- Electric mixer: This recipe creates a very stiff dough, so you'll need either a stand mixer or a powerful hand mixer.
- Parchment paper sheets: You are going to roll the sugar cookie dough out between two sheets of parchment.
- Rolling pin: For rolling the sugar cookies out flat.
- Baking sheets: On which to bake the sugar cookies.
- Cookie cutters: For cutting out your cute shapes.
How to make cutout cookies that don't spread
Step 1: Mix butter and sugar
Start by blending the butter and sugar together until smooth.
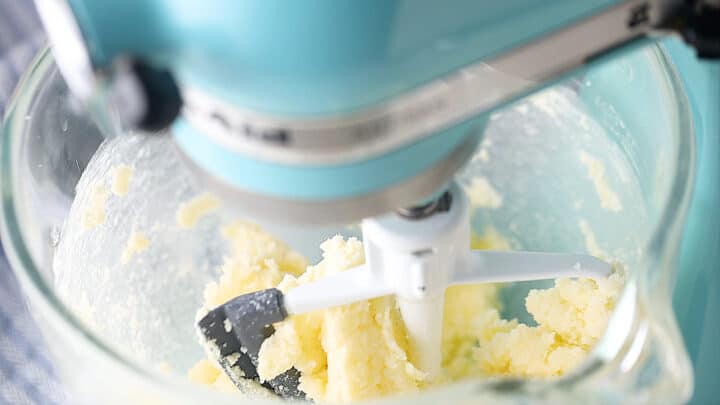
Stop as soon as you have a homogenous mixture. Unlike a lot of other cookie recipes, you don't want to whip in a lot of air here. That will just expand when it gets hot and cause your cookies to spread.
Step 2: Add eggs
Mix in the eggs, one at a time, until incorporated.
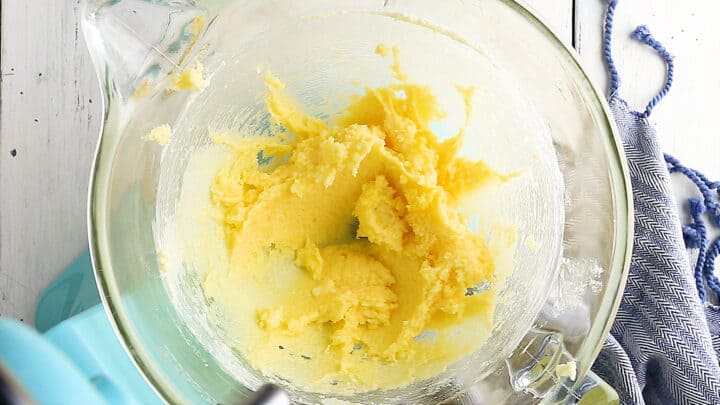
Allow each egg to mix in fully, before adding the next. This will prevent lumps!
Step 3: Stir in dry ingredients
Add the flour, cornstarch, and salt, and mix on medium-low speed.
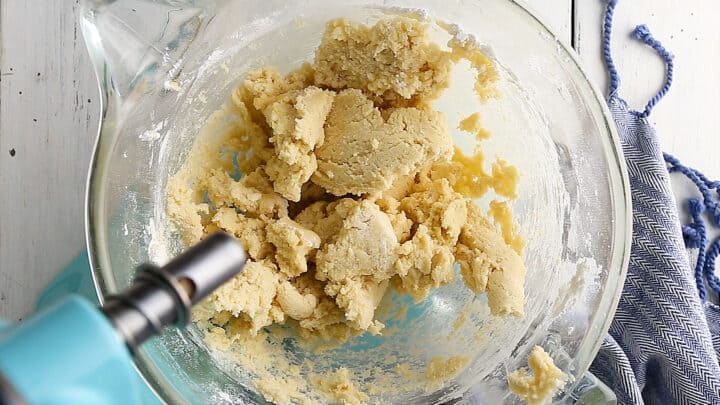
The mixture will initially seem very dry and sandy, but after 3 to 5 minutes in the mixer, it will gather itself into a ball and pull away cleanly from the sides of the bowl.
Step 4: Flavor
Stir in the vanilla. (If you do not have an electric stand mixer with a paddle attachment, you may have to knead the dough by hand to bring it together fully.)
Step 5: Roll
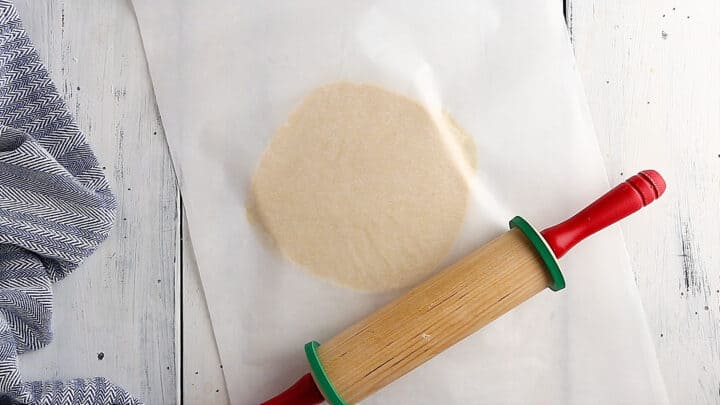
Working with a manageable amount of dough at a time, roll it out between 2 sheets of parchment paper to a thickness of ¼-inch to ½-inch.
Step 5: Cut
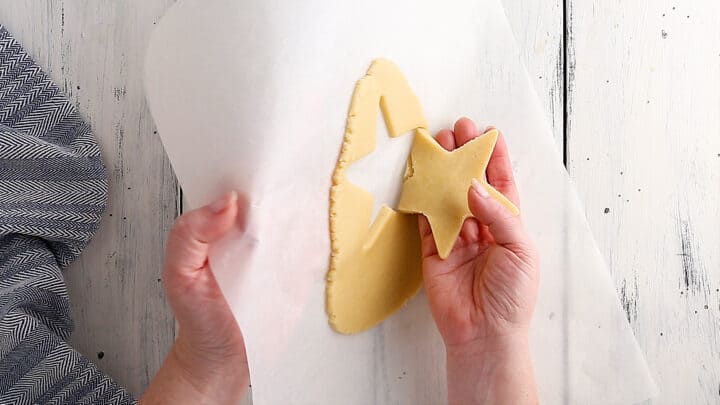
Cut into shapes, then carefully peel each unbaked cookie from the bottom sheet and flip it onto your baking sheet.
Step 6: Bake
You'll know your cookies are done baking when the edges feel set and the centers are still a little soft.
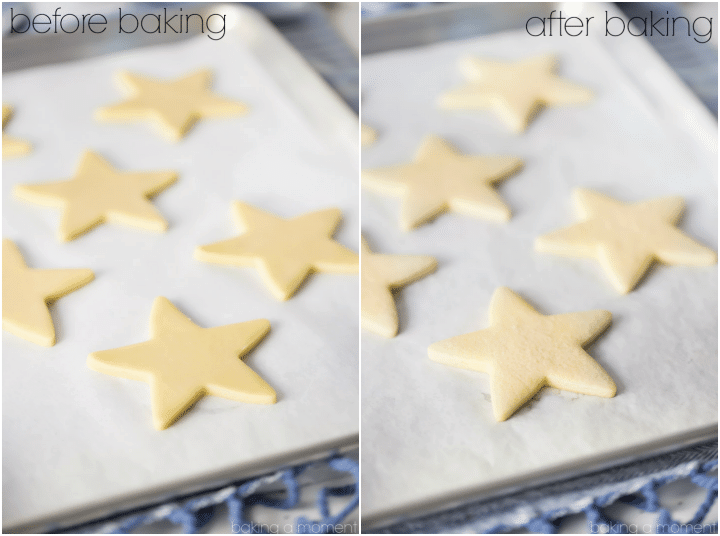
The bake time is going to depend upon how big and thick your cookies are. Larger, thicker cookies will need more oven time than smaller, thinner ones.
Recipe FAQ's
You can make this dough ahead and keep it in the refrigerator for a day or so, but if you do, you may want to add less flour because the dough will become drier as it sits. If your dough has become too dry and crumbly to work with, it can be moistened with a few drops of heavy cream.
The dough for drop cookies has a soft and sticky consistency. It's typically spooned or scooped onto a baking sheet, and the cookies maintain the shape they take when dropped onto the sheet. Cutout cookie dough is firmer and more structured. It's rolled out to a specific thickness, and shapes are cut out using cookie cutters.
The answer depends on how thick you roll the sugar cookie dough, and how big your cookie cutters are. I typically get around 30 cookies from a batch, if I roll the dough to ⅜-inch and use cutters that are around 2 ½-inches in diameter.
This answer will also depend on the size of the cookie. Larger, thicker cookies will need more time in the oven than thinner, smaller cookies. You'll know your sugar cookies are done baking when they are set around the edges but still a little soft towards the center. Remember that they will continue to cook for a few minutes, even after they're removed from the oven. This is called "carry-over cooking," and if you don't account for it then your cookies could end up dry.
Absolutely! Wrap them tightly in plastic wrap and they should keep in the freezer for several months. Pop them out and thaw at room temp, and decorate!
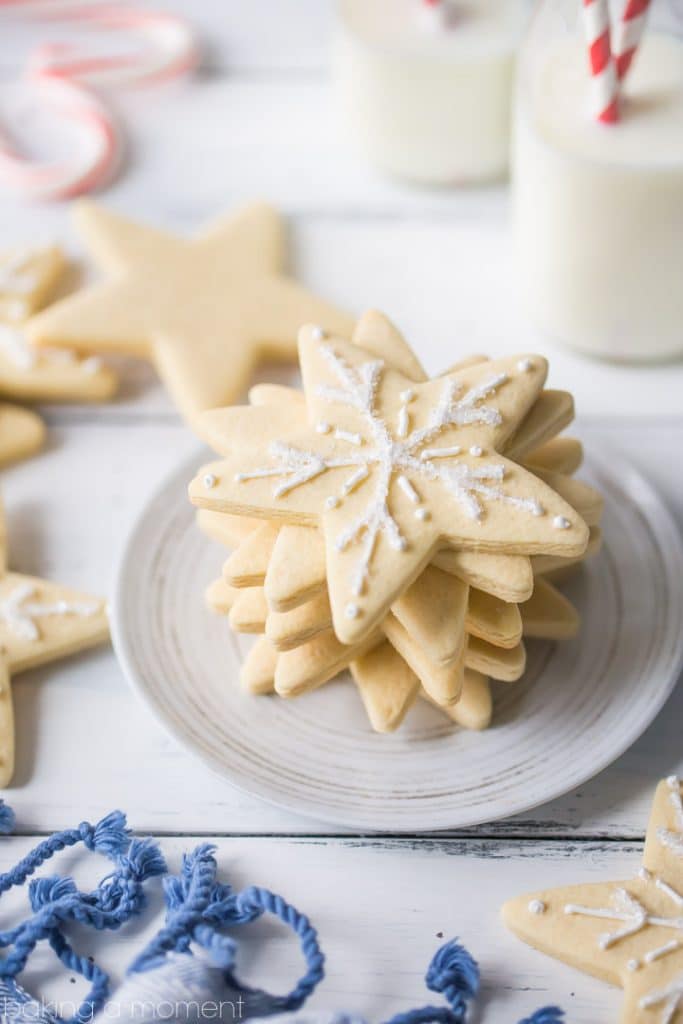
Expert tips for making cutout sugar cookies that don't spread
- Don't bother softening the butter: I like to use cold, cubed butter when I make the dough. It saves the step of chilling the dough before baking, which is another trick many bakers use to help their cookies keep their shape. If you work quickly, the butter is still pretty cold when it goes into the oven, so the dough holds its shape better and doesn't get all melty and slide over the baking sheet.
- Mix until just combined: Try not to whip a lot of air into the butter. This can cause spreading.
- Leave out the leavening: Now, you may notice that my recipe contains no leavening of any kind. If you think about the purpose of baking powder in a recipe, it's to help things puff up and spread out (hello!?) and be light and fluffy. Light and fluffy is great in a muffin or a pancake, but we are talking cookies here, people. They are meant to have a little bite to them. Perhaps they are a little bit more dense, but in this instance, you want that. Most likely, you are either shipping your cookies or delivering them by car, and if they are too light and delicate, they're more likely to break. So, this will give you a more durable cookie, and I promise you, they are still every bit as delicious.
- The magic ingredient: This is the biggest key to the whole business and maybe the only thing you won't find on any other blog (that I've seen, anyway). THE CORNSTARCH. It's pure witchcraft. Not only does it lend added structure to the sugar cookies without making them tough, but it also makes the dough SUCH a pleasure to work with! It is NOT sticky at all, nor is it crumbly. It just stays right where you want it. And those edges! I about died…! SO clean and perfect!
- Make parchment your bestie: Also, definitely try rolling your dough between two layers of parchment paper. It is absolutely no-muss, no-fuss! Between this dough's silky, UNcrumbly texture and the parchment thing, I barely even need to wipe my countertops after making these cookies! **No bench flour!** (Which, by the way, can also make a tougher, less tender cookie.) I also line my baking sheets with it, and besides keeping things from sticking, it keeps the pans cleaner, too! My cookies are baked on parchment, and then I lay them on the same sheets to dry after decorating, so each sheet gets double duty. Here are the baking sheets I use, and here is where I order my parchment.
- Use rolling pin rings: These are a great way to make sure you're rolling your dough out to a consistent thickness. Which is important for even baking!
- Crank up the oven temperature: Finally, you may notice that I recommend baking the cookies at a higher temperature for a shorter time. This allows the cookie to "set up" more quickly and hold its shape during baking, making it less melty-slidey.
How to serve
Plain and simple: Enjoy the cookies just as they are. Their precise shapes and wonderful flavors can stand alone as a delightful treat.
Decorated masterpieces: Decorate the cookies with royal icing, fondant, or colorful icing gels. Let your creativity run wild by adding intricate designs, patterns, and even personalized messages.
Cookie sandwiches: Make cookie sandwiches by spreading a layer of frosting or jam between two cookies of the same shape. Peanut butter, chocolate ganache, or cream cheese frosting can be excellent fillings.
Cookie pops: Insert sticks or colorful paper straws into the cookies before baking to create cookie pops. These are great for kids' parties or as edible party favors.
Dipped in chocolate: Melt chocolate (white, dark, or milk) and dip half of each cookie into it. You can even sprinkle crushed nuts, sprinkles, or edible glitter on the chocolate while it's still wet.
Coffee or tea companions: Serve alongside a cup of coffee, tea, or hot chocolate for a simple pairing.
How to store and keep
Cover the cookies with plastic wrap or store in an airtight container at room temperature.
If you keep them tightly wrapped so they don't dry out or become stale, they should last for at least a week or two (if not longer!) at room temperature.
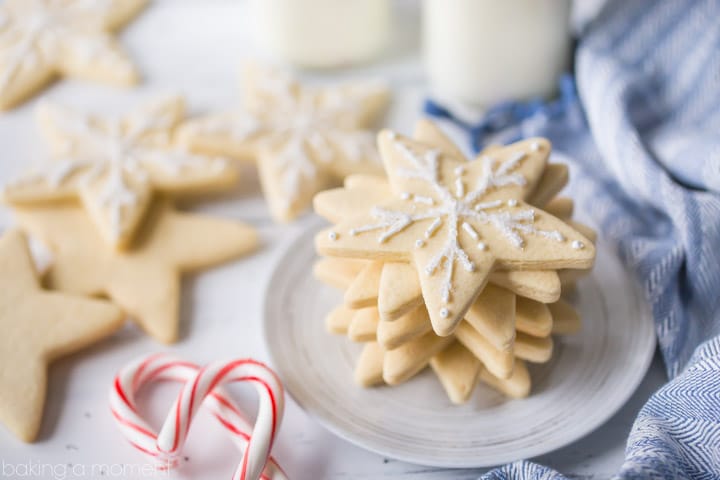
More cutout cookie recipes
- Chocolate Cutout Cookie Recipe
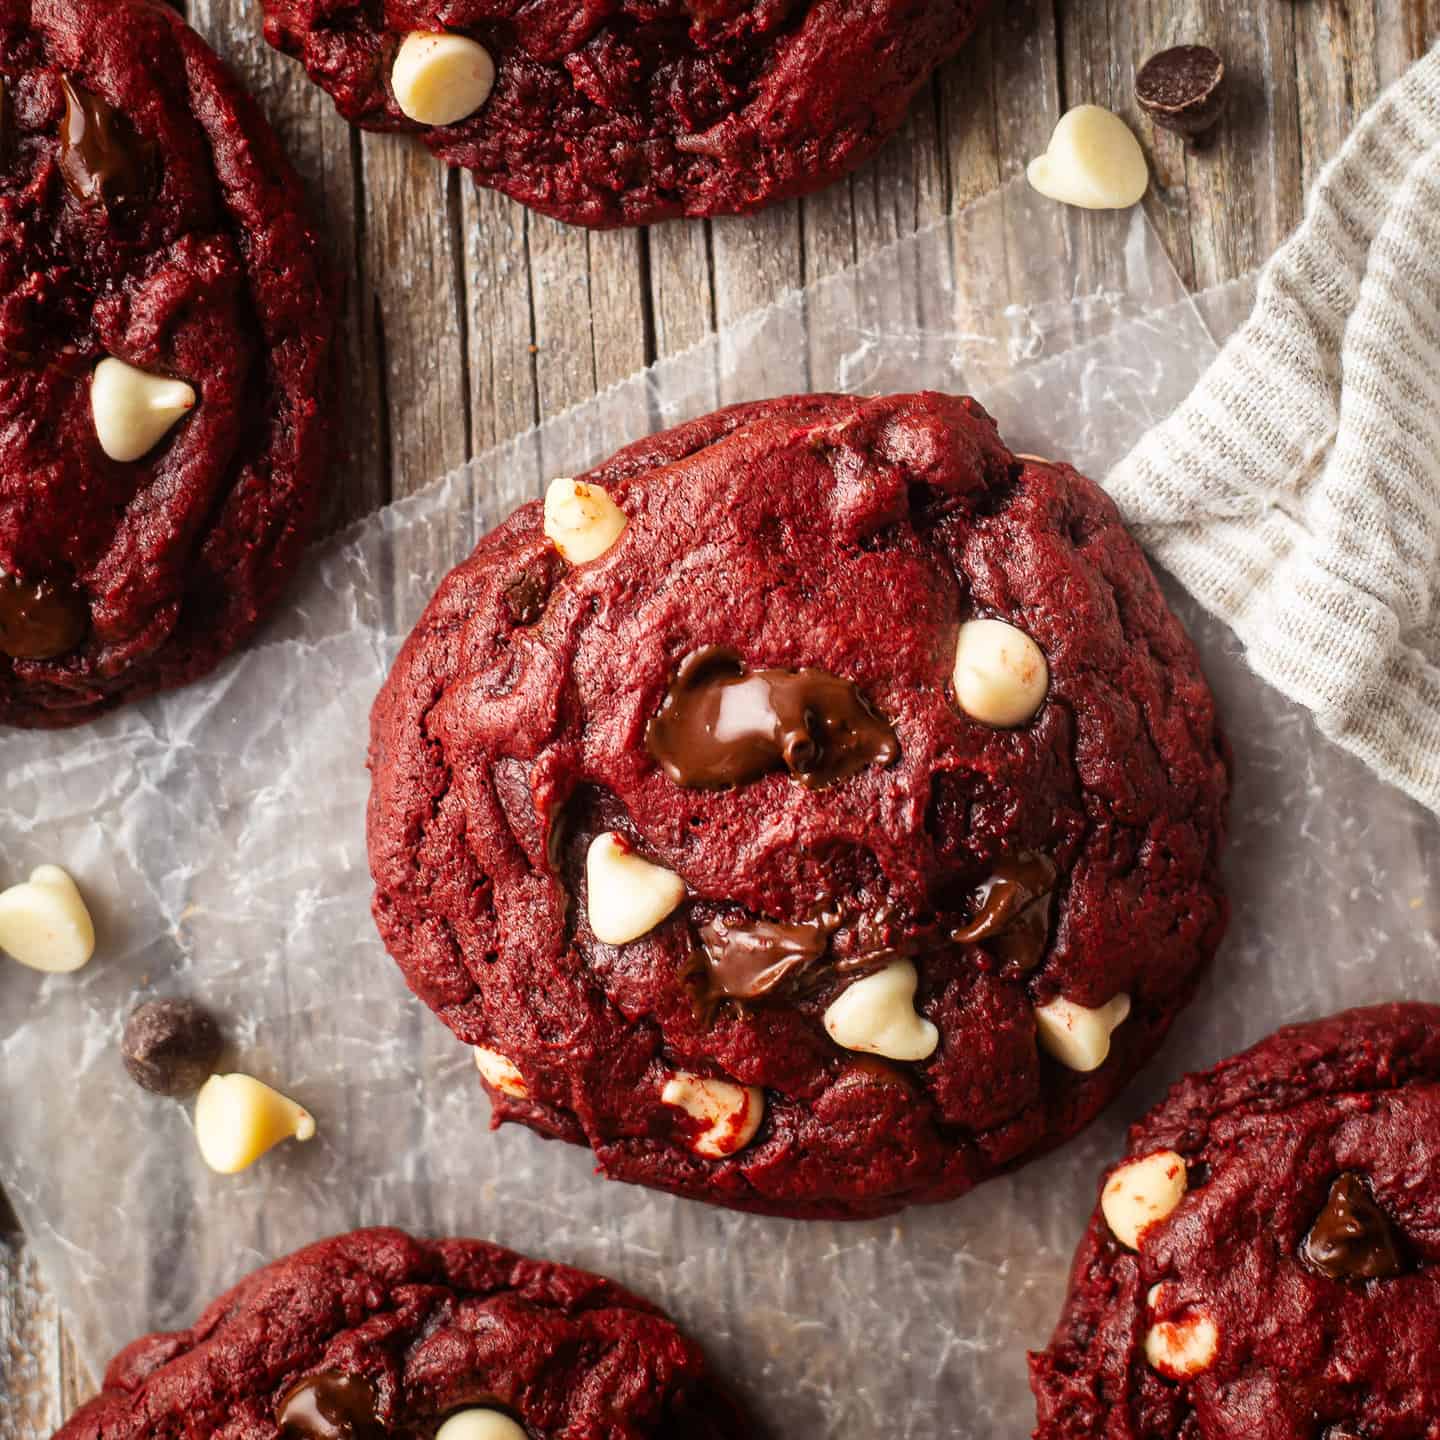
- Red Velvet Sugar Cookies
- Gingerbread Cookies
- Soft Cutout Sugar Cookies
This post contains affiliate sales links.

Vanilla Cutout Cookies that Don't Spread
Ingredients
- 1 cup (227 g) unsalted butter, (2 sticks) cubed, cold
- 1 cup (200 g) granulated sugar
- 2 (88 g) eggs, large
- 1 teaspoon (4 g) vanilla extract
- 1 teaspoon (5 g) vanilla bean paste, (optional)
- ½ cup (64 g) cornstarch
- ¾ teaspoon (4.5 g) kosher salt
- 3 ½ cups (437.5 g) all-purpose flour, (approx., you may need slightly more or less)
Instructions
- Preheat the oven to 375 degrees, and line baking sheets with parchment.
- Cream the butter and sugar, just until smooth and combined (try not to whip in any air).
- Mix in the eggs and vanilla until incorporated.
- Add the cornstarch and salt, mixing on medium-low speed.
- Stir in the flour (about ¼ cup at a time) until the dough gathers itself into a ball and pulls cleanly away from the sides of the bowl (it should feel soft but not sticky).
- Working with a manageable amount at a time, roll the dough out between 2 sheets of parchment paper to a thickness of ⅜-inch.*
- Cut into shapes, peel away from the bottom sheet of parchment carefully (see the video below), flip onto the prepared baking sheets, and bake until set around the edges but still quite soft in the centers (approx. 7 to 10 minutes for 2 ½-inch, ⅜-inch thick cookies).
- Cool completely, then decorate with royal icing.
Notes
Author

Have a question about this recipe? Ask AI:
Can i use salted butter
You can, just omit the kosher salt from the recipe then. Good luck!
Hi there! Thanks for sharing all your tips...trouble shooting question. I use Sweet Sugarbelle's cookie recipe and have never really had an issue until lately. Some of the batch ends up with a cracked and crumbly top to it? As I said, it's never really happened before, I haven't changed anything in the recipe...I wonder what I'm doing and don't even know it! THanks for the suggestions!
Hey Pam thanks so much for reading! I wish I could help you out but I really don't know much about Sweet Sugarbelle's recipe. This is the recipe that I've been making for the last 5+ years so if I can ever help you with this one, don't hesitate!
Hi I just want to say.....you changed my life!!!! Awesome recipe !!! I have a question Can the dough be frozen? Thanks
Hey Clarissa! I'm so happy you like the recipe! I'm sure you probably could, the only thing I would caution you about is the dough maybe getting a little dry. I've noticed that when I don't roll/cut/bake right away, it can get a little crumbly. Maybe you could compensate for that by adding a little less flour. I hope that's helpful! Good luck!
Hey. As a new baker I really enjoyed your video! I didn't have success with the dough ? It was very crumbly and I mixed it for awhile. I even tried adding some extra butter but that didn't work out. It seemed like a lot of flour but I only put in the 4 cups. I didn't have a paddle mixer so I just used a plain old hand held beater. Any suggestions on what might have gone wrong?? Any help would be great. I would really like to learn how to make these. 🙂
Hey Jane! I'm so sorry you had trouble with the dough! There are a few other comments similar to yours on this post. I really think that if you aren't using a stand mixer, it's harder to get the ingredients incorporated into this very stiff dough. I've advised other readers to try kneading it by hand a bit, if their mixers just aren't quite powerful enough. Also, be aware that as the dough sits, it becomes drier, so if you don't plan on rolling it out right away, it's best to add a bit less flour. If life gets in the way, and you aren't able to do it all at once, you can bring back a too-dry dough with a few drops of heavy cream. Hopefully that helps and you'll have better luck next time!
Hi! I was wondering if I could add matcha powder into this recipe. If so, how much do I add?
Hey Magg! I think that would be just lovely. Personally, I think matcha can be somewhat overwhelming in large doses, so I would start with about a teaspoon and see if you like the taste. You can always add a little more if you feel like it needs it. Good luck and enjoy!
HI. I have been making cut off butter cookies for years. I was searching for one and came across to yours. When read it and based on experience I said YES. This is perfect. But....I tried it following everything and didn't work. It was very crumbly and dried. Couldn't pull it together. I ended adding more butter and flour and mixing. Basically trial/ error. I took a little, baked a cookie, tried and adjusted until I ended with a good one. I am not sure why it didn't work for me since honestly I agree your proportions should work. Any thoughts?
Please do not take this as a criticism. I cannot figure out why was crumbly and didn't hold. Very dry
Hey Carina! Thanks so much for reading and trying one of my recipes! I'm sorry you didn't quite get the results you were after. Question: are you using a stand mixer or a hand mixer? I use a stand mixer and it's quite powerful. I think if you are using a hand mixer it might not be strong enough to combine the ingredients of this very stiff dough. I have two suggestions: 1) Add the flour just a little at a time, instead of all at once, and 2) if your mixer can't handle it, try kneading it in by hand. Hopefully that is helpful!
Great post. I've been always looking for this kind of recipe, with all the tricks. you're amazing Allie. I appreciate you for these all . I've tried this recipe and the cookies came out as they were, with no spreading out. the taste was great either.
thanks a lot dear Allie
My pleasure Rose! I'm so glad you were happy with the result. Thanks for the awesome feedback!
Hi, I have been looking for a cutout cookie recipe where the cookies don't spread and came across this one. So, I'm going to give it a try for my stepsister's 30th birthday party this weekend. I do plan on decorating them with royal icing as well. I have been having a very difficult time finding a recipe where the cookies don't puff up or spread. I don't have time to make a test batch, so I'm a little nervous. I don't have vanilla bean paste. Will that effect the flavor at all? Can I add extra vanilla extract?
Thanks!!!
Hey Lisa! You can leave the vanilla bean paste out or sub with extract. Good luck!
Thanks for responding so quickly! I will probably omit it. I don't know where I would find it. I might add a little extra vanilla. Looking forward to trying it out. I'm making crown and high heel shoe cookies, so I really don't want them to spread. I'll keep you posted. 🙂
They came out great!!! I'm so excited, they actually look like shoes and crowns! Thank you!!
That's great news! So glad you are happy with the recipe. Thanks for the great feedback Lisa!
Sounds great!
These look amazing! I bookmarked it for this weekend 😉
Awesome! Thanks so much Nicole I hope you enjoy!
Where oh where has this recipe been all my life? I just made a test batch of this dough and I've never been able to successfully make dough or cut out cookies for some reason even though I can actually cook & bake very well haha. This dough is amazing, easy to roll out and I have my second batch of cut out cookies in the oven now. These absolutely do NOT spread. They stay right in the 4" heart shape I made them in. They are very tasty almost like those danish butter cookies which are my favorite. I didnt have a stand mixer only a hand mixer so do yourself a favor if you can and buy one which is what I am doing today. The hand mixer worked just as well though tiring and you'll have to pull your dough together just like she said and roll them out. These are awesome! Thanks!!
I'm so glad you're happy with this recipe Tanya! Thanks so much for the great feedback, and the tip about using a hand mixer. Enjoy!
I've been looking for a recipe for cutout cookies that would keep their shape for years. Found this recipe, watched the video, gave it a try....and I have found THE recipe that works!!!! My cookies came out PERFECT!!! Thank you!!!
I'm so glad! Thanks so much for the great feedback Craig! Hope you're enjoying the cookies 🙂
Hi Allie -- I've never commented on an online recipe ever, but I had to thank you, thank you, thank you! I had gone through 3 batches of 3 different recipes before trying yours (nearly losing all hope), and they turned out perfectly. So clean, crisp and *zero* spreading. I had run out of cornstarch by the time I got to your method, so I turned to potato starch (!) to make up and the difference, and it seemed to work fine. The cookie has just the right amount of sweetness, given they are to be decorated with even more sugar. I am so, so pleased to have come across your website – you are a genius! Happy holidays, to you!
Stef! I am so thrilled that this worked out so well for you! Thank you for commenting with your positive feedback. And I'm so glad to hear that the sweetness was just right for you. There are some readers/commenters who have complained that they're not sweet enough, but I agree- when they're coated with royal icing and sugar sprinkles, it all works out. Great to know about the potato starch too! Thanks so much for taking the time to come back and leave a positive review! Happy holidays!
I really like this recipe for a 'picture perfect' result but it is certainly more of a soft, semi-crunchy shortbread than a very crunchy sweet sugar cookie. With the sugary topping I'm going to add, it is exactly what I'm looking for. The recipe is absolutely fool proof as far as I'm concerned. I'm really surprised to hear people had trouble with it. Yes it dries over time, but even after almost 2 hours I found it was still easy to work with, and easily comes together again for re-rolling. I cut gingerbread men just under 3" high and baked off a massive 104 cookies 🙂 Way more than your estimated 3 dozen! Thank you so much for sharing. Looking forward to looking at more of your blog posts now 🙂
I've tried the recipe again in the same afternoon and doubled the sugar and vanilla for flavour and texture. Too wet... same old fussy sugar recipe....
Thanks for the update! Good to know that the ingredient amounts listed are spot on. Have a great day!
Thanks Sam! I think you hit the nail on the head as far as texture. Definitely meant to be soft and semi-crunchy. That's great that you were able to get so many cookies out of a batch! How thick were they rolled?
Rolled to 1.5mm and still look much thicker than your pictured cookies.
Interesting! Ok thanks for letting me know 🙂
This was an absolute disaster! I ended up with sand!! I followed everything to a T, but I kept thinking that the dry ingredient mix was a LOT, but kept adding it anyway. By the time I got it all in, I have nothing but a sandy mixture that is unusable. I am crushed. I live in Europe where the shops are closed today, and I am supposed to deliver American style Xmas cookies to my son's daycare tomorrow morning. Any idea what went wrong??
Update: I added milk to get the dough to a usable consistency. The flavor is more like a flour biscuit rather than a cookie. We don't eat super-sweet things where I live, but the sugar was almost undetectable. I added about another 1/3 cup of sugar and baked. The baked appearance is not nice, and the final result is a very unpleasant taste--no hint of sweetness. Overall I just crushed at how this turned out after the time and ingredients I put in to it, and will have to throw it all away. The ingredients in the country that I live in are not significantly different from what you get in the US, but perhaps this recipe just doesn't work with non-American ingredients.
I'm sorry for your trouble. I really think it was a mistake to add milk though. The better option is to continue working the dough until all the dry ingredients are incorporated. I know it does start out very dry, but if you put some muscle behind it, it will come together and it becomes quite workable. As for the taste, the reason it is less sweet is because these cookies are meant to be iced with a very sweet royal icing. I think you'd find that that balances the flavor in a very nice way. Again, I'm sorry for the difficulty you had. If you decide to take another crack at it, perhaps watching the video tutorial would be helpful.
I'm so sorry you had such difficulty! I only wish you had seen the convo I had with Emily, just a few comments above yours. She asked if I thought it would be ok to add less flour. I'm pasting my reply here for you: "Hey Emily! Thanks so much for reaching out and for the great question. I think it’s a good idea to add one cup at a time. You may be able to get away with less but this is what always works for me. That said, I do use an electric stand mixer, and it’s pretty powerful. It usually starts out looking very “sandy,” but after a few minutes it does come together and form a ball. If I do less flour, the dough tends to be quite sticky and hard to work with. For me, it’s worth taking the extra time to work in all 4 cups of flour. If you’re using a hand mixer and it’s not allowing the dough to come together, I know other readers have had success with just kneading it all together by hand. I hope this is helpful!"
HI. Can I reduce the cornstarch to 1/2 cup so that they win the be so crunchy on the edges? Or should I reduce the flour? Thanks
Hi Rosa! You can definitely do that. Just swap out some of the cornstarch & sub with flour. Good luck and enjoy!
This looks so Beautiful like you