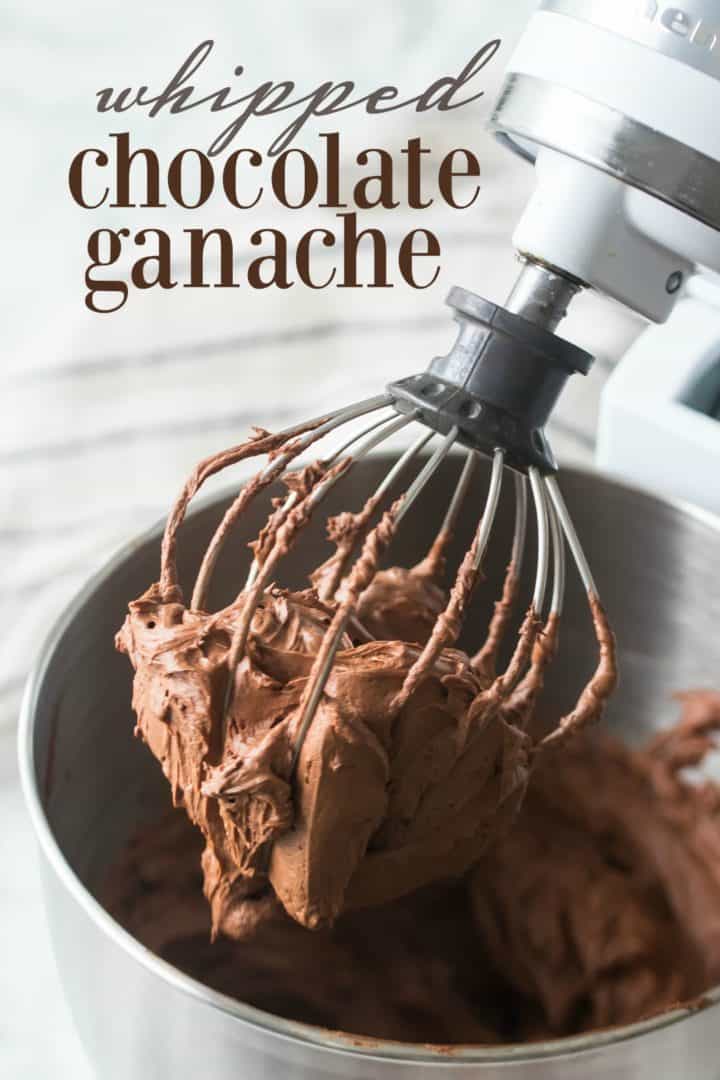
Whipped Chocolate Ganache
As an amazon associate I earn from qualifying purchases.
Chocolate lovers: This is the recipe for you! Rich and silky chocolate ganache whipped until light, fluffy, and spreadable. Great on cakes, cupcakes, & cookies.
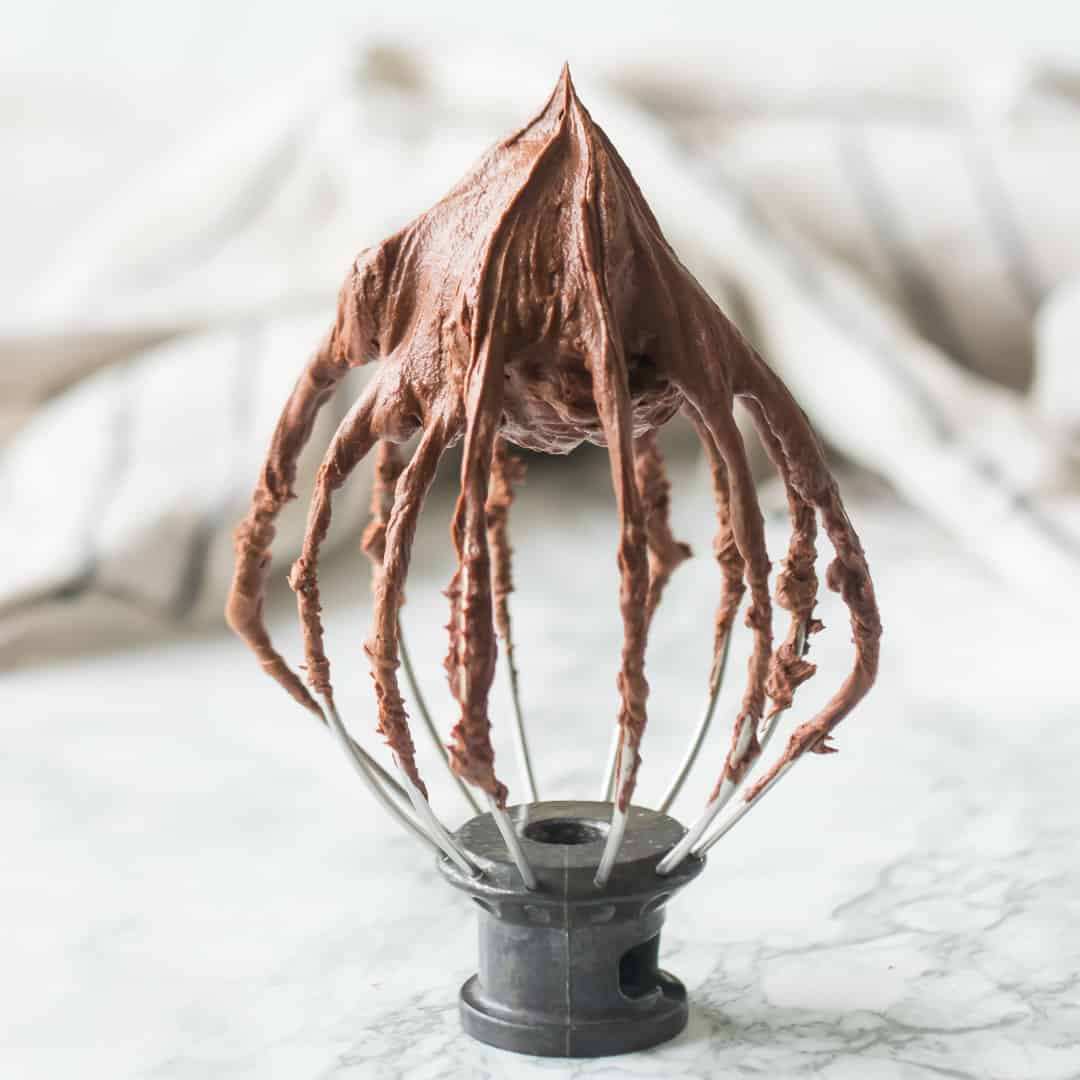
Table of Contents
- Why You'll Love This Ganache Recipe
- Key Equipment
- Ingredients and Notes
- Substitutes
- How to Make Chocolate Ganache
- Expert Tips
- How to Serve
- Recipe FAQS
- How to Store and Keep
- Serving Size
- More Recipes You'll Enjoy!
I love sharing icing recipes because they can really take your cake, cupcake, and cookie recipes to another level! There are lots of choices here on Baking a Moment, including this Swiss meringue buttercream, this royal icing, and this whipped cream frosting.
But this whipped, easy chocolate ganache recipe might be my favorite one yet! The texture is so silky and light, with the most incredibly deep, dark, and intense chocolate flavor. If you are a true chocoholic, you will love this recipe!
Why You'll Love This Ganache Recipe
Rich and Decadent Flavor: Whipped chocolate ganache is incredibly rich and indulgent. The chocolate flavor is off the charts! You won't find a more chocolate-y frosting recipe than this!
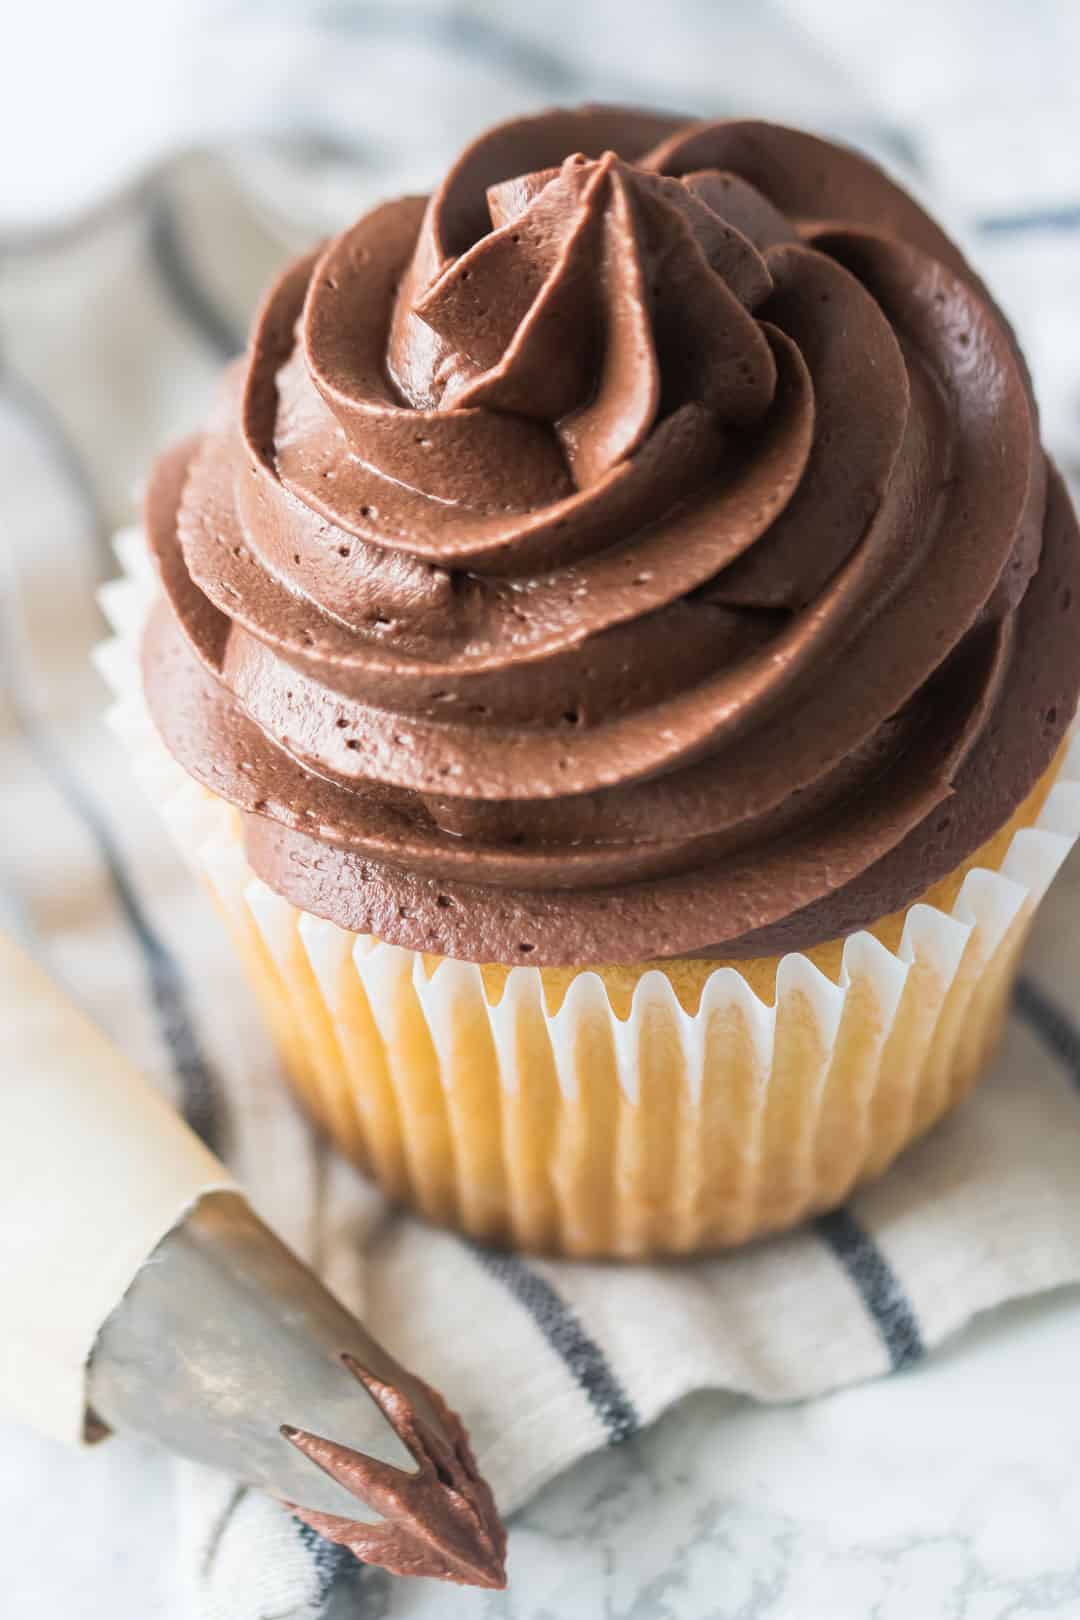
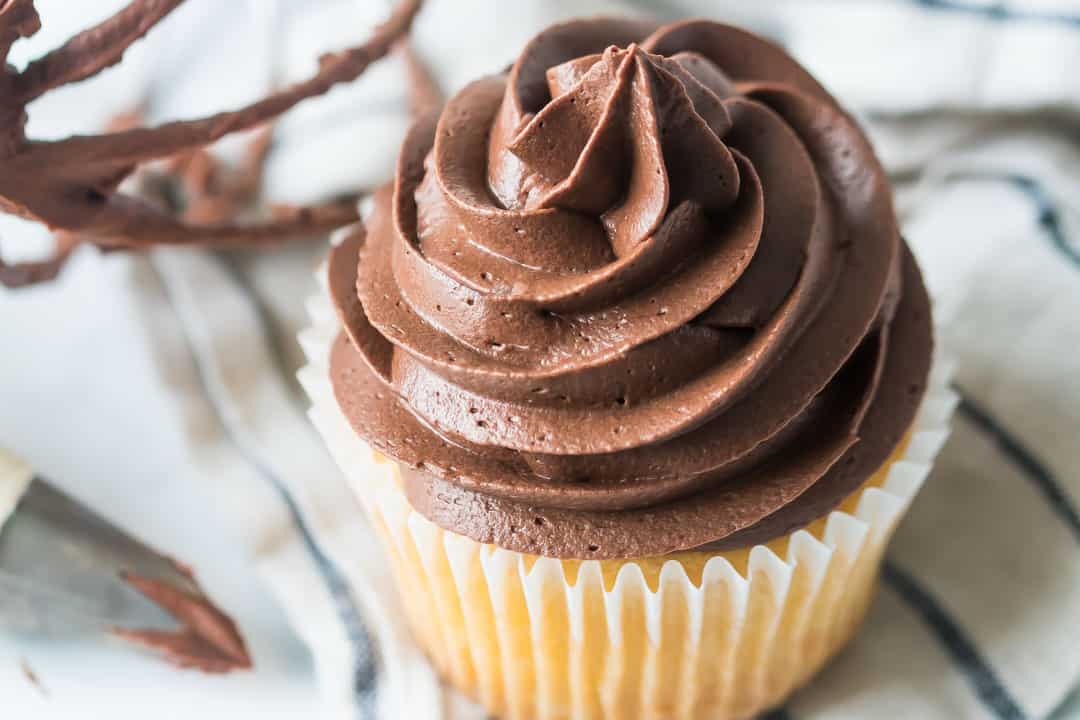
Silky Smooth Texture: When whipped, it transforms into a light and fluffy frosting with a silky smooth texture. It spreads easily on cakes and cupcakes, making it such a pleasure to work with!
Simple and Easy to Make: This frosting is made with just two ingredients: chocolate and cream. It's a straightforward recipe that doesn't involve a ton of steps. Once you have the ganache prepared, it's just a matter of whipping it up to the desired consistency.
Loved by Chocolate Enthusiasts: If you're a fan of chocolate, this frosting is for you. It provides the ultimate chocolate experience, and its intense flavor will satisfy any chocolate lover's cravings.
Key Equipment
Stand Mixer or Electric Mixer: You don't have to use a stand mixer, but it can make the process a lot easier. Whipping ganache requires consistent and even mixing to achieve the desired texture. A stand mixer ensures uniform mixing and helps prevent over- or under-whipping. Use an electric hand mixer if you don't have a stand mixer.
Ingredients and Notes
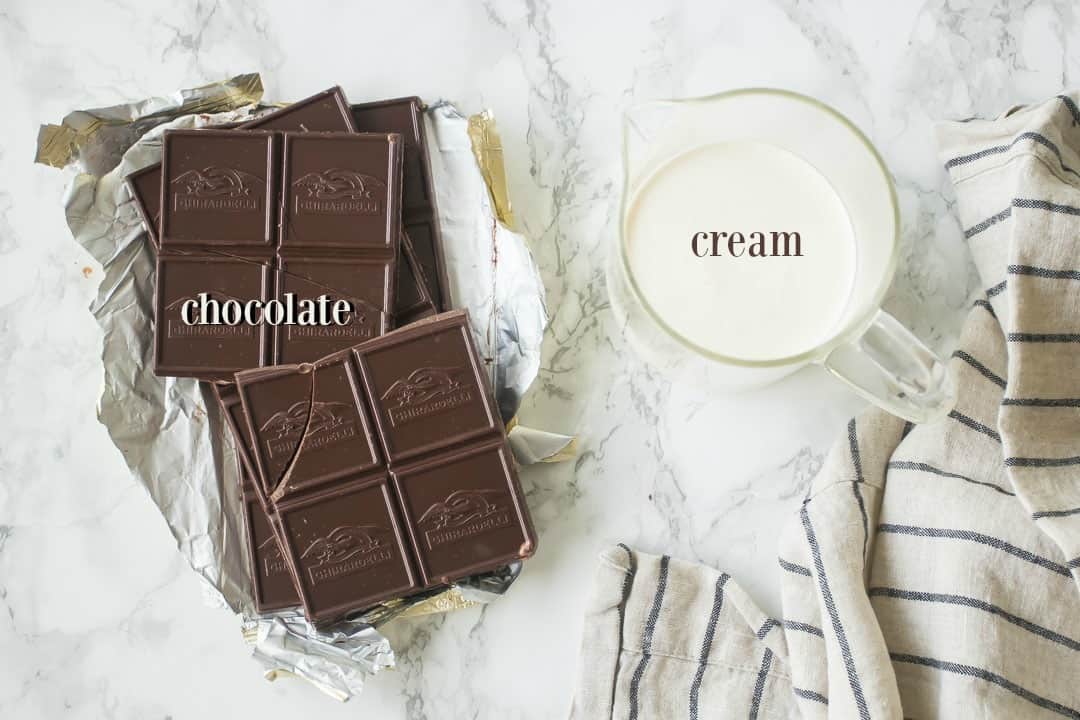
Making ganache is super simple, and you only need chocolate and cream.
The ratio of chocolate to cream depends on the type of ganache you are making. For this spreadable ganache, we use a 2:1 ratio which uses more chocolate and less cream.
Chocolate: I like semi-sweet chocolate because the flavor is deep and rich. But you can also make white chocolate ganache with white chocolate and cream.
Cream: Be sure to use heavy whipping cream. Heavy whipping cream is high-fat, typically around 35% or more. The fat content is essential for achieving the desired smooth and creamy ganache texture. The fat in the cream helps emulsify the chocolate and gives the ganache its luxurious texture.
Substitutes
Make it Vegan: You can make this recipe vegan by using dairy-free chocolate and unsweetened coconut cream.
How to Make Chocolate Ganache
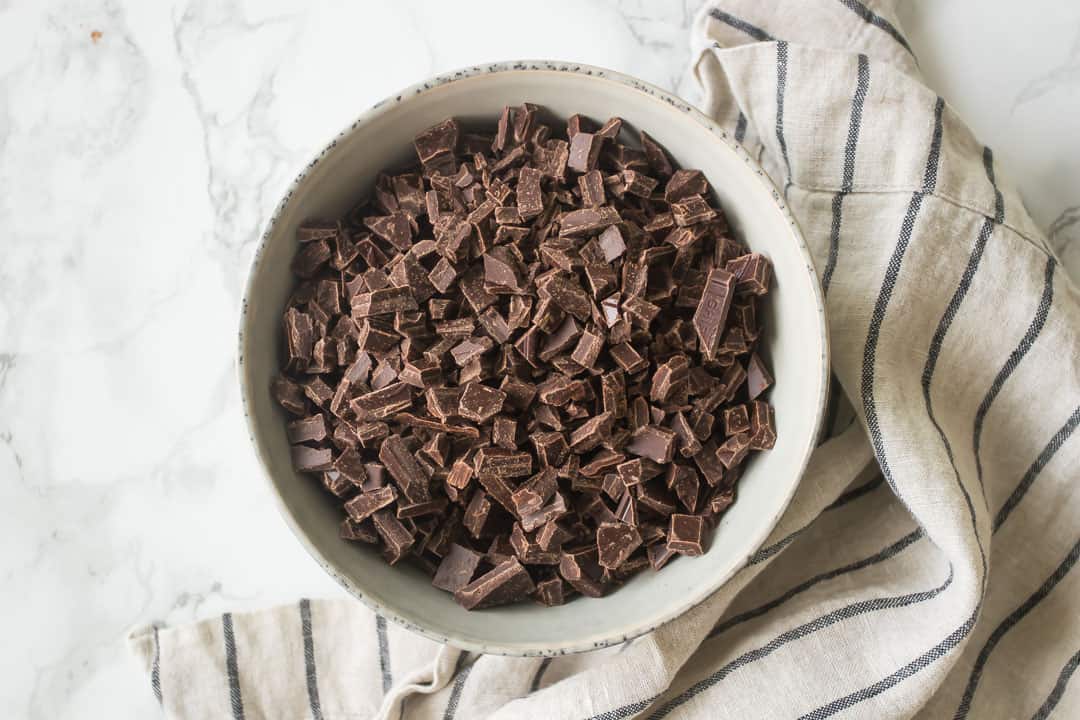
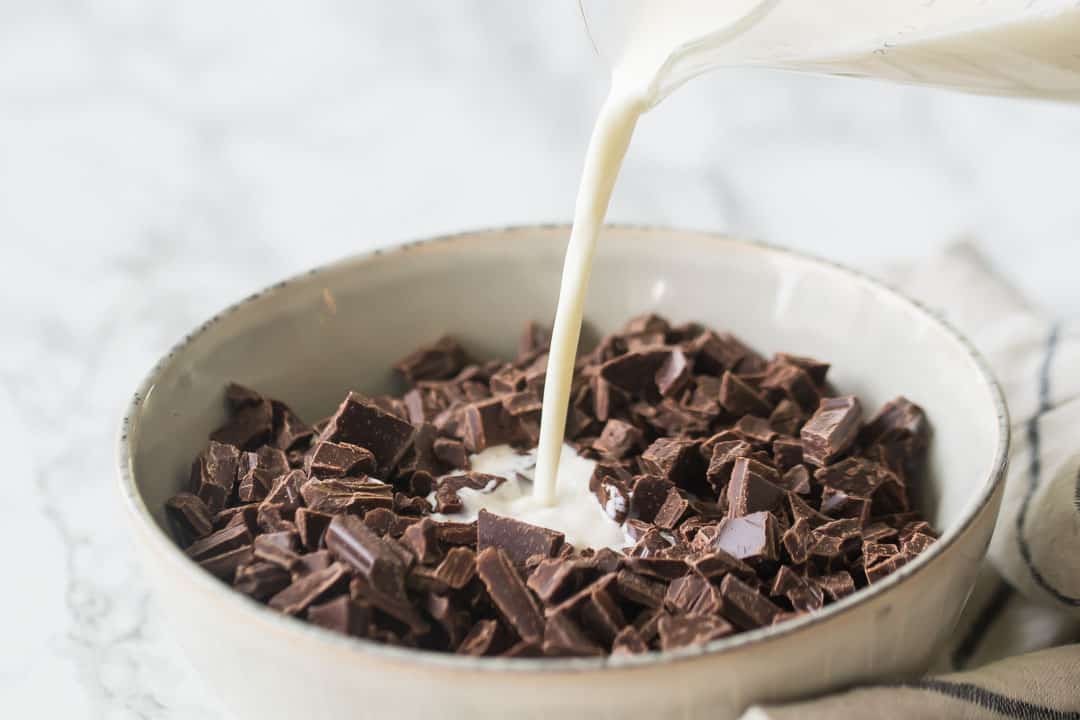
Step 1: Start by chopping the chocolate into small pieces.

Step 2: Place the chopped chocolate in a bowl and heat the cream. You can heat the cream on the stove in a small saucepan, or in the microwave; just be sure to keep a close eye on it so it doesn't boil over!
Step 3: Pour the warm cream over the chopped chocolate and allow it to stand for about 5 minutes.
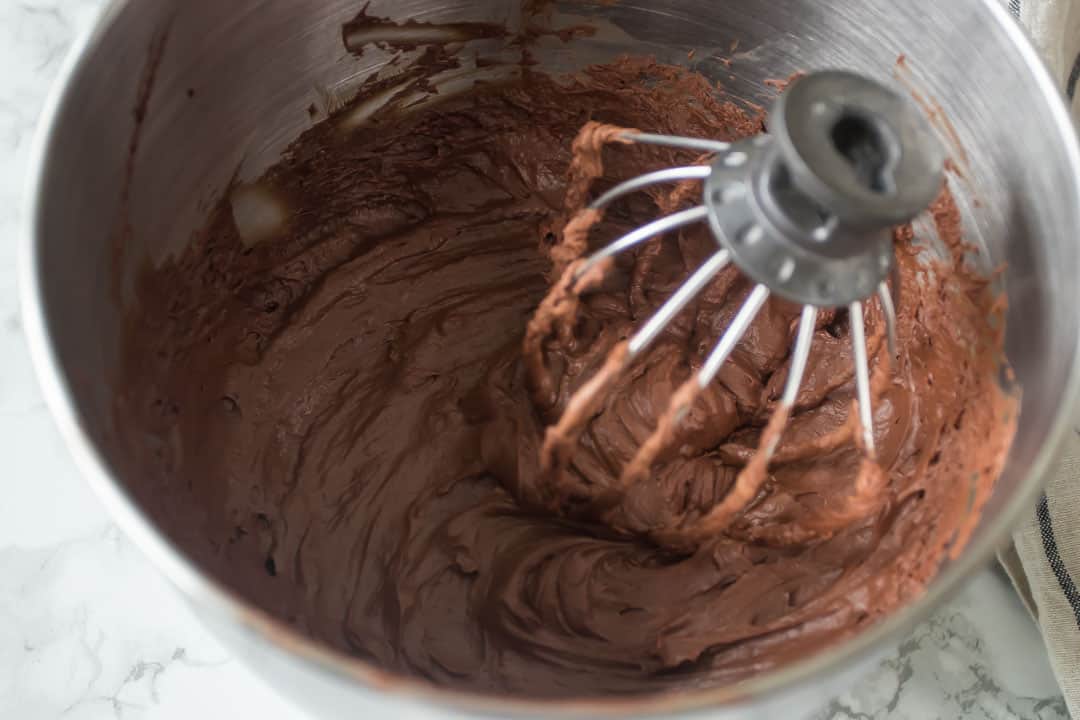
Step 4: After 5 minutes or so, the chocolate should be melted and you can whisk the ganache smooth.
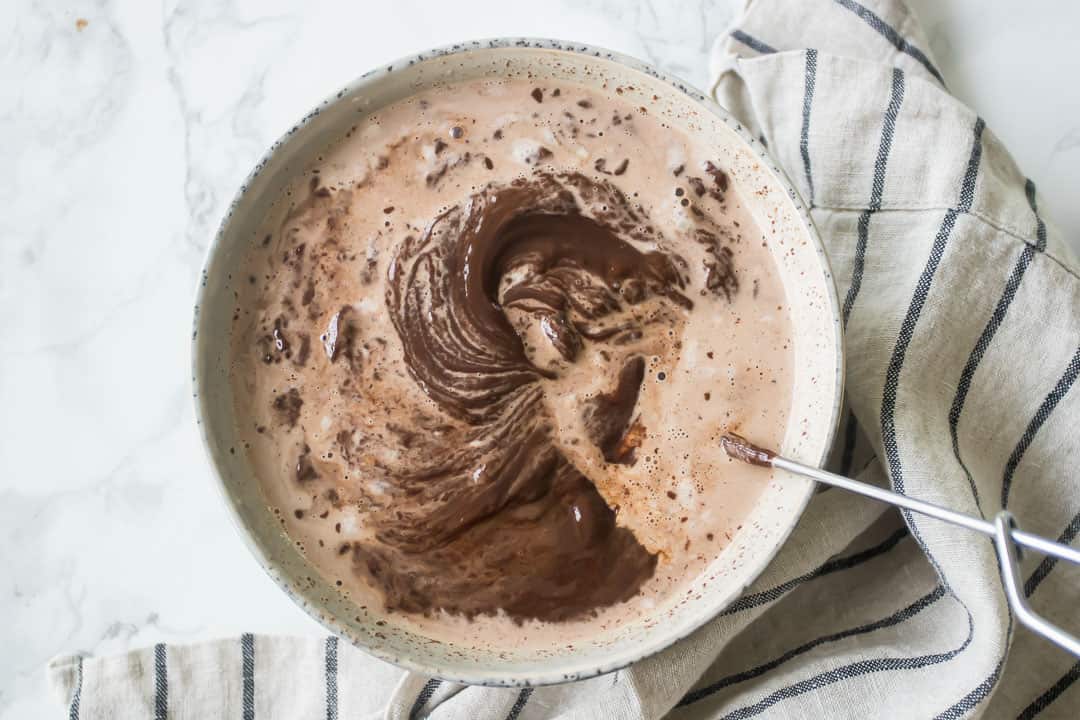
Look at how good it looks! It's so glossy and dark.
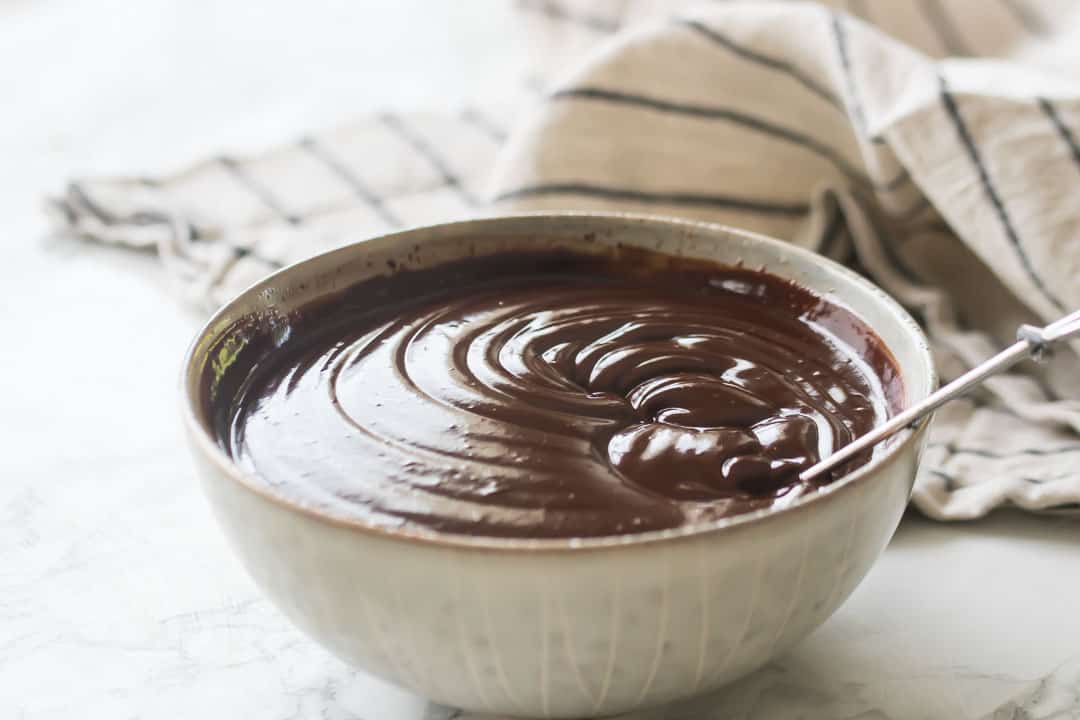
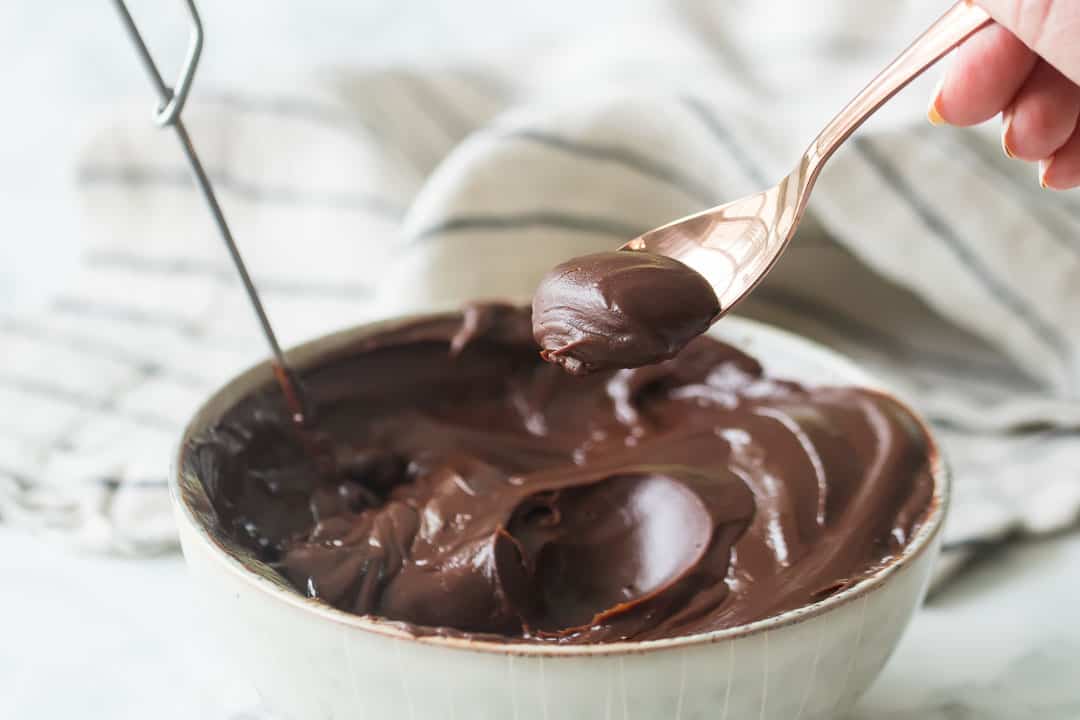
Step 5: Let the ganache cool until it reaches the right consistency. Honestly, this is the trickiest part of the whole thing. You want it to be solid but still soft. Kind of like peanut butter or Nutella.
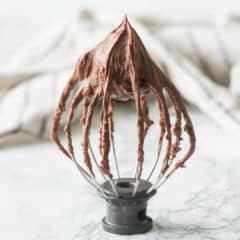
Step 6: Once you have a nice solid but soft consistency, whip it up on high speed until it's doubled in volume, a little paler, and fluffy.
Know that the color will initially look light (from all the air you whipped in), but as it sits, it will become much darker.
Expert Tips
- It's best to use chocolate bars (rather than chocolate chips) when melting chocolate. They will melt smoother and have less chance of seizing up, curdling, or splitting. Use good quality chocolate. Dark or semi-sweet chocolate is typically preferred for a rich and intense chocolate flavor.
- To help the chocolate melt evenly and smoothly, chop it into small, uniform pieces. This will speed up the melting process and prevent lumps in the ganache.
- Heat the heavy cream in a saucepan over low to medium heat until it's steamy. Be careful not to let it boil or scorch. Heating the cream allows it to melt the chocolate and create a smooth emulsion.
- To speed up the cooling process before the ganache is whipped, you can put the bowl of ganache in the fridge for 10-minute intervals, whisking after each. In my fridge, this took a total of 30 minutes. I just gave it a good whisk every 10 minutes, and it was perfect after three 10-minute intervals.
- Chill the mixing bowl and whisk attachment in the refrigerator beforehand to make the whipping process more effective. The lower temperature helps the ganache whip up faster and maintain its shape.
How to Serve
Cake or Cupcake Frosting: Use chocolate ganache as a luscious cake frosting for layer cakes, or as a cake filling. Spread it evenly over the cake's surface, or create decorative patterns and designs using a piping bag. It also works well under fondant, especially once it's been chilled.
Chocolate Truffles: Allow ganache to cool and firm up, then shape it into small balls to create homemade chocolate truffles. Roll the truffles in cocoa powder, chopped nuts, or sprinkles for an extra touch.
Macaron Filling: Sandwich two macaron shells around a generous dollop of whipped ganache. It makes a great complement to the delicate almond cookies.
Profiteroles or Éclairs: Fill delicate pastry shells with the ganache for classic French treats. Dust them with powdered sugar for an elegant touch.
Dessert Dip: Warm up the chocolate ganache and serve it as a dip for fruits, marshmallows, cookies, or other delectable treats.
Ice Cream Topping: Pour warm ganache over a scoop (or several scoops!) of ice cream. It will create a glossy shell that firms up when it comes into contact with the cold ice cream.
Recipe FAQS
"Ganache" is just a fancy word for chocolate and cream that have been melted together.
It's got a silky-smooth texture, and it melts in your mouth.
Adding cream makes it softer at room temperature than just regular chocolate.
It can be used in a lot of different ways. While it's melted, it can create a drip edge on a cake or pour it all over it to enrobe it. Once it's cooled and solidified, you can roll it into balls to make truffles. Or, you can do like I've done here and whip it up to create a luscious frosting or filling.
I love a good buttercream, but this is your best bet if you are really going for the maximum chocolate flavor. It's got the same fluffy texture as buttercream but with TONS more rich chocolate flavor.
Because it's only got two ingredients, the chocolate flavor shines. There is nothing to get in its way!
It's a good idea to make this ahead since waiting for the ganache to reach the perfect consistency can take some time.
How to Store and Keep
This ganache is fine at room temperature for a couple of days. But any longer than that, and it should probably go into the fridge.
Store any leftovers in an airtight container in the fridge for a couple of weeks.
It will stiffen up and harden quite a bit when kept cold. If it becomes too stiff, allow it to come to room temperature. It may need to be re-whipped to get it fluffy again.
You can also freeze ganache. It will keep in the freezer for around three months.
Serving Size
This ganache makes 24 servings. That's enough to frost an 8 or 9-inch layer cake, a 9x13 sheet cake, or 24 cupcakes.
More Recipes You'll Enjoy!
As an amazon associate I earn from qualifying purchases.
Ingredients
- 12 ounces (340.2 g) semisweet chocolate
- 1 cup (236.59 ml) heavy whipping cream
Instructions
- Chop the chocolate and place it in a medium bowl.
- Heat the cream until steamy. You should see small bubbles start to form around the outer edges (this can be done in a small pot on the stove, or in the microwave). Be careful it doesn't boil over!
- Pour the hot cream over the chopped chocolate, and allow it to stand for about 5 minutes.
- Whisk the ganache until smooth, then allow it to set. (This can be done at room temperature or in the refrigerator. Whisk it every 10 minutes to keep it smooth and lump-free.)
- When the ganache is firm but still soft, transfer it to a mixing bowl and whip it on high speed until fluffy (about 3 to 4 minutes).


I really want to use this recipe for a chocolate cake. My question is how well does it do with heat cause it’s an outside party and is one batch enough to frost a sheet cake or should I double it?
Hey Abigail! Thanks for reading and for the great question. Chocolate does tend to get very soft and melts at around 86 degrees F. If there's any way you can keep your cake cooler than that, then I think this would be a delicious option. Or, if you don't mind things getting a little messy! I find many times the messiest desserts are the tastiest lol. If not then you may want to try this instead: https://bakingamoment.com/easy-chocolate-frosting/, which while it is butter-based, will form a thin crust on top when exposed to air, which may help to stabilize things. Good luck!
Hi, I am making a ganache frosting for the first time for someone..
My plan is to use it to fill and frost the whole cake with it. I need it to be ready for Thursday.. would you recommend I make the ganache chill it and then whip and frost first thing on thursday or can I whip and frost it all on Wednesday and refrigerate it overnight?
I am scared how tough the texture might be by keeping it in the fridge overnight?
I'd recommend whipping it right before you plan on using it. That should yield the fluffiest result. Good luck- I hope you enjoy!
Hi if i make this now can i leave and whip tomorw to frost cake. Or do i frost now and then place cake in fridge?. If i leave till tomorw do i place ganache in fridge or leave iut on bench to whip tomorw
Hey Robyn! I'd suggest frosting now and then placing your cake in the fridge. The ganache is at its best when freshly whipped! Good luck!
Hi, I want to fill and frost a cake with whipped ganache, is it possible to prepare the cake and fill it two days before I frost and decorate it with a new batch of ganache, or will the air get pressed out of the layers? Im planning on storing it in the fridge over the two days. (sorry for my bad english, hope you understand what I mean)
Your English is perfect Lena! I understand you completely. And the answer is yes! That should work just fine for you. Good luck!
Hi there, I am making this tonight and will be leaving it out at room temperature overnight to frost cupcakes in the morning. In the morning, do I need to re-whip the room temperature ganache? Thank you so much!
If you're whipping it tonight then you probably won't have to do it again in the morning. But if it seems too dense or compacted you certainly can!
If it’s 2:1 ratio then why are we using 340 gm chocolate to 230 gm cream
Because here in the US we measure by volume, not weight.
Was just wondering how many 8" cake tin tiers this recipe would fill?
I want to make sure I'm understanding your question- are you looking to spread it in between the 8" cake layers? Or are you actually wanting to fill cake pans with it? It's more than enough to fill and frost a triple layer cake, if that's what you mean.
I have never whipped ganache but will definitely try your recipe. Can I use the ganache base as usual on cakes also or will that be a different ratio when it’s not whipped?
I'd suggest using the ratio given here. This is meant for cakes. Good luck!
My ganache becomes hard when I put it in fridge. What should I do to avoid it?
Probably don't put it in the fridge then. Just allow it to cool at room temperature, stirring every so often. Good luck!
I am super excited to make this recipe for my boyfriend's birthday coming up on Dec 22 as I think it will go perfectly with my KitKat themed cake I am making. This recipe looks super simple and easy to follow!
My question is how far in advance can I make this whipped ganache before use? I am planning on using it in the layers of my cake, as well as frosting the whole cake with it. Can I make this whipped ganache the night before and store it in the fridge before using the next day? Or is this best used right after it is whipped?
Appreciate you letting me know!
Hey Elyssa! Your cake idea sounds fantastic! If I were you I'd make the ganache the night before but it's probably best if you whip it just before filling and frosting. That way you know it's soft and airy enough. If it gets too cool it could tear the cake. Hope that makes sense! Good luck!
I made this for Yule log and icing became hard when I was icing cake and crumbled when I cut into cake. What did I do wrong? I used heavy cream and semi sweet Bakers chocolate bars.
Sounds like it got too cool and stiff. Sorry! This is what I do for Yule log: https://bakingamoment.com/yule-log-recipe/.
Would I be able to use this as a drip topping?
It would work but you'd want to skip the whipping. Whipping it makes it more like a frosting. Spreadable, not drip-able. You could also use this: Chocolate Glaze. Good luck!
I have tried several ganache recipes. This one is by far my favorite. It is easy and only 2 ingredients. Your directions, suggestions and variations are excellent. It’s the only chocolate icing I use. Thank you very much.
You're so welcome and thank you for the great feedback!
Hi, does this separate when whipping? Mine looks gritty. Is there a way I can fix this?
It shouldn't be gritty. I'm wondering if this could be a result of the type of chocolate you used? I recommend high quality bars because they're less likely to seize. Seizing can happen when moisture gets into the chocolate. Using full-fat heavy whipping cream should also prevent this.
Hi! this looks lovely, if i wanted to add a hazelnut spread like nutella, how much can i add to keep the consistency firm? do i need to decrease some of the chocolate or cream?
I think you are going to have to experiment with that a bit. I haven't tried it myself so I can't say for sure. Good luck and let us know how it works out!