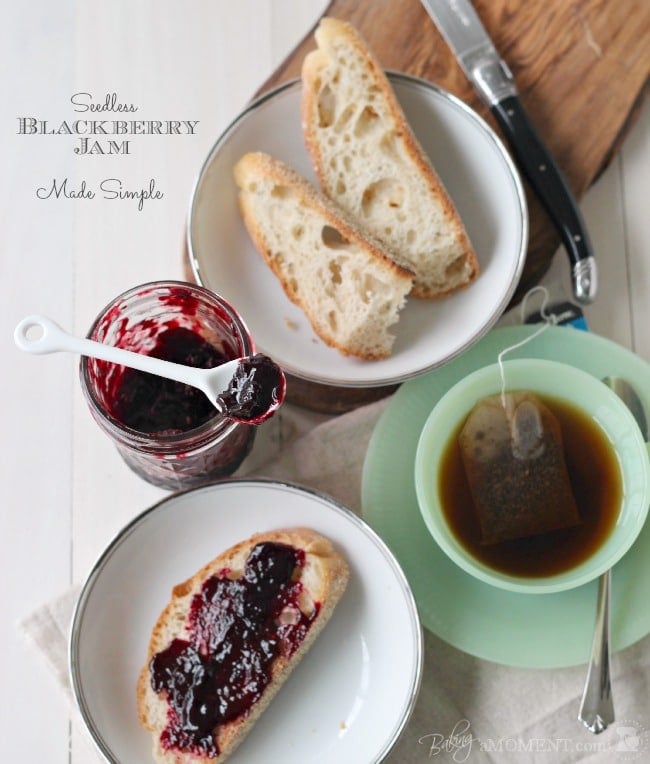
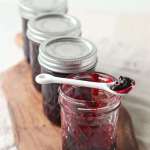
How to Make Seedless Blackberry Jam (No Pectin)
Don't be afraid of canning! A few simple steps will have you enjoying homemade fruit preserves, no pectin or special equipment needed.
I made jam!
Woot!
This was a first for me. I always thought the idea of canning and preserving seemed so complicated and scary, and I was too intimidated to make any attempt. Daunted!
Well, sometimes the most wonderful things have a way of just falling into your lap, and before you know it, you're knee-deep in a water bath, sterilizing jars...
We enjoyed our last summer shore weekend this past, and it was so nice to relax, enjoy a little sun and cool breeze, and catch up with family for a few days. (And my older son lost his first tooth! Please excuse my hollering like a lunatic...)
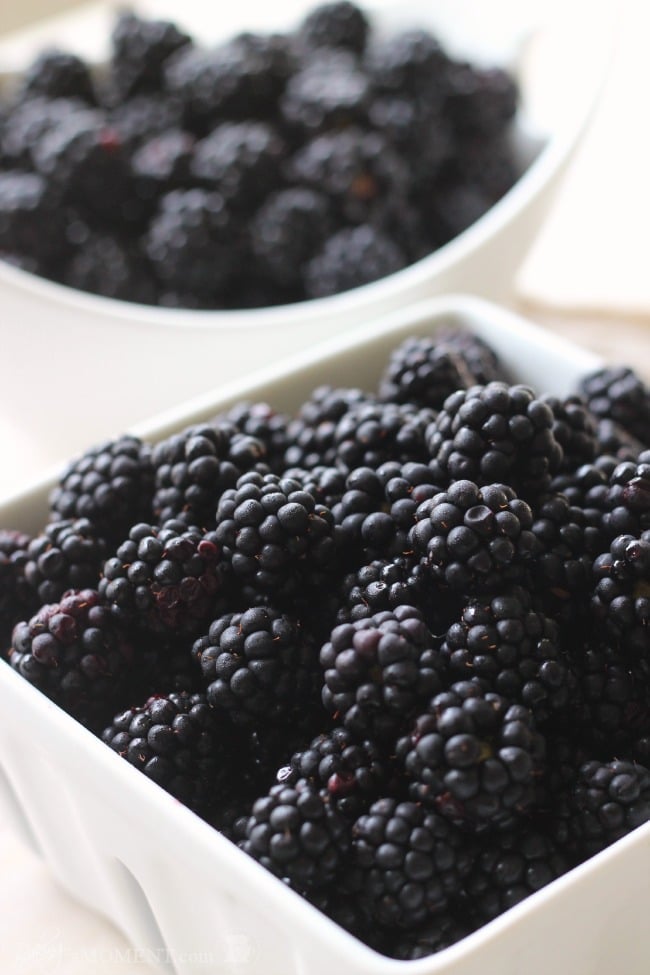
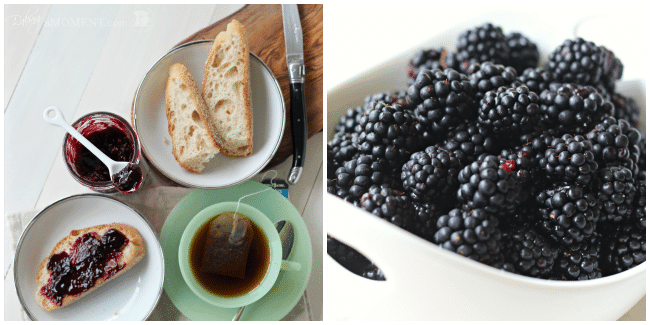
My brother- and sister-in-law showed up with a mahoosive bucket of blackberries they had picked at a local farm. (Remember just a couple of weeks ago, I was griping about how expensive blackberries are in PA? What a stroke of luck!) Many of them went straight into our hungry mouths, but by the end of the weekend, there were still over two pounds remaining. My husband and I bounced a few ideas around for what I could do with them, but I soon realized there were just way too many to simply bake into a recipe.
And what better way to repay my dear in-laws for their blackberry generosity, than to offer them a jar or two of homemade preserves at our next holiday gathering?
There's a lot of info on home canning out there on the interwebs, so I spent a solid morning just familiarizing myself with the process. I decided to go the non-pectin route. Just seemed a little more rustic to me. Plus, I didn't feel like making a trip to the store. Truth.
I learned that you can be super specific about it, or you can be more relaxed, and add sugar/flavor enhancers by taste and feel. Contrary to my uber-perfectionist, Virgo (read: anal) tendencies, I decided to just go with the flow. Worrying about sterilization and sanitation is enough of a fuss for me, being a first-timer and all.
Before I launch into the nitty-gritty, let me put your mind at ease. Jam, or preserves, are nothing more than reduced and thickened fruit. If you can make a sauce, you've got jam in the bag. And if you don't mind keeping it in the fridge, you don't even have to bother with the boiling and sterilizing. I wanted to go ahead and take a proper crack at it, so here's how it all went down.
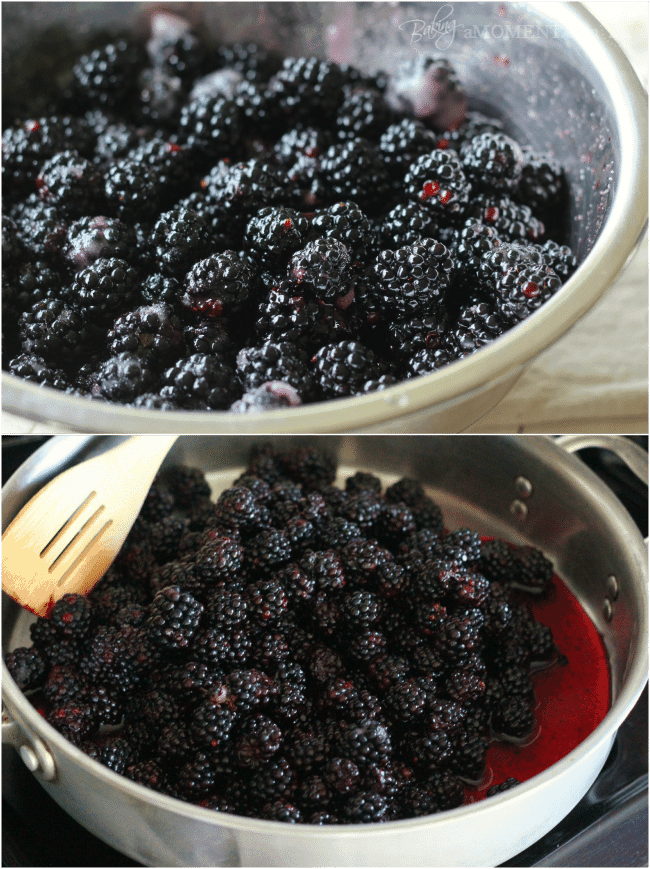
After giving them a cool-water rinse, I macerated the berries in sugar overnight, sweetening them and helping them to give up a lot of juice.
I didn't really bother to pick over the berries, removing stems/leaves, etc., because I knew I'd be straining them anyway. I'm not a fan of seedy jam so I took the extra step. Any other kind of fruit, and I would have loved big chunks, but I just find those big blackberry seeds to be super-annoying. No thanks.
Speaking of de-seeding blackberries, I remember receiving a food-mill as a wedding gift, oh, about an eternity or so ago. This would have been the perfect time to crack it out, but here's a glimpse into our mad basement organization skillz:
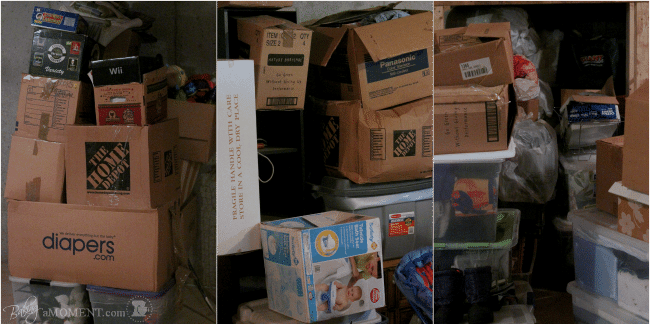
Um, ya. Maybe I'll just use my seive, mmmmkay?
Back to jam. I let the berries soften up over medium heat, and then I strained them. It was a tedious process, but don't let that deter you from jam-making. If not for this step, the whole business would have been a snap. And after a little while it became kinda meditative... Scoop in soft berries, push, push, swirl... push, push, swirl... the ladle worked great for this.
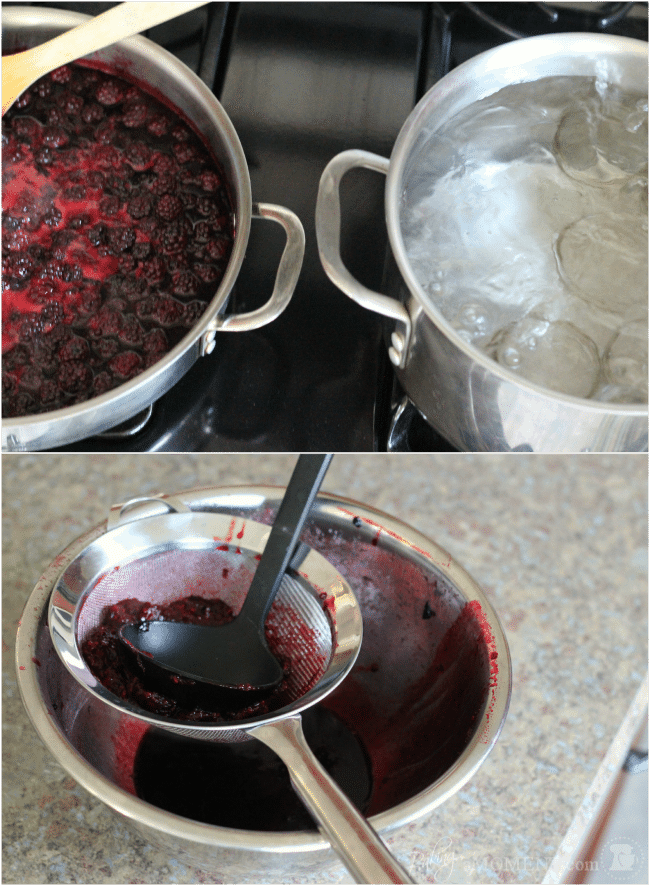
I submerged the jars in boiling water for 10 minutes while all this was going on. (Keep them warm so they don't crack when the hot jam goes in!)
Once the blackberries were de-seeded, I just whacked the puree on the stove and (slowly) brought it up to a bubble, stirring. I also threw the lids into some simmering water to soften up that ring of gummy gunk that makes the seal airtight.
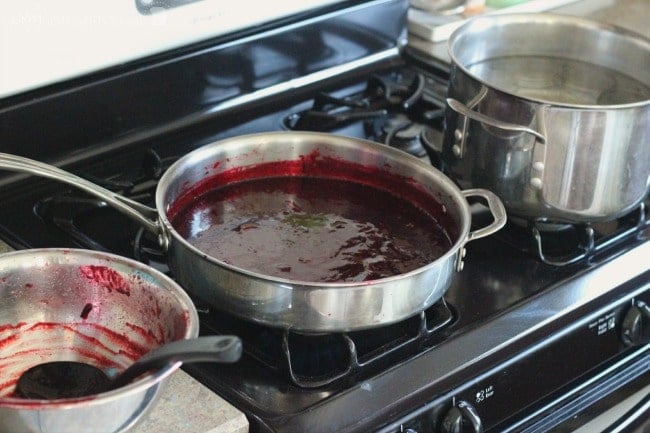
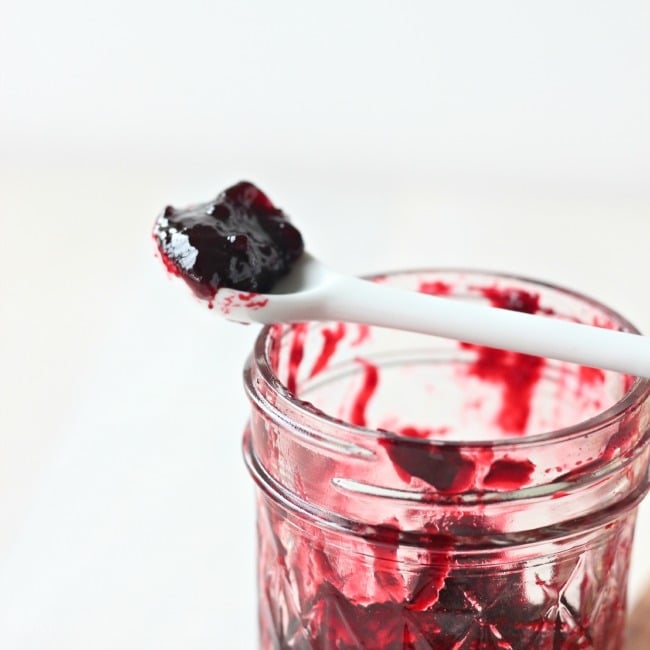
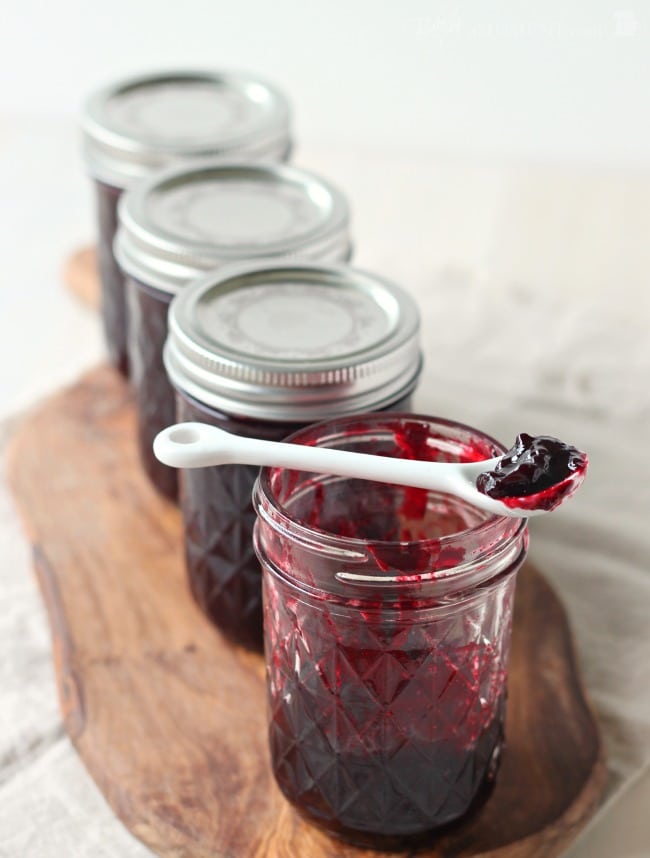
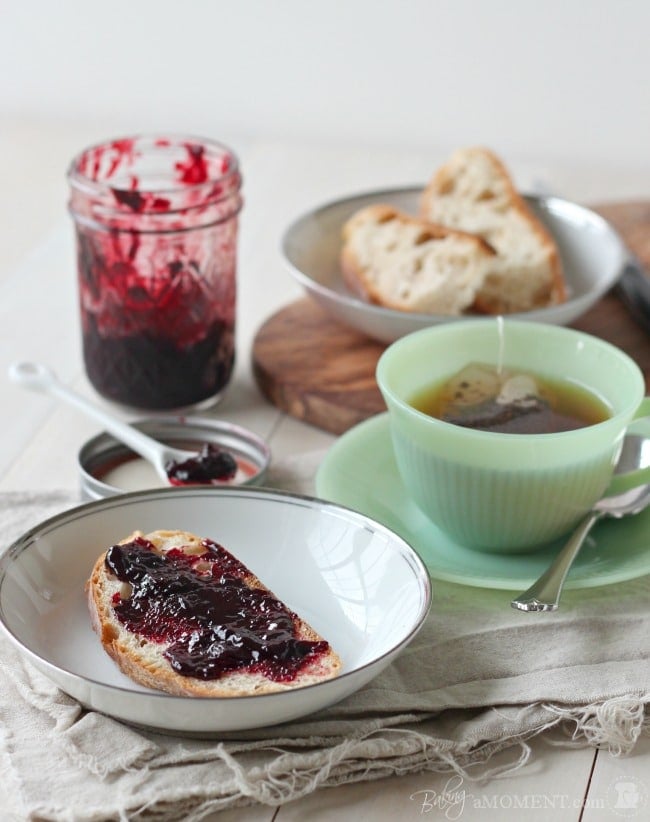
A squeeze of fresh lime, a quick taste for sweetness and maybe a little more sugar or citrus, and once it looked dark, shiny, and thickened, it was ladled into hot, sterilized jars.
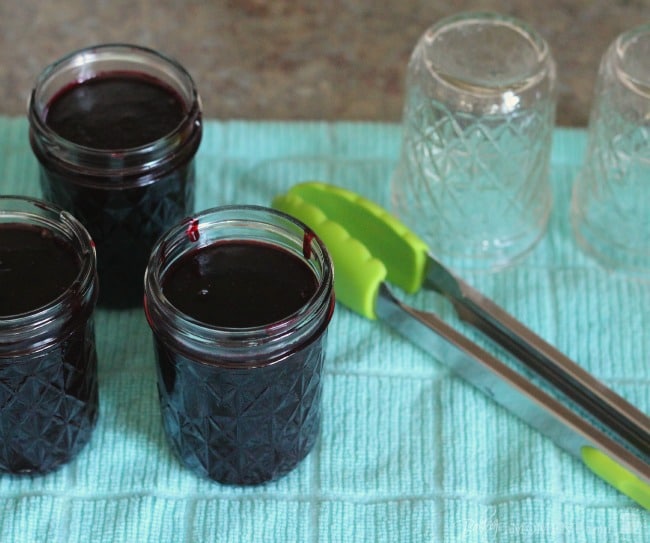
Wipe around the rim, lids go on, and the jars are placed back in the big pot of water and boiled for 10 minutes.
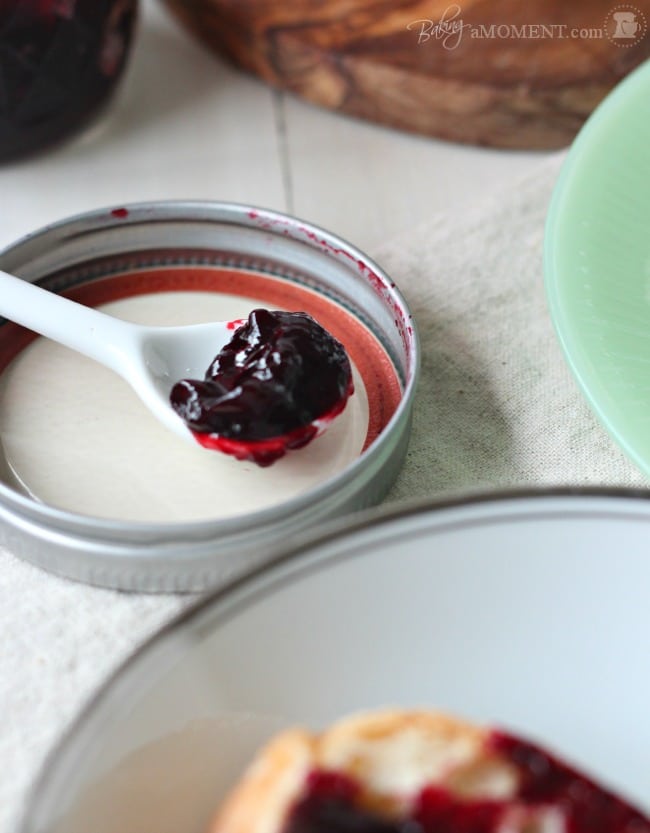
Once they've cooled completely, you can check the seals. If the "button" pops up and down, then they didn't seal properly. It's ok though. Those'll keep in the fridge for a couple of weeks. But if it's a tight seal, they'll keep in a cupboard for MONTHS! Perfect homemade gift!
This wasn't so hard. I'd do it again. As a matter of fact, I've got an itch to make a big batch of tomato jam... so keep an eye out for another possible canning post, guys. 😉
And, I've got a scrumptious recipe up my sleeve to utilize these sweet and luscious preserves! So stay tuned! I'm totally psyched to get baking again!
A very handy chart, for your reference: http://pubs.ext.vt.edu/348/348-594/348-594.html
PS- I didn't buy any special equipment, other than the jars. A lot of websites/stores will make you think that you need a whole arsenal of task-specific canning equipment, but I just was not interested in making the investment (of time, storage space, or money). A well-stocked kitchen already includes a stockpot and a pair of tongs, and mine's no exception. I'm sure a wide-mouth funnel, pair of canning tongs, magnetized lid-grabber, and jar-lifter-outer-basket would have been nice, but unless you think you'll be doing a buttload of canning in the future, I think you'll get by ok without.
Have you ever tried canning? Do you enjoy it? Are you a pectin-using, recipe following type, or do you just taste and adjust? Have you ever done any interesting flavor combos? (I toyed around with the idea of adding a little gin to my blackberry-lime concoction.) Or are you just completely intimidated by the whole idea? I have to say, that for me, once I gave it a go I realized it's not so scary. Just keep everything warm and boil it well and you're golden.
How do you like to use fruit preserves in your baking? Would love to hear your thoughts/ideas; as always, your comments are the bright spot in my day! 😉
As an amazon associate I earn from qualifying purchases.
Ingredients
For the jam
- 2 ½ pounds fresh blackberries
- 1 ½ cups granulated sugar
- 1 tablespoon lemon or lime juice, (juice of half a lime or lemon)
Equipment
- 3 8-ounce canning jars with fresh lids
- Large Saute Pan
- Sieve
- Tongs
Instructions
- Rinse the berries in cool water, and toss in sugar. Allow to macerate, refrigerated, overnight.
- In a large saute pan, warm the berries over medium heat, until softened.
- Press the mixture through a fine mesh sieve or food mill, to remove the seeds.
- Submerge the jars in a large pot of boiling water, for 10 minutes. Keep warm.
- Place the puree back in the saute pan, and heat, over medium heat, until thickened.
- Place the lids into simmering water to soften the seal.
- Stir in the citrus juice, taste the jam, and adjust seasoning, if needed. When it has reached the desired consistency, spoon it into the hot jars.
- Wipe the edge of each jar with a clean cloth, and place the lid on. Screw on the rings and submerge in boiling water for 10 minutes.
- Remove with tongs, and allow to cool.
Notes
- Allowing the berries to sit overnight in the fridge with the sugar allows them to sweeten and release their juices.
- You don't need to pick over the berries and remove leaves or stems since you will use a sieve later to remove the seeds.
- Allow the berries to soften in a large saute pan over medium heat before you strain them.
- Add the softened berries a scoop at a time to the sieve, push them down, and swirl using the bottom of the ladle to release the juices into a separate bowl.
- To save yourself time, submerge the glass canning jars into the boiling water for about 10 minutes while you strain the juice from the berries.
- Keep the jars warm so when the hot jam is added, they don't crack.
- Once everything is strained, it goes back into the pot to thicken.
- Check the seals on the lids. If they pop up and down, they do not seal properly.
- If correctly sealed, the jars will last for months in your pantry.
- Many websites and stores will make you think you need a whole arsenal of task-specific canning equipment, but you don't! Besides the mason jars for canning, you should have everything in your kitchen.
- Any leftover jam (that does not fill a jar within ¼" of the rim) can be kept refrigerated for 2-3 weeks.
- Jam that has been appropriately processed (the button on the lid should not pop up and down) can be kept in a cupboard for several months.

I didn't get the yield I was expecting. I got 2, 6oz jars. Taste is excellent! I will try again!
For blackberries, be sure to rinse them in lemon or lime juice. There are little worms that love to live in blackberries but they hate lemon and lime. They'll get out of those berries as fast as they can. Hope this helps.
Great tip! TYSM!
Rinse the berries in cool water. Toss in the sugar, how much water?
There is no additional water needed. You can just toss the rinsed berries in the sugar and they will release their juices. Good luck!
I'm so glad I came across this recipe! I'm using frozen berries & let them sit out overnight with the sugar to draw out the juices. I want to strain the seeds but wasn' t sure if it was okay if I had already added the sugar. I'm so glad to see you did it this way as well. Now I'm not so scared to try it this way!
How many cups would 2 1/2 lbs be