Butterscotch Krimpets
As an amazon associate I earn from qualifying purchases.
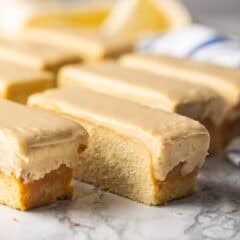
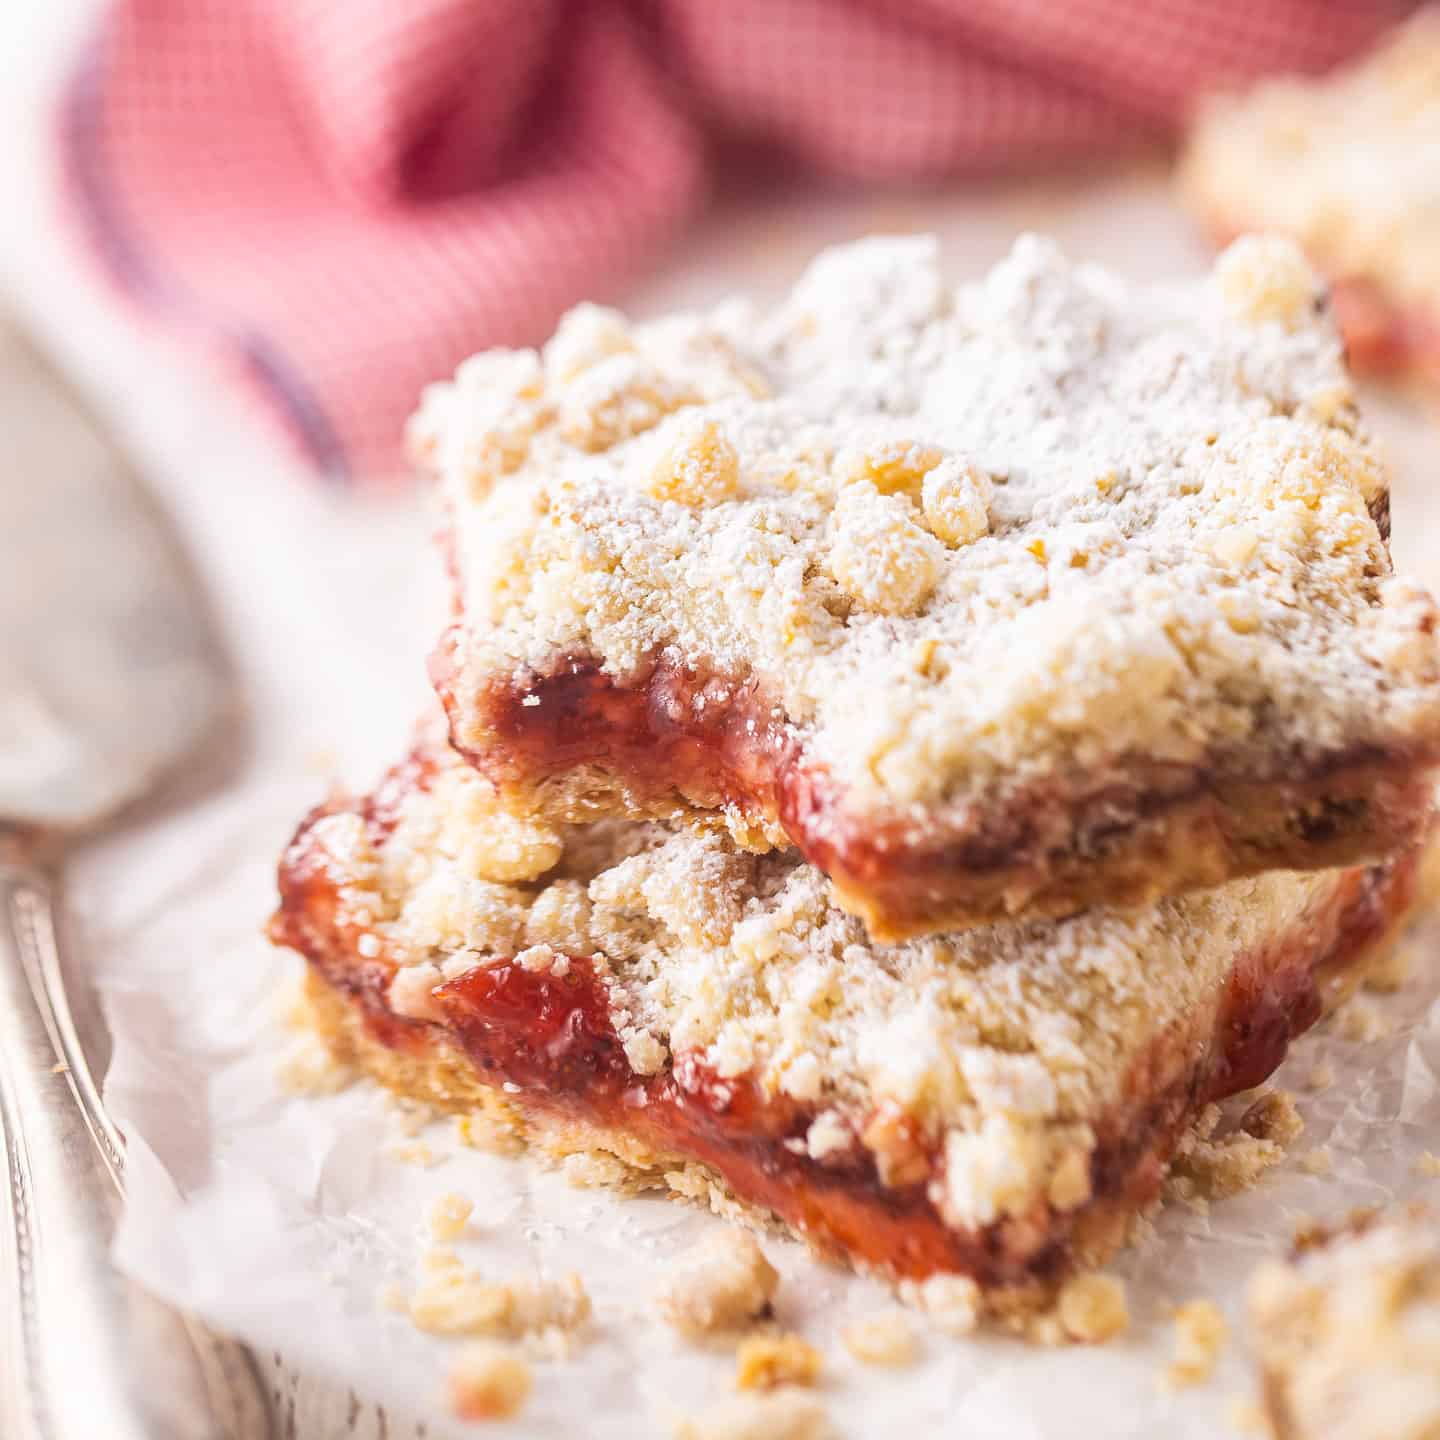
Homemade butterscotch krimpets: Even better than Tastykake! A Philly classic. Buttery brown sugar cake fingers with butterscotch icing.

This is a copycat recipe for a classic Philadelphia treat that I've enjoyed as long as I can remember: Butterscotch Krimpets!
The original is made by Tastykake, which is a local company similar to Hostess or Little Debbie. They make pre-packaged individual cakes, donuts, pies, and cookies.
My butterscotch krimpet recipe tastes every bit as good as the Tastykake kind! Maybe even better!
"Krimpet" is probably a made up word but everyone in the Philadelphia area knows it to mean like a little finger-shaped cake.
Butterscotch krimpets consist of a buttery brown sugar cake with the most incredible butterscotch icing on top. They're rich and flavorful and there's a little bit of a sweet & slightly savory thing going on that's completely irresistible!
I absolutely adore cake. Both for eating and for making!
I find it so much fun to bake a cake recipe from scratch and watch everyone enjoy it. Nothing's better than homemade!
If this sounds like you too then you'll want to have a look at my orange creamsicle cake, my chocolate chip cake, and my pineapple upside-down cake recipes too!

Table of Contents
- What are butterscotch krimpets?
- Why this is the best butterscotch krimpet recipe
- What do butterscotch krimpets taste like?
- Ingredients
- Special equipment
- How to make butterscotch krimpets
- How to serve butterscotch krimpets
- Expert tips
- Frequently asked questions
- A few more of my best butterscotch recipes
What are butterscotch krimpets?
Let's start by first answering the question "What is butterscotch?"
Butterscotch is just brown sugar and butter. That is all there is to it!
It often has a hint of salt for contrast and to bring out the rich taste of the butter.
Sometimes people want to add some type of spirit, such as rum or whiskey, but that really doesn't have to be part of it. The main components are just butter and brown sugar.
So these are little individual cakes in the shape of a bar. The bottom is a layer of soft, moist, butterscotch cake and it's topped with a smooth butterscotch icing.
They're made by Tastykake, a commercial bakery native to the Philadelphia area. As a kid, we often had Tastykakes packed in our lunches or for after-school snacks or desserts.
My recipe is patterned after this but it's homemade, so you know it's going to be fabulous!
Why this is the best butterscotch krimpet recipe
- Tastes amazing: When you use real, wholesome ingredients like fresh butter, eggs, and real vanilla, you get a result that stands head and shoulders above anything you could buy off a store shelf.
- Few ingredients: You probably already have most (if not all!) of them on hand.
- Easy to make: The cake mixes up in just a few minutes.
- Wholesome: I like to think that homemade is healthier! It at least doesn't have any of the chemical preservatives!
What do butterscotch krimpets taste like?
These have a rich, buttery flavor, accented with warm brown sugar.
The cake is soft and delicate, with a fine, even crumb that almost goes creamy on your palate.
And the icing is sweet and so delicious, almost like a Werther's caramel.
Ingredients

Brown sugar: I've used light brown sugar here and I think the flavor and color are a dead ringer for the original.
Flour: I like a combination of cake flour and all-purpose flour. Cake flour gives that beautiful even, delicate crumb while all-purpose lends some strength to the cake. If you're unfamiliar with cake flour, click here: What is Cake Flour?
Leavening: A combination of baking powder and baking soda ensures that your butterscotch cake will rise sky-high and soft as a cloud!
Salt: Kosher salt has the cleanest, purest flavor. There are no bitter-tasting additives like iodine.
Butter: Unsalted butter is best so you can add the exact right amount yourself, instead of guessing at how much is in the butter. Make sure your butter has softened to room temperature.
Eggs: Large chicken eggs, or a plant-based product that can swap 1:1. It's preferable if the eggs are at room temp, although I don't find this to be too critical.
Sour cream: The natural acid will combine with the leavening to help the cake rise. You could also use the same amount of buttermilk or unsweetened yogurt.
Milk: Keeps the cake moist. Any kind will work, even a plant-based milk.
Vanilla: Vanilla extract lends a sweet fragrance that compliments the butter and brown sugar flavors.
Cream: Gives the butterscotch icing a workable consistency.
Powdered sugar: Gives body to the icing.
Special equipment
- Measuring cups and spoons: Follow my guide on how to measure ingredients.
- Mixer: If you don't have a stand mixer, a handheld electric mixer works fine too but you'll also need a large mixing bowl.
- Silicone spatula: For scraping down the bottom and sides of the bowl and getting out every last bit!
- Pan: This cake bakes in a 9x9-inch metal pan. If you use glass or ceramic it could affect the bake time.
- Non-stick spray: To keep the cake from sticking to the pan.
- Parchment: Allows you to easily lift the cake from the pan and onto the cutting board for slicing.
- Pot: A medium-sized, heavy-bottomed saucepan, in which to make the butterscotch icing.
- Thermometer: The icing is cooked to a specific temperature to prevent graininess.
- Whisk: Whisk the butterscotch as it cooks, for even cooking. A narrower design works best for getting into the corners of the pot.
How to make butterscotch krimpets
Step 1: Make the butterscotch cake
Start by placing the brown sugar, flours, leavening, and salt in a large bowl.

Give these dry ingredients a stir, just to get them combined.
Then add the butter.
Work it in until you get a mixture that resembles damp sand. We are using the "reverse creaming method" which is stupid simple and guarantees fantastic results!
Next, add in the eggs.

Stir each one in separately, allowing one to fully incorporate before adding the next.
Then, in go the liquids.

Stir in the sour cream, milk and vanilla until you have a smooth, thick batter.

Transfer it to the pan and allow it to bake until a toothpick in the center comes out clean.
Step 2: Make the butterscotch icing
Once your butterscotch cake is made and cooled, you can get going on the icing.
Start by melting brown sugar, butter, cream, and salt in a pot over medium heat.

Allow the mixture to come to a boil and reach a temperature of 240 degrees F. Cooking it to this temperature ensures your icing will be satin-smooth and not the least bit grainy.
Once you hit that critical temp, remove the butterscotch from the heat and whisk in half the powdered sugar.

Then add the remaining powdered sugar, using a hand mixer to get a good consistency.

Keep in mind that you may need to add a little more cream to get it spreadable.
Step 3: Cut into fingers
Spread or pour the icing over the cake and give it a little time to set. This icing should set firm and form a little bit of a crust as it cools and dries.
Lift the entire cake out of the pan by the parchment overhang, and set it on a cutting board.

Cut it in half down the middle, then cut 5 equal krimpets from each half. Each slice of cake will be around 4.5-inches by just over 1.75-inches.
How to serve butterscotch krimpets
These are fantastic as a sweet snack or dessert.
I prefer them at room temperature, but you could also serve them chilled!
Expert tips
Measure precisely: Measure all the ingredients accurately. Use liquid measuring cups for the liquid ingredients, and dry measuring cups for the dry ingredients. Accurate measurements ensure the right balance of ingredients and prevent the cake from being too dry or too wet. Read more about this here: How to Measure Ingredients for Baking.
Room temperature ingredients: Allow ingredients like eggs, butter, and sour cream to come to room temperature before starting. Room temperature ingredients mix in more smoothly, so you don't end up with a lumpy batter.
Scrape often: Stop frequently to scrape the bottom and sides of the bowl. This will help to incorporate any stiff butter that could be clinging there, so all the ingredients are smoothly incorporated into the batter.
Watch as it's baking: Keep a close eye on the cake while baking and avoid overbaking it. Overbaking can lead to a dry cake. A few minutes before you think it will be done, flip on the oven light and view the cake through the window. If it doesn't look wet in the middle, crack open the door slightly and give it a feel. If it's springy, give it the toothpick test. If it comes out clean or with a few moist crumbs, the cake is done.
Cool completely: Allow the cake to cool in the pan. Cooling in the pan helps keep the cake moist.

Frequently asked questions
Yes! And it's not a bad idea to make up this recipe a day before you plan to serve it, since it does need time to cool.
It will keep (lightly covered) at room temperature for a couple of days, or in the fridge for around a week.
These freeze very well. Just be sure to wrap them tightly so they don't dry out or pick up any funny freezer odors.
Butterscotch krimpets will last in the freezer for about 2 months, and can be thawed at room temperature or in the fridge.
My homemade krimpets are a bit larger than the Tastykake kind!
While Tastykake krimpets come 3 to a pack, I think one of my homemade version is more than enough!
So the nutritional info below is for just 1 krimpet.

A few more of my best butterscotch recipes
As an amazon associate I earn from qualifying purchases.
Ingredients
For the Butterscotch Cake
- 1 cup (220 g) light brown sugar, loosely packed
- 1 ½ cups (187.5 g) cake flour
- ¾ cup (93.75 g) all-purpose flour
- 1 teaspoon (4 g) baking powder
- ¾ teaspoon (3 g) baking soda
- 1 teaspoon (6 g) kosher salt
- ¾ cup (170.25 g) unsalted butter, softened
- 2 (88 g) eggs, large
- ⅔ cup (153.33 g) sour cream, buttermilk or unsweetened yogurt can be substituted
- ¼ cup (61 g) milk, any kind
- 1 teaspoon (4 g) vanilla extract
For the Butterscotch Icing
- 1 cup (220 g) light brown sugar, tightly packed
- ¼ cup (56.75 g) unsalted butter
- ¼ cup (59.5 g) heavy cream, you may need a little extra to get the proper consistency
- ½ teaspoon (3 g) kosher salt
- 2 cups (240 g) powdered sugar, divided
Instructions
To Make the Butterscotch Cake
- Preheat the oven to 325 degrees F, mist a 9x9-inch metal cake pan with non-stick spray, and line it with parchment.
- Place the brown sugar, cake flour, all-purpose flour, baking powder, baking soda, and salt in the bowl of an electric mixer, and stir on low speed to combine.
- Add the butter, mixing on medium-low speed until the mixture resembles damp sand (about 1 minute).
- Add the eggs, one at a time, scraping the bottom and sides of the bowl to be sure all of the ingredients are fully incorporated.
- Add the sour cream, milk, and vanilla, mixing on medium speed for 2 to 3 minutes to aerate the batter and build the cake's structure.
- Transfer the batter to the prepared pan, and bake until a toothpick inserted in the thickest part comes out clean or with a few moist crumbs (approx. 40 to 45 minutes).
- Cool completely in the pan, then top with butterscotch icing and cut into individual 4.5x1.75-inch fingers.
To Make the Butterscotch Icing
- Place the brown sugar, butter, cream, and salt in a medium pot over medium-low heat.
- Cook the mixture (whisking) until it comes to a boil.
- Continue to cook the butterscotch until it reaches a temperature of 240 degrees F, then remove it from the heat and whisk in half the powdered sugar.
- Beat in the remaining powdered sugar with an electric mixer on medium speed (add additional cream as needed to get the proper consistency).
- Immediately pour or spread the icing over the cake and allow it to set before slicing.

These were soooooo good. I grew up on butterscotch krimpets as a kid and these are even better--plus I know everything that is in them.
Ok I’m so confused over the powdered sugar
On the icing it said add remaining powered sugar where did the other go? I’ve gone through the recipe a few times now and already made the cake please tell me I didn’t leave powdered sugar out of the cake
Check out steps 3 and 4 of the icing recipe 😉
Since the frosting has butter & cream do the krimpets need to be refrigerated?
Hey Peter! I think if you eat them within 1 to 3 days of making them it's probably ok. But if they're laying around longer than that, it's probably a good idea. Thanks for reading!
Very good though I wish I had sifted the confectioner sugar.
I’m giving 5 stars because if properly prepared this cake is fantastic. There were a couple of problems, but they were user errors. I baked it for 45 minutes which was too long. I also didn’t mix the batter properly so there are some pockets. Looking forward to making it again.
Just following up to say I made this with the Bob's Red Mill 1:1 Gluten free flour and also used half and half instead of full cream in the icing and my kids declared it the best cake ever! It really is good and simple to make. Thanks!
Hi Sharon, Thanks for letting us know. We're so glad that your kids loved these– it's one of my favorites, too!
I can't wait to make these! I'll need to use gluten free 1:1 flour. Any issues you see with that?
Hi Sharon, Most recipes will work with gluten free 1:1 flour (Bob's Red Mill is a great option). Enjoy!
This was absolutely the most amazing thing I have ever made. I can’t believe how amazing it is !
Ha! Love that! I thought it was really good too. TYSM for the 5-star review!