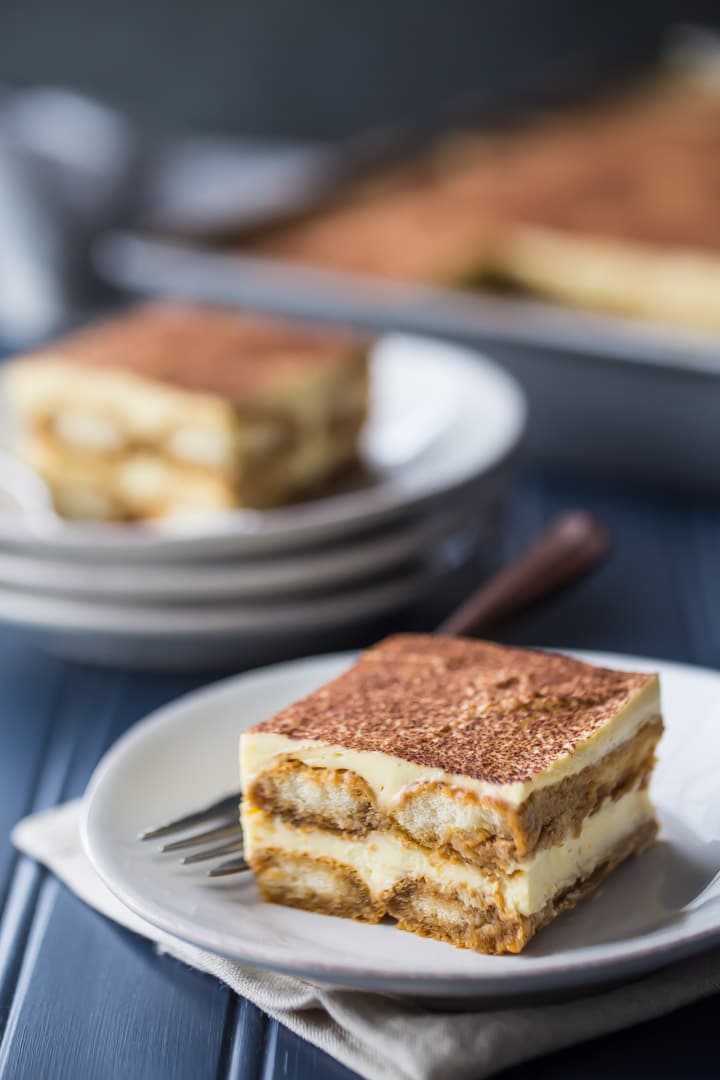
Classic Tiramisu Recipe
As an amazon associate I earn from qualifying purchases.
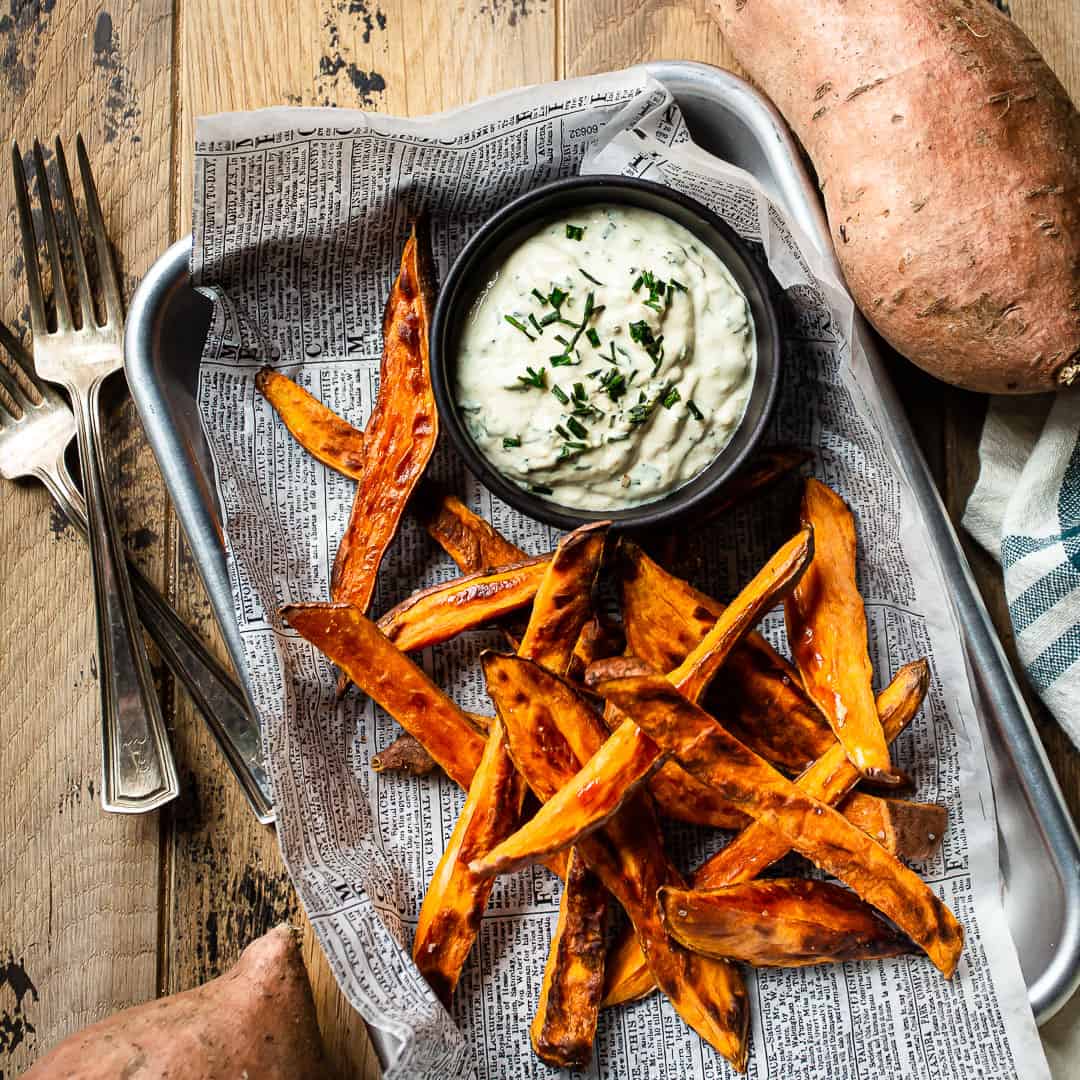
This authentic Tiramisu Recipe is made in the classic Italian way, and one bite will have you convinced. It tastes amazing! I use a mascarpone filling, ladyfingers soaked in espresso, and a hint of Marsala for that unmistakable tiramisu flavor.
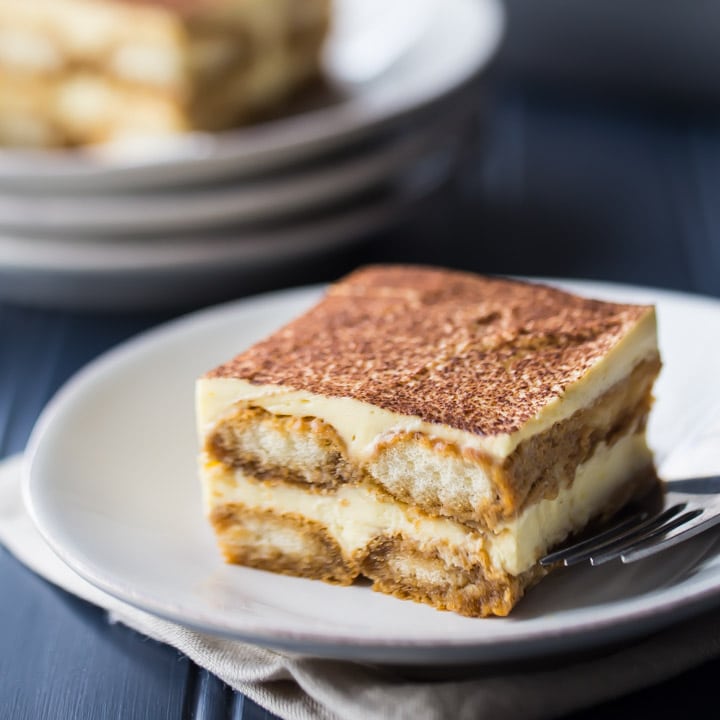
Table of Contents
- Here's Why You'll Love This Recipe
- Ingredients You'll Need
- How To Make Tiramisu
- Recipe FAQ
- More Recipes With Coffee
I love making tiramisu because it's so easy, you don't even have to bake it. And it serves a big crowd, so it's perfect for parties and potlucks. Plus, because of the fancy-sounding name, people are always so impressed with it!
If you check online, you'll find TONS of different tiramisu recipes, and the ingredients are all over the map. Different recipes call for different kinds of liqueurs. Some call for instant espresso, and some call for the real brewed kind. Some tell you to use cream, while others recommend egg whites. Some don't even have any eggs in them at all!
I use eggs in my tiramisu because they are traditional and give the filling a richness and an airy texture that is hard to replicate. I do prefer to cook them, though.
Whisking the yolks with sugar and Marsala over a double boiler not only makes them safer to eat, it also transforms them into a thick, pale, mousse-like mixture called zabaglione. This step dissolves the sugar and creates an incredibly smooth, luxurious filling.
Marsala is the traditional wine used in tiramisu, and when it is cooked with the yolks, it leaves behind a warm, complex flavor. The coffee mixture for dipping the ladyfingers is a little different, since the alcohol is not cooked off there.
There is only a small amount of liqueur in the espresso soak, so it adds more flavor than potency. For a non-alcoholic version, just leave it out or replace it with extra espresso or fruit juice.
Here's Why You'll Love This Recipe
- It has that classic Italian flavor with espresso, mascarpone, and Marsala wine.
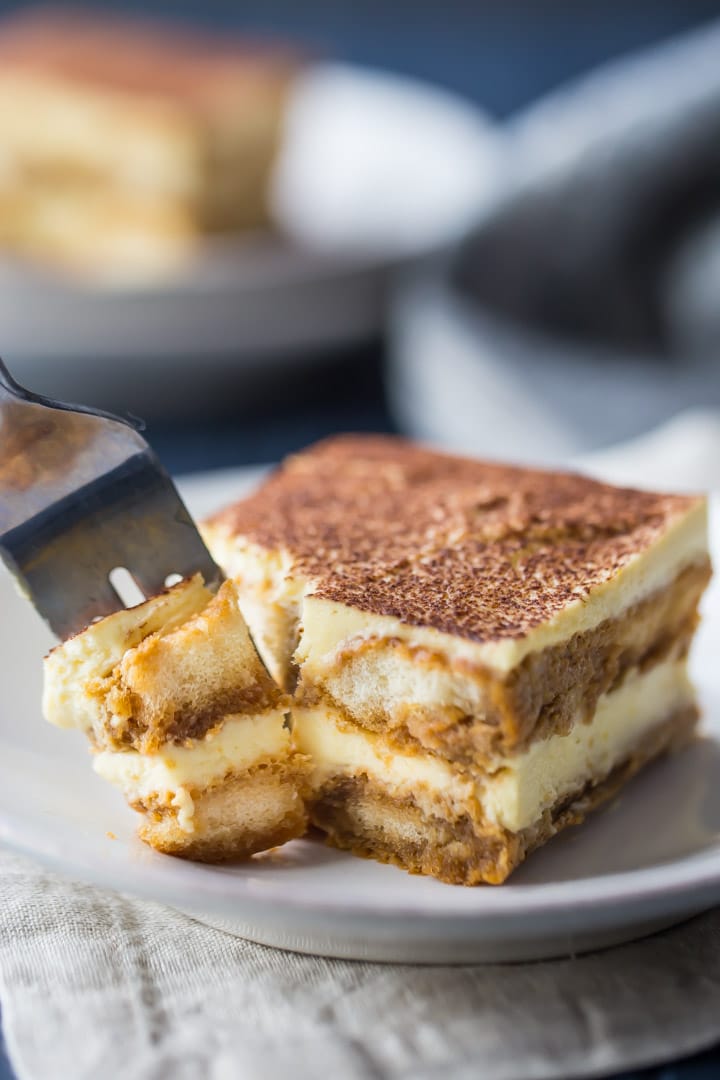
- The texture is dreamy, with soft ladyfingers and a silky, cloud-like filling.
- It is a wonderful make-ahead dessert since it needs time to chill before serving.
- It looks impressive, but the process is very approachable.
- It serves a crowd beautifully, making it ideal for gatherings and celebrations.
Ingredients You'll Need
The recipe card at the bottom of the post contains the full list with all of the amounts. Refer to that when you're cooking.
For the filling
- Egg yolks: Create a rich, custardy base for the filling.
- Granulated sugar: Sweetens the mixture and helps the yolks whip up pale and fluffy.
- Marsala wine: Adds classic depth and warmth.
- Mascarpone cheese: Makes the filling smooth, creamy, and luxurious.
- Heavy cream: Whipped and folded in for a light, airy texture.
For the coffee soak
- Brewed espresso: Gives tiramisu its signature bold coffee flavor.
- Coffee liqueur or brandy: Adds extra richness and complexity.
- Powdered sugar: Blends into the coffee mixture for a smoother, slightly sweeter soak.
For assembling
- Savoiardi ladyfingers: Soak up the espresso while holding their shape in layers.
- Unsweetened cocoa powder: Dusted on top for the classic finish.
How To Make Tiramisu
Step 1: Make the mascarpone filling
Put the egg yolks, sugar, and Marsala in a large heatproof bowl over simmering water. Whisk all the time until the mixture is pale, thick, and has doubled in size. This step takes just a few minutes and helps build the right texture and flavor.
Remove the bowl from the heat and whisk in the mascarpone until smooth.
In another bowl, whip the cream until it forms stiff peaks. Gently fold it into the mascarpone mixture until everything is light and well mixed.
Step 2: Prepare the coffee mixture
Mix the espresso, coffee liqueur or brandy, and powdered sugar together in a shallow dish.
The mixture should taste strong and a little sweet, because it will add flavor to every layer of the dessert.
Step 3: Layer the tiramisu
Dip each ladyfinger quickly into the espresso mixture. Do not let them soak too long, or they will get too soft.
Lay the dipped ladyfingers in a single layer in an 8x10-inch casserole dish. Spread half of the filling on top. Add another layer of dipped ladyfingers, then cover with the rest of the filling.
Finish with a dusting of cocoa powder.
Step 4: Chill before serving
Cover the tiramisu and refrigerate for at least 8 hours. This lets the layers soften and blend into a classic creamy texture.
Helpful Tips and Tricks
- Whisk the egg yolk mixture constantly over simmering water so it thickens smoothly.
- Let the mascarpone come closer to room temperature before mixing for a creamier filling.
- Dip the ladyfingers very quickly to keep them from becoming soggy.
- Chill overnight when possible. The flavor and texture get even better.
- Dust with cocoa powder just before serving for the prettiest finish.
Recipe FAQ
If you soak your ladyfingers in caffeinated espresso, it could!
The word "tiramisu" is Italian for "pick-me-up," so it definitely has the reputation for putting a little extra pep in your step.
Personally, I am very sensitive to caffeine, so I choose to use a decaffeinated espresso. I have an espresso machine that uses pods. It took 4 pods to make enough espresso to soak all 48 ladyfingers.
If you don't have an espresso machine, you can purchase brewed espresso at a coffee shop or use instant espresso powder mixed with hot water. There's a link to my favorite instant espresso just above the recipe card below. The flavor is rich and full, and I always keep a little jar on hand for any coffee or mocha-flavored treat I might want to make.
You might also want to check out my chocolate tiramisu for a completely caffeine-free and non-alcoholic version that the whole family will enjoy!
Look for Savoiardi. This is what is traditionally used in tiramisu.
They're light and very dry, so they will soak up the liquid well.
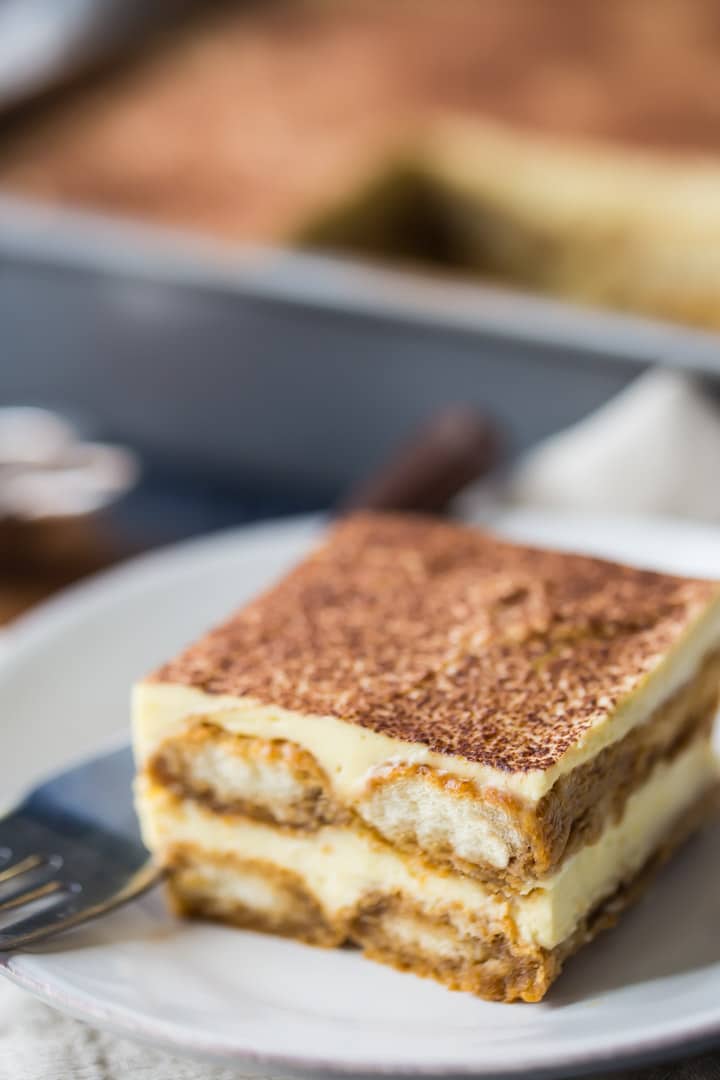
Sometimes I can find them in the gourmet cookie or Italian section of my supermarket; sometimes I have to order online. Look for a link below (just above the recipe card), to the exact brand I used for the tiramisu you see pictured here.
You can also make homemade ladyfingers! Check out my homemade ladyfingers recipe, if you really want to be a superstar! Just leave them out (uncovered) overnight so they become crisp.
I've definitely seen the case made for no cream in tiramisu. Some people say it's more authentic that way, although I've enjoyed tiramisu in Italy that I'm sure was lightened with whipped cream.
I prefer tiramisu with whipped cream because it builds it up and makes it more fluffy and light. It also helps the squares to hold together better. And it makes it last longer, without weeping or deflating.
If you want to leave out the cream, that's no problem. You can leave it out entirely (your squares won't be quite as tall), or replace it with 4 egg whites, beaten to stiff peaks.
Mascarpone is a soft, creamy cheese that's made in Italy. It's very similar to American cream cheese, but without the tangy flavor. It's pretty easy to find in the cheese section of most grocery stores.
If you're looking to make a substitution, cream cheese is probably the closest thing. But it will yield a slightly different flavor, and not be as authentic. Tiramisu is all about the mascarpone!
Allow your mascarpone to come to room temperature before whisking it into your zabaglione. It might take a little elbow grease, but you can get a nice, smooth filling with no lumps by whisking vigorously by hand.
That is one of the best things about this dessert! It gets better the longer it sits.
I would recommend making tiramisu the day before you plan to serve it. This way, all the flavors have a chance to meld, and the ladyfingers become pillow-soft.
If you make this tiramisu recipe as written, it should keep in the fridge for up to 5 days, but it's definitely best the day after it's made.
Looking for a layer cake version of tiramisu? Be sure to check out my Tiramisu Cake!
More Recipes With Coffee
- No-Churn Coffee Ice Cream
- Coffee and Donuts Ice Cream
- Irish Coffee Creme Brulee
- Coffee Macarons with Nutella Filling
Ingredients
- 4 large egg yolks
- ½ cup (100 g) granulated sugar
- ⅓ cup (80 g) Marsala wine
- 16 ounces (453.59 g) mascarpone cheese
- 1 cup (238 g) heavy cream
- 2 cups (60 g) brewed espresso*
- 3 tablespoons coffee liqueur or brandy
- 3 tablespoons powdered sugar
- 48 Savoiardi ladyfingers
- 2 teaspoons unsweetened cocoa powder, (for garnish)
Instructions
- Place the egg yolks, sugar, and Marsala in a large metal mixing bowl, and set it over a pot of simmering water.
- Cook, whisking, until the mixture is pale, thick, and doubled in volume (about 5 minutes).
- Remove from the heat, and whisk in the mascarpone.
- Whip the cream until it holds stiff peaks.
- Fold the whipped cream into the mascarpone mixture.
- Set the filling aside.
- Whisk the espresso, liqueur, and powdered sugar together in a shallow dish.
- One at a time, dip the ladyfingers into the espresso mixture and arrange in an even layer in the bottom of an 8x10-inch casserole dish. (Line the ladyfingers up in two straight rows of twelve.)
- Spread half the filling over the ladyfingers, and repeat.
- Spread the rest of the filling on top, dust with cocoa powder, and refrigerate for 8 hours.
Notes
For a layer cake version, try this Tiramisu Cake.


This is my go to recipe...the first time making was a bit stressful but BOOM the egg yolk mixure just doubled like magic...so good! Every loves it and I have made many times. I have been to Italy and this is so much like what you get there. A little patience is required. So very good! Thanks for sharing!!!
This looks delish! Can I use Marsala COOKING wine? (The kind you find at the grocery store by the vinegars)
I think that usually contains salt...? I would taste it first just to be sure. Good luck!
Hi Allie, It’s difficult to get Marsala wine here at my country, at the egg whisking process, is there anything else I can replace Marsala wine with? Example Kahlua or Rum? Or is it ok if I totally omit any replacement?
Hello! I plan on making this tonight! I do have a questions can I use heavy whipping cream instead of heavy cream? THanks!
They are actually the same thing, so yes, absolutely! Good luck and enjoy!
Can I substitute the Marsala wine for something non-alcoholic?? Thanks.
Dear Allie,
Do you think I could skip dusting the cocoa on top & freeze the tiramisu then, after it’s been thawed,dust it with cocoa once I want to serve it?
Thanks.
Hi Zainab! To be honest I am not 100% sure. Sometimes the freezing/thawing process can cause soft cheeses to become a little grainy.
Making this today for a dinner party tomorrow! Do I soak both sides of the ladyfingers? Or just one?
It doesn't really matter. If you want more coffee flavor then do both sides. Up to you!
Hello! I am so excited to try this recipe for my birthday! I do have a question about using a metal mixing bowl; is the goal to have a double-boiler, and would a glass bowl work as well?
I don't have any metal ones and am hoping that I can still make a egg yolk/marsala mixture without one.
Thanks!
Hi Grace! Yes the idea is to create a double-boiler effect. You can do it with a glass bowl, but because they are thicker they will take a little longer to warm up. Good luck and happy birthday!
Hi Allie,
The tiramisu was a big hit. I also used your ladyfinger recipe! I made three desserts for my party and your tiramisu was the first one finished! Thanks so much.
That's so great to hear Grace! I'm so happy everyone enjoyed. Thanks so much for letting me know!
Hello! I’d love to try your recipe for tiramisu but I won’t be able to get the Savoiardi ladyfingers by time I need to make it. Would another brand of ladyfingers be ok?
Hi there! You can use any kind of ladyfingers you like. The drier the better! You could also make homemade ladyfingers and just let them sit out and get stale: https://bakingamoment.com/homemade-ladyfingers/.
I just attempted your tiramisu recipe and the filling got lumpy when I added the mascarpone. I was wondering if you let the mascarpone get to room temperature before you start mixing everything together? Also, do you have any other tips on avoiding lumps? Thanks you so much!
Ashley Salazar
Hi Ashley! It usually does start out lumpy but the more you whisk it should come together. It does help if the mascarpone is not cold. And cream will always whip up better if it is cold. Hope that's helpful!
Allie, I wrote last week about making many batches of your Ladyfingers recipe, to prepare for a large batch of Tiramisu at the private lodge where I bake desserts. Thank you so much for this Tiramisu recipe, I've now made it twice and my Chef boss (world-traveled) honestly critiqued it, and pronounced it 'balanced and very good' which is a stunningly awesome and positive comment from him! 😀 I made it in a hotel pan. The first time, I doubled the 9" x 13" proportions and it was fine. But today I decided to triple that formula for the hotel pan and I am more pleased with the outcome. Your step-by-step directions gave me confidence and now I consider this a permanent fixture in my repertoire. Thank you so much!
That's such great news HollyRae! I love that you're tripling the recipe- more is always better lol! Thank you so much for letting me know how it's worked out for you. I hope your Chef boss gives you a big raise!
Dear Allie, I just made your tiramisu recipe. Should I keep it covered in the refrige or not? Can’t wait to try a piece. Tx diane
Hi Diane! It's best to keep it covered so it doesn't dry out or pick up any funny fridge odors. Hope you enjoy!
I don't have marsala. Can I sub sherry?
Hey Dale! Marsala is more authentic, but sherry does taste similar so I think it would work in a pinch. Good luck & I hope you enjoy!
I would like your recipe for the lady fingers,Allie. Can’t get them from our only supermarket in a country small town. Please help! Your tiramisu recipe said it was below but I never found it. Duh!!!
No problem Terry! The recipe you're looking for can be found here: https://bakingamoment.com/homemade-ladyfingers/. It's also linked in the last paragraph below the heading "What kind of Ladyfingers should I use." Hope you enjoy!
Hi, Can you link the marsala wine you used? I tried making it today but it didn't quite workout. If anything, can i substitute the marsala with something else to just not use it?
Hey Ella! I'm so sorry to hear you had trouble. Can you be a little more specific as to how exactly it didn't work out? I'd like to help troubleshoot.
Is there any way to save it if the mixture is runny? I think the egg yolk and marsala wine part didn't get think enough (wisked about 5 minutes longer to try to get it thicker).
Hey Katie! So sorry you are having trouble! I'm not sure which step you are on, but if the mascarpone hasn't been added yet, you can keep cooking the yolk mixture until it's properly thickened. Good luck!
Hi Allie! Would you have any recommendations on what to replace the wine with or should I just leave it out completely if I don’t want to use that?
Also, how long should the lady finger be in the coffee? I just made a recipe, not traditional at all more of an “easy” one I guess, but I believe I dipped the lady finger stop long! Excited to try your recipe, my fiancé loves this!
Hey Maggie! You could either sub it with water or you could use more espresso. Totally up to you! If you run out of coffee then you may have dipped your ladyfingers a little too long, lol! I usually give them a couple of seconds on each side. Hope that's helpful! And hope you and your fiance enjoy!
PS- If you're interested in a non-alcoholic and caffeine-free option, you might like this recipe: Chocolate Tiramisu.