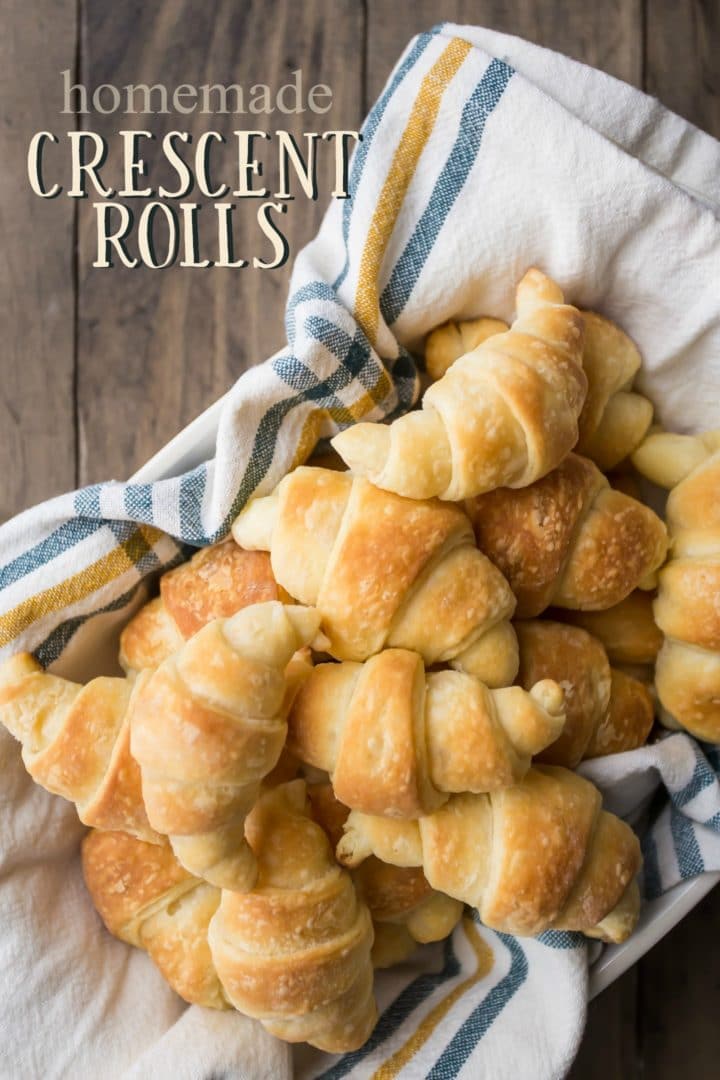
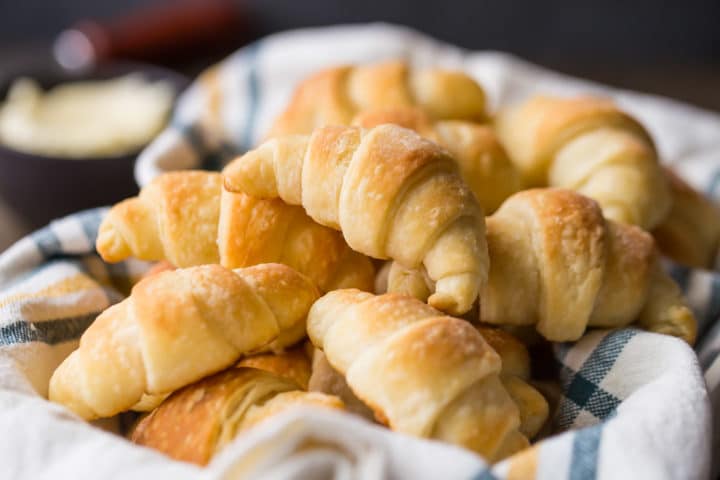
Homemade Crescent Rolls
Light, flaky, and soft homemade crescent rolls! Made with just a few simple ingredients. These will take your dinner to the next level!
Who doesn’t love crescent rolls?? Am I right?
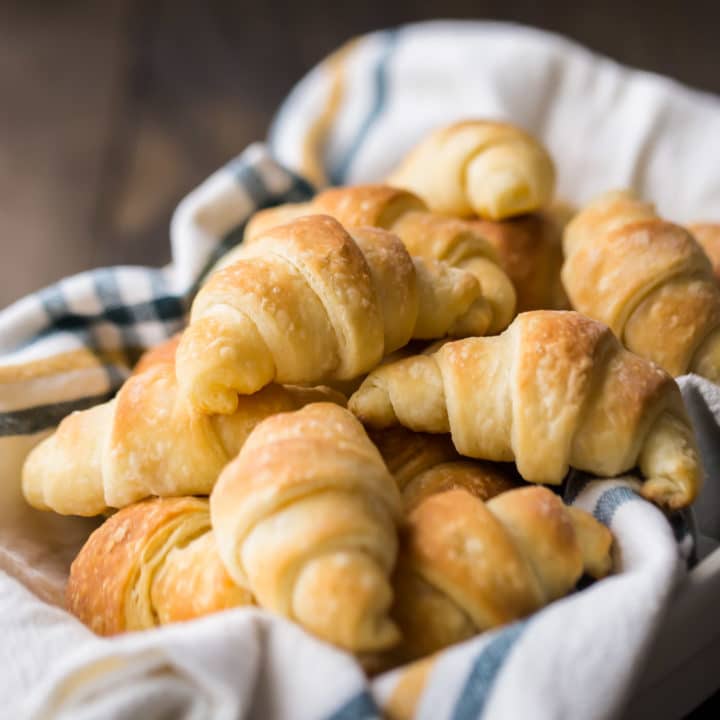
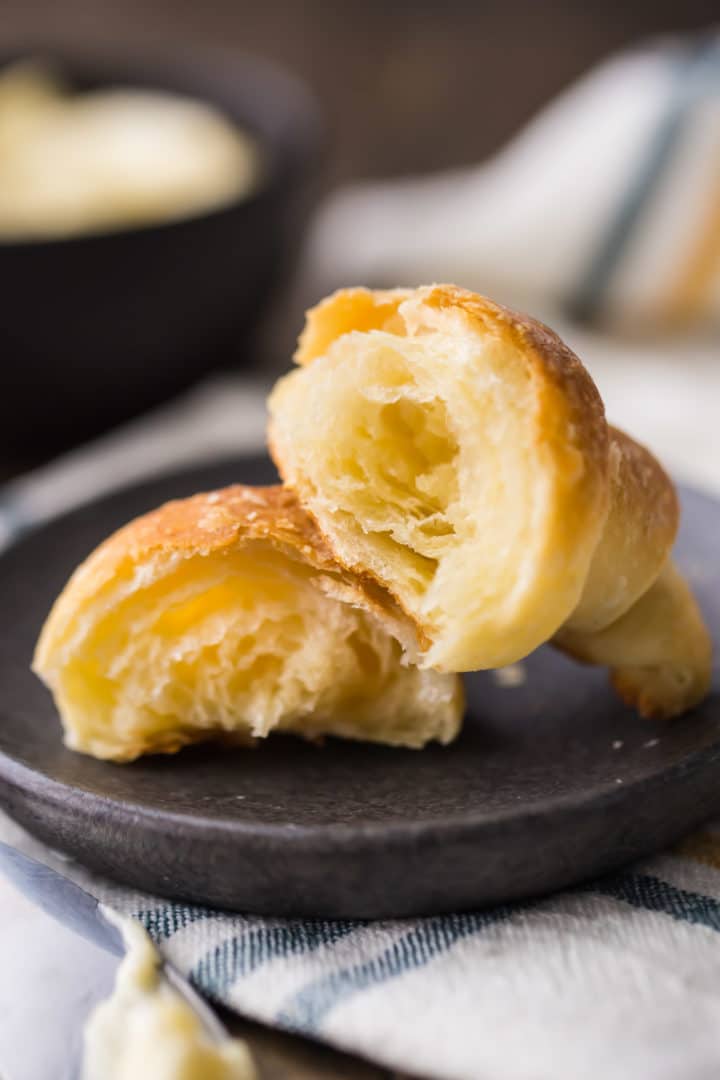
There is just something so irresistible about those light, fluffy, flaky dinner rolls. They have a little hint of yeasty sweetness, and they’re so buttery and delicious.
Having any kind of homemade bread to pass around the dinner table truly makes any meal so much more special. My family always enjoys my homemade wheat bread, challah, and these beautiful stenciled bread rolls. But they really go crazy for homemade crescents!
I don’t blame them for a second! But have you ever thought about making them homemade?
I’m here to tell you that it’s so worth it! Everything tastes better when it’s made from scratch, and dinner rolls are no exception!
This recipe bakes up soft, puffy, and so incredibly delicious! And it’s actually pretty easy to make, with just a few simple basics.
There’s a little bit of downtime for chilling the dough, but other than that you’re looking at only around 45 minutes of active time ’til crescent roll heaven!
HOW TO MAKE HOMEMADE CRESCENT ROLLS FROM SCRATCH
This dough is really easy to make. You don’t even need a mixer! And it only has a few basic ingredients.
Start by placing the flour, sugar, yeast, and salt into a large mixing bowl. Whisk all those dry ingredients together, just to get them combined.
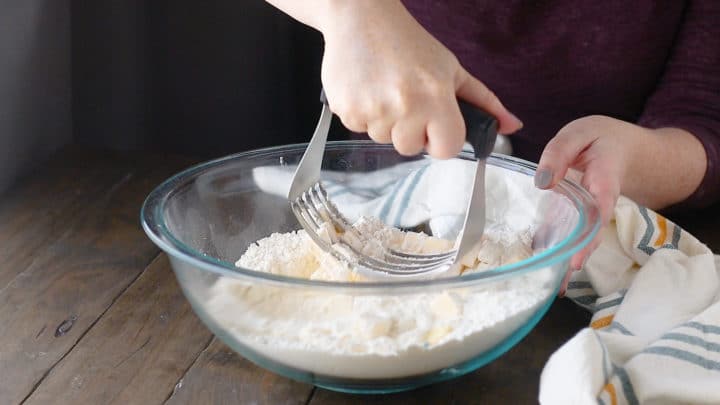
Next, add your cold butter. Cut the cold butter in until only pea-sized pieces of butter remain. I like to do this with a pastry blender, but if you don’t have one, you can do it the old-fashioned way with 2 knives. Or you could use a food processor.
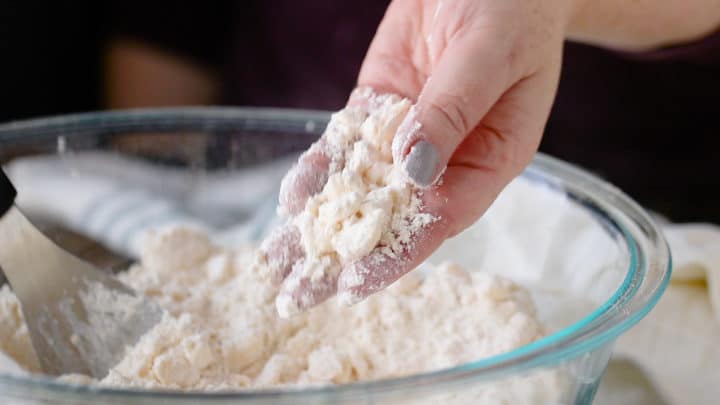
Whichever method you use, just be sure that the butter stays nice and cold! This is really a really important detail. Cold butter will allow your crescent roll dough to form all those flaky layers!
Once the butter is all worked in, add the liquid ingredients. Milk, water, and egg get whisked together and added to the dry mix.
Stir everything until the dough comes together into a ball, then wrap it in plastic and let it chill in the fridge.
WHAT IS THE SECRET TO FLAKY CRESCENT ROLLS?
This is the best part of this whole recipe. I absolutely love the results you get with this special technique!
It’s a little extra, but I promise you it is SO worth the effort!
Once your dough is made and nicely chilled, just roll it into a long rectangle shape, and fold it into thirds, like a letter. Turn it 90 degrees, and repeat a few more times. You can do this step maybe 3 to 5 times.
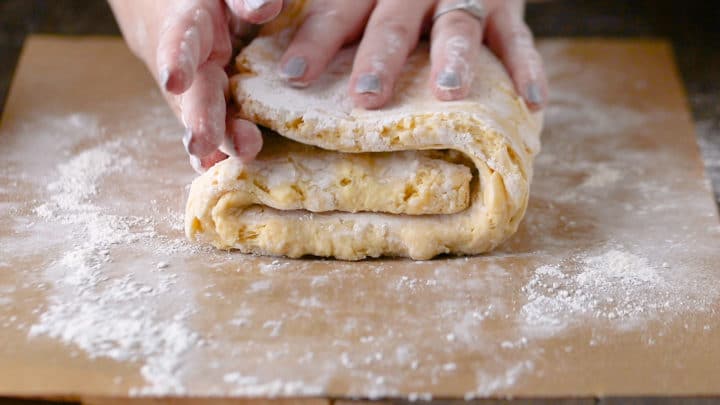
Every time you do, you’re creating hundreds of layers of dough and butter. When this gets baked, you’ll have the flakiest homemade dinner rolls ever!
This step is called lamination, and it’s a pastry chef’s secret weapon for recipes like this one. I do this with my pie crust, Danish, and homemade puff pastry, and the results are amazing. Take a look at the video below (within the recipe card) to see just what this looks like.
You don’t have to do it, if you’re short on time. You can just make the dough, roll it, cut it, and shape it into crescent rolls and they will still come out fantastic. But if you can spare a few minutes for that extra step, you will be rewarded with the most incredible flaky layers.
HOW TO SHAPE CRESCENT ROLLS
Once your crescent roll dough is made, laminated, and chilled, it’s time for the fun part: shaping the bread rolls!
Start by dividing the dough into 3 equal portions. This will just make things a little easier to manage.
Roll out a portion of dough into a long rectangle shape. You want to get it pretty thin! The thinner you roll your dough, the more flaky layers your crescent rolls will have.

Once your rectangle of dough is about 1/8-inch thick, trim away the rough edges, and cut it into long, kinda skinny triangles. (Ideally, you want the triangles to be about 2 inches at the wide end, and about 4 inches long. But please don’t get too hung up on these dimensions!)
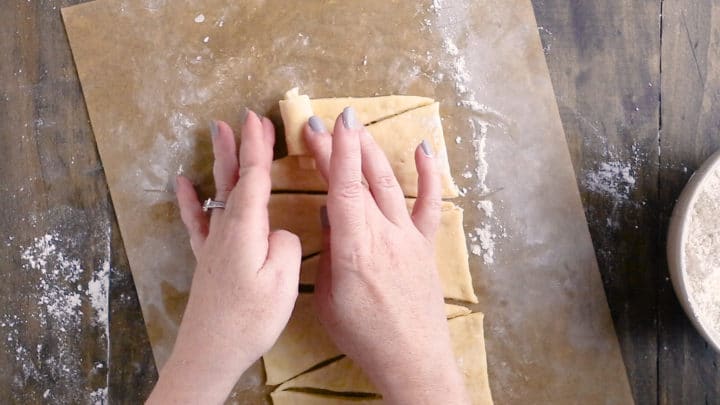
To shape the crescents, start at the wide end of a triangle and roll your way along, all the way to the point. Make sure the point is tucked under the roll, and then just bend the roll into a curved crescent shape. I have a little video within the recipe card, so you can see just what I mean!
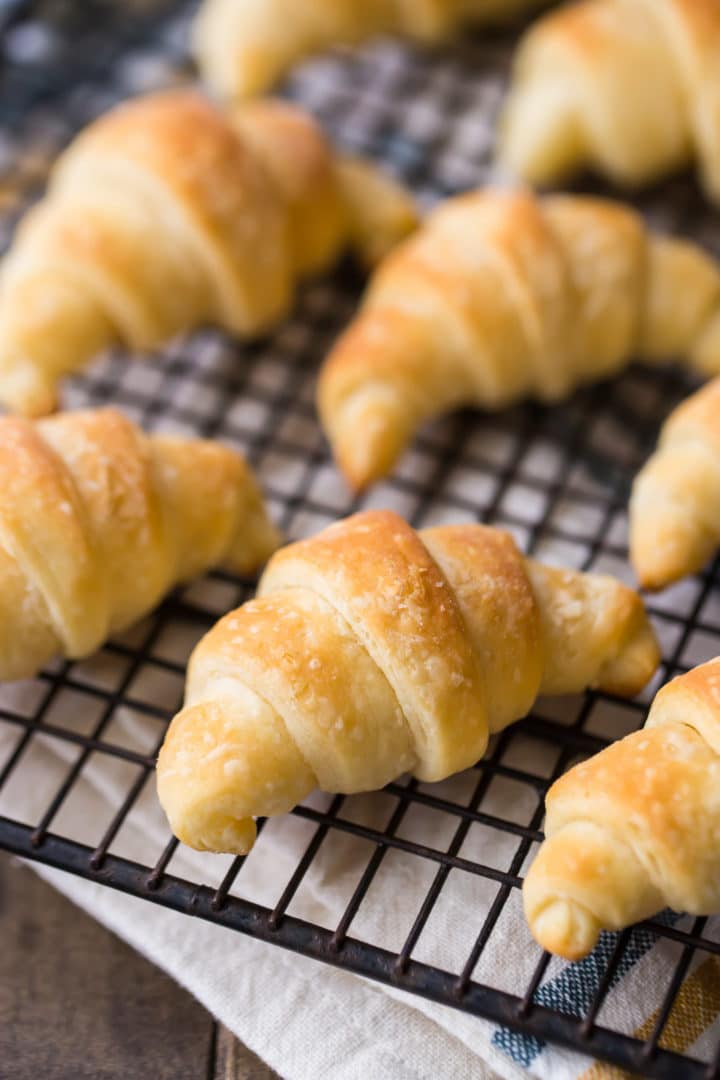
Pop these onto a parchment-lined baking sheet, let them proof, and bake!
CAN HOMEMADE CRESCENT ROLLS BE MADE AHEAD?
One of the reasons I love this recipe so much is because it can easily be made ahead.
Follow all the steps of the recipe, right through to the one where the dough is cut and shaped into crescents. When you’ve got all your little crescents shaped and laid out on the baking sheet, cover them loosely with plastic wrap and pop the whole tray into the fridge.
The unbaked crescent rolls can be kept in the fridge like this overnight, or up to 24 hours.
A few hours before you’re ready to serve them, take the trays out of the fridge and let them come to room temperature. Then just continue on with the proofing and baking steps of the recipe.
HOW LONG WILL HOMEMADE CRESCENT ROLLS KEEP?
Once baked and cooled, just slip any leftover crescent rolls into a zip-top bag to keep them fresh. They will keep at room temperature for a few days, or in the fridge for around a week.
You could also freeze them. They’ll last in the freezer for several weeks to a month. When you’re ready to have some, just warm them gently in the oven (on the lowest setting) for about 10 or 15 minutes.
Your friends and family are going to love these homemade crescent rolls! They truly make the whole meal- so soft and light! And everyone will be so impressed that you made them from scratch.
This post contains affiliate sales links.

Homemade Crescent Rolls
Ingredients
- 2 3/4 cups (343.75 g) all-purpose flour
- 3 tablespoons (36 g) granulated sugar
- 2 teaspoons (6.22 g) dry active yeast*
- 1 1/4 teaspoons (7.5 g) kosher salt
- 1 cup (227 g) unsalted butter,, cold
- 1/2 cup (122 g) milk
- 1/4 cup (59.15 g) water
- 1 (44 g) egg, (large)
Instructions
- Place the flour, sugar, yeast, and salt in a large mixing bowl and whisk to combine.
- Cut in the butter with a pastry blender (or two knives), until only pea-sized pieces remain.
- Whisk the milk, water, and egg together in a small bowl, and add to the flour/butter mixture.
- Stir together until the dough gathers itself into a ball.
- Wrap the dough in plastic wrap and chill for at least 30 minutes.
- Dust the work surface with flour, and roll the dough out to a rough rectangle shape, about 1/2-inch thick.
- Fold the dough into thirds, like a letter.
- Turn 90 degrees, roll, and fold again.
- Repeat about 3 to 5 times, wrap the dough in plastic wrap, and chill for at least 30 minutes.
- Divide the dough into 3 equal portions.
- Roll each portion out into a long rectangle, about 1/8-inch thick, 16-inches long, and 5 inches wide.
- Cut the dough into skinny triangles, and roll each triangle, starting at the wide end and tucking the pointy end under the roll.
- Place the crescents on parchment lined baking sheets, cover loosely with plastic wrap, and allow to rise for 1 hour or until puffy and nearly doubled in size.
- Preheat the oven to 400 degrees F, then bake the crescent rolls for 10 minutes or until puffed and golden.
Notes


You think these can be made into pigs in a blanket?
I made these a few days ago and they were very good!I am thinking about using this dough for homemade cheesey bread. However, I am not sure how to handle the rise. Should I let it rise and then roll it out to cut into sheets? I need two 14 X 9 Pastry sheets.
Very delicious recipe – I used this as a pie crust for ‘taco pie’ that we usually make with dough from a tube but they were out of stock. I used the remaining dough to make crescent rolls (my 2y/o kept saying Christmas rolls – “more Christmas rolls please!” lol) which were tender and flaky.
Needless to say, we’ve been spoiled now and there will be no going back to mushy dough from a tube 😂
As a note for others making this recipe, I had to bake the crescent rolls for ~14 minutes at 350F to get them fully baked. It probably is my oven or something, but 10 mins may be too little time so just watch them and use your judgment if the color is still too light after 10 mins.
Thanks so much for the great feedback! I’m so happy you and your little one enjoyed- taco pie sounds fantastic!
Loved the crescent roll recipe..very easy..good results
So happy to hear it! Thanks for the positive review!
Hey Allie!
Between this recipe and your website’s intro video (you are too cute!!), I’m officially a fan!
Umm we should totally be friends! Lol!
I tried making crescents last weekend with a different recipe and they were terrible.
Today, I tried your recipe and they were amazing!!
There were only 3 of us for brunch and we demolished the tray! I followed the recipe exactly. Your instructions are perfect!
Thank you very much!!
I am looking forward to trying more of your recipes!
So happy you were pleased! TYSM for all the sweet compliments!
This is an excellent recipe! very tasty!
Can garnish with a disked egg to get the glistening cold just before putting to the oven.
I just made these for my family and they got devoured! Absolutely the best rolls I’ve ever made or tasted! Thank you for the recipe!
You’re so welcome Estelle! I’m really glad you and your family enjoyed!
Great recipe:)
Do you flash freeze these before bagging them ?
Yes, so they don’t stick together in the bag.
Can margarine be substituted for the butter? It would be less xpensive.
I have not tried that so I can’t say for certain.
Hi, I am making your crescent roll recipe. I am wondering if you have ever rolled out the rolls and then just freeze them before baking them?
Yes, you can do that. They will keep in the freezer for about 1 month, after that the yeast starts to die off. You’ll want to freeze them just after shaping them, then when you’re ready to proceed, allow them to come up to room temperature before giving them their second rise and baking them off. Good luck!
Thanks for your recipe. I made these rolls yesterday and they are delicious. But I have problem with rolling the dough into a rectangle shape. Can you share with me how to do it?
Hey there! If you watch the video just below the recipe instructions you can see the dough being rolled at just around the 55-second mark. Hope this helps!
Gosh Allie I also see you only bake ten at a time. Should one refrigerate the dough between making each batch? Surely if you roll all 28 and some proof for longer it won’t work out right? I don’t unfortunately have space in my fridge to chill them once they are rolled.
Hey Karen! I’m not sure what gave you the idea that you are only to bake 10 at a time. It doesn’t say that anywhere in the recipe directions. It’s fine to bake the whole batch at once; that is what I do when I make them.
Hi Allie I’m loving your recipes! And your writing too.
I’ve just made the dough for these crescent rolls.
I really felt it was too soft – in fact it wasn’t coming together in a ball at all.
So I added a few more sprinkles of flour.
Even then I had to use my hands to make a ball.
I tried to handle it as little as possible.
I have only just put it in the fridge to chill.
Our large eggs are surely the same as around the world and to be absolutely safe I used the metric measures for milk and water.
Perhaps I worked the butter to too small a crumb.
I’ll let you know how it turns out though!
Happy Sunday.
Karen
Johannesburg South Africa
Hello! I don’t see the link to how to laminate the dough… I’ve never done this before and want to be sure I do it right.
Hi there! Do you mean you don’t see the video? There is not a link to how to laminate the dough, but there is a comprehensive explanation under the heading “WHAT IS THE SECRET TO FLAKY CRESCENT ROLLS?” and there is a video embedded in the recipe card that shows the steps. The video can be found just below the last step of the recipe directions. If you’re using an ad blocker, turn it off, otherwise the video will not load. Let me know if this makes sense or if I’ve misunderstood your question.
Absolutely wonderful! Understand I have never baked bread and my previous attempts using yeast were not successful. But as I didn’t want to go out and buy crescent rolls, and we had a packet of yeast, I thought I would try it. I followed the recipe exactly and they turned out perfect! May I recommend serving with butter that was mixed with Ms. Dash (or create your own Ms. Dash). Outstanding!
Great tip Pattie! I’m so glad you had such great success!
Have you ever used this to make veggie pizza? I’m looking for a recipe for the crust so I don’t have to use the packaged crescent rolls. Wondering if this would work. Thanks!
I have not but I do think it would work beautifully! Good luck!
I was curious how your veggie pizza turned out and if you have any advice! I’ll be attempting this tomorrow and we don’t have canned crescent rolls where I live so fresh it is.
Hi! These were delicious!!!! Could I freeze the rest of the dough? (Only baking for two here :))
I think you could probably get away with it! You’d need to be careful though to bake them all off before the yeast dies. It might actually be more foolproof to just bake a full batch and then reheat them as needed. There’s instructions for that under the heading “How Long will Homemade Crescent Rolls Keep.” Good luck!
These seem more like croissants, but I definitely want to try making them!
Made these for our Thanksgiving dinner. My very first time making yeast rolls of any kind. My family raved over these, especially with the honey butter I made to use on the side. Now they want them for our Christmas dinner! This is a heartfelt “Thank you” to you for creating and sharing such wonderful recipes. One question. Do you ever make them a little larger or are they perfected for this size? Mine were small crescents even though they more than doubled in size in the rising stage.
You are so welcome Jennie! I’m so glad your family enjoyed. Feel free to play around with the size! I personally like them on the smaller side but if you’d like something bigger then go for it. Just keep in mind that if they are bigger, you will probably need to adjust the bake time. Good luck!
The recipe does not call for kneading the dough either before the first rise or after. Can you explain that to me?
There is no kneading involved with this recipe. It’s a laminated dough; it’s got the folding step in lieu of kneading. (See steps 6 through 9 of the recipe instructions. This is also demonstrated in the video which is embedded into the recipe card.) Hope that’s helpful!
I made the rolls this morning but they are not rising. It has been more than an hour. I checked the recipe, but I used everything as stated. Any suggestions?
So sorry you’re having trouble Judith! Is it possible your yeast was past the expiration date? Or perhaps your kitchen isn’t warm enough? This dough will want a warm environment in order to rise…