Homemade Pie Crust Recipe
As an amazon associate I earn from qualifying purchases.
Flakiest-ever homemade pie crust recipe! With a rich, buttery taste. Easy to make, with a special technique you have to see to believe!

*Original post date: November 12, 2013. Updated: April 10, 2018, June 16, 2020.*
There is just nothing nicer than homemade pie!
It's so comforting and old-fashioned. Such nostaglia, such tradition, and such a great way to take all that love that is just bursting out of your heart, put it in a dish, and feed it to the ones you love.
At this time of year, I especially love to make Dutch apple pie, chocolate pecan pie, and sweet potato pie.
But before you can make a really wonderful homemade pie, you need to have a great pie crust recipe.
This one is perfect. Thanks to a really special and unique method, it bakes up so unbelievably flaky and tender, with a rich, buttery taste.
Every time I make a pie using this special technique, people just can't believe how flaky the crust is!
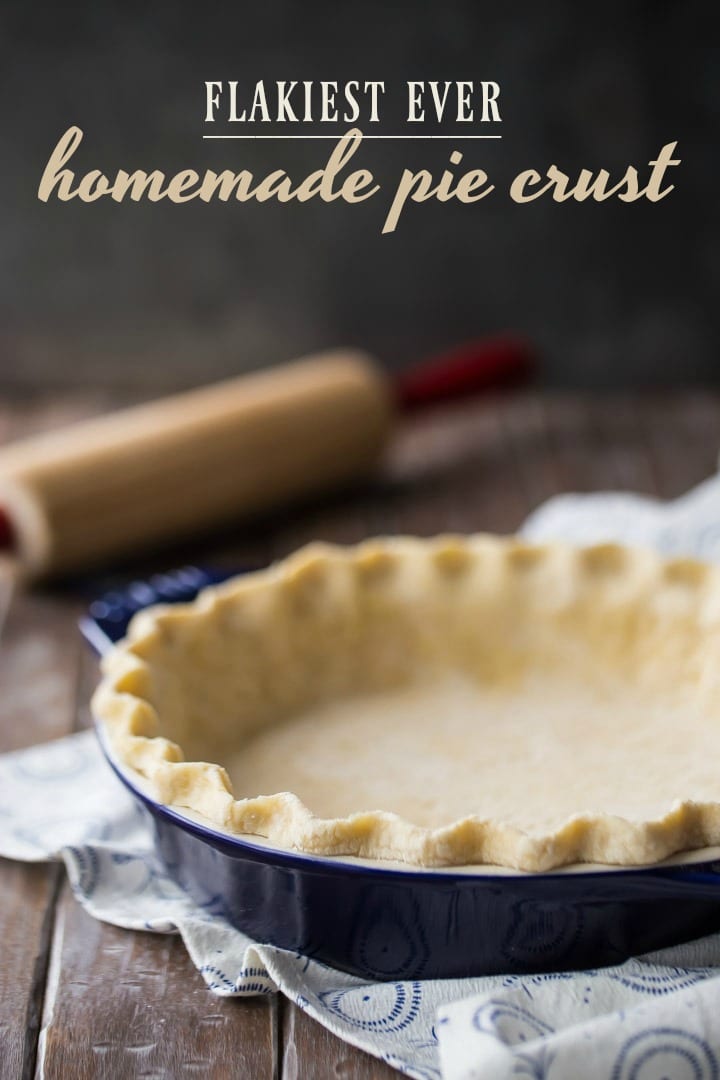
Table of Contents
- What is pie crust?
- What makes this the best pie crust recipe
- What does homemade pie crust taste like?
- Homemade pie crust ingredients
- Special equipment
- How to make this easy pie crust recipe
- How long to bake pie crust
- Expert tips
- FAQ's
- A few more of my favorite pie recipes:
What is pie crust?
Here in the US, we just call it pie crust!
But in some other countries (and in the pastry world), it's also known as pate brisee (pronounced "pat bree-ZAY").
Even though we often use it in desserts, it's actually a savory type of pastry. It does not contain any sugar.
Ideally, it bakes up tender and flaky, with a rich, buttery taste.
It's different from a tart crust in that tart crust (aka: pate sucree or pate sablee) is sweeter and it's not flaky. It has more of shortbread-like texture, which would be referred to as "short" or "tender." This means it crumbles really easily and almost melts in your mouth.
Pie crust has some of that tenderness, but it's also got the flaky factor. This literally looks like thousands of tissue-thin layers, similar to puff pastry.

When you take a bite, these layers are crisp and they shatter into countless buttery shards. It's a really incredible food experience!
What makes this the best pie crust recipe
- The texture: The best thing that this recipe has going for it is the texture. I can't stress it enough, it is SO FLAKY!
- Taste: Unlike some recipes that are made with shortening, this one has the most incredible, buttery rich flavor.
- Few ingredients: You only need 5 pantry staples to make it.
- Quick and easy: There's only about 15 minutes of active time required, and it's all made in just one bowl.
- Versatile: The possibilities are limitless with this easy pie crust recipe! You can fill it in an infinite number of ways.
What does homemade pie crust taste like?
It bakes up toasty and buttery, with just a hint of salt, so it will balance and complement the flavors of just about any type of pie filling.
There's a little bit of oil in this recipe (for tenderness). I usually just use vegetable oil, but sometimes I'll add something with a little more flavor, such as olive oil, coconut oil, or walnut oil. In those cases, the flavor of the oil also comes through.
Homemade pie crust ingredients
You only need 5 simple ingredients to make this. Here they are:
Flour: All-purpose flour works best, but if you need to make gluten-free pie crust, swap it out for a gluten-free flour blend that can sub 1:1 for regular flour.
Salt: Salt carries the flavors and intensifies them. The end result won't taste salty, but it will make everything so much more flavorful! I like kosher salt best because it doesn't have any additives (table salt usually contains iodine which can leave a bitter taste), so the flavor is pure. It's also inexpensive and easy to find in a regular grocery store.
Oil: Oil makes it tender. I prefer oil over shortening because shortening is loaded with unhealthy trans-fats. Any kind of oil that's liquid at room temp will work. I usually use vegetable oil but feel free to get creative.
Butter: I like to use unsalted butter because it lets me control the amount of salt in the dish. Different brands of butter can contain different amounts of salt, so this way you get a more consistent result. This recipe works best if you use cold butter. When cold pastry hits the hot oven, steam is released and that puffs up the pastry, creating a beautifully light, airy texture. For a vegan or dairy-free pie crust recipe, use a plant-based butter that can substitute for dairy butter 1:1.
Water: The water should be ice cold. Like, literally, put ice in it. The amount you will need can vary based on environmental factors. You may need slightly more if it's a very dry day, or less if it's humid. For me, it's usually *around* ½ cup, but just stir it in a tablespoon at a time, continuing to add until the proper consistency is achieved. And err on the side of less! Too-wet dough can bake up tough and it can shrink as it bakes.
Special equipment
- Measuring cups and spoons: It's important that the ingredients are measured out precisely. Follow this guide: How to Measure Ingredients for Baking.
- Mixing bowl: In which to mix up the pie dough.
- Whisk: To combine the dry ingredients and the oil.
- Sharp knife: We are going to cut the butter into thin slices.
- Plastic wrap: This will keep the dough from drying out while it chills in the fridge.
- Rolling pin: To flatten the dough into a thin sheet.
How to make this easy pie crust recipe
This dough is made in 4 easy steps.
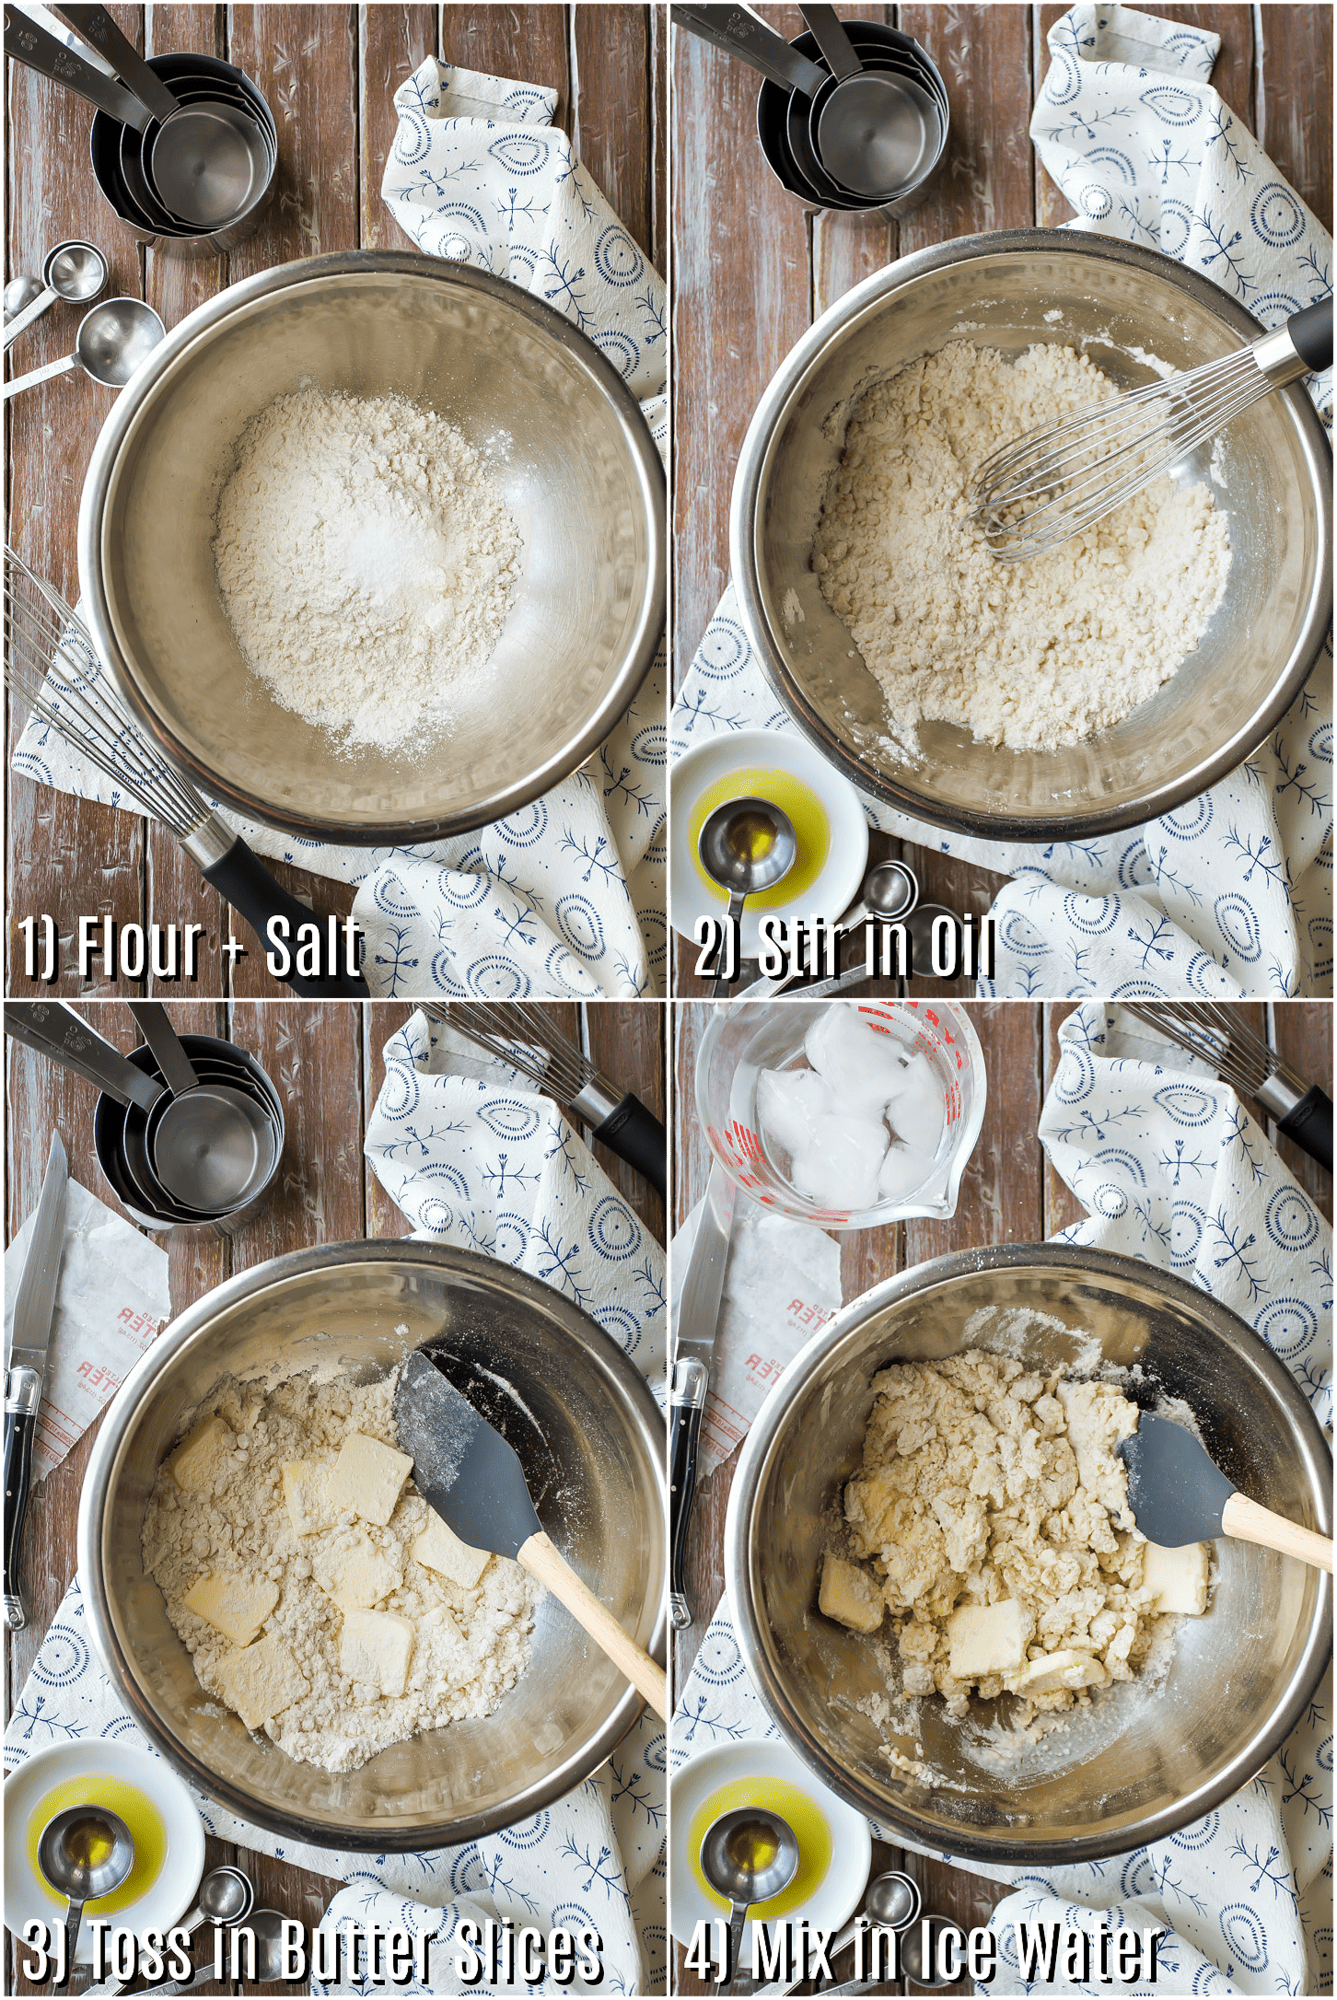
Step 1: Combine the dry ingredients
So many great recipes start this way!
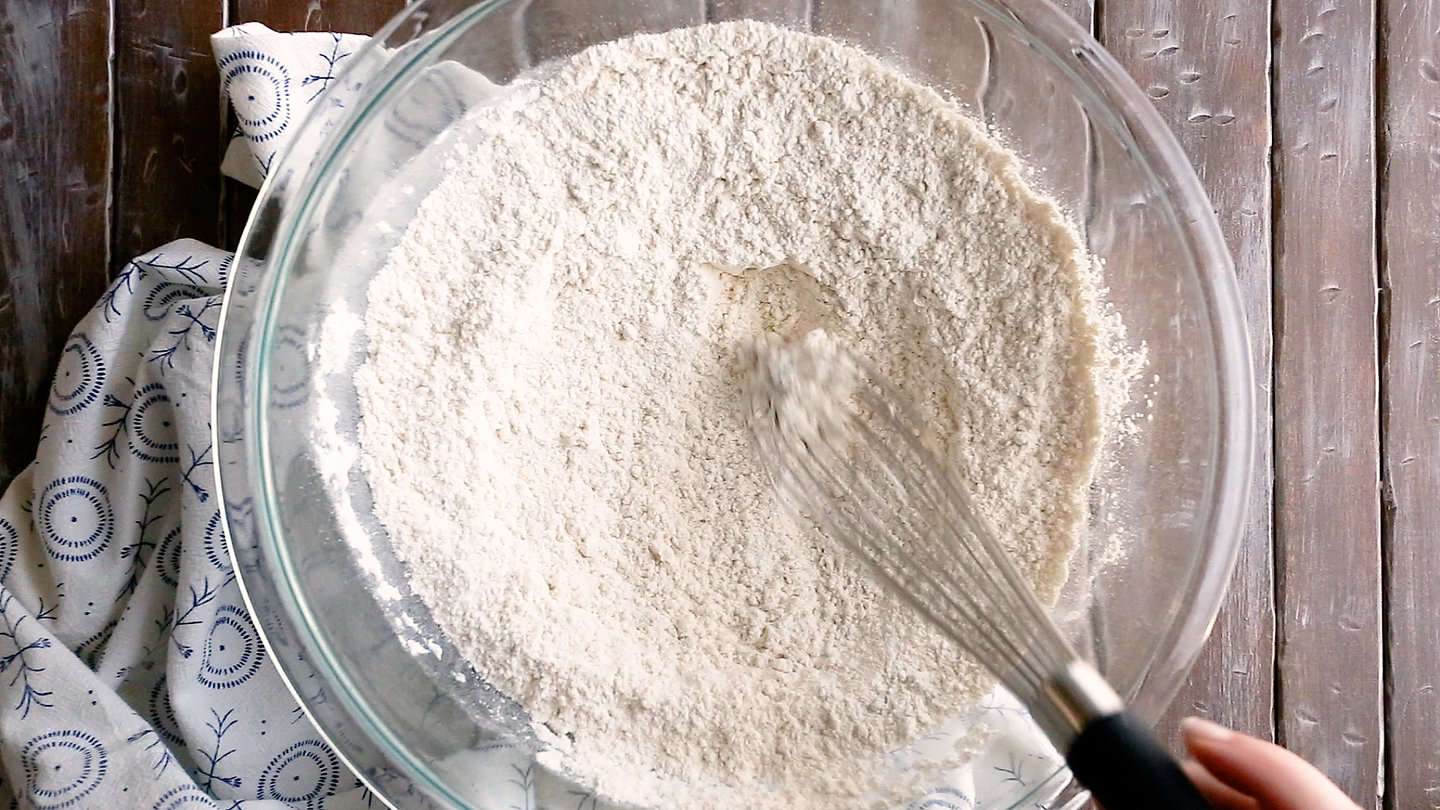
Flour and salt in a large bowl; whisk to combine.
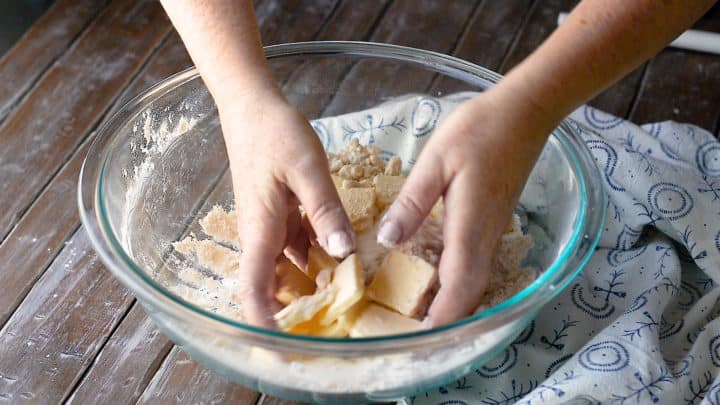
Step 2: Work in the fats
Add the oil to the dry ingredients and stir with the whisk.
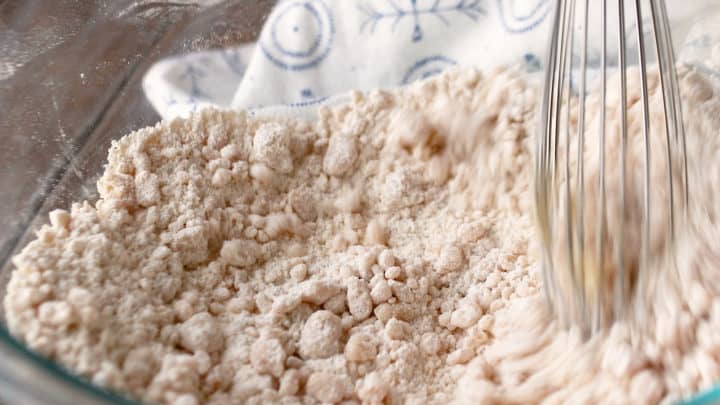
Already it's creating that crumbly, short texture!
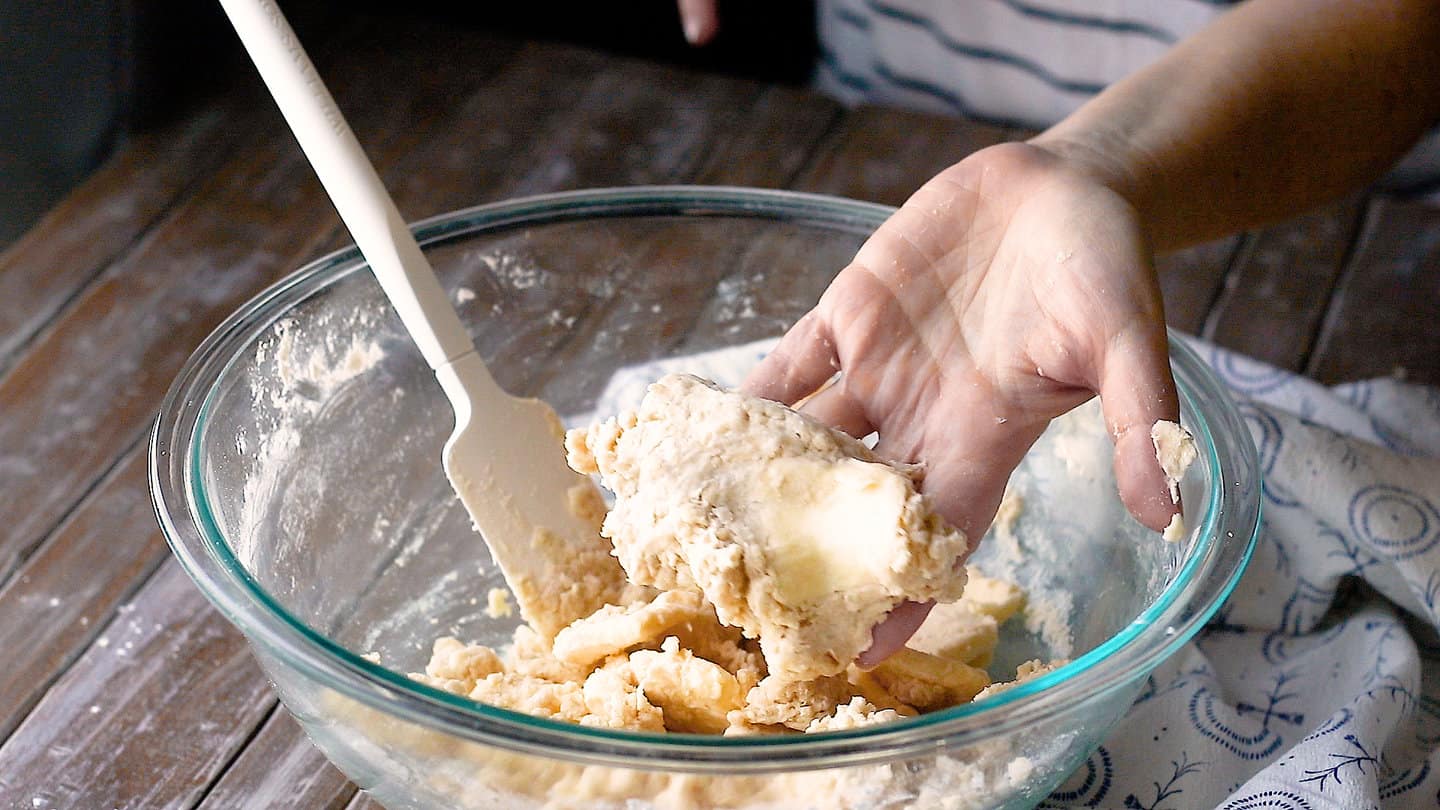
Now it's time to add the butter. I use a special technique that creates the most unbelievably flaky result! (More on that below.)
For this technique, you want the pieces of butter to be relatively large, so just cut the butter into thin slices (about ⅛-inch).
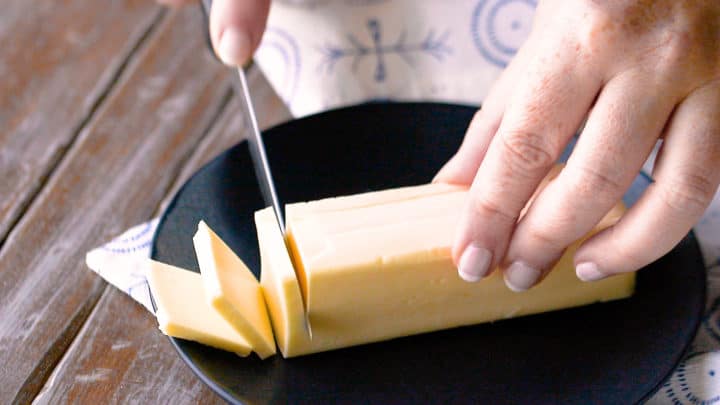
Add the thin slices of butter and toss them around with your clean hands, so each slice is coated on every side and edge.
Step 4: Add water
Next comes cold water. Dribble in about a tablespoon at a time, while stirring.
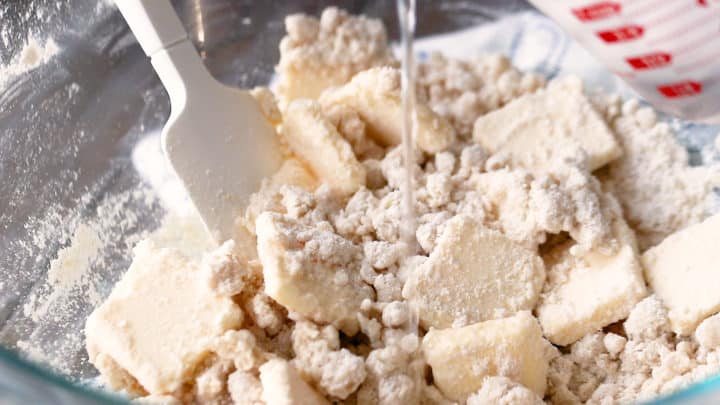
You may need a little less or a little more water depending, so look carefully at your dough as it's coming together to determine how much to add.
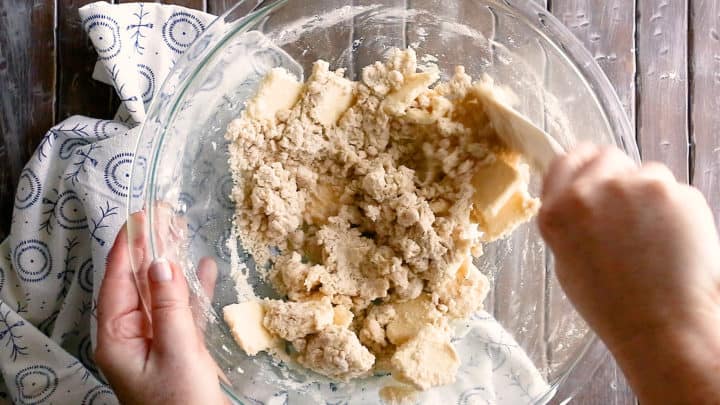
When it looks a bit crumbly, but you can squeeze a handful together and it holds its shape, you're done!
Step 3: Chill
Tumble it out of the bowl and onto a big sheet of plastic wrap. Use the wrap to squeeze it into a flat disc, press down on it firmly to flatten and compress it even more, and pop it into the fridge to chill.
As the dough chills, it will become more hydrated. So keep that in mind when you're adding your ice water, and err on the side of it being slightly dry. Many times, what goes in looking dry and crumbly can come out of the fridge just perfect.
Step 4: Laminate
This is the step that makes all the difference in the world!
You see, the reason this pie crust recipe has so many flaky layers like puff pastry, is because it's laminated like puff pastry.
Laminating is just a chef-y trick to create layers of cold butter, sandwiched between thin sheets of dough. It's done by flattening and folding the dough over a number of times.
Now let's look at how it's done.
Once the disc of dough has had a rest in the fridge, divide it in two and give each half a quick roll, to a thickness of about ¼ inch.
Then fold into thirds, like a letter, give it a quarter turn and another fold, and roll again.
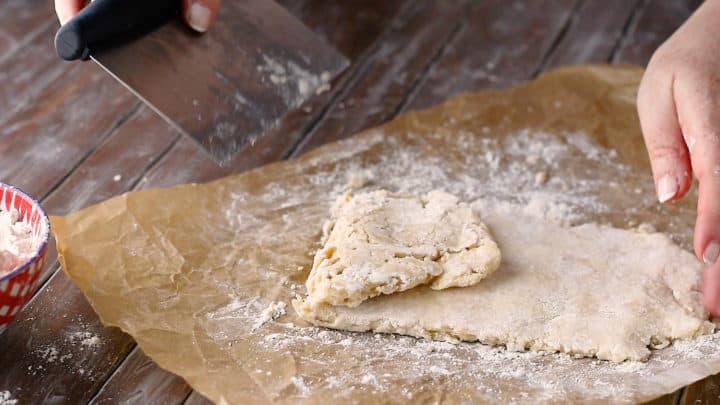

Repeat one more time, then refrigerate for another hour.
At first, the dough might seem really crumbly, but as you continue to roll and fold, the glutens will develop a bit and it will become more cohesive.
You can see exactly what this looks like when you watch the video embedded in the recipe card below. (Just be sure to turn off your adblocker because that could prevent it from displaying!)
As you roll, the butter flattens out into big streaks that are sandwiched in between layers of dough. When the cold butter hits the hot oven, the steam is released and that opens up the layers.
Just make sure the dough stays cold as you're working it! If you notice it getting soft or melty, put it right into the fridge or freezer until it stiffens back up.
How to roll pie crust
Using a rolling pin and even pressure, start in the center of the disk of dough, and work your way outward.
Make sure to dust your work surface, rolling pin, and the dough with plenty of flour, to avoid sticking.
Every so often, give the dough a 90-degree turn so that it's rolled to an even thickness.
If you notice the dough is warming up or the butter seems soft, pop it right back into the fridge or freezer for about 15 minutes.
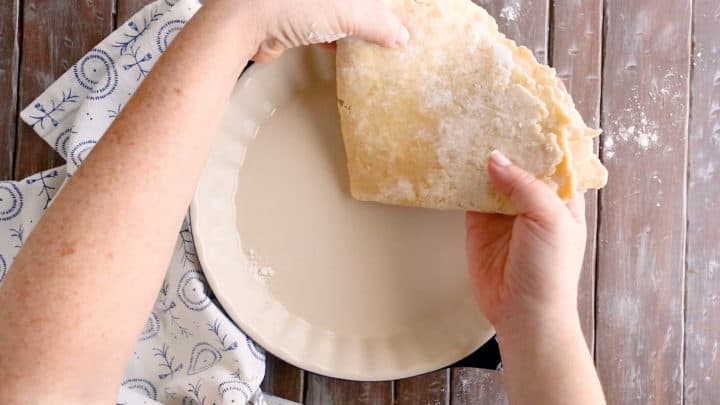
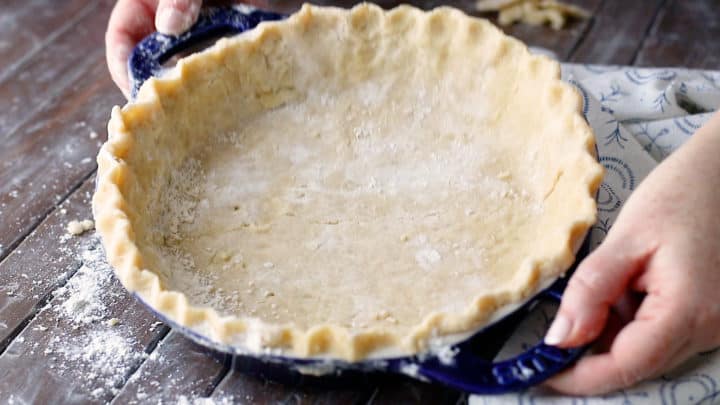
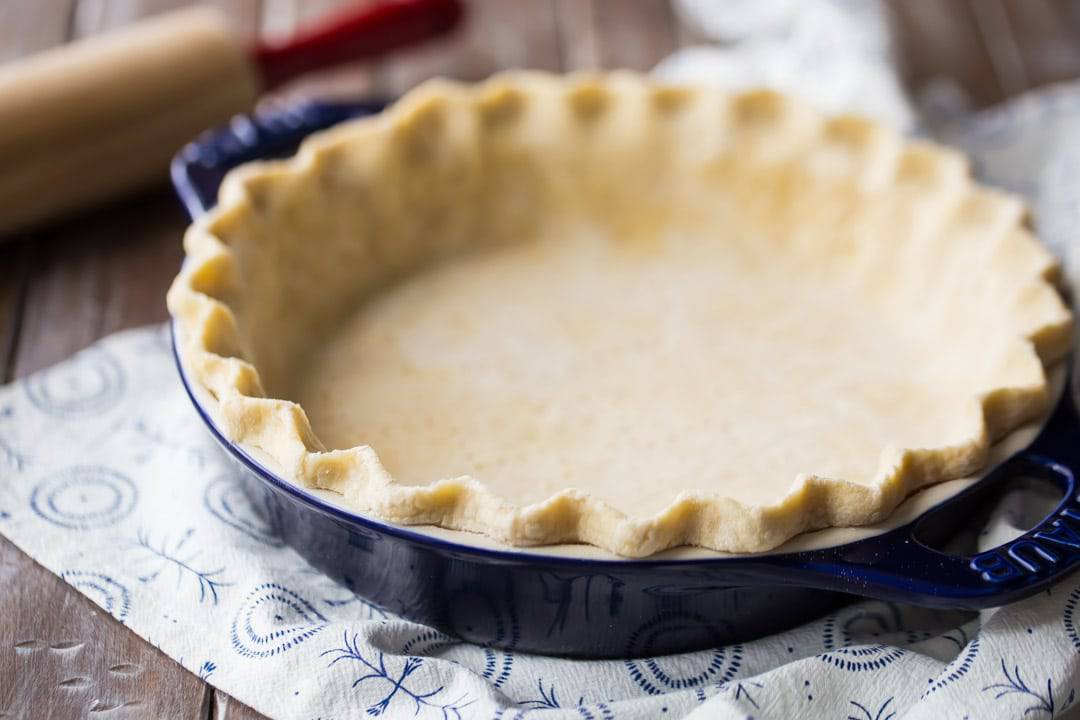
Then, roll the dough out to about an inch larger than your pie pan, fold it into quarters, and transfer it to the dish, easing it down the sides and into the bottom. Be careful not to stretch the dough, or it could shrink as it bakes.
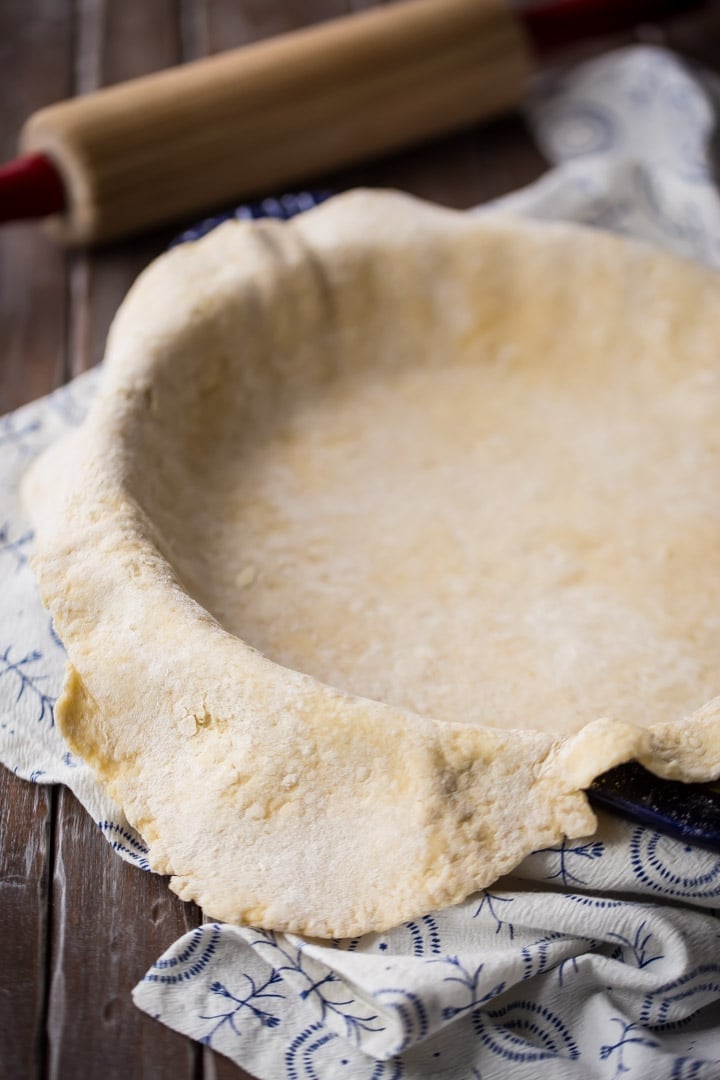
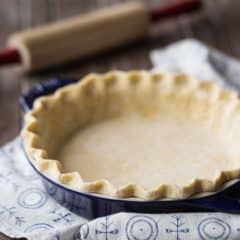
Trim off any excess, then fold the edge under and crimp it.
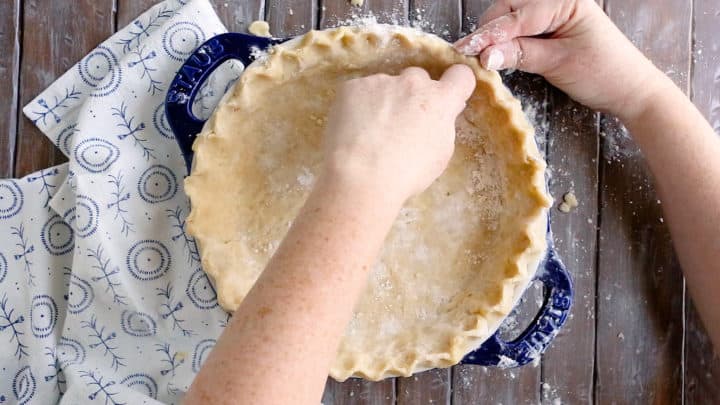
Ta-dah!
How long to bake pie crust
It all depends on what kind of pie you're making. Some fillings need a longer bake time than others. While some pie recipes will direct you to par-bake the crust before filling, some fillings don't get baked at all!
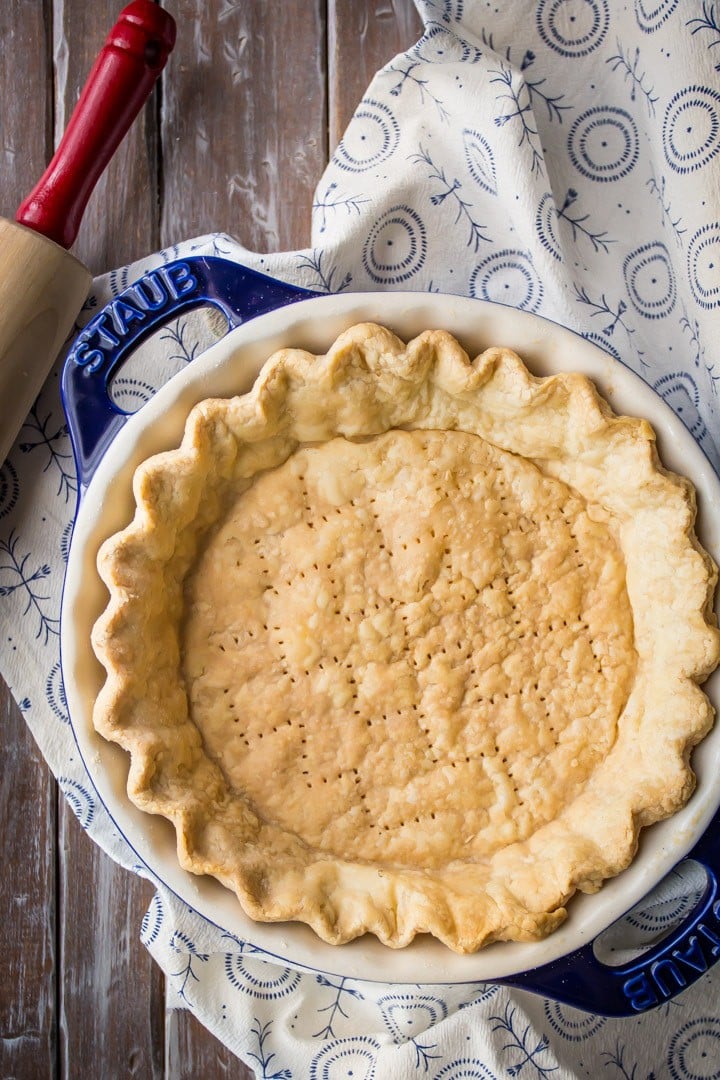
It's best to follow the instructions for whatever pie recipe you are making, but just for reference, the blind-baked crust you see here was baked for 35 minutes at 375 degrees F.
Expert tips
What kind of oil to use
I've yet to find an oil that I don't like in my homemade pie crust. The options are truly limitless, and I would recommend you start by thinking about what kind of filling your pie will have, and then choosing something that would compliment it well.
Here are a few ideas:
For the step-by-step pictures you see here, I chose to use a light, floral olive oil. If you can get your hands on a fruitier olive oil, the subtle flavor can complement even a sweeter pie in a really nice way.
Make it a little dry
When you're adding ice water, add only as much as is needed for the dough to hold together when squeezed.
If you add too much, your pie crust could come out tough and it could shrink in the pan as it bakes. Remember that it will moisten up a lot as it chills.
Keep it cold
The best tip I can give you is to keep the dough cold at all times.
Not only will it make the it easier to work with, but it makes for a flakier crust.
When cold butter hits a hot oven, steam is released. This steam will open up all those gorgeous flaky layers.
If you are working and you start to notice that the dough is becoming softer, immediately pop it into the fridge or freezer until it stiffens back up.
FAQ's
There are a lot of pie crust recipes out there that do this, but for this one, I wouldn't recommend it.
You need a lighter touch to keep those chunks of butter nice and big.
Again, I've seen recipes like that and it's an interesting technique but it's probably not right for this method. We want big pieces of butter.
As you roll and fold these will flatten out into large streaks that create those flaky layers.
It absolutely can.
The dough will keep in the fridge (tightly wrapped) for several days.
You can also make the pie dough a few weeks beforehand and freeze, just to make the prep a little easier on yourself. The laminated disks of dough can be thawed in the refrigerator a day or two before you're ready to roll them out.
Or, if you have room in your freezer, you can roll it and place in the pie pan, and freeze it that way.
You could even roll it into a large circle, place a sheet of parchment paper on top, then roll it into a tight cylinder, just the same way store-bought pie crust is sold. Place this in a plastic bag to keep it from drying out.
There are 2 main causes of pie crust shrinkage:
1) Too much water in the dough: When you're mixing up your dough, add the ice water just a tablespoon or so at a time. Depending upon the humidity levels in your kitchen, you may need slightly more or less water. You'll know you've got enough water in when you can take a handful of dough and squeeze it together, and it holds its shape. In the bowl, it may look really crumbly or scrappy, but as it chills in the refrigerator, the particles of flour will continue to hydrate. What seems overly dry at first will become surprisingly wet after a nap in the fridge!
2) Overworking the dough: If you overwork the dough, it will develop the glutens in the flour too much, and cause things to become elastic. This is good for yeast bread recipes, but bad for pie crust! When the dough is baked it might shrink away from the sides of the pan. So be sure to stop stirring/kneading just as soon as everything comes together!
Same idea as above. Overworked pie dough will yield a tough pie crust.
You also want to be careful not to add too much liquid. Add the ice water just a tablespoon at a time, and stop just as soon as your ingredients are moistened enough to hold the shape of a ball when squeezed together. Bear in mind that the pie dough will become more hydrated as it chills.
If you are baking a homemade pie with a wet filling, your pie crust may absorb some of that moisture. A good way to avoid this is to par-bake the crust (before filling) for about 15 minutes at 375 degrees.
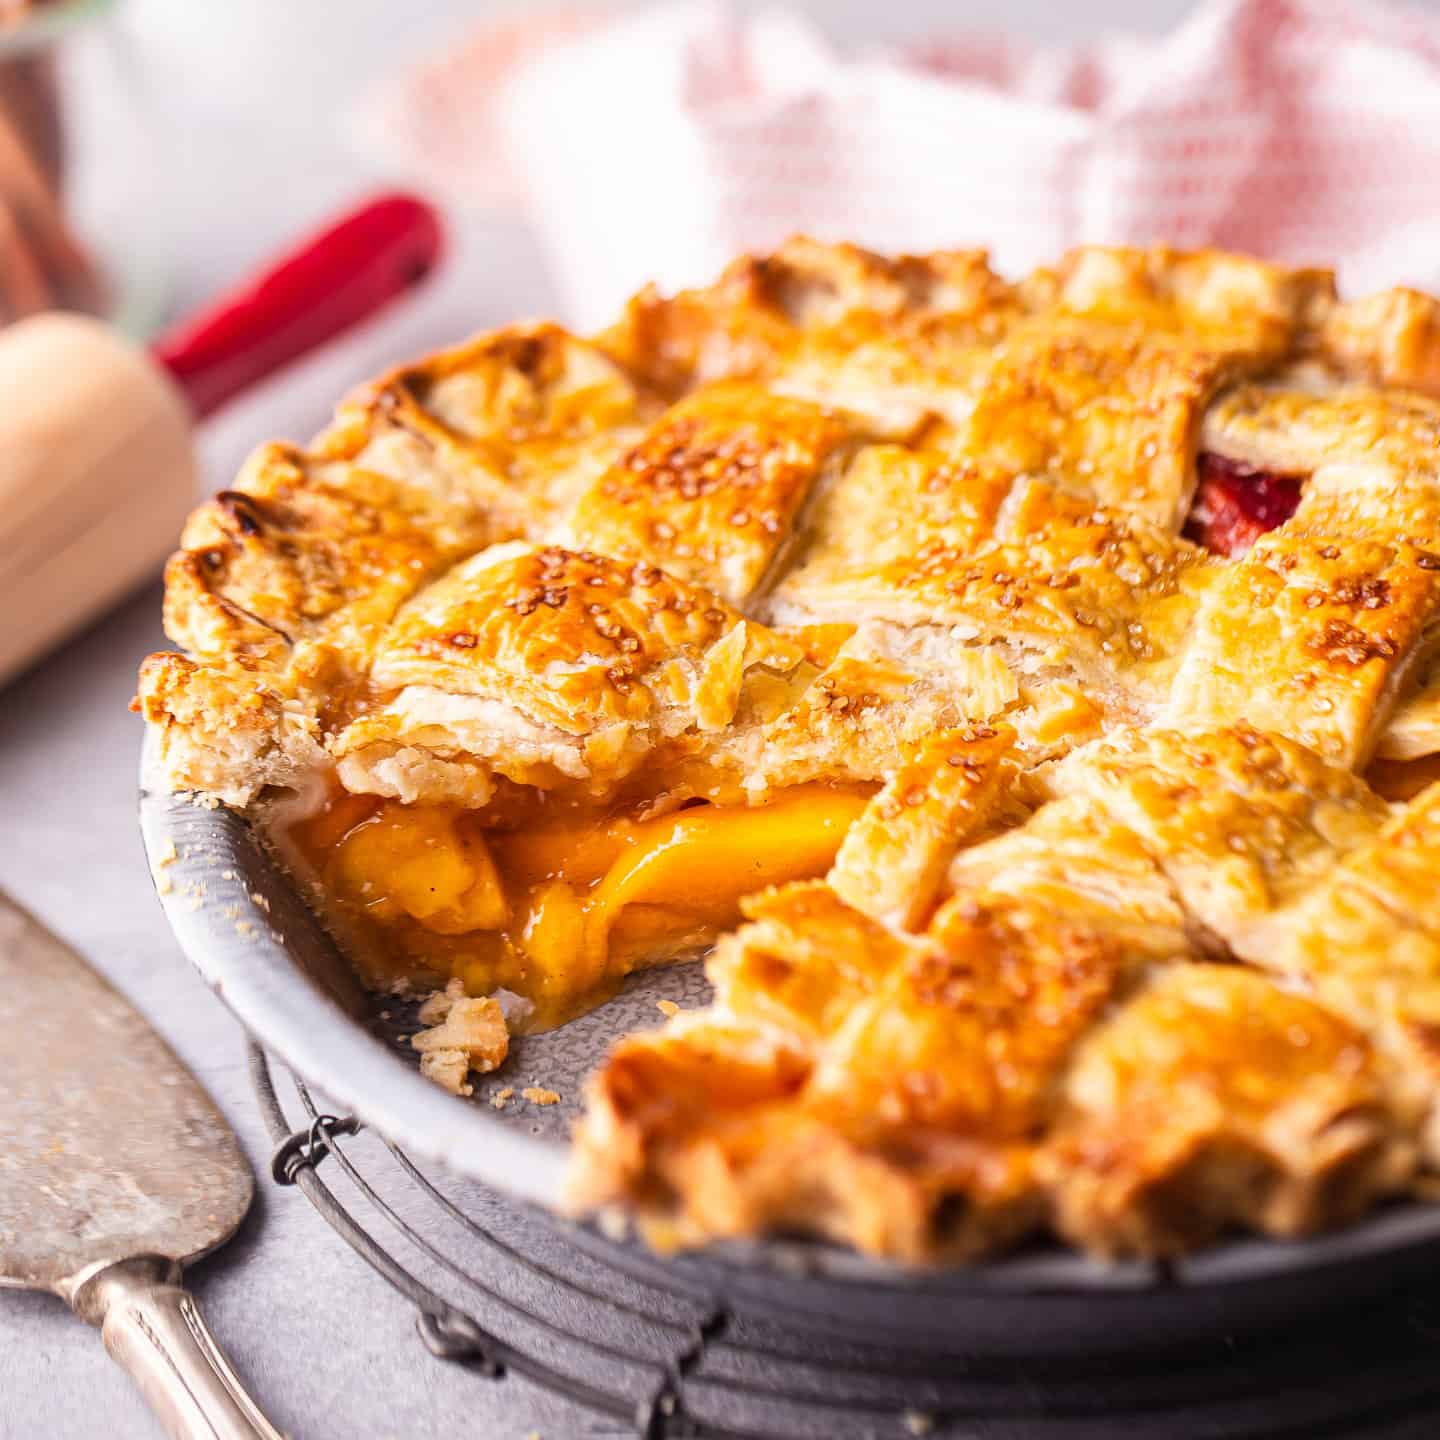
You can also brush it with egg wash (one large egg beaten with about 2 tablespoons of water) before par-baking, to create a barrier between the crust and the filling. This is also a great way to give your double-crust or lattice-top pies a gorgeous sheen and golden brown color.
During the cooking process, any air that may be trapped between the pie dough and the bottom of the dish will expand. Try to press out any air bubbles, and use the tines of a fork to "dock" (or pierce little holes) into the bottom, to release the steam.
You can also use pie weights or dry beans to hold everything down while baking.
If you notice that the edges of your crust are browning more quickly than the rest, you can cover them with foil or use a pie shield. This will help everything to bake more evenly.
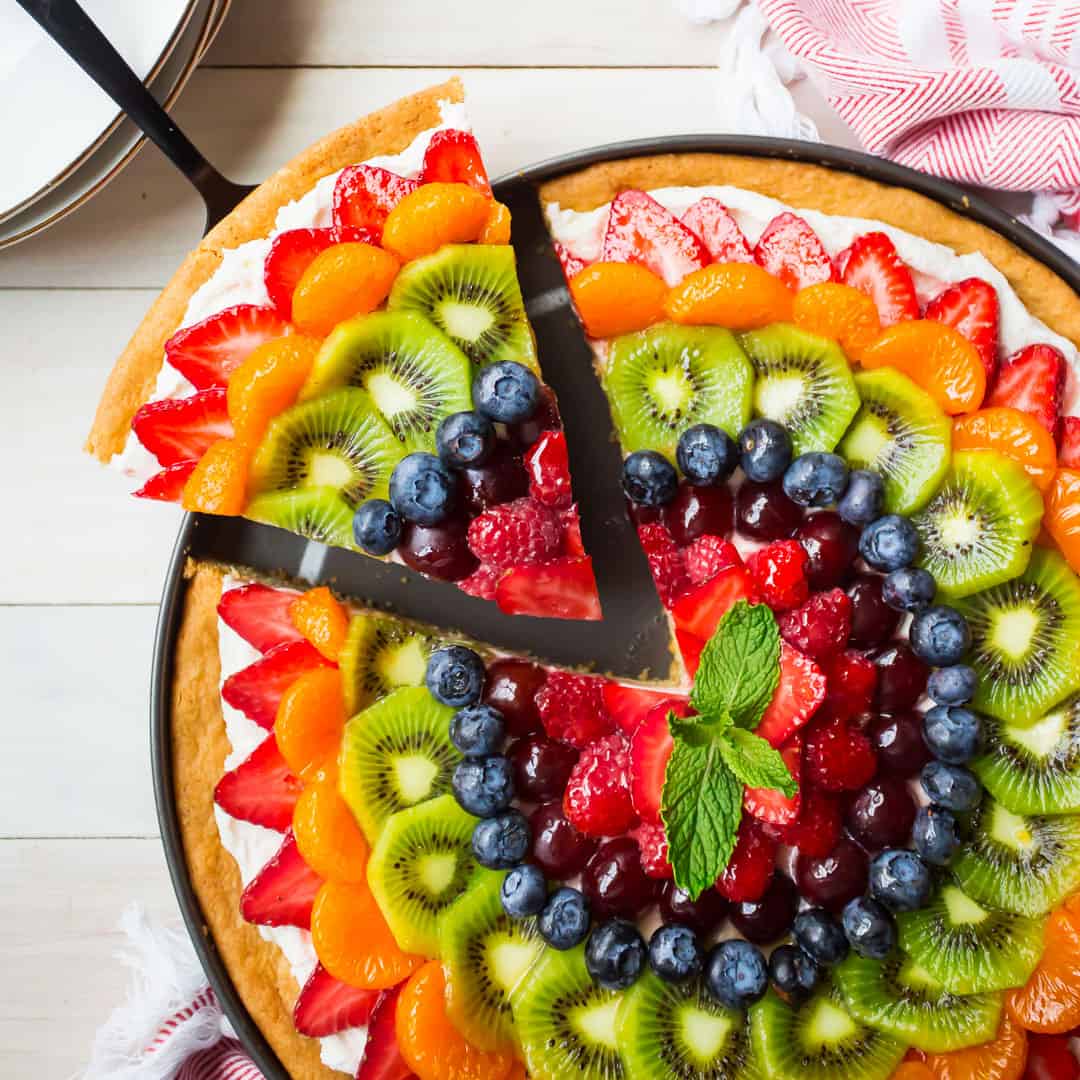
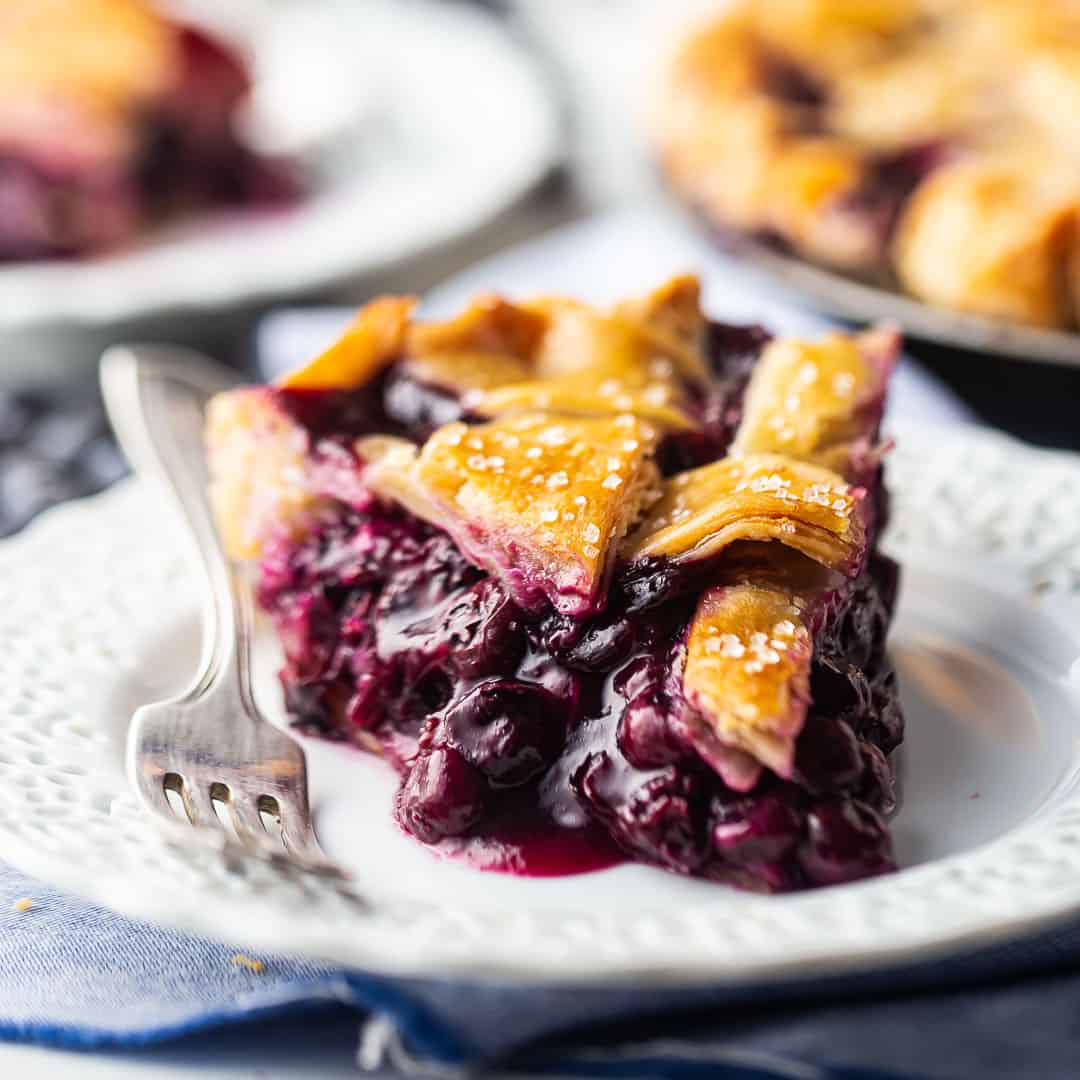
A few more of my favorite pie recipes:
As an amazon associate I earn from qualifying purchases.
Ingredients
- 2 ½ cups (312.5 g) all-purpose flour
- 1 teaspoon (6 g) kosher salt
- 5 tablespoons (70 g) oil
- ½ cup (113.5 g) unsalted butter, cold
- ½ cup (118.29 g) ice water, (approximately)
Instructions
- Place the flour and salt in a large bowl, and whisk to combine.
- Add the oil, stirring until the mixture resembles coarse crumbs.
- Cut the butter into thin slices and toss in the flour mixture to coat.
- Dribble ice water in, a tablespoon at a time, mixing just until the mixture can hold it's shape. (You may need slightly more or less water.)
- Tumble the dough out of the bowl and onto a large sheet of plastic wrap.
- Use the plastic wrap to gather the dough into a disc shape, then wrap the dough tightly and press down on it firmly to compact it.
- Chill the dough in the refrigerator for 1 hour.
- Flour the work surface, rolling pin, and the chilled dough lightly, then divide the dough into 2 equal portions.
- Roll each portion out to ¼" thickness, and fold into thirds. Fold into thirds again, then one more time.
- Refrigerate for one more hour, or freeze for later use.
- If frozen, thaw the dough in the refrigerator overnight.
- Unwrap the dough and roll to about two inches larger than the diameter of your pie plate.
- Slip the dough into the ungreased pie plate, and prick the bottom with a fork. Refrigerate while preparing the filling.
- Baking time will vary according to pie filling (see notes above, under the heading "How Long to Bake Pie Crust). Crust should be a deep golden color, and flaky.


Hello,
For blind baking your pie crust recipe, do you recommend using pie weights, or just prick the crust and bake? Thank you!
Either way should work! Good luck Susan!
Thank you! I made it and it was great!
Excellent recipe! My crust came out so flaky and delicious. I did add a teaspoon of white vinegar to add to the flakiness. . I used the entire batch for a very large pie and made “crackers” with the clippings that I sprinkled with cinnamon and sugar. They were gone before they even cooled off.
Yay! Love your ideas. Thanks so much for the great feedback Mary!
I made this pie crust for a chicken pot pie. I substituted salt for chicken soup base. Crust worked very nicely for pot pie.
Your instructions for pie crust are really inspiring and not at all intimidating! I have never made a pie crust of any kind. I just picked fresh blueberries and hope to make my first blueberry pie.
That's great! I hope this works well for you! Good luck!
Thank you so much for this pie crust recipe. I pastor a small Baptist church in SE Texas and we have a pot luck lunch every month and I was wanting to try my hand at a true homemade pie crust. This is it! My wife may help me but she’s battling stage 4 cancer so it’s just according how she feels. This recipe looks like I could make it. Now gotta figure out what filling to make. Thanks again and God bless!
So happy you like it Jimmy! Good luck and please don't hesitate to reach out if you have any questions. Sending healing vibes to your wife and love to your congregation!
Looked easy to accomplish but when baking the butter oozed out of the crust. I ended up with a rock solid pie crust that was even hard to break when I threw it away. I assure you every instruction was followed and ingredients kept cold. Help! This has happened with every butter pie crust recipe I’ve made
Hi Allie,
I have a problem with the butter bubbling out of the crust onto the baking pan underneath the pie dish. What's left is a crust I can lift out of the pie dish in one piece. I can carry it to the garbage and throw it out-doesn't break even when thrown away!! Can you tell me what went wrong??? By the way used European butter.
Hey Sha! Gee I wonder if the European butter could be a factor. I know that it tends to be much higher in fat. I'd try it with regular butter as that is what I test with (I always just use generic; I want to make sure my recipes taste good even if budget ingredients are used). See if that makes a difference? If not I'd also suggest making sure the unbaked crust is well chilled and the oven is fully preheated. Cold butter + hot oven is the key!
Thanks Allie. I used Land of Lakes butter this time. Still had the same problem. The oven is preheated for at least 30 minutes and rolled out in pie pan have been in fridge for one hour-at least.
Hi! 👋🏼 I'm wondering - could you have used too much water? the pie dough should just barely come together. if there are still dry crumbly bits in the bowl, remove the dough that sticks together well and add drops of water to the dry part until it also sticks together. The dryer the dough, the better the crust in the end.
68 yr old happy baker just found the BEST pie crust recipe I have ever used!! The ingredients, perfect! But what shines, shines, shines are the instructions! Only thing I changed, out of necessity to meet a dinner deadline, was that each of my chillings was only 20 minutes. Worked absolutely perfectly!! THANK YOU, beautiful young former pastry chef!
Aw, thank you so much Debra! I'm so happy you were pleased. This feedback is so helpful! I really appreciate it!
Did I miss the measurements of the recipe?
Yes, all the way at the bottom of the post, just above the comments section 😉