Dutch Apple Pie
As an amazon associate I earn from qualifying purchases.
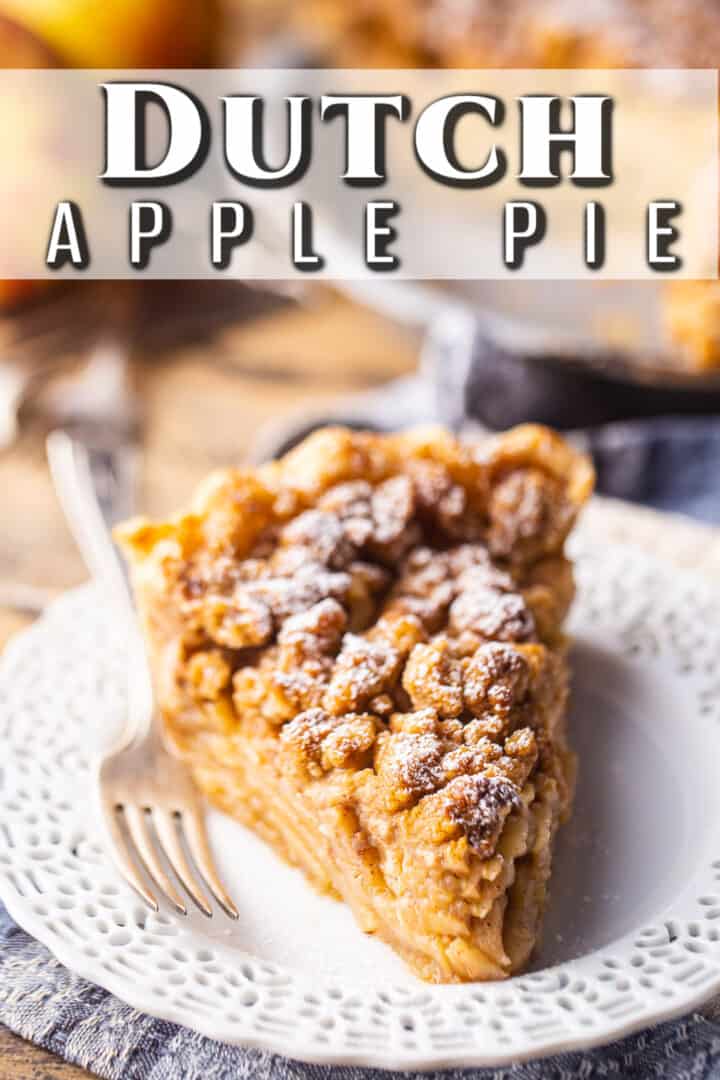
The most magnificent Dutch apple pie recipe! Softly spiced seasonal apples, topped with a crunchy, buttery crumb topping. Out of this world!

Today I'm bringing you an absolute must-make recipe for fall: Dutch apple pie!
We are all about apple recipes here at my house. Apple turnovers, apple dumplings, apple crisp... these are my older son's favorites so I try to keep them on heavy rotation, especially in the fall and winter when apples are in season.
So he was very excited when I told him this Dutch apple pie recipe was in the works!
It's everything you love about apple pie, plus everything you love about apple crisp. He went gaga for it, and I think you will too.
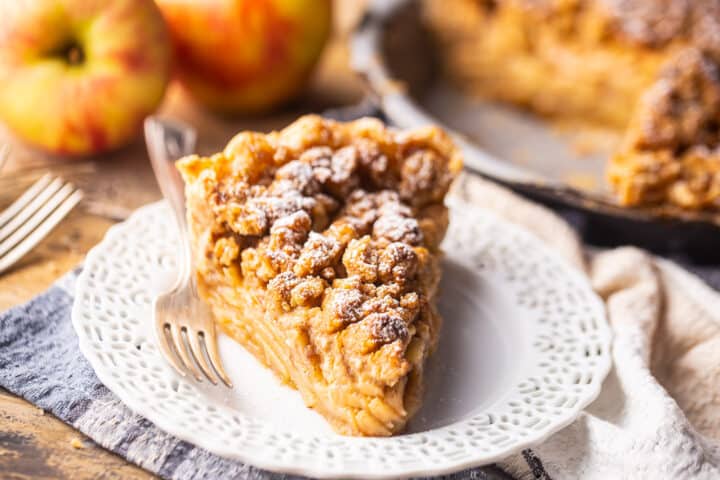
The crust is flaky as can be, and the apples are slightly sweet, toothsome, and gently spiced with warm cinnamon. The topping is crunchy-sweet, buttery, and contrasts texturally with the soft apples in the most incredible way.
WHAT IS DUTCH APPLE PIE?
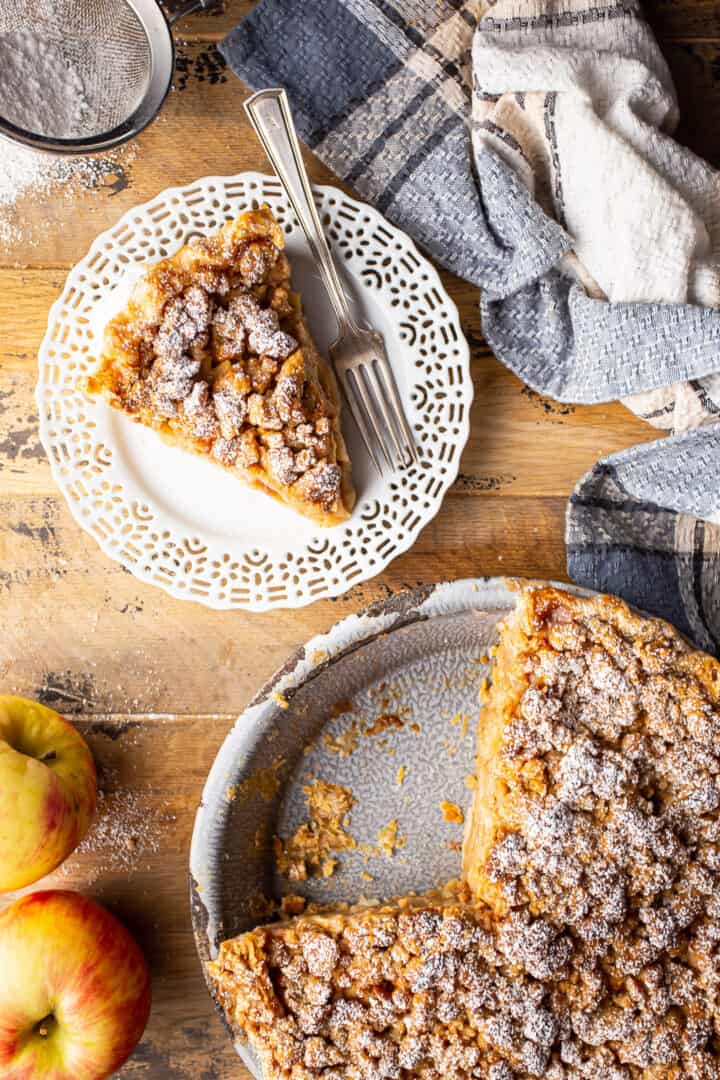
Dutch apple pie is just like traditional apple pie, but without the top crust. Instead, it gets a thick layer of crunchy crumb topping.
- Pie Crust
- Apple Pie Filling
- Crumb Topping
HOW TO MAKE THIS DUTCH APPLE PIE RECIPE
To make this pie, you're going to start from the bottom and work your way up.
THE PIE CRUST
If you're in a time crunch, you can use a store-bought pie crust for sure. But I love my homemade pie crust recipe. It's got so much rich, buttery flavor, and it is without a doubt the flakiest pie crust you'll ever taste.
This is thanks to a unique folding process, similar to what you'd do if you were making croissants or puff pastry (but a lot less fussy!).
That extra step yields results that are just incredible. I highly recommend you give it a try! The recipe can be found here: Homemade Pie Crust Recipe.
You'll only need to make half the batch.
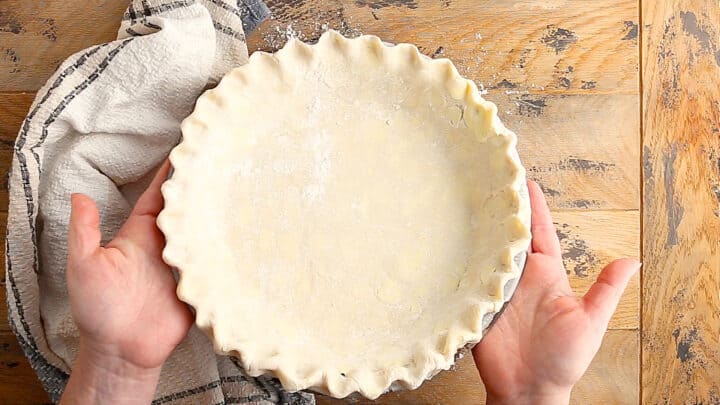
Roll it out to an inch or so larger than your pie dish, then nestle it in, trim off the excess, fold and crimp the edge, and pop it into the fridge to chill, while you make the apple pie filling.
THE APPLE PIE FILLING
This recipe calls for a LOT of apples. When it's still raw, you might think it's too much, but trust me. As the pie bakes and cools, the apples soften and sink down a ton.
Use any kind of apple that's good for baking. In other words, you want something that holds its shape well when cooked, like a Granny Smith, MacIntosh, or Honeycrisp apple. Nothing that would become mushy. Those kinds of apples are more suited for making applesauce.
Peel, quarter, and cut out the cores.
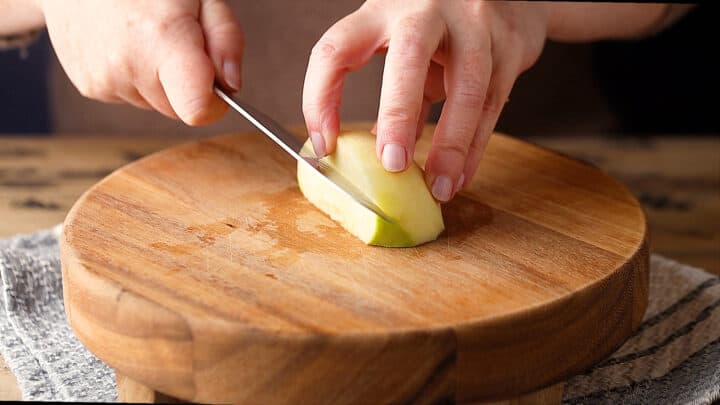
Then slice the apples to about ⅛ to ¼ of an inch thick.
Toss them together with sugar, flour, lemon juice, cinnamon, nutmeg, salt, and cloves, making sure every slice gets coated in the mixture.
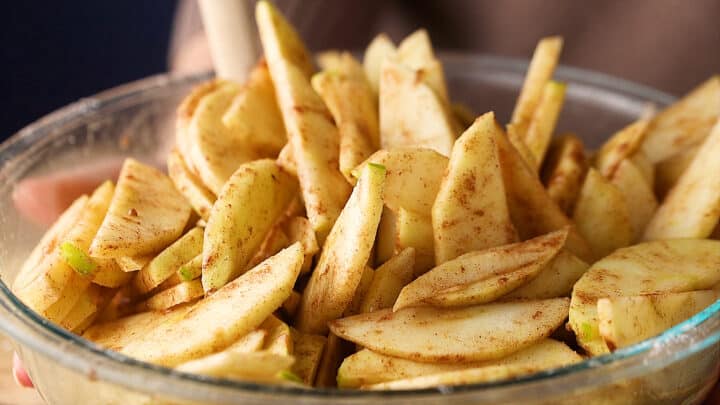
The flour will thicken the juices as the pie bakes. No runny pie filling here!
The lemon juice lifts the flavors and makes the apples taste even more apple-y. Salt does the same, and the spices are traditional for American apple pie. You could substitute apple pie spice, if you like.

Tip the filling into your prepared pie crust, and put the unbaked pie back in to chill while the topping gets made.
THE CRUMB TOPPING
This is the crumb topping recipe I use for everything from muffins and quick breads, to pies and crisps.
It can be customized in all sorts of ways (more on that below) and it's really quick and easy to make.
It's just melted butter, flour, brown sugar, cinnamon, and salt.
Toss all these ingredients together with a fork. While it's warm it will be kinda like wet sand, but as it cools it gets more crumbly.
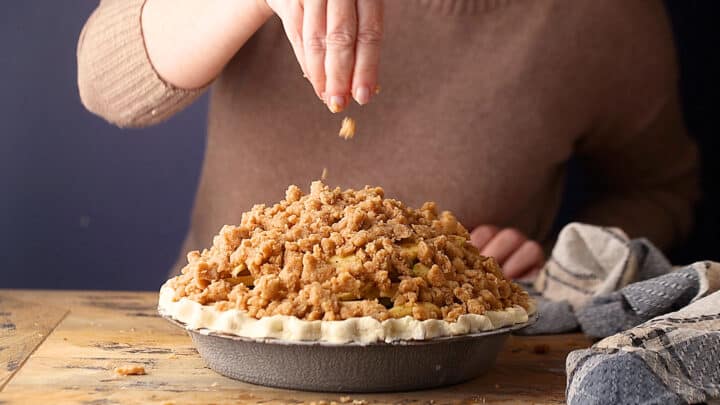
Sprinkle it all over the apples in an even layer, then slide your pie into a hot oven to bake.
WHEN IS IT DONE?
This pie is so big and thick and heavy, and the apples are a very firm fruit so it will take a while to bake. Usually somewhere in the neighborhood of one hour.
You'll know it's done by feel. Push a toothpick into the center of the pie. The apples should feel softened and tender, but not mushy.
If the topping starts to get too brown before the apples are done, lightly drape a sheet of aluminum foil over the pie while it continues baking.
IS THIS HEALTHY?
Overall I think pies are relatively healthy as far as desserts go. They're mostly fruit and they're not super-sweet and sugary, so they have that going for them.
But "healthy" can mean a lot of different things to different people, so you should probably judge for yourself.
There's a full nutritional breakdown in the recipe card below.
- I have not tried making this gluten-free so I don't know how well it would work, but I do think it's worth experimenting! Use a gf flour blend that can sub for regular flour 1:1.
- Same goes for dairy-free or vegan, but again, a plant-based butter substitute would probably work beautifully.
- This recipe is naturally egg-free and nut-free.
ADD-INS
This recipe just calls for the basics, but you could definitely get jazzy with it!
Think about adding:
- Raisins or dried cranberries to the filling
- Oats to the topping
- Nuts to the topping (walnuts or pecans would be nice!)
- Some kind of interesting spice or herb (maybe sage or rosemary, or ginger, chili, or cardamom?)
- What about bacon? Everything's better with bacon, right?
- Another fruit (perhaps figs or pears?)
- Whipped Cream
- Vanilla Ice Cream
- Caramel Sauce
- Dulce de Leche
- Creme Anglaise
CAN THIS BE MADE AHEAD?
Pies are definitely a winner for making ahead! They take a long time to bake and cool so it's a very good idea to make this Dutch apple pie recipe at least a few hours before you plan to serve it.
It will keep at room temperature, loosely covered, for a day or so.
If you have any leftovers, stash them in the fridge. They should last for around 5 to 7 days.
You can also freeze this, either baked or unbaked.
If it's already baked, just wrap it tightly in plastic wrap and it will keep in the freezer for a couple of months. Thaw it in the fridge or at room temperature and it can be reheated in the microwave or in a warm oven.
If it's unbaked, think about preparing it in a foil pan so your regular pie dish isn't tied up in the freezer for a long time. You might need it!
Wrap it tightly and it will be ready for you up to several months from now. Thaw it in the fridge, then bake it off according to the recipe instructions below.
A FEW MORE OF MY FAVORITE RECIPES:
As an amazon associate I earn from qualifying purchases.
Ingredients
For the Pie Crust:
- 1 ¼ cups (156.25 g) all-purpose flour
- ½ teaspoon (3 g) kosher salt
- ¼ cup (56.75 g) unsalted butter,, cold
- 2 ½ tablespoons (34 g) vegetable oil
- ¼ cup (59.15 g) ice water, (approx.)
For the Apple Pie Filling:
- 10 (1820 g) apples,, medium (approx.)
- ½ cup (100 g) granulated sugar
- 3 tablespoons (22.5 g) all-purpose flour
- 2 tablespoons (30 g) lemon juice
- 2 ½ teaspoons (5 g) ground cinnamon
- ½ teaspoon (1 g) ground nutmeg,, (or ⅛ teaspoon freshly grated)
- ¼ teaspoon (1.5 g) kosher salt
- ⅛ teaspoon (0.25 g) ground cloves
For the Crumb Topping:
- 8 tablespoons (112 g) unsalted butter
- 1 ½ cups (187.5 g) all-purpose flour
- ½ cup (110 g) light brown sugar
- 1 teaspoon (2 g) ground cinnamon
- ¼ teaspoon (1.5 g) kosher salt
Optional Garnish:
Equipment
- 1 pie dish (standard sized)
Instructions
To Make the Pie Crust:
- Place the flour and salt in a large bowl, and whisk to combine.
- Add the oil, stirring until the mixture resembles coarse crumbs.
- Cut the butter into thin slices and toss in the flour mixture to coat.
- Dribble ice water in, a tablespoon at a time, mixing just until the mixture can hold its shape. (You may need slightly more or less water.)
- Tumble the dough out of the bowl and onto a large sheet of plastic wrap.
- Use the plastic wrap to gather the dough into a disc shape, then wrap the dough tightly and press down on it firmly to compact it.
- Chill the dough in the refrigerator for 1 hour.
- Flour the work surface, rolling pin, and the chilled dough lightly, then roll out to ¼-inch thickness, and fold into thirds. Give it a quarter-turn, fold into thirds again, then repeat one more time.
- Refrigerate for one more hour,
- Roll out the pie crust dough to a little larger than the width of your pie pan and gently nestle it in, allowing any excess to drape over the sides.
- Trim, fold under, and crimp the edge, then chill.
To Make the Apple Pie Filling:
- Peel, quarter, and cut out the cores of the apples.
- Cut into ⅛-inch to ¼-inch thick slices.
- Toss together in a large bowl with sugar, flour, lemon juice, cinnamon, nutmeg, salt, and cloves.
- Transfer the filling to the prepared pie shell and chill.
To Make the Crumb Topping:
- Melt the butter in a small pot, then add flour, brown sugar, cinnamon, and salt.
- Toss together with a fork and sprinkle over the top of the pie.
To Bake the Dutch Apple Pie:
- Preheat the oven to 400 degrees F.
- Bake the pie until the apples feel softened and tender when pierced with a toothpick, but not mushy (approx. 55 to 70 minutes).*
- Cool completely and dust with powdered sugar (optional) before slicing.


If I freezer the pie how much ahead of time do I have to take it out before I bake it?
That would probably depend on how warm you keep your house, but I would probably allow at least an hour or two. Good luck!
Is the temp supposed to be 425? I had it in less than 55min and it burned the top and the crust.
Hi Laura, I'm sorry that the crust burned for you. We recommend the oven rack being placed in the center or lowest spot in the oven. You can also cover the crust a little over halfway through to prevent burning– just cover loosely with aluminum foil or if you have a pie shield.
Unfortunately the pie was ruined because the heat was too high. 425° is an extremely high temperature to bake a pie for an hour. After 40 minutes it was burned on top. I did use the foil as suggested but at that point it was too late. I have seen other recipes suggest starting at that temp and then decreasing it to 350. If I were to make it again I would decrease the temperature to 350 or 375. I should have trusted my instinct that 425 was too high. Sad 🙁
I'm very sorry this happened to you. I baked the pie at the temperature noted, kept an eye on it, and put the foil on top when it reached the desired color. This does also work if done as noted in the recipe notes. Thanks for reading and for trying one of my recipes!
I made this pie exactly as written for Thanksgiving (along with Allie's pumpkin pie). It was a huge hit! The crumble topping is delicious, and the apples really do cook down. The pie before baking was so large and impressive that my husband took photos so that our guests could really appreciate the "before" and "after" of baking! I made the pie the day before serving, and it sliced beautifully at room temp.
One note: I lined the rack below with foil (folded to make a rim on all sides), and I was so glad I did - the pie did bubble over a bit and I would've had a mess in the oven if I hadn't.
Another slam-dunk - thank you!
You're so welcome Angie! I'm so glad it worked out for you and thank YOU for the awesome feedback!