Easy Homemade Croissant Recipe
As an amazon associate I earn from qualifying purchases.
This simplified croissant recipe will have you baking croissants like a pro. Flaky, buttery, and deliciously authentic, yet so easy to make!

Today I am sharing a recipe that's been on my bucket list for years: homemade croissants!
I've wanted to try making them forever. There are TONS of croissant recipes to choose from. But after creating this easy puff pastry recipe, I had a feeling that I could make a version that's quicker, simpler, and far less intimidating than anything else.
I've taken my time and done just that. I think you will love how much easier this homemade croissant recipe is!

What is a croissant?
If you have never had French croissants before, boy, are you in for a treat!
Croissants are a classic French pastry, rolled and shaped into a crescent.
They're light, airy, and buttery, with a hint of sweetness and a little bit of a yeasty, stretchy texture. There's nothing else quite like a croissant!
They come in different flavors like chocolate croissants (pain au chocolate), almond, and more!
When you make them yourself from wholesome ingredients like real butter and milk, you won't believe how delicious homemade croissants can be!
Croissants fall into that category of "laminated pastry." This means the dough gets folded repeatedly, with cold butter between each tissue-thin layer. The butter creates steam when baked in the oven, and the layers puff up like crazy. The result is incredibly light and flaky, and so delicious.
To learn more about laminated pastry doughs, check out this puff pastry recipe, these homemade crescent rolls, this flaky pie crust, or this Danish dough.
Are croissants made with puff pastry?
While the texture of a croissant is very similar to that of puff pastry, there are some key differences.
Namely, puff pastry does not contain any sugar at all. It's a little more savory than sweet.
And croissants contain yeast, whereas puff pastry does not.
Croissants are also made with milk; puff pastry has water.
Are croissants made with Danish pastry dough?
Croissants are more similar to Danish dough than they are to puff pastry. There is only one difference, and that is the addition of eggs.
Danish dough contains eggs, but croissants do not.
Is it hard to make homemade croissants?
I would characterize a classic French croissant recipe as best made by an experienced baker. There are a lot of steps, a lot of folding, and a lot of specific measuring and counting.
But for this recipe, I've cut out a lot of that! And to me, the result is every bit as good. You still get the incredibly rich, buttery taste and all those flaky layers.
They are heavenly when fresh out of the oven! Store-bought could never even hold a candle to this recipe.
The most important thing to remember is to keep the dough cold at all times. Work as quickly as you can, and if you notice the butter becoming soft at any point, wrap it up and chill it until it's stiff again.
Cold butter is the absolute key to success when it comes to laminated doughs!

Ingredients and Notes
All-Purpose Flour: Use simple all-purpose flour. Measure by weighing the flour or spooning it into the measuring cup and using a knife to level it off so that the flour isn't packed. You can find more info on how to measure your ingredients here: How to Measure Ingredients for Baking.
Granulated Sugar:White granulated sugar is best, but feel free to experiment with other sweeteners if you like. The sugar in this recipe provides sweetness, but it also aids in browning and keeps the croissants moist.
Active Dry Yeast: I prefer active dry yeast, but instant yeast may also be used. (Check out the instructions in the "Notes" section of the recipe card below.) For this recipe, you don't have to dissolve the yeast before making the dough.
Kosher Salt: Kosher salt is my favorite salt for baking. It has a pure taste and it's inexpensive. In this recipe, salt carries and intensifies the buttery flavor.
Milk: Use whatever kind of milk you keep on hand. Even a plant-based milk will work. Just note that the amount of milk listed in the recipe card is merely a guideline. You may need slightly more or less milk to get your dough to the right consistency.
Butter: I prefer unsalted dairy butter. It allows the baker more control over the flavor. (Don't forget: The butter must be cold!) I have not tested this recipe with plant-based butter, but it could work! If you give it a try, I'd love to hear about the results. Vegan croissants could be amazing!
Croissant Recipe Method Overview
Here's a brief overview of the steps to making croissants:
- Make the dough with flour, sugar, yeast, salt, butter, and milk.
- Chill the dough.
- Roll and fold the dough 4-6 times.
- Re-Chill the dough.
- Roll out the dough to an appropriate thickness.
- Cut the dough into long skinny triangles.
- Roll the triangles into a crescent shape.
- Cover with plastic wrap and let rise.
- Bake.
How to make this easy croissant recipe, step-by-step
My goal with this croissant recipe was to eliminate that extra step of creating a butter square and encasing it in the dough. While that is very effective for precisely getting butter in every layer, it can be time-consuming. Plus, it's a little intimidating with all the exact measurements.
So for this recipe, we are slicing the cold butter into slivers and mixing it right into the dough. After it's been chilled and folded, you'll still have all those beautifully flaky layers, but it cuts way down on the prep!
How to make the croissant dough
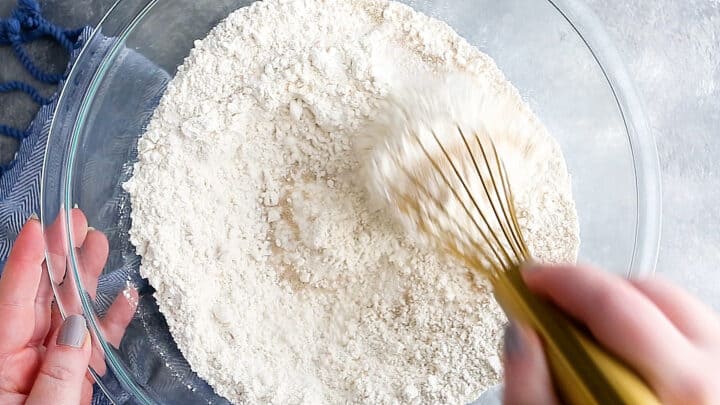
Start by mixing the flour, sugar, yeast, and salt in a big bowl.
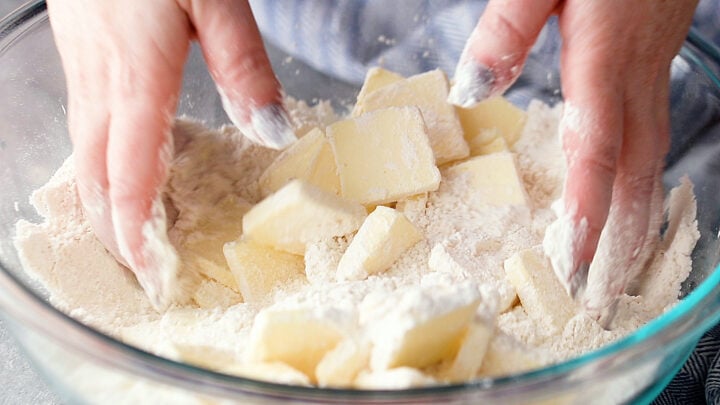
Then toss in thin slices of cold unsalted butter. Make sure every piece of butter is coated in the flour mixture.
Next, stir in the milk. I like to use a silicone spatula or wooden spoon for this step. An electric mixer could break up the butter too much.
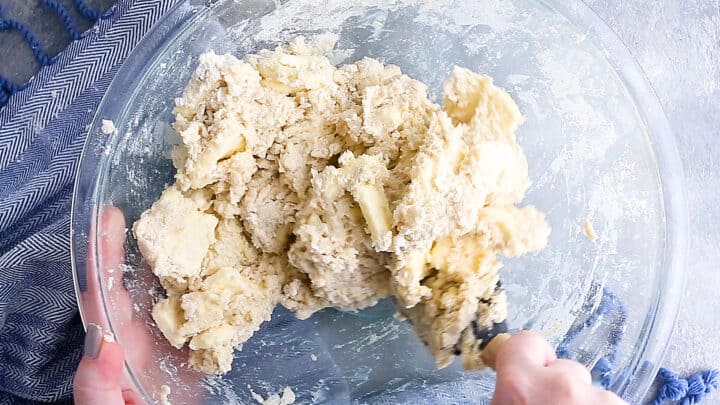
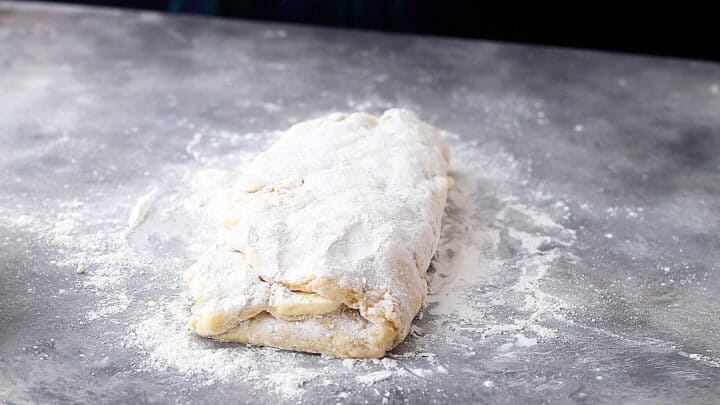
Fold everything together until the dough forms a ball. (It should pull cleanly away from the sides of the bowl.)
Note: Keep in mind that the amount of milk listed is only a guideline- you may need slightly more or less to get the right consistency. It shouldn't be a wet dough. It should be pretty stiff, like this:
You can also look at the video in the recipe card below to see how the dough should look.
Remember that the dough will hydrate even more as it rests and chills.
Wrap up the dough in plastic wrap, and chill it in the refrigerator for 1 hour.
How to laminate the dough
After it has chilled, place the dough on a lightly floured surface. Using a rolling pin, start rolling and folding.
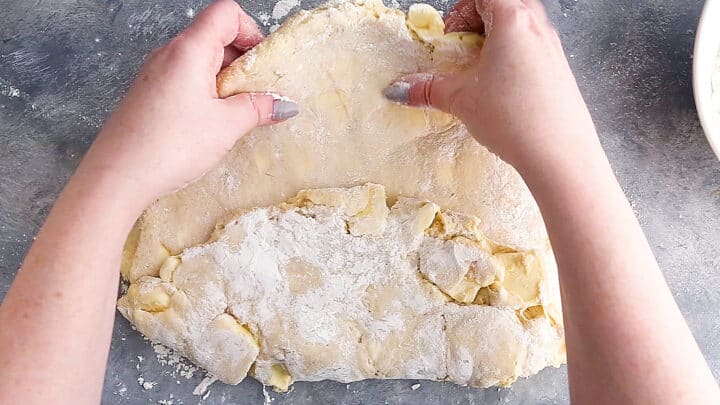
Just flatten the dough with your rolling pin, gently encouraging it into a long rectangle shape as best you can.
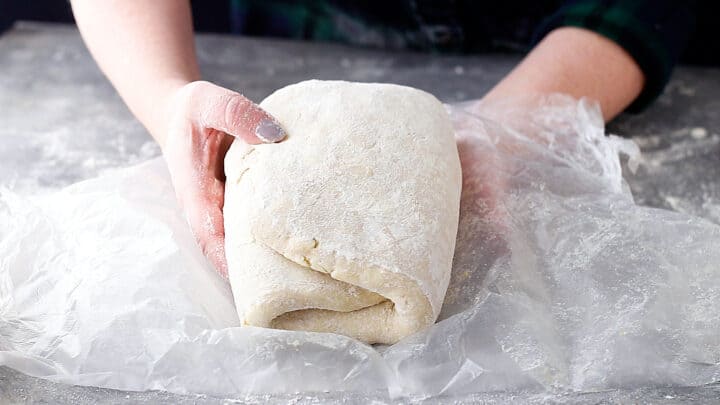
Once it's flat enough, fold it into thirds, like a letter.
At first the dough will be very lumpy, bumpy, and difficult to work with. But the more you roll and fold, the smoother it will become.
Once you've folded the dough into thirds, turn it 90 degrees, and repeat this process 3 to 5 more times, or until the dough has large streaks of butter in it but it is smooth and flat.
(If at any point the butter starts to feel soft, chill it in the refrigerator or freezer until it becomes stiff again.)
Watch the video in the recipe card at the bottom of this post, to see how this process looks.
How many times should croissant dough be folded?
Many recipes are particular about how often croissant dough should be folded, but I find that to be overly fussy. It stresses me out when I read a recipe like that! So much so that it often intimidates me right out of trying.
I think letting this process be a little more intuitive is okay. If you understand what a croissant is meant to be, you know there are countless flaky layers of pastry. The more you fold it, the more layers there will be.
Now it's good to have lots and lots of layers, but at a certain point, the layers can become so thin they're nearly nonexistent.
So as you're rolling along, notice the feel of the pastry- has the butter flattened out into many thin sheets within the dough? Or is it lumpy and bumpy?
You're shooting for lots of thin, even layers. You should be able to see large streaks of butter running throughout, but the dough should lie flat and smooth and not have a lot of rough bumps.
For me, this is usually achieved after around 4 to 6 folds (total), depending on how thinly the butter was sliced at the beginning.
How to shape croissants
The next step is to divide the croissant dough in half so it's easier to work with, then roll it into a big, long rectangle.
It's not necessary to get too hung up on measurements, but ideally, you're looking for a little more than 10 inches wide, 22 inches long, and about ⅛-inch thick.
With a sharp knife or pizza cutter, trim the uneven edges away and cut the dough into long, skinny triangles.
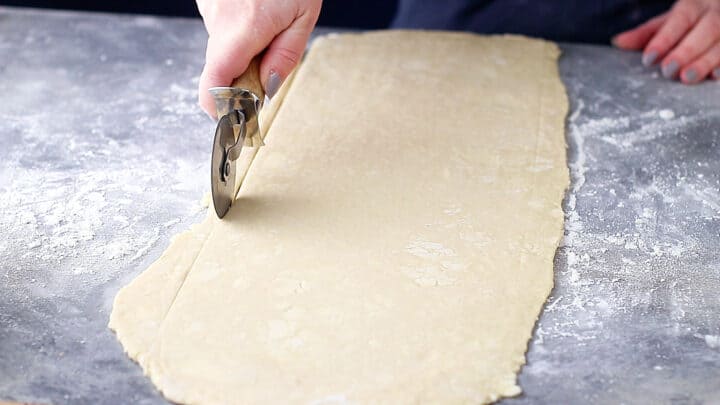
Aim for a width of roughly 5 inches.
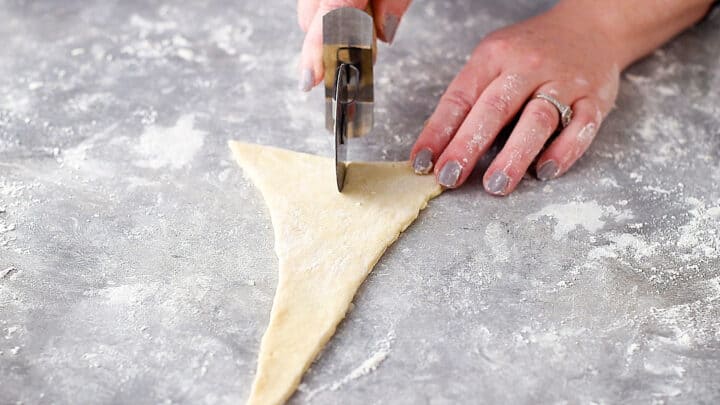
Next, cut a little notch in the wide end. This will help the croissant to bend easily and keep its curved shape.
Starting at the wide end of a triangle, roll it away from you towards the pointed end.
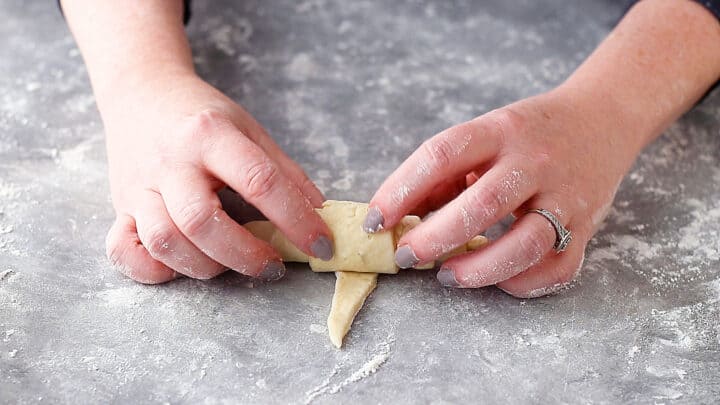
Make sure the point is tucked underneath the croissant, and bend the croissant into a curved crescent shape. Then pinch the two ends together.
Place the shaped croissants on a baking sheet lined with parchment paper.
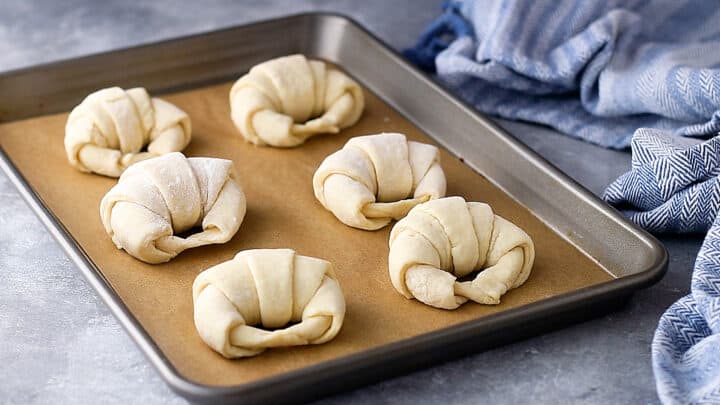
Next, you'll want to lightly cover the unbaked croissants with greased plastic wrap, and allow them to rise at room temperature.
Or, to break up the prep a little, you can make overnight croissants. Just place the trays in the fridge for up to 48 hours, then allow them to come back up to room temperature and rise when you're ready.
How to bake homemade croissants
Once they've roughly doubled in bulk, remove the plastic wrap and brush the unbaked croissants with egg wash.
This is just one egg beaten with a little bit of water to thin it out to a "brush-able" consistency.
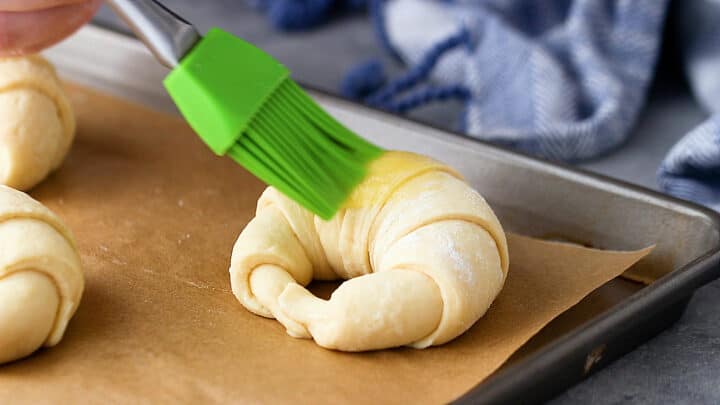
This egg wash will give your croissants a lovely sheen and help them to bake up golden brown and delicious!
Make sure your oven is fully preheated. You want it nice and hot so that the moisture in the butter can create steam and puff up in between all those gorgeous layers!
Bake them until they look flaky, puffed, and lightly browned.
What to eat with croissants
A freshly baked croissant is perfect just as is!
But if you'd like to dress them up a little bit, they can be spread with all sorts of yummy toppings.
Anything from a smear of soft butter to a bit of strawberry jam, lemon curd, or apple butter would be a fantastic addition.
Or you can stuff these delicious croissants before baking! Lay a few pinches of chopped dark chocolate across the wide edge of the triangle before rolling. Or layer with ham and cheese. So yummy!
You can also split these croissants horizontally and treat them like sandwich bread. I love a little chicken salad on a croissant!
Frequently Asked Questions
How do you store croissants?
Keep these homemade croissants in an airtight container. They will still be delicious the following day and should last up to a week.
In the refrigerator, their shelf life will extend to about 10 to 14 days.

Can croissants be frozen?
Croissants can most definitely be frozen after they are baked. Like many other kinds of pastry or bread recipes, they freeze beautifully and thaw in about an hour or less at room temperature.
However, I would not recommend freezing unbaked croissants or croissant dough. Although many bread doughs can be frozen for up to 2 weeks, there is a chance that the yeast will not survive.
What is laminated dough?
Laminated dough is made by folding butter into the dough multiple times to create thin layers of dough and butter. The result is numerous flaky layers that are impossibly light and airy!
Why are there chunks of butter in the dough?
If there are very thick chunks of butter in your dough, you'll want to continue the folding and rolling process to laminate the dough further. Look for streaks of butter rather than chunks.
If your butter is too cold before baking, or if your oven isn't fully preheated, your croissants could end up leaking butter as they bake.
The proofing process should allow the butter to come to room temperature and hold the butter within the pastry, rather than having your croissants sitting in a pool of butter.

I hope this simple recipe has encouraged you to try homemade croissants! I think it's so much easier and less intimidating. And the results are stellar!
Let me know what you think!
As an amazon associate I earn from qualifying purchases.

Ingredients
- 4 cups (500 g) all-purpose flour
- ⅓ cup (78.86 g) granulated sugar
- 4 teaspoons (19.72 g) active dry yeast*
- 2 ¼ teaspoons (11.09 g) kosher salt
- 1 ¼ cups (283.75 g) unsalted butter, , cold (2 ½ sticks)
- 1 cup (244 g) milk , cold (you may need slightly more or less)
- egg wash, (1 large egg beaten with a teaspoon or two of water)
Instructions
- Place the flour, sugar, yeast, and salt in a large bowl and whisk together until combined.
- Slice the butter into ⅛-inch thick slices and toss in the flour mixture to coat.
- Add the milk and stir together until a stiff dough forms.
- Wrap the dough tightly in plastic wrap and chill for 1 hour.
- On a lightly floured surface, roll the dough into a long rectangle shape.
- Fold it into thirds (like a letter), turn 90 degrees, and repeat 3 to 5 more times, or until the dough has large streaks of butter in it but it is smooth and flat. (If at any point the butter starts to feel soft, chill it in the refrigerator or freezer until stiff.)
- Wrap tightly and chill for 1 more hour, then divide the dough in half and roll each portion to a thickness of about ⅛-inch, in a long rectangle shape (approx. 10-inches wide by 22-inches long).
- Cut the dough into long, skinny triangles (about 5-inches at the wide end).
- Notch the wide end of each triangle with about a ½-inch cut, then roll from the wide end to the pointed end, tucking the point under the croissant.
- Place on a parchment-lined baking sheet, cover loosely with plastic wrap, and allow to proof until doubled in size (1 to 2 hours).
- Preheat the oven to 375 degrees F, and gently brush the croissants with egg wash.
- Bake for 15 to 20 minutes, or until puffed, golden brown, and flaky.


I tried this and I was so happy with the results!
So much easier than other recipes and they turned out wonderfully!
I made a double batch and I prepped everything one day and then baked them early the next morning for breakfast.
Really good, thanks Allie!
My pleasure! So happy you enjoyed!