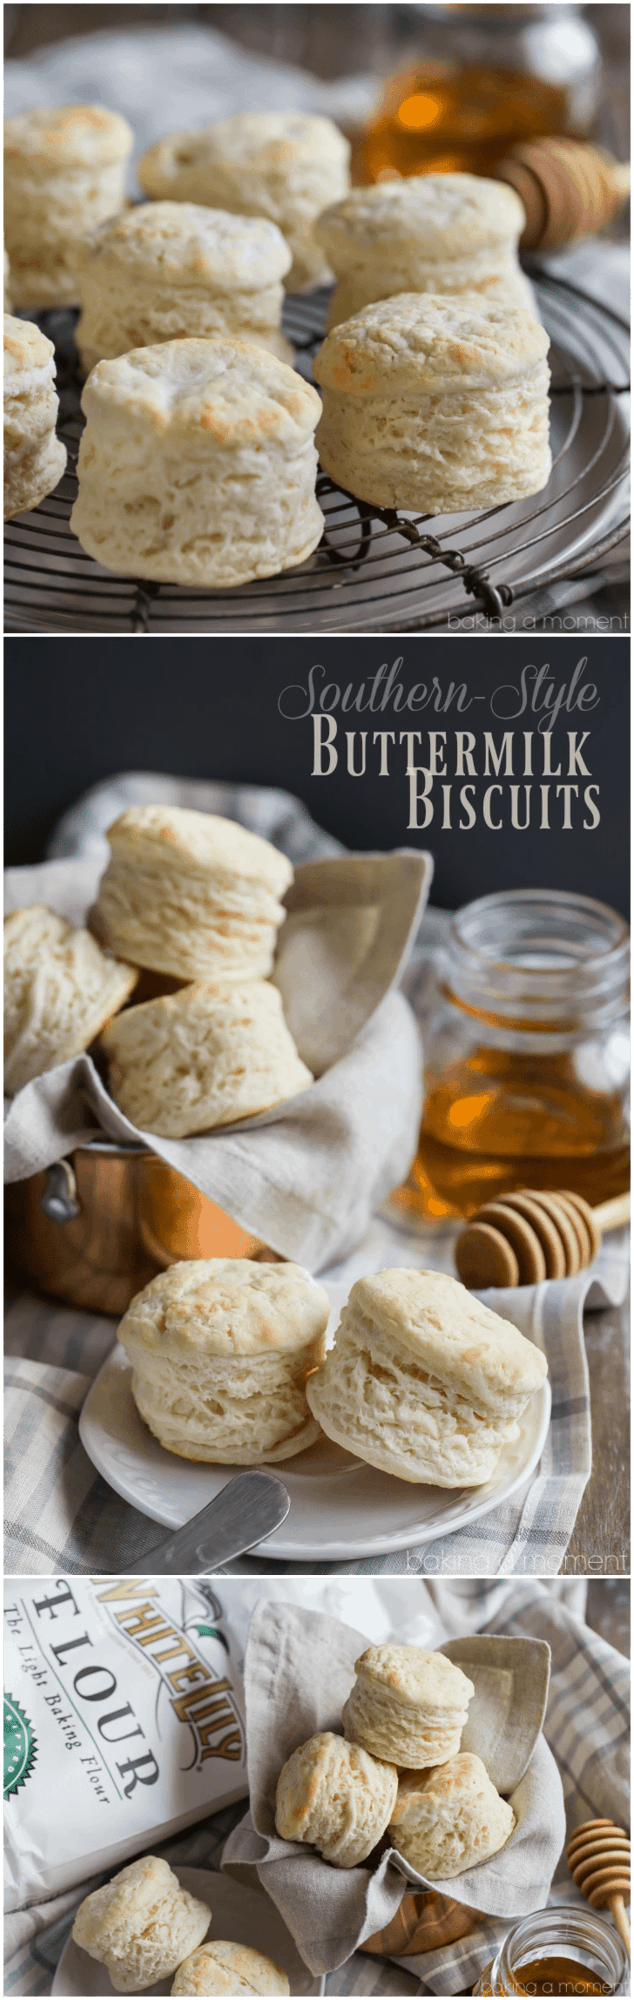
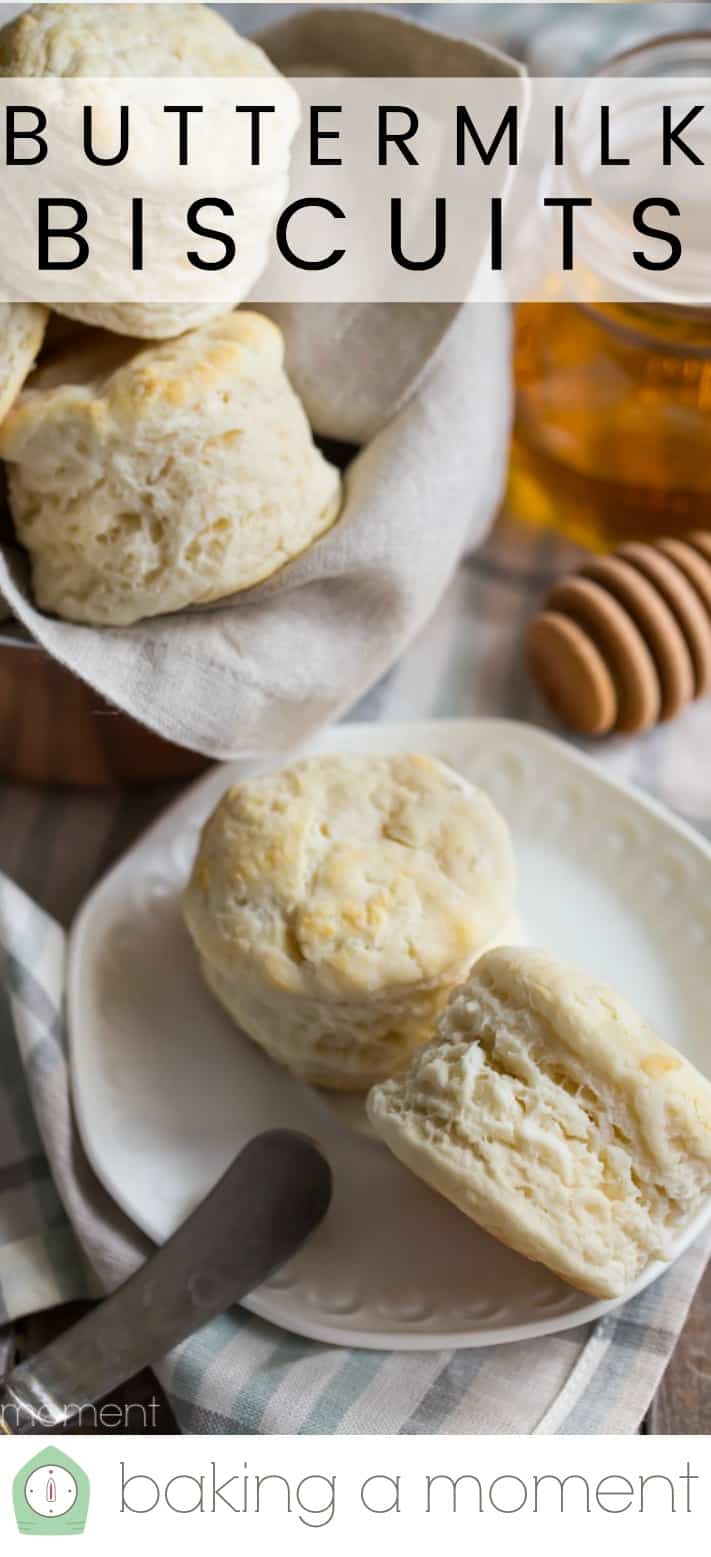
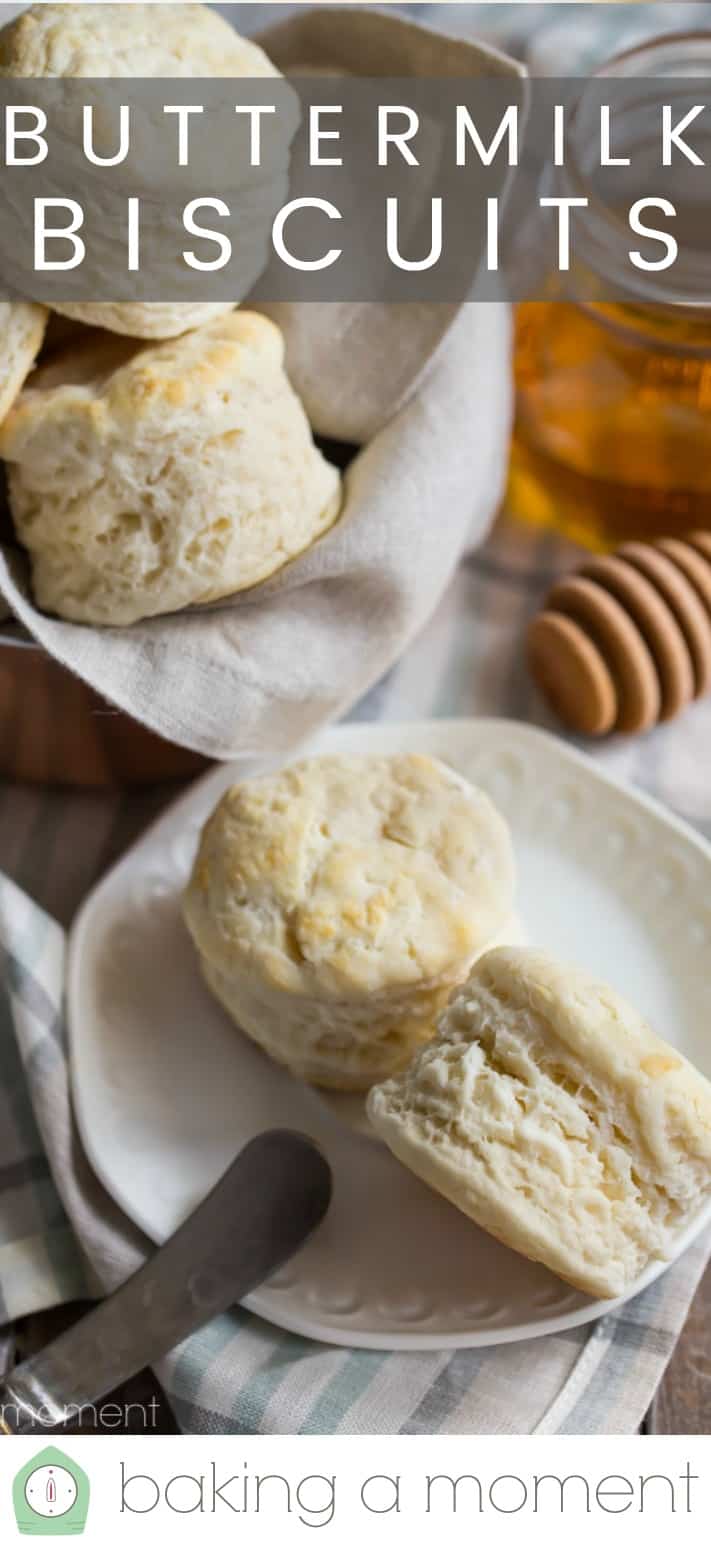
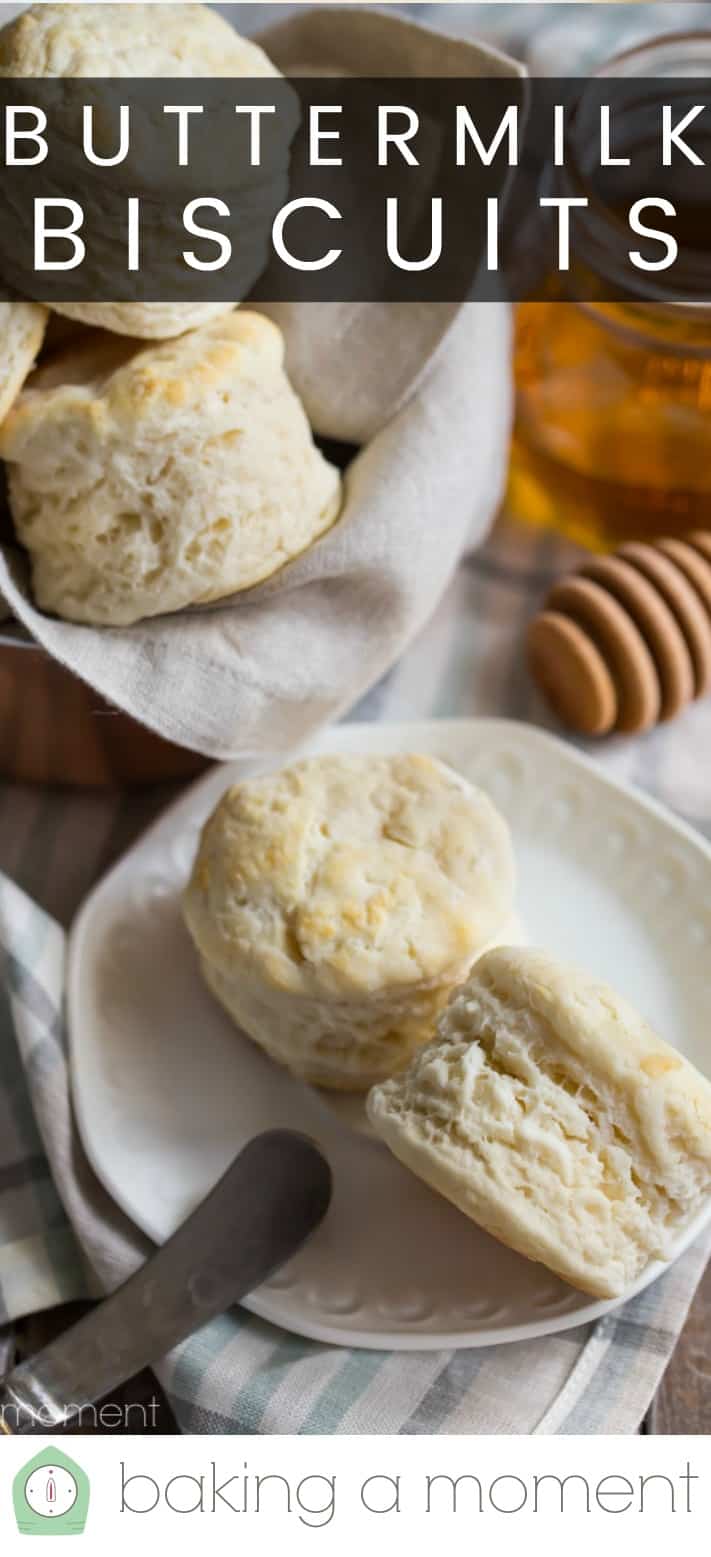
Southern-Style Buttermilk Biscuits
As an amazon associate I earn from qualifying purchases.
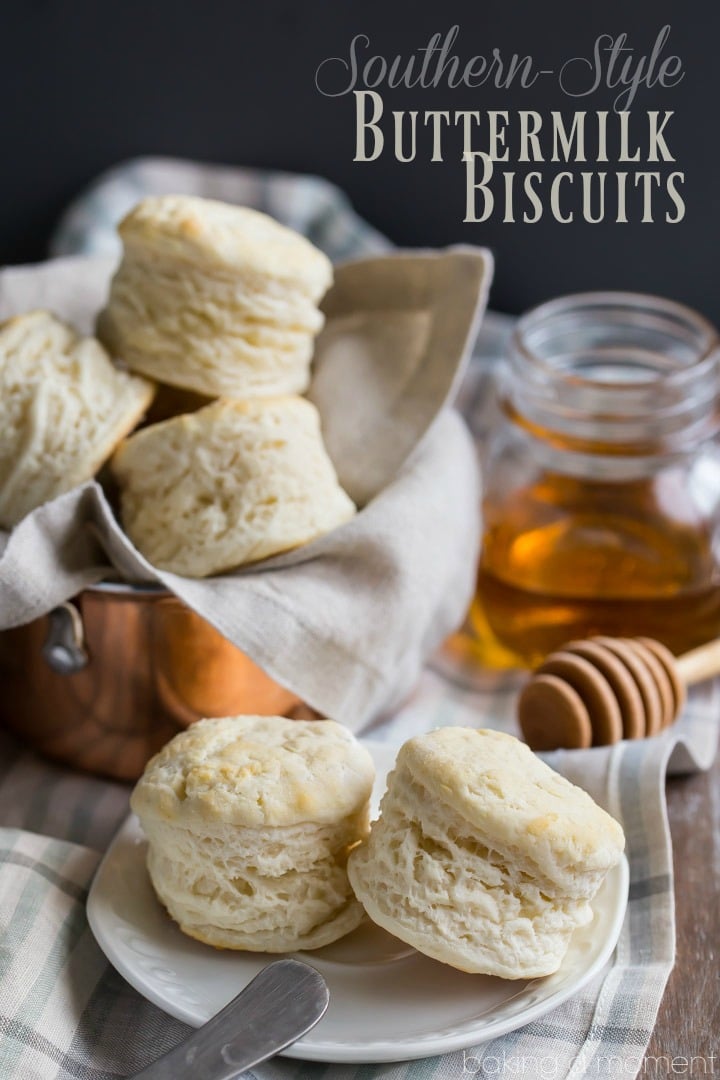
Learn the secrets of making southern-style buttermilk biscuits that bake up tall, fluffy, and light as a cloud. Homemade bread in 20 minutes or less!

*This buttermilk biscuit recipe originally published on September 15, 2016. I thought it was about time it was updated. So, I’ve added a video and answers to some frequently asked questions. Hopefully, you’ll enjoy these buttermilk biscuits as much as my family and I do!*
I may not have been born in the south, but you’d never know it by the way I bake biscuits.
Much of the credit goes to my husband. He’s not a southerner either, but he is truly a connoisseur of buttermilk biscuits. Actually, he’s a lover of all kinds of southern comfort food, but biscuits are a top favorite for him. And one he craves on a weekly basis.
Almost every Saturday, from the time we were first married, he’s begged me to make biscuits for his breakfast. And since I love to bake, I always do it.
Honestly, it’s not just because I love to bake. It’s also because biscuits are so quick and easy. They’re a quick bread, so similar to waffles or scones or cornbread, they whip up in a snap.
He loves to make breakfast sandwiches with them, but he’s also been known to slap a piece of fried chicken in there with some cole slaw.
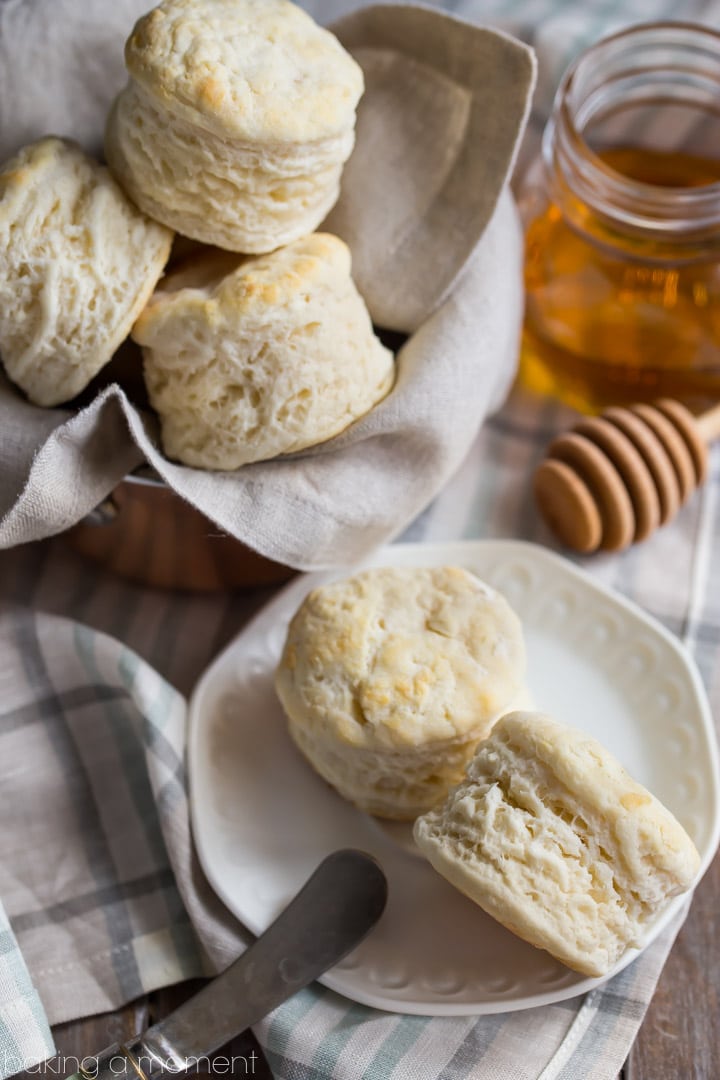
For me, nothing beats a warm biscuit slathered with butter and strawberry jam.
I can remember years ago, back in my architecture days, I had a client who was from South Carolina. Whenever we would have project meetings, she would always put out freshly made biscuits and jam for all the designers and contractors to nibble on while we talked business.
I had already caught the baking bug way before then, so I loved that she had made it her tradition to bake like that every day. It amazed me that she could put out bread, fresh from the oven, on such a frequent basis. I told her so, and that’s when she shared the secret that so many southerners already know.
As it turns out, biscuits are one of the simplest things you could ever make.
HOW TO MAKE SOUTHERN-STYLE BUTTERMILK BISCUITS
To make these tall, fluffy biscuits, you’ll need:
- Flour
- Baking Powder
- Salt
- Butter
- Buttermilk
And that’s it! Just 5 simple ingredients.
In fact, if you use self-rising flour that brings the list down to just 3 ingredients.
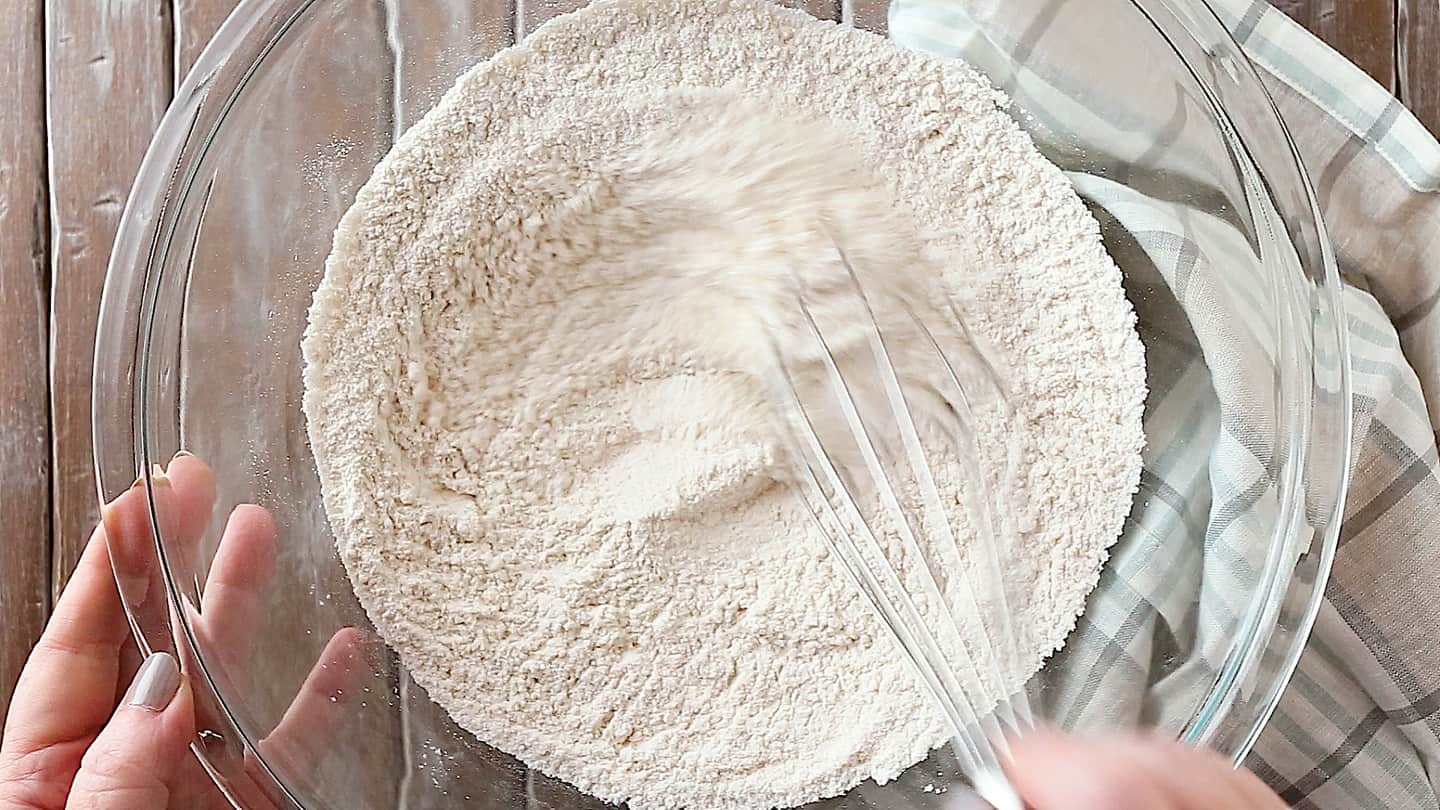
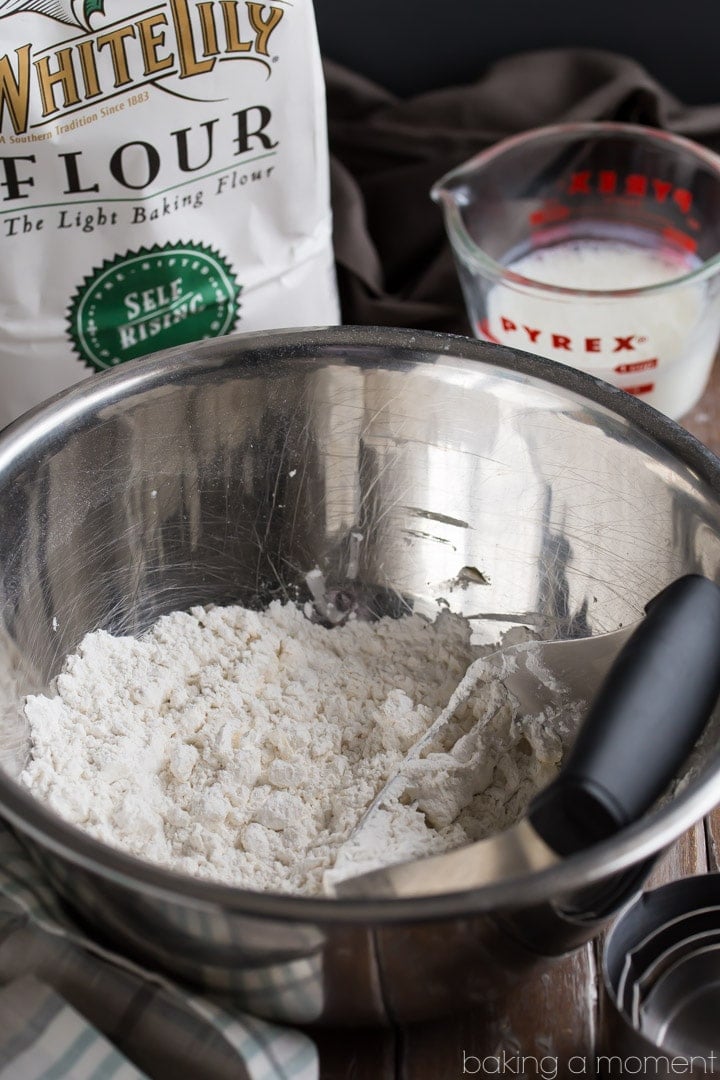
Start by placing the flour, baking powder, and salt in a big bowl. Give these dry ingredients a quick whisk, just to make sure they’re combined.
Next, add the butter. I know a lot of bakers bake biscuits with shortening, but I like to use all butter because I prefer the flavor.
Now the key to a tall biscuit is cold butter, so don’t take it out of the fridge until you are ready to use it. And once you do, you want to work fast.
When the cold butter hits the hot oven, it releases steam that makes the biscuits puff up.
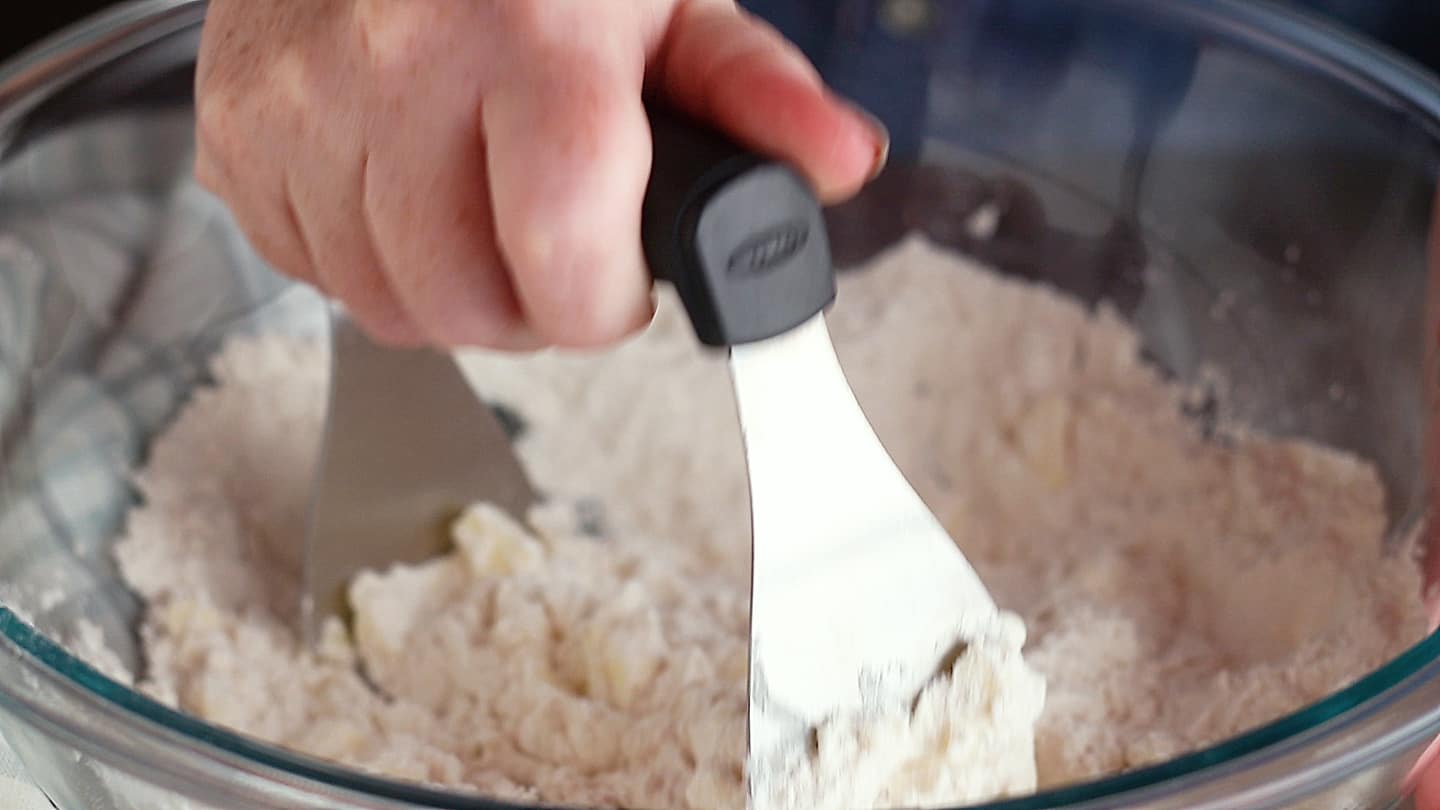
Cut the butter into the flour using a pastry blender– it works really fast and I like it better than using my fingers because the butter stays colder this way.
You don’t need to go too crazy with the cutting in, in fact, it’s better to under-work it than to over-work it. I stop just as soon as the pieces are no bigger than pea-sized. Here’s a pic, so you can see what I mean:
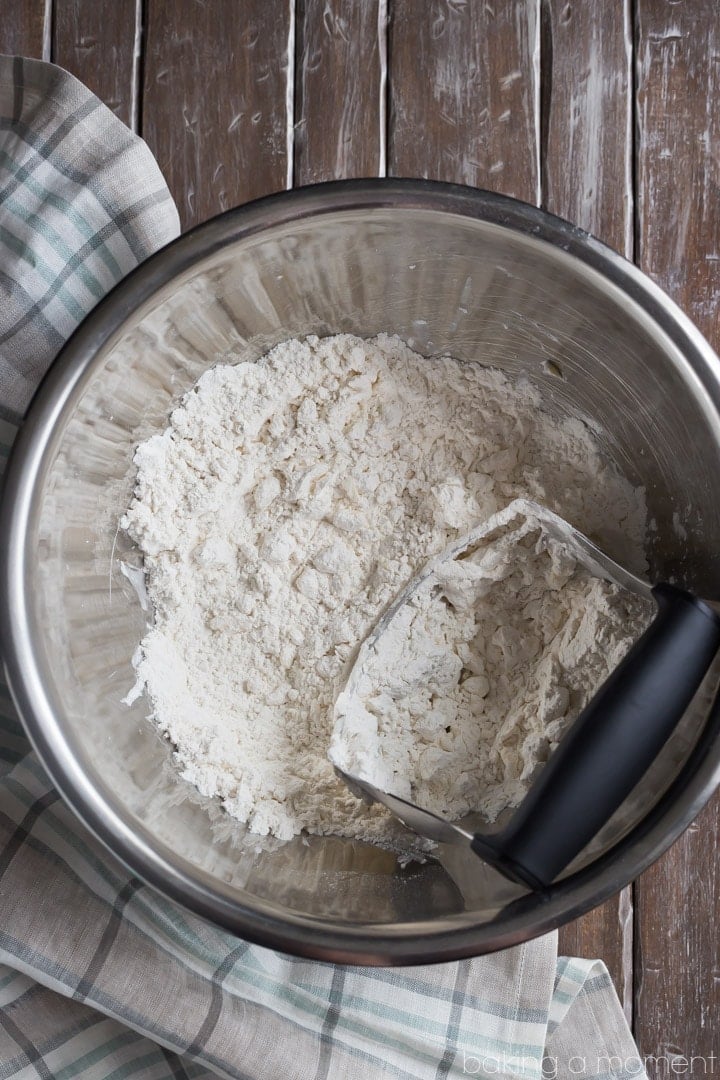
See how there are some little nubs of butter still visible? That’s what you want.
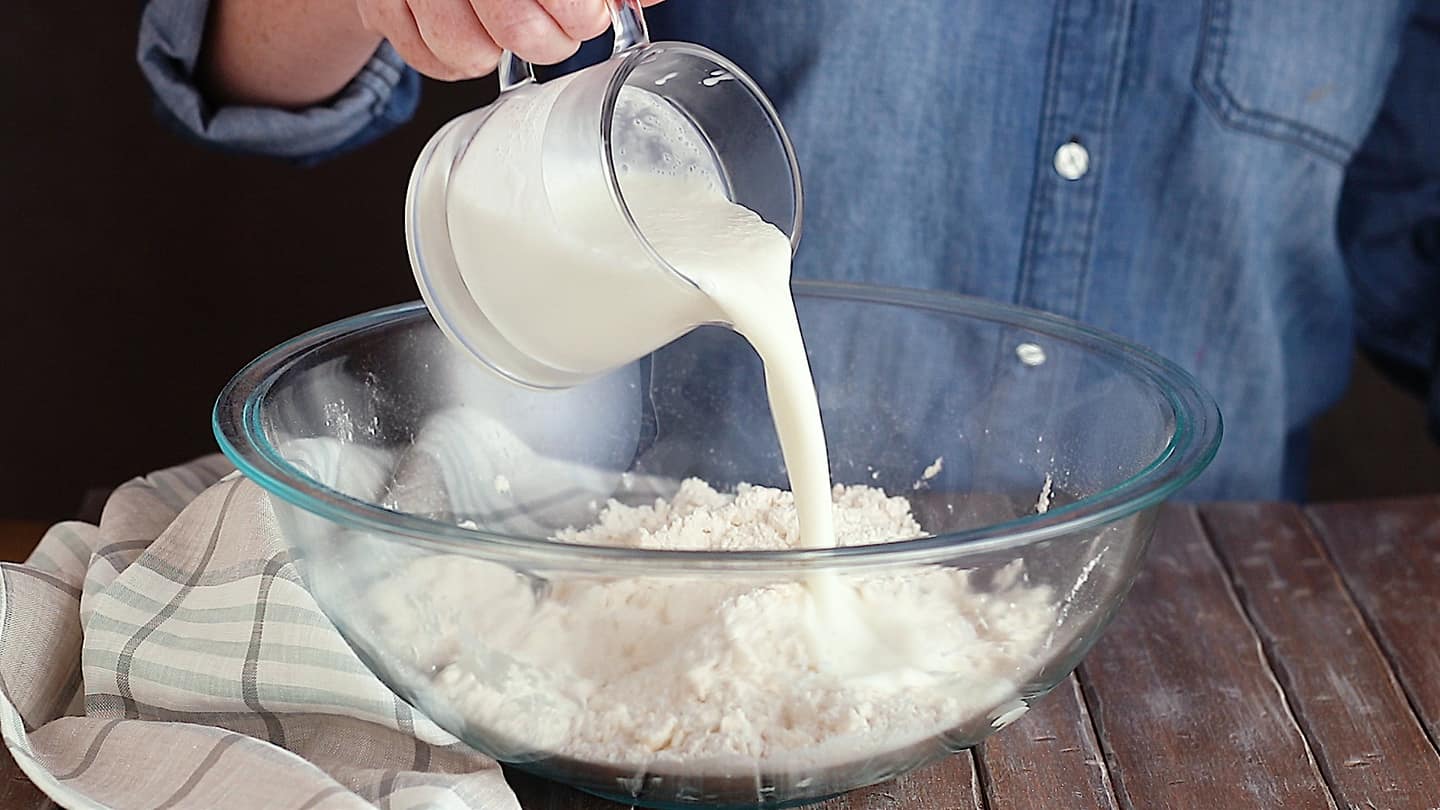
The final ingredient is buttermilk. Again, it’s best if it’s cold.
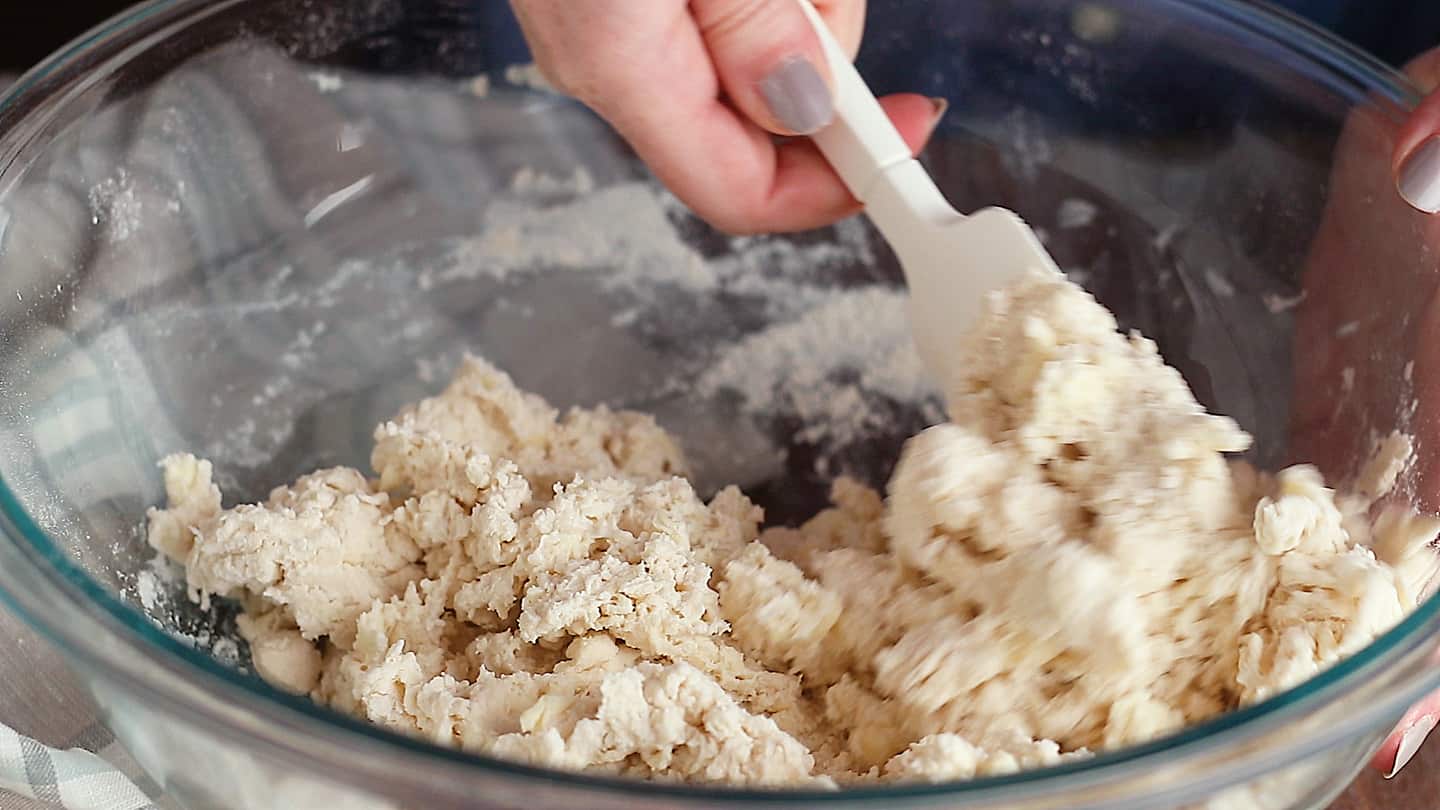
I like to start by stirring it in with a spatula, but you will see that after a little while it looks like there’s not going to be enough liquid for all that flour. Don’t worry though- just get in there with your hands and knead it a few times. It will come together, and be pretty sticky at that!
Dust the work surface with flour, so the dough doesn’t stick to your counter, and form the biscuits.
Flatten the dough to a thickness of about 3/4-inch, and then use a 2-inch diameter cutter to make rounds.
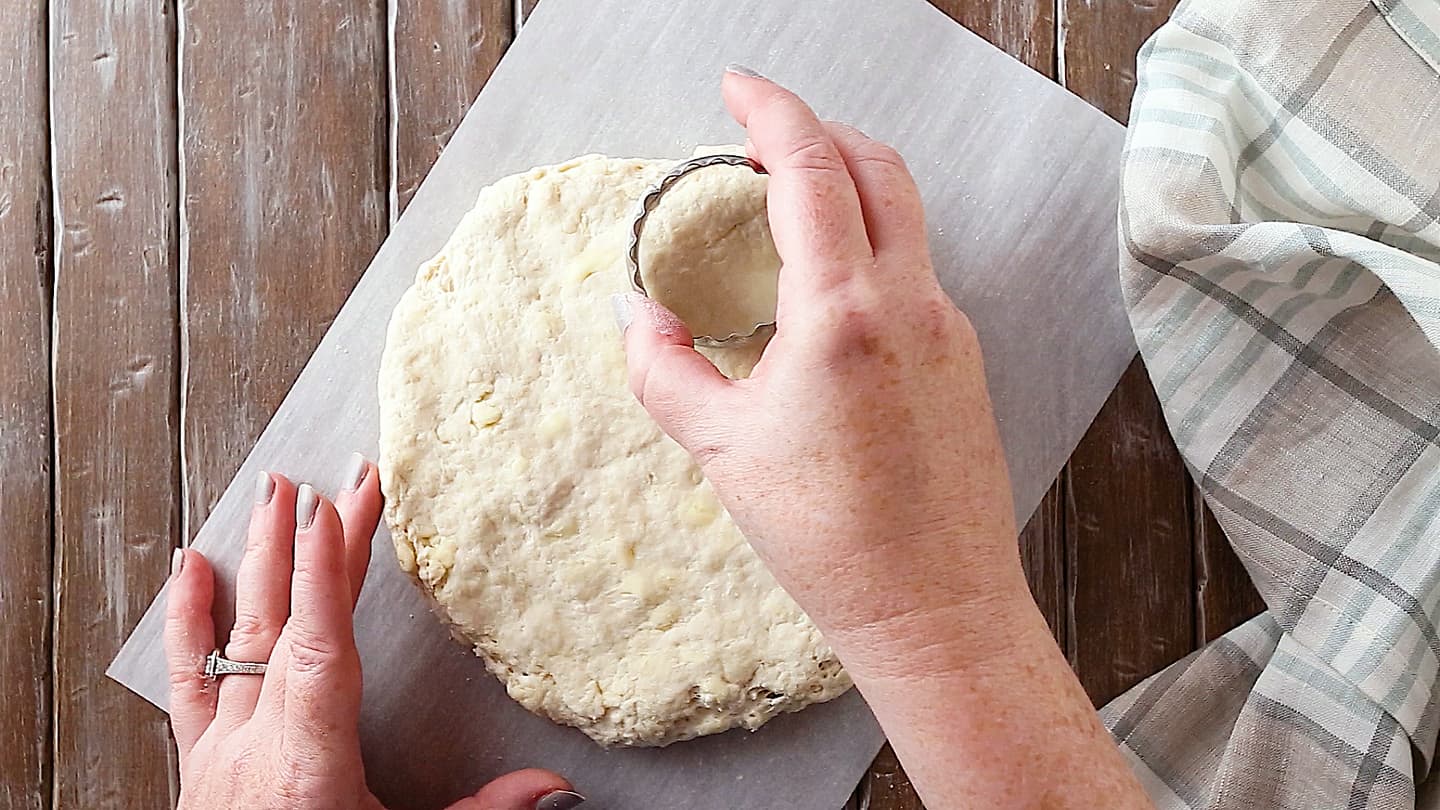
I find it’s really helpful to dip the cutter in flour before every cut, just to keep things from sticking. Transfer to a lightly greased baking sheet, and into the hot oven they go.
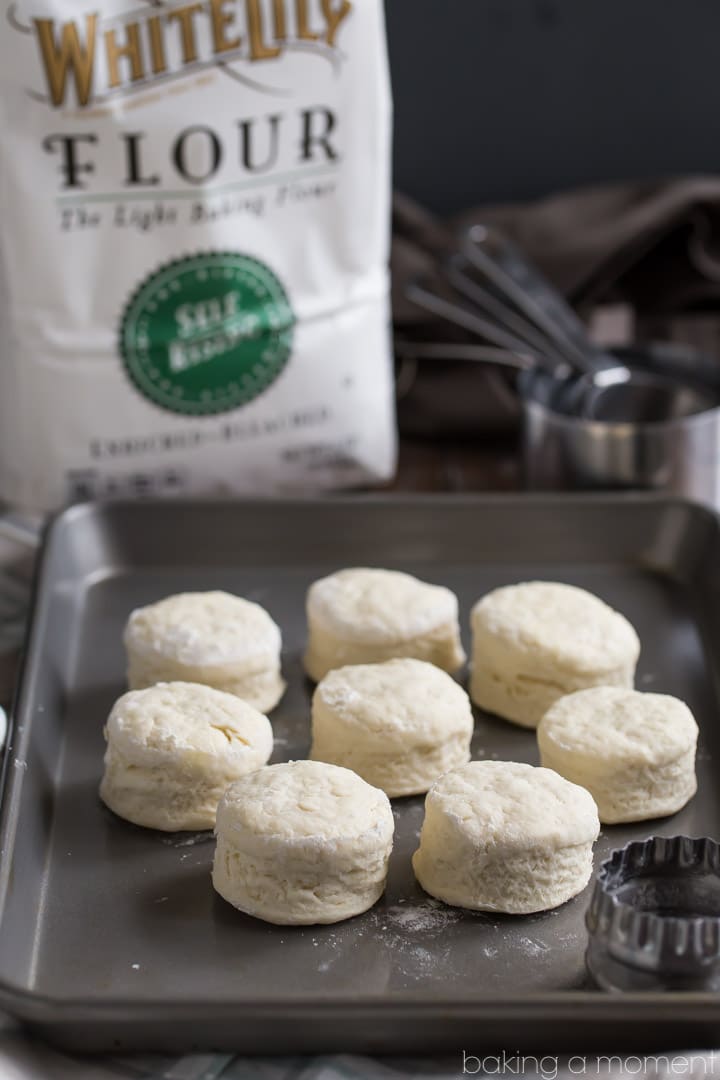
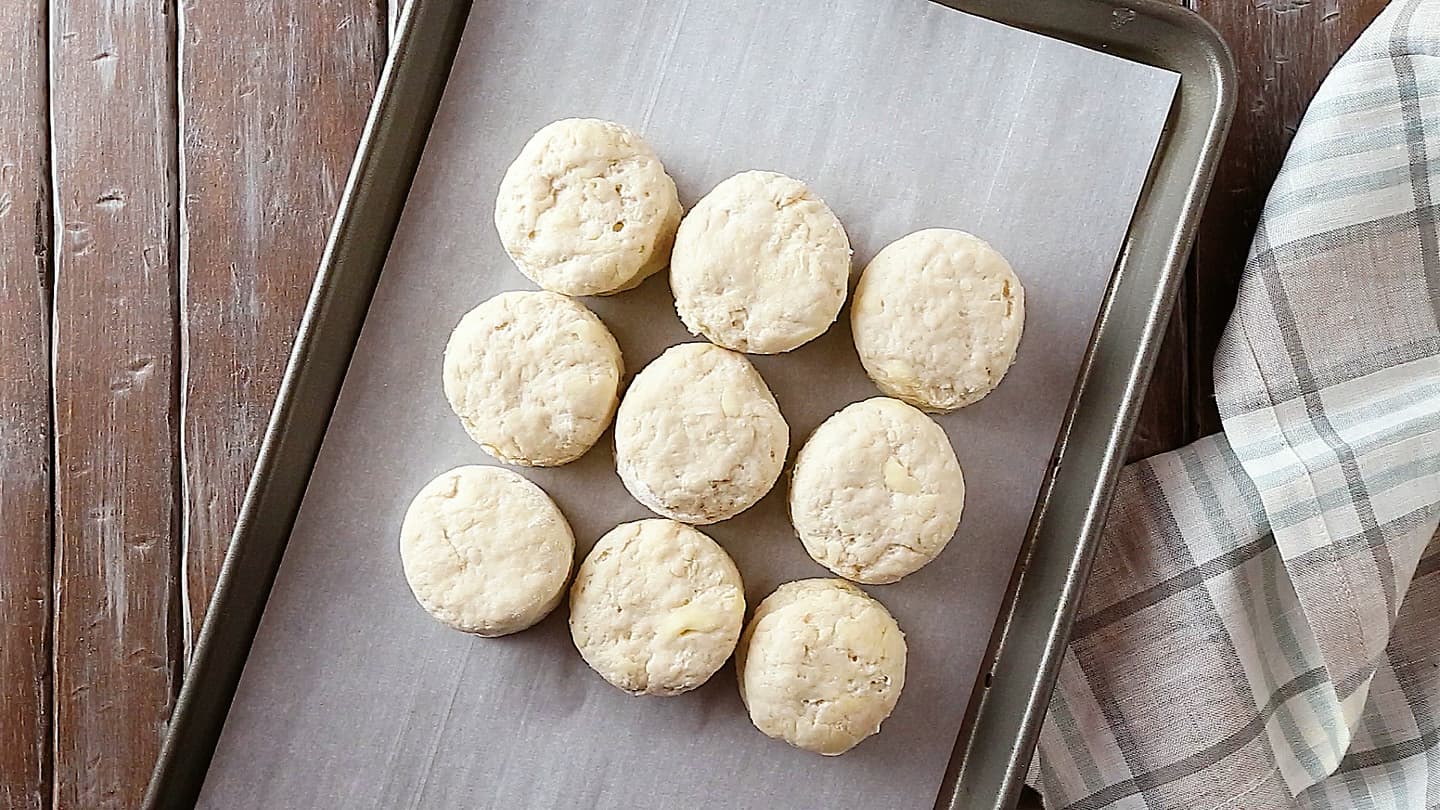
As you can see, I like to bake them on a parchment-lined baking sheet.
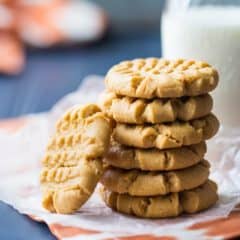
You should get anywhere from 9 to 12 homemade biscuits to a batch.
And if you place them on the tray so that their sides are just barely touching, they’ll have room to spread while still supporting each other. This way they’ll bake up nice and tall!
CAN YOU MAKE HOMEMADE BISCUITS WITHOUT BUTTERMILK?
I always keep buttermilk on hand because I use it in so many things (from cakes to waffles to of course, biscuits).
But if it’s not a go-to ingredient for you, you can make a reasonable facsimile. Just stir 2 1/2 teaspoons of lemon juice or white vinegar into 3/4 cup regular milk. Let that sit for 10 minutes or so, until the liquid gets thick and looks curdled.
Another option is to make cream biscuits.
Just use half the amount of butter (so, 1/4 cup aka: 4 tablespoons), and swap the buttermilk for 1 1/4 cups heavy whipping cream.
TROUBLESHOOTING: WHY ARE MY BISCUITS FLAT?
Nothing is sadder than a flat biscuit! We like ’em sky high around here, so I pat the dough to a thickness of no less than 3/4-inch before cutting them out.
Also, it’s really important to work quickly so the dough remains cold. If at any point your flow gets interrupted (to answer a phone call, get the kids a juice box, whatever), pop your ingredients into the fridge to keep them nicely chilled while you do your thing.
And if you’re worried that you’ve taken too long to make your biscuits and things have gotten too warm, put them into the fridge for 15 to 20 minutes, or the freezer for 5 to 10. The colder they are when they hit the hot oven, the higher that steam will make them rise!
If all else fails, the culprit could be your baking powder. Baking powder does expire after a while, so make sure it’s not past its date. This goes for self-rising flour too!
TENDER & FLUFFY BUTTERMILK BISCUITS
Ideally, biscuits should be so tender they practically melt in your mouth. To achieve this, be sure you don’t overwork your dough.
The less you knead your dough, the better. Overworked dough will produce a tough biscuit, so just give it a few quick turns to make sure all the flour is incorporated.
WHAT GOES WELL WITH BUTTERMILK BISCUITS
My family really loves to have homemade biscuits and a big pot of soup for dinner, especially during the cooler months. We especially love this biscuit recipe alongside a bowl of steamy corn chowder or broccoli cheese soup.
It also works well as a topping for our favorite chicken pot pie! Just swap out the puff pastry and use biscuits instead.
We often enjoy biscuits for breakfast too. They’re great sandwiched around a fried or scrambled egg. Even better if bacon is involved!
And sometimes we just keep it simple: buttered, with a dollop of homemade jam or apple butter, or a drizzle of sweet honey.
HOW TO STORE BUTTERMILK BISCUITS
Slip them into a zip-top bag once they’re completely cooled, and these buttermilk biscuits will keep at room temperature for about 2 days, or in the fridge for 5 to 7 days.
CAN YOU FREEZE BUTTERMILK BISCUITS?
I freeze homemade biscuits all the time! It’s great to have a stash in the freezer.
Just zip them into a freezer bag and they’ll keep in the freezer for a couple of months.
Thaw them in the fridge or at room temp.
HOW TO REHEAT BUTTERMILK BISCUITS
Nothing’s nicer than a hot biscuit!
These reheat nicely in the microwave, for about 10 to 15 seconds on full power (per biscuit).
Or, wrap them loosely in foil and heat them in a 170 degree F oven until warmed through.
Buttermilk Biscuits
Ingredients
- 2 cups (250 g) all-purpose flour*
- 1 tablespoon (14.79 g) baking powder
- 1 teaspoon (4.93 g) kosher salt
- 1/2 cup (113.5 g) unsalted butter, (1 stick), cold
- 3/4 cups (180 g) buttermilk,, cold
Instructions
- Preheat the oven to 475 degrees F and line a baking sheet with parchment.
- Place the flour, baking powder, and salt in a large mixing bowl.
- Whisk the dry ingredients together until combined, then cut the butter into half-inch cubes and add to the bowl.
- Using a pastry blender, cut the butter into the flour until the pieces of butter are no bigger than the size of a pea.
- Stir in the buttermilk until a shaggy dough forms.
- Knead the dough with your hands a few times, to gather the dough into a ball and incorporate any flour that may be left in the bottom of the bowl.
- Dust the work surface with flour, and flatten the dough to a thickness of 3/4 inch.
- Dip a 2-inch diameter cutter into flour and cut rounds.
- Place the rounds on the prepared baking sheet (with their sides barely touching) and bake for 8 to 12 minutes or until golden.


As far as I’m concerned these are not biscuits. Not the old fashioned ones. Good biscuits are always made with lard. Not butter not shortening, but with lard. I will concede I have occasionally used half lard and half butter but you need lard for that good old flavor. Other than that these are right on point. And of course bake in a cast iron skillet.
This recipe is one that’s been around for awhile now, but your step by step instructions, explanations to “the whys”, and Q&A is by far, the best I’ve ever seen!!!
I’ve been making homemade biscuits for years, my grandmother showed me how as a child, but you answered questions that I’ve had for years :). Thank you so much for taking the time to share your knowledge!! My husband has always requested biscuits too lol.
Side note: Not sure if it’s as efficient, but I freeze sticks of butter and grate it in. I flour the grater surface every few strokes.
So happy this was helpful for you Alicia! And thanks so much for the great tip!
Interested in your recipes, especially cookies, biscuits, foods, etc. thanks
Glad to know you’re liking what you see. Feel free to browse around through the different categories on the “Bake” tab, and if there is anything specific you’re looking for, type it into the search window at the tippy-top. Enjoy!
I have always wanted to make biscuits from scratch, this looks like the perfect recipe !!
It’s definitely a favorite- never let’s us down!
So funny story… my first attempt making these biscuits was not a success. I stood staring at my nicely browned, very flat disks, rather perplexed. While I was not able to buy White Lily flour, as it is not sold locally in my area on the west coast, surely King Arthur, I thought, should have sufficed. Then the realization hit…”self rising” flour. I used all purpose flour. It pays to read a recipe before you start, even one that only has three ingredients…lol! ; )
I had everything I needed on hand and quickly made up another batch within 1o mins, adding 3 tsp of baking powder and 1 tsp salt to the mix. Success! They rose beautifully and were so yummy just out of the oven slathered in butter and Marionberry jam. My husband is so impressed with me right now. Thanks for another 5 star recipe Allie! I promise to thoroughly read your next recipe, before I start. And I do have plans to order White Lily flour, since I will definitely make these again, and again, and again. So easy!
So happy it worked out in the end Susan! They sound mouthwatering with the marionberry jam. You’re making me hungry!
Hudson Cream self rising flour works best for me.Thanks for sharing.I did learn a couple of new tricks in this recipe.
I’m waiting for my delivery of White Lilly Self-rising flour. So excited to try this recipe. I’ve been making biscuits every weekend for my teenage daughters sleepovers and I just don’t have it down yet. I’m looking for tall, fluffy biscuits. Fingers crossed.
Wishing you the best of luck Lori!
These look amazing! My son wants me to make them. Hardee’s is the only biscuits that I like, but I think these will now take 1st place in my book! What kind of Self – Rising Flour can you use, when you cannot find White Lilly Flour? I do not pay bills or buy anything online. If it cannot be purchased with cash & in a store, I do without.
Hi Susan! So happy you like the recipe. Any kind of self rising flour will do!
I find your web site very interesting. Happened upon it while searching for a store that carried cake flour. Thank you for your tips. I had know idea that cake flour would make such a difference. Wish me luck!! Thanks again!!!
My pleasure Dola! Glad I could be of help!
Hi! As a born and bred southerner from South Carolina, this is the only recipe we use to make biscuits. Any other recipe is just plain wrong. I will say one tip I learned from my Granny. When you are cutting your biscuits don’t twist the cutter. This seals the biscuit and it will not rise straight up, it will be dome-like. Just push down then lift up. It makes a prefect biscuit to cut open and fill with butter and jam. Thank you for sharing! Happy Baking!!
Great tip! Thanks so much for sharing. Happy baking to you too!
Holy smokes, these look amazing!! I need to make a larger quantity (like about 70) for a party…. any tips on making ahead, or freezing, storing, etc.?
Hey Monica! I do have a tip for you- freeze the cut biscuits on a parchment-lined baking sheet, unbaked. In my opinion, there’s nothing better than a freshly baked biscuit, warm from the oven. So I would pull them from the freezer at least 2 hours before serving, to let them thaw a bit. Keep them in the fridge- you still want them to be cold when they go into the oven. Follow the rest of the recipe directions as written, and they should come out puffy, fluffy and piping hot for your guests!
Ya that didn’t work out as planned. Biscuits were to sticky and wet to cut out. After a fun time of adding flour and very messy process I got 8 Biscuits out of it. In oven now..
You definitely want to flour your work surface, hands, dough, and cutter when making these biscuits. It will make things much easier. That said, if it’s very humid where you live, you may be able to cut back a little on the amount of buttermilk. You’ll know when you have the right consistency. I hope they bake up nice for you.
omigosh these biscuits are everythiiiing! They’re just perfect
Thank you so much Kayle! We were all so pleased with the way they came out. Hope you’re having a great weekend!
Uh
NO white Lily in California
Hey Debbi- just follow the instructions at the bottom of the post if you’re interested in purchasing White Lily products. Thanks!
i’m with your man. there is nothing better than a biscuit. nada. not a thing. other than maybe slathered in butter. and yours look so, so good and flaky!
Sounds like you and my husband have a lot in common, lol! Biscuits are definitely a top favorite for him. And you are so right, when they’re done well, nothing can beat ’em! Thanks so much Cathy!
Alliie, I was kind of sad but happy when I seen this recipe. My grandmother passed away on September 10 1987.She always made the best buscuits. When I was a little girl, my family would always go to her house the week of Thanksgiving and stay with her while my Daddy and uncle would deer hunt. She would always make me biscuits with yummy, smooth, delicious chocolate gravy to pour over the piping hot biscuits. Thanks for posting this beautiful recipe from my childhood.
Aw, this is so nice to hear Beverly. Isn’t it funny how much food is tied to our memories? I love that this recipe made you remember your grandmother. She sounds like she was a really special person. I would have loved to have tried her biscuits and chocolate gravy! Thanks so much for reaching out and sharing your story, I’ll be carrying it in my heart.
that’s some serious lift!! 🙂
Isn’t it though? I’m telling you, that flour is so light! Thanks Grace!
Allie, these biscuits look amazing and I LOVE White Lily flour!!!! I’m making biscuits this weekend!! woot woot!
Hooray! Hope you have fun baking biscuits Alice! Thank you!
Hi. Is 500′ correct? After 7mins mine were still very wet in the centre and burning on the outside …..boohoo
Hi Sharon! Yes, 500 is correct- that is the temperature called for on the White Lily recipe and that is the temperature at which I baked the biscuits pictured here. It sounds like your oven might be off. I would suggest buying one of those little $10 oven thermometers from the baking section of your local supermarket. It’s surprising how far out of calibration our ovens can wander!
I neef to understand why you call them buttermilk biscuits when it looks like a scone.
I make scones just like these except I add in an egg.
Are you in the US Linda? I know it’s not the case in the UK and other countries, but here in America we call these “biscuits.”
That is how I feel about scones! They are so quick to make, from start-to-finish, and then you have freshly baked goods for weekend mornings. These biscuits are sky-high, and looks so fluffy and flaky! I am dreaming about one of these covered in melted butter, hot from the oven. Lovely!
Aw, thank you so much Sarah! I am totally a scone lover too- now you’ve got me thinking I should bake up a batch this weekend 🙂
Hi, its noon now and I would like to prepare the dough and cut out everything and bake them early next morning for breakfast. Can I keep the prepared dough in the fridge the day before, but all wrapped up with cling wrap?
Honestly I’m not sure I would recommend this. Once the liquid goes into the mix, it activates the baking powder, and if it sits too long there won’t be any oomph left to rise the biscuits during baking. If anything, I would measure the dry ingredients out into a bowl & cut in the butter, then add in the buttermilk just before you’re ready to bake. Good luck!
Love.