Swiss Roll Cake
As an amazon associate I earn from qualifying purchases.
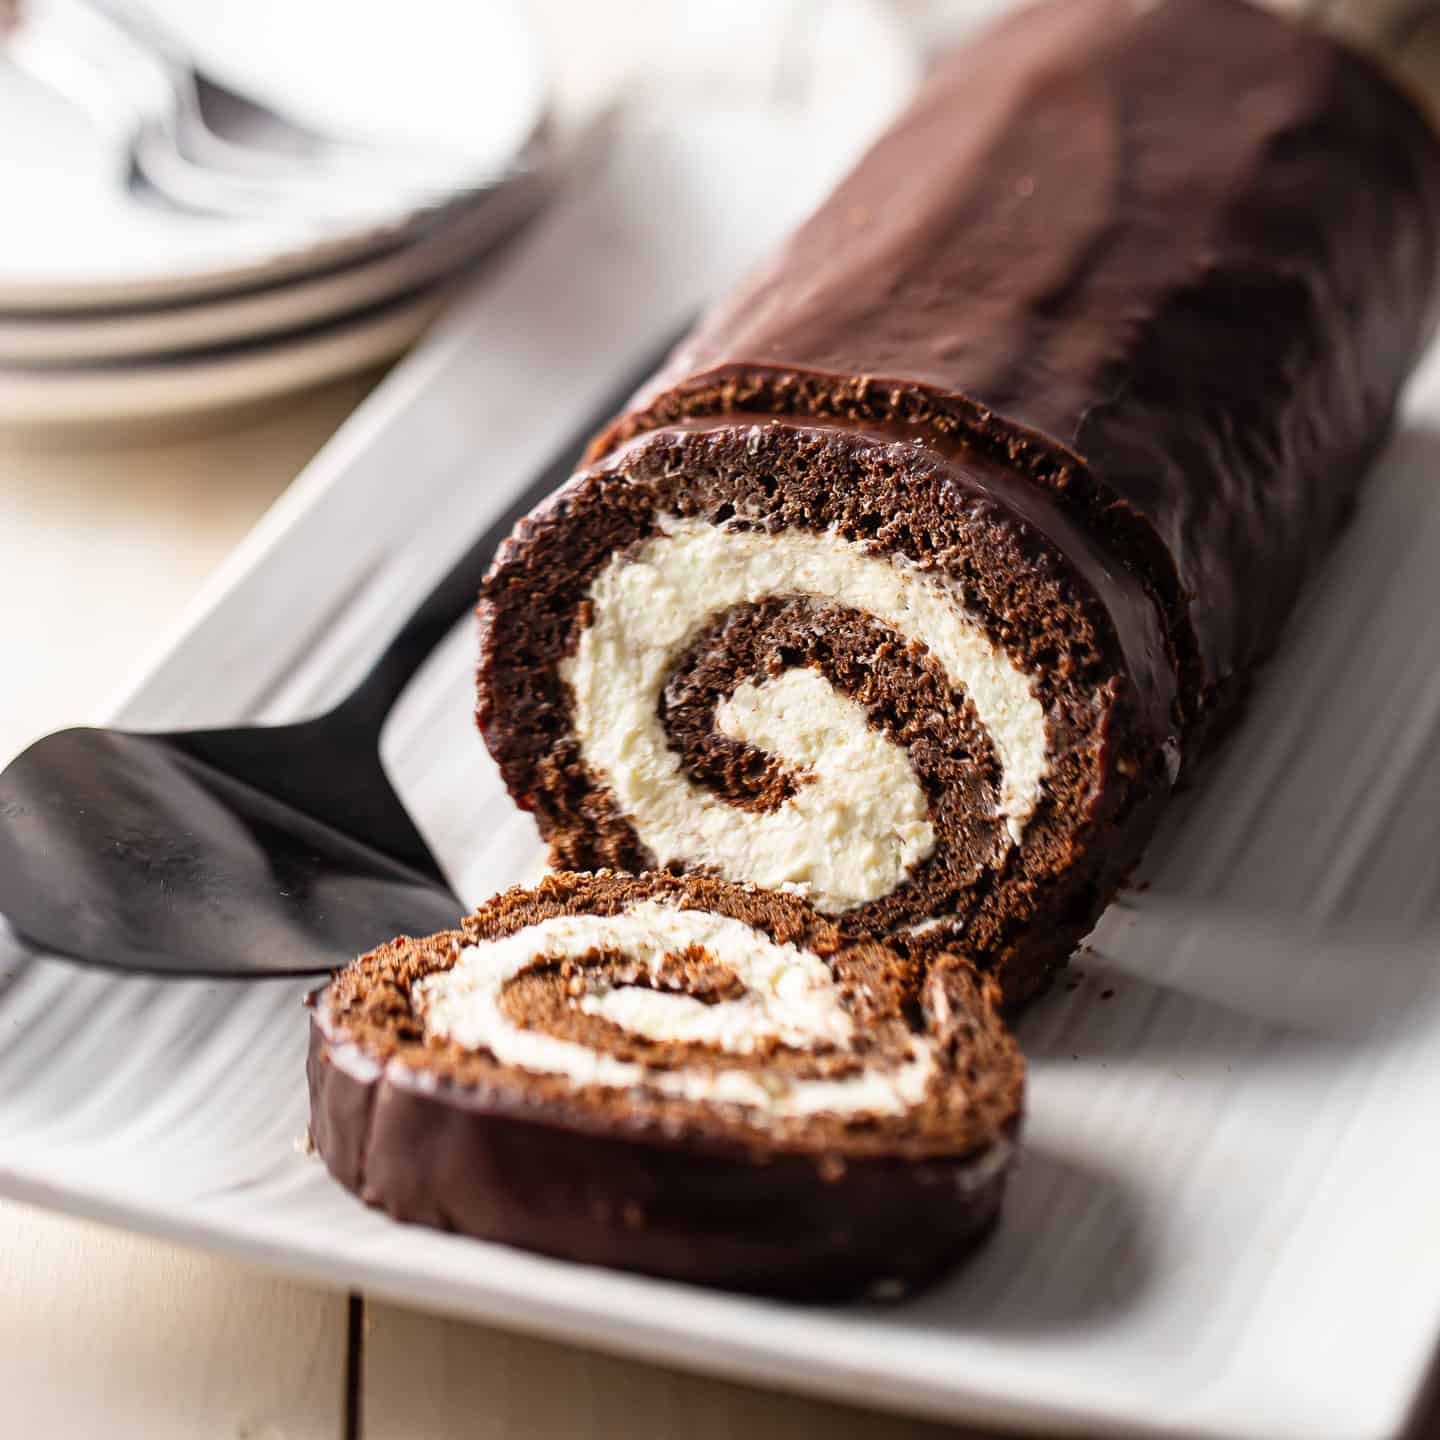
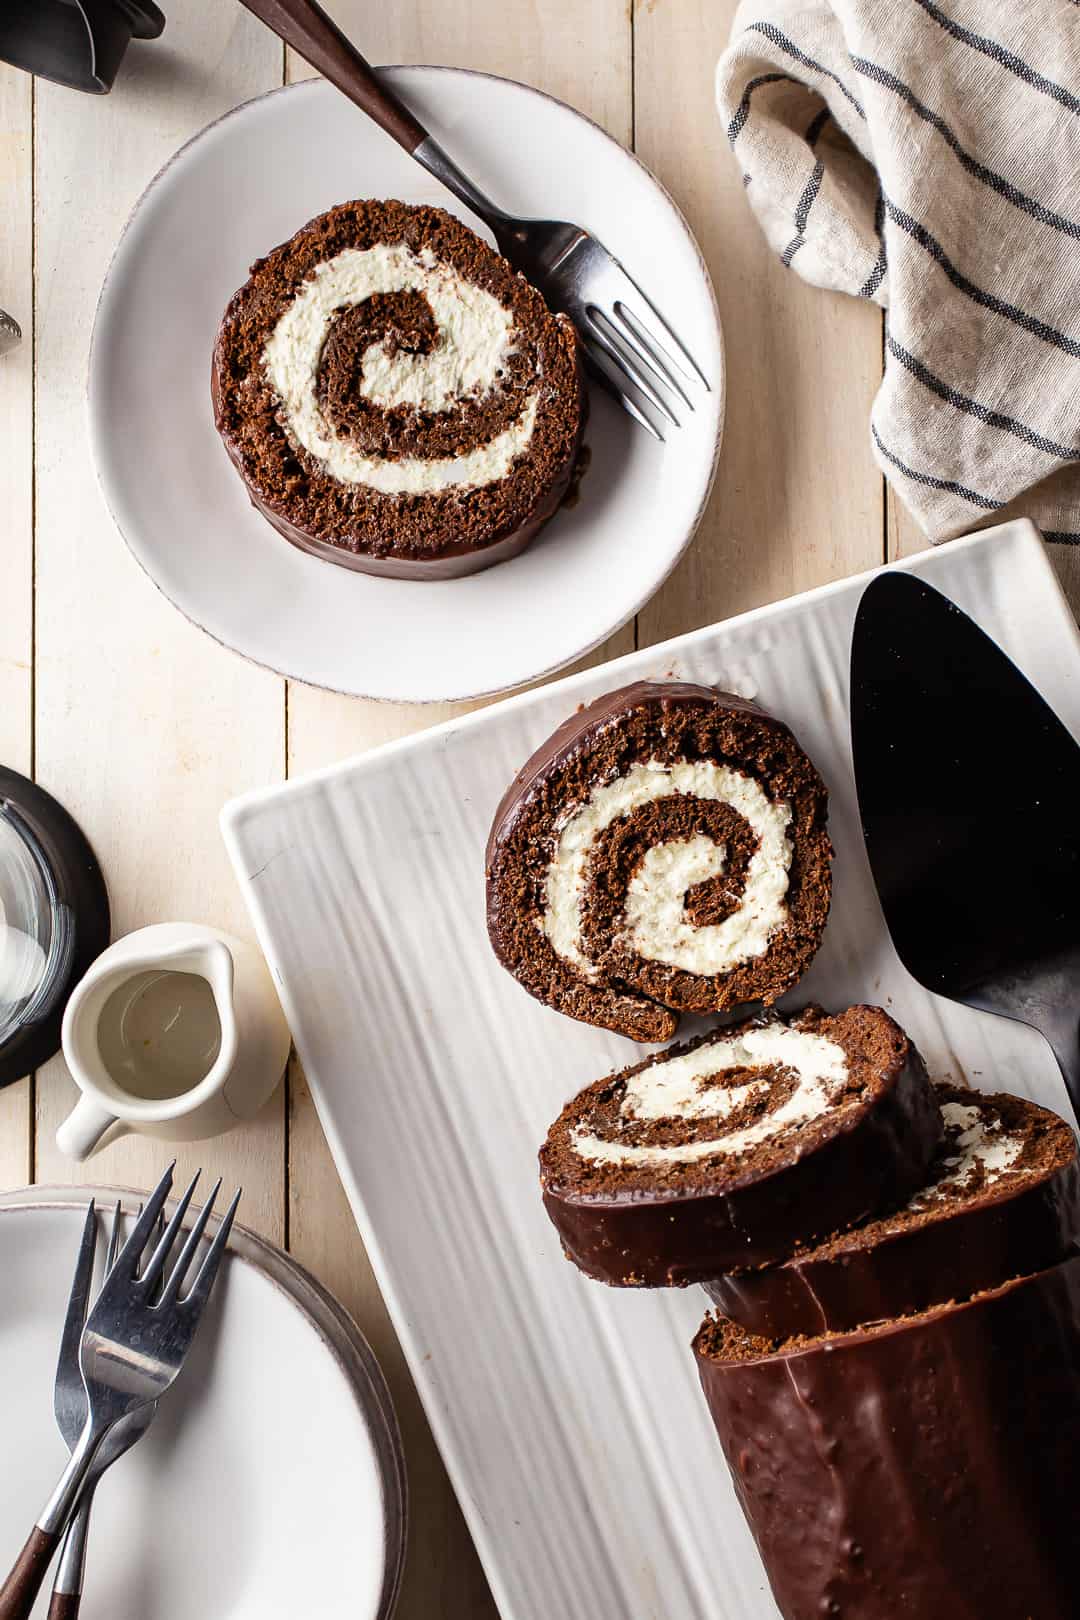
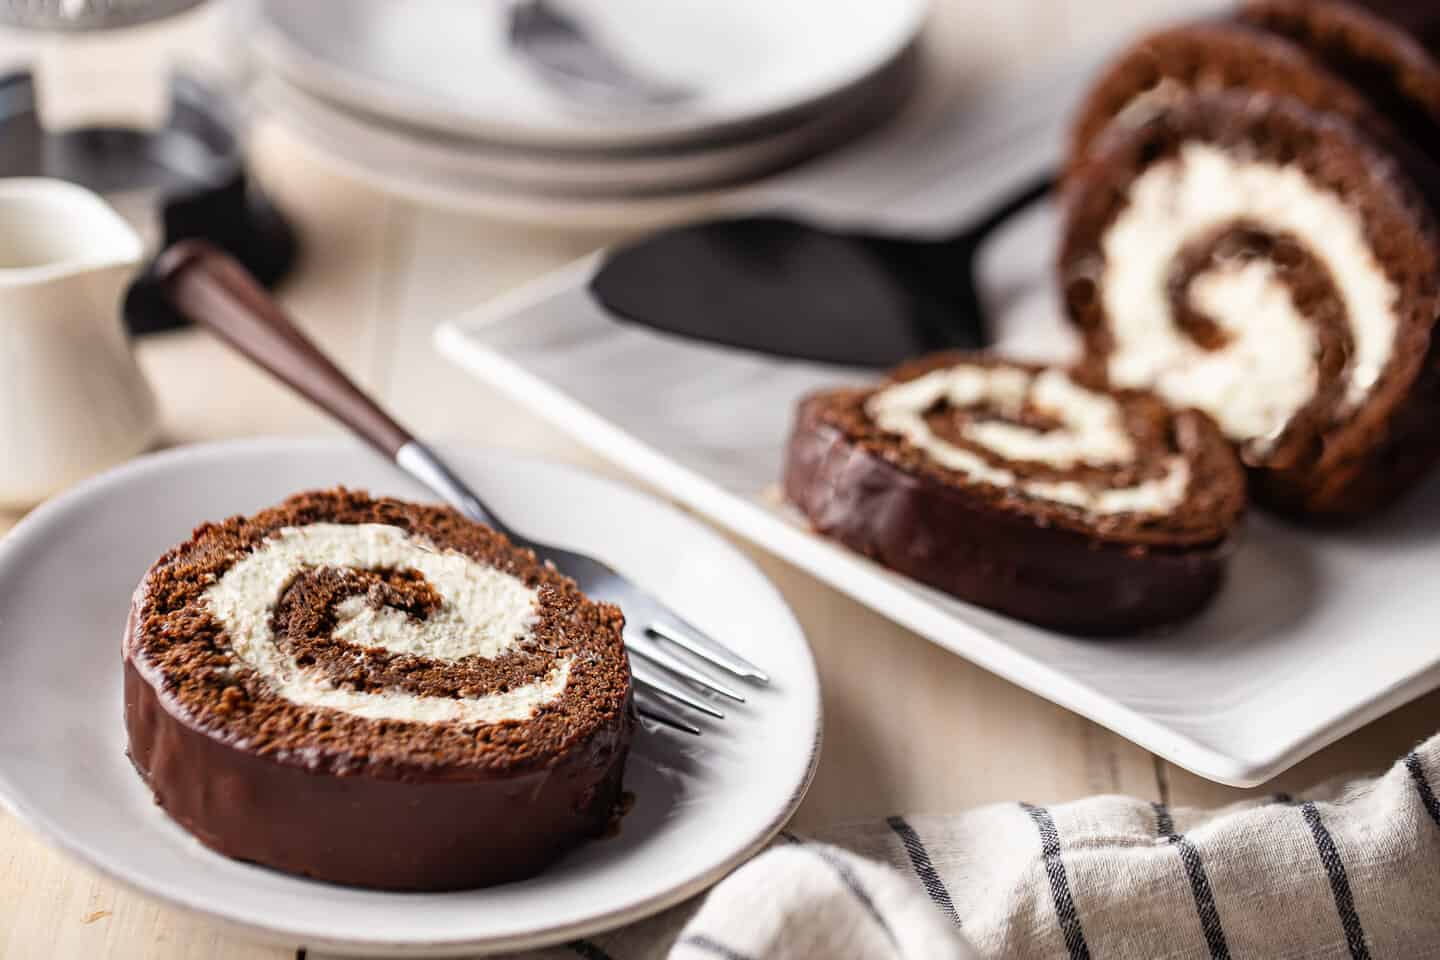
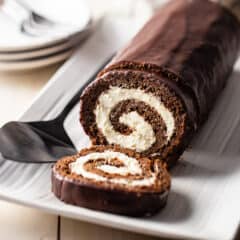
Swiss Roll Cake: Rich chocolate sponge cake spiraled around a light, fluffy whipped cream filling and coated with chocolate glaze. So good!
If you really want to impress, Swiss roll cake is the answer!
Just look at how beautiful and eye-catching it is! The contrast of dark chocolate cake and white creamy filling is just gorgeous!
And it tastes incredible too. The cake is moist yet springy and light, and it has such a great deep chocolate flavor. The filling is somehow rich and airy at the same time, with just the right amount of sweetness to balance out the chocolate.
But I have to be real with you: These kinds of roll cakes can be really challenging to make. Even for a very experienced baker such as myself!
I've been baking both professionally and as a home cook for decades (I seriously can't believe how old I'm getting!). Developing all the recipes on this website for the last decade or so has taught me a ton. And I bake almost every day. So I think I can say that my skill level is pretty high, not to brag or anything.
But I will admit that when I make a roll cake I often really struggle. The one you see here, for instance, I made it 5 times. The first one actually came out the best but I kept thinking I could do better. And I don't regret it because it allowed me to really experiment and see what works and what doesn't.
Because I spent so much time practicing this Swiss roll recipe (in so many different ways!), I'm able to share all that with you. My hope is that by reading this post, you'll have a really easy time!
So don't fear! If you like to get stuck in with a fun baking project, you'll really love this!
And if you happen to be a roulade cake pro, you may want to also take a crack at my Yule log cake and my pumpkin roll recipe!
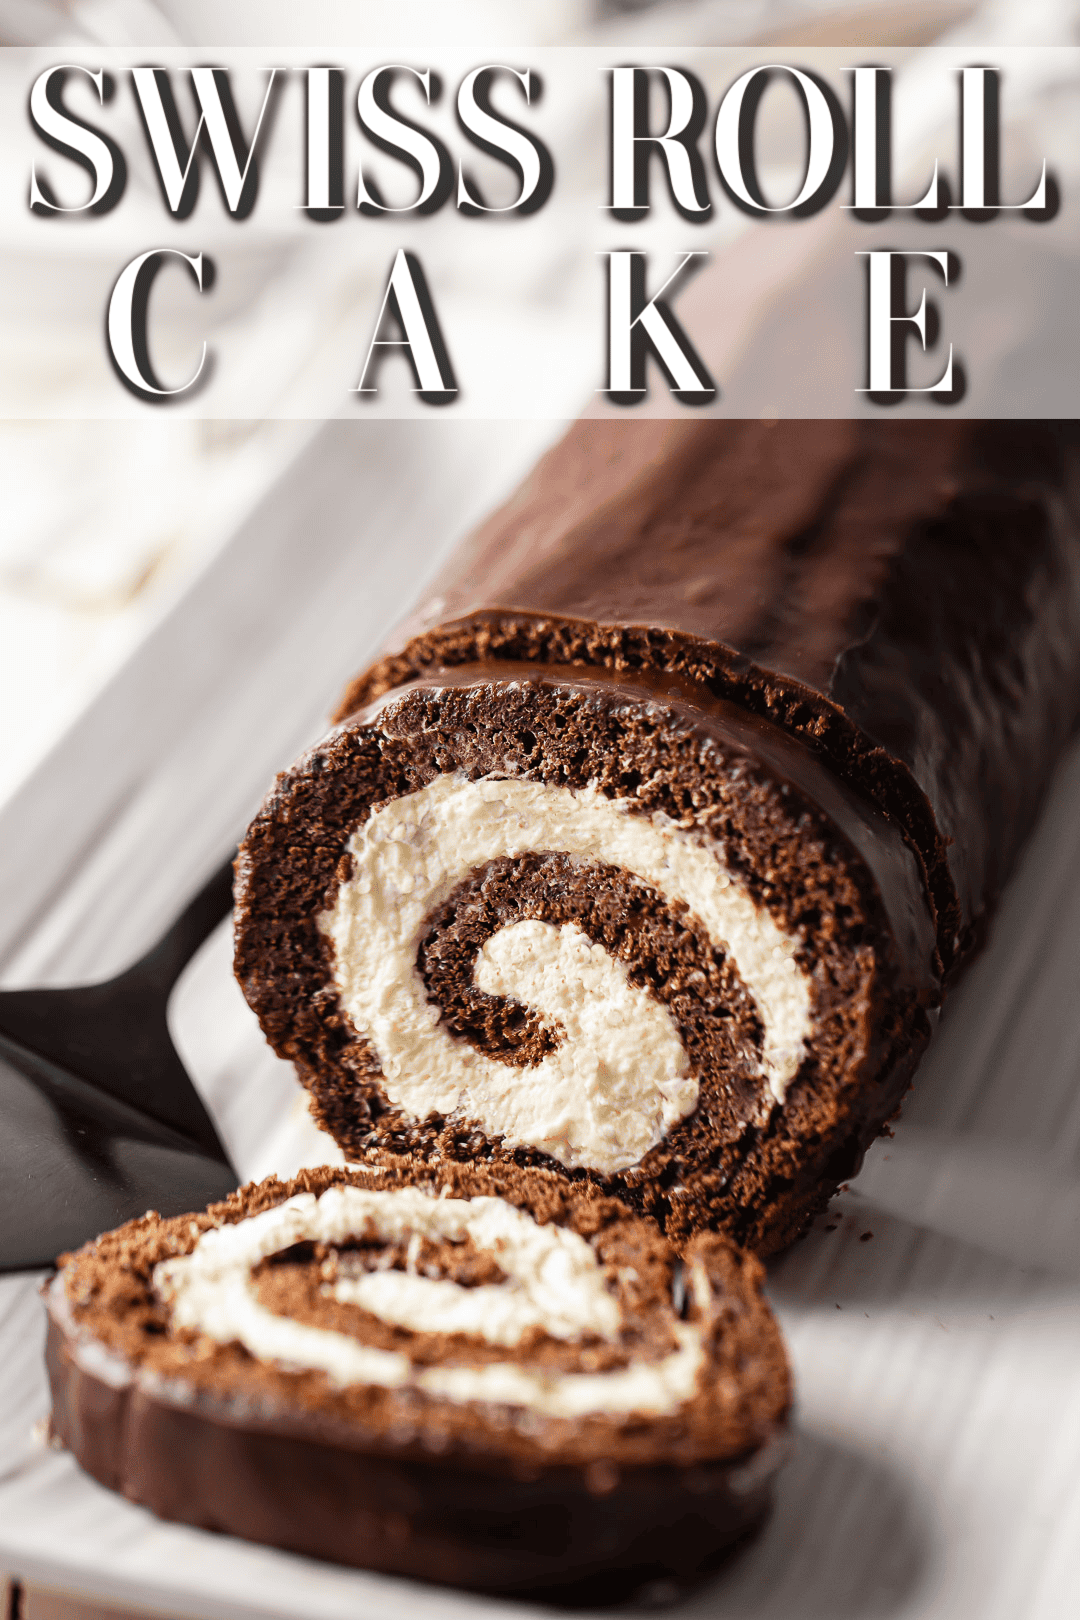
Table of Contents
- What is Swiss cake roll?
- Why this is the best Swiss cake roll recipe
- What does it taste like?
- Ingredients
- Special equipment
- How to make Swiss roll cake
- How to serve
- Expert tips
- Frequently asked questions
- A few more of my best cake recipes
What is Swiss cake roll?
Swiss roll is a roll cake that combines rich chocolate sponge cake with whipped cream. It's then enrobed in a glossy chocolate glaze.
Why this is the best Swiss cake roll recipe
- Tastes amazing: The contrast of deep, dark chocolate with airy, sweet whipped cream is just out of this world!
- Fun challenge: If you're ready to take your baking to the next level, this is the recipe for you.
- In-depth instructions: I practiced the bejesus outta this one, trying to arm you with all the best info so you have guaranteed success!
- Impressive: Everyone will be so impressed with the beauty of this masterpiece!
What does it taste like?
When you take a bite you can't help but get a little cake plus a little filling at the same time.
The cake is moist and deeply flavorful, but it has a light, spongy texture like nothing else.
The filling is whisper light and cool, with an airy, mousse-like texture. And the milky sweetness contrasts with the dark chocolate in the most incredible way.
A shiny chocolate glaze adds another layer of deep flavor that's so indulgent and satisfying!
Ingredients
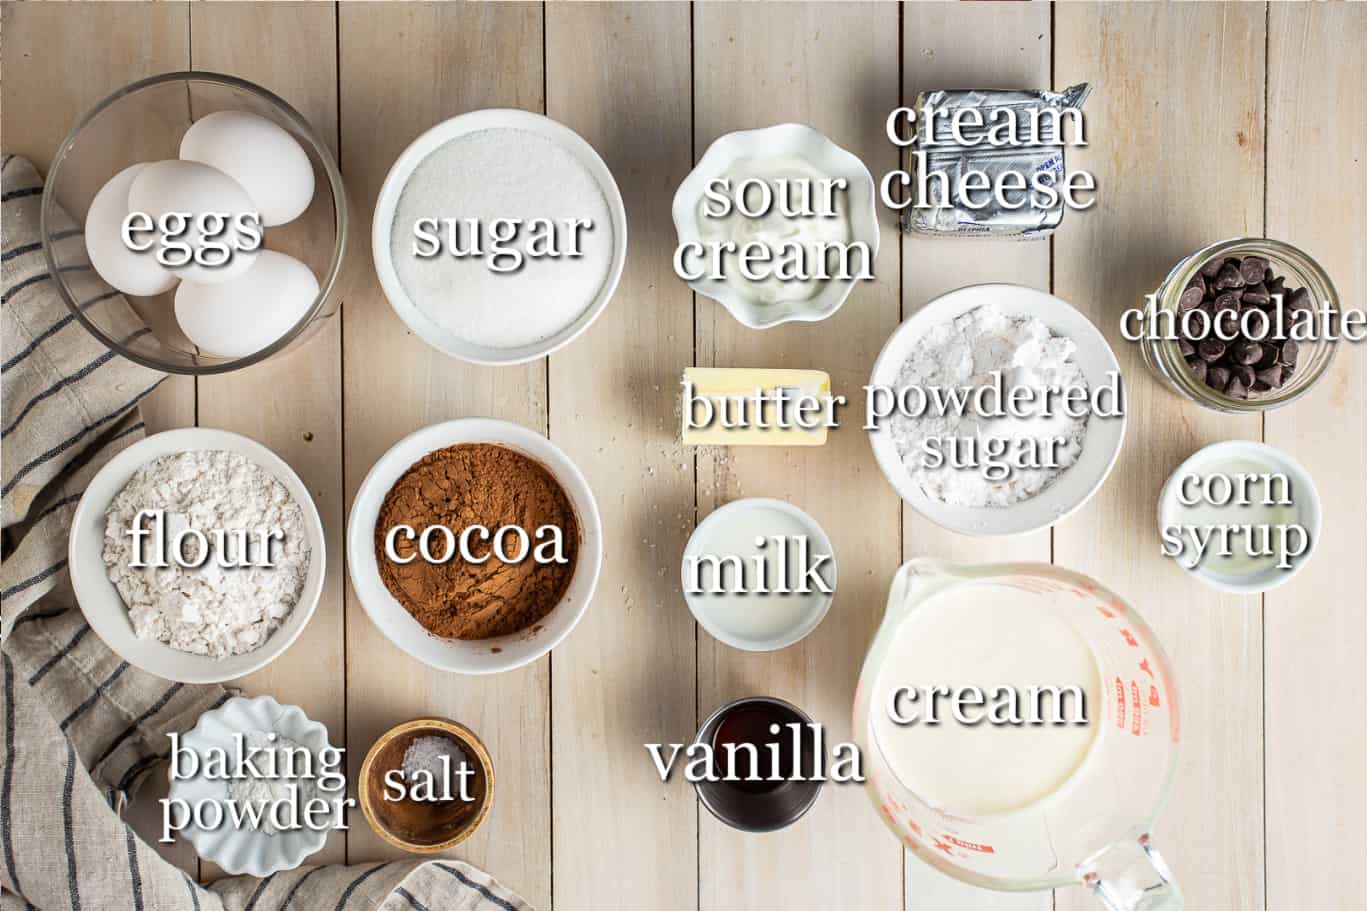
Eggs: Eggs give this Swiss cake roll its distinctive springy texture. Use large chicken eggs, preferably at room temperature.
Sugar: There is granulated white sugar in the cake for sweetness and to keep it moist. And the filling has powdered sugar in it. Powdered sugar works well because it dissolves so easily into the cream. You'll also use it to prevent sticking when you roll the cake into its signature shape.
Flour: Flour provides the cake's structure. I like all-purpose flour best because the biggest challenge is that sometimes the cake cracks. And I feel like all-purpose flour has a little more strength than cake flour, which can sometimes yield an extremely delicate result.
Cocoa: This ingredient adds some structure too, but it's mainly about the flavor. Cocoa is pure cacao with nothing else, so it gives a really prominent chocolate flavor. I like natural, unsweetened cocoa powder best because I think it tastes the most purely of chocolate. Dutch processed cocoa can also work if you'd like more of an Oreo-like taste.
Baking powder: Baking powder, heat, and the acid in the sour cream get together to form a chemical reaction that makes the cake rise. It really helps to provide that light, spongy texture.
Salt: Salt carries the flavors and intensifies them. Kosher salt is my go-to because it's pure, without any bitter-tasting additives like iodine.
Butter: Butter gives moisture to the cake and a richer mouthfeel that allows all the yummy flavors to linger on your palate. Unsalted butter is best since different brands of butter can have different levels of saltiness.
Sour cream: For moisture and flavor, and also to give that little bit of acid to activate the baking powder. You could also use the same amount of plain, unsweetened Greek yogurt or buttermilk.
Milk: Just a little bit, to keep the cake moist. Whatever kind you keep on hand is fine. Even a plant-based milk will work!
Vanilla: Vanilla extract gives a sweet fragrance to the cake that complements the chocolate.
Cream cheese: Helps give body to the filling and make it a little thicker and more stable. Use the kind that comes in a block- it has the least amount of air or water added to it. You don't taste the tanginess a whole lot, because the cream really mellows it out. But if you're really sensitive and you don't like it, you could probably substitute mascarpone for an even milder taste.
Cream: Look for heavy whipping cream. If you live outside the US, you may know it as "double cream." Half and half won't work, and neither will light cream. You need the highest possible fat content in order for the filling to whip up to stiff peaks.
Chocolate: This is for the glaze. I like chopped semisweet baking bars best, but you could use milk chocolate or white chocolate too. Chips will work in a pinch, but only if they're really high quality.
Corn syrup: An optional ingredient that helps make the glaze shiny. Either dark corn syrup or light corn syrup will work just fine.
Special equipment
- Pan: You will need a 10x15-inch jelly roll pan. The size is very important!
- Parchment: To line the pan, prevent sticking, & help roll the cake.
- Measuring cups and spoons: Follow my guide on how to measure ingredients.
- Mixer: Either a handheld electric mixer or a stand mixer, fitted with the whip attachment.
- Silicone spatula: For folding the batter and scraping the bowl.
- Sieve: For sifting a layer of powdered sugar onto the cake after baking.
- Towel: Lay a clean kitchen towel over the cake before rolling.
- Rolling pin: This is optional, but I like to roll the cake around a rolling pin to help shape it.
- Offset spatula: Helps spread an even layer of filling over the cake.
- Wire rack: Allows excess glaze to run off and away from the cake roll.
How to make Swiss roll cake
Carefully follow these steps and you should have great success!
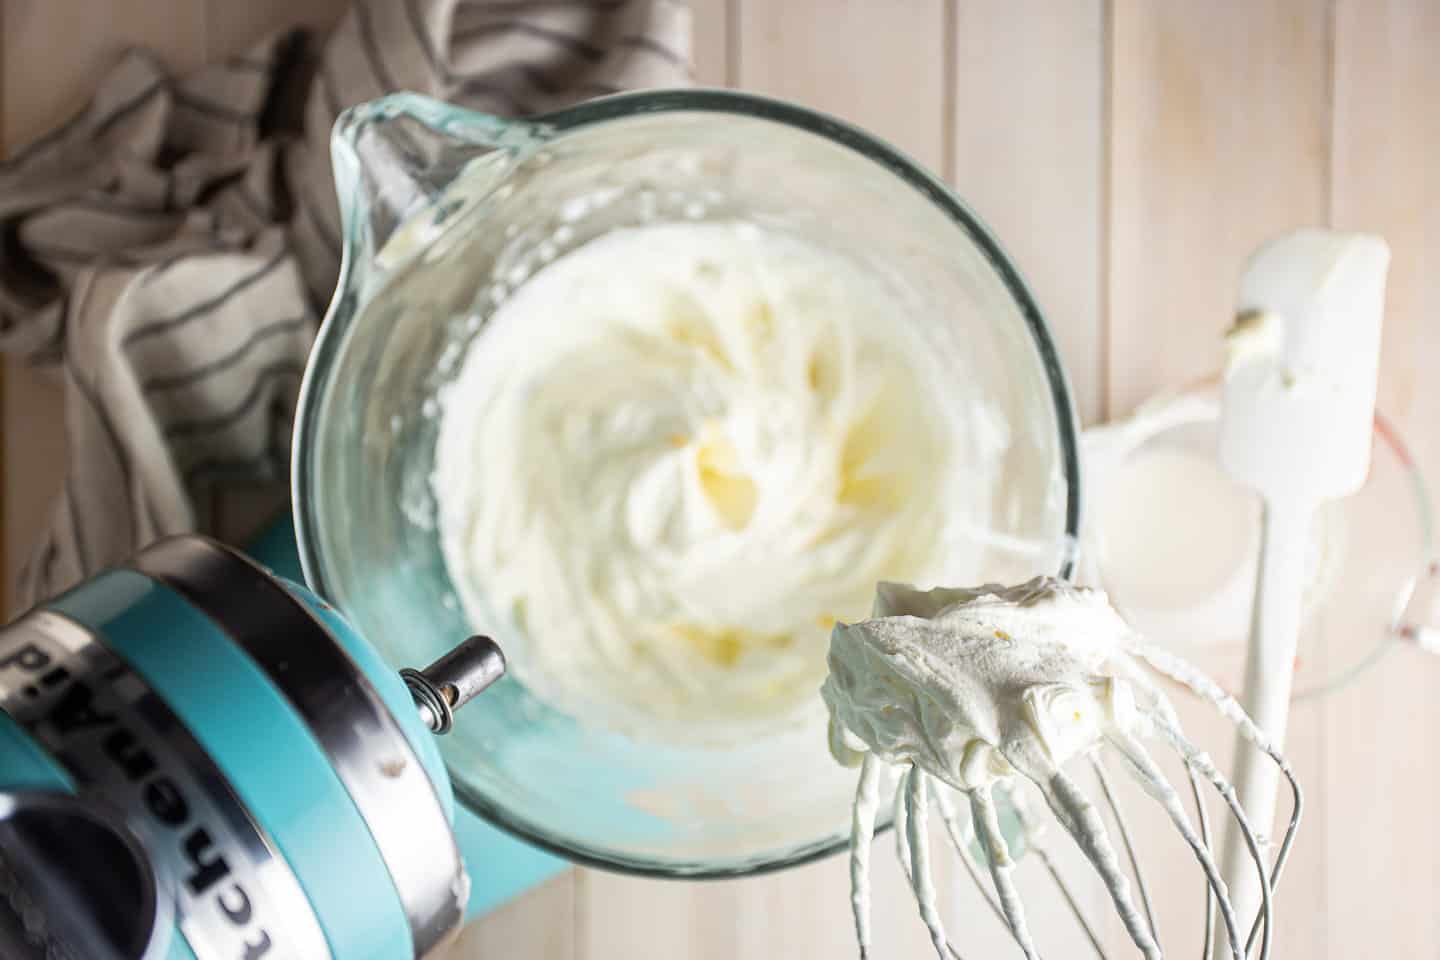
Step 1: Whip the eggs and sugar
Place the eggs and sugar together in a large mixing bowl, and whip them together until they're very pale, very fluffy, and tripled in volume. This typically takes no less than 5 full minutes on medium-high speed.
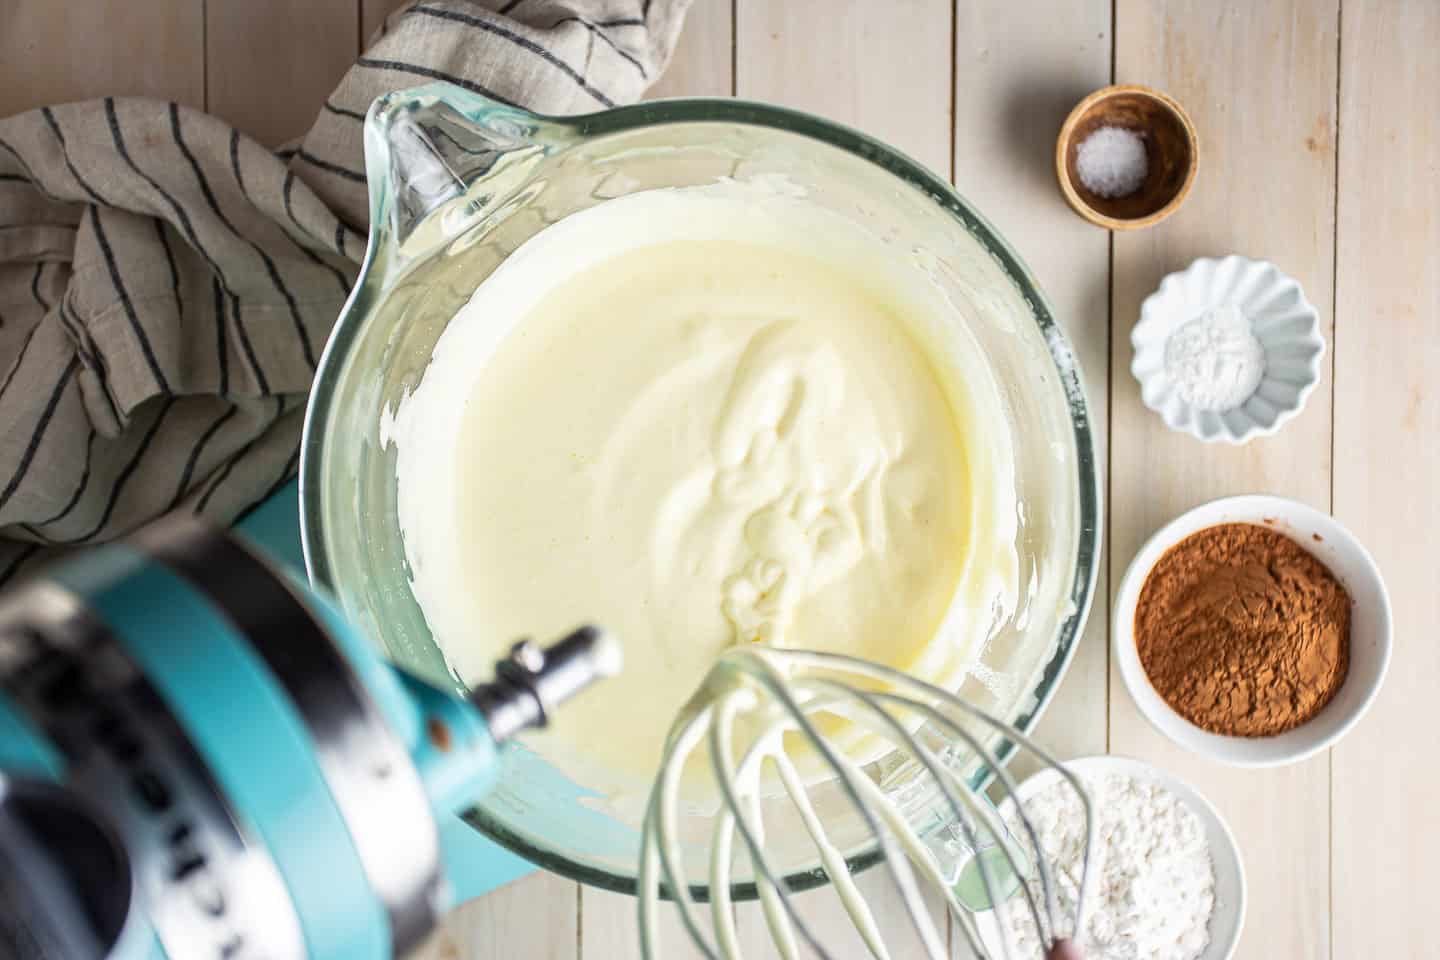
When you lift your whip from the mixture, it should fall in a thick ribbon and remain on the surface for a few seconds before melting in.
Step 2: Fold in dry ingredients
Next, add the flour, cocoa, baking powder, and salt.
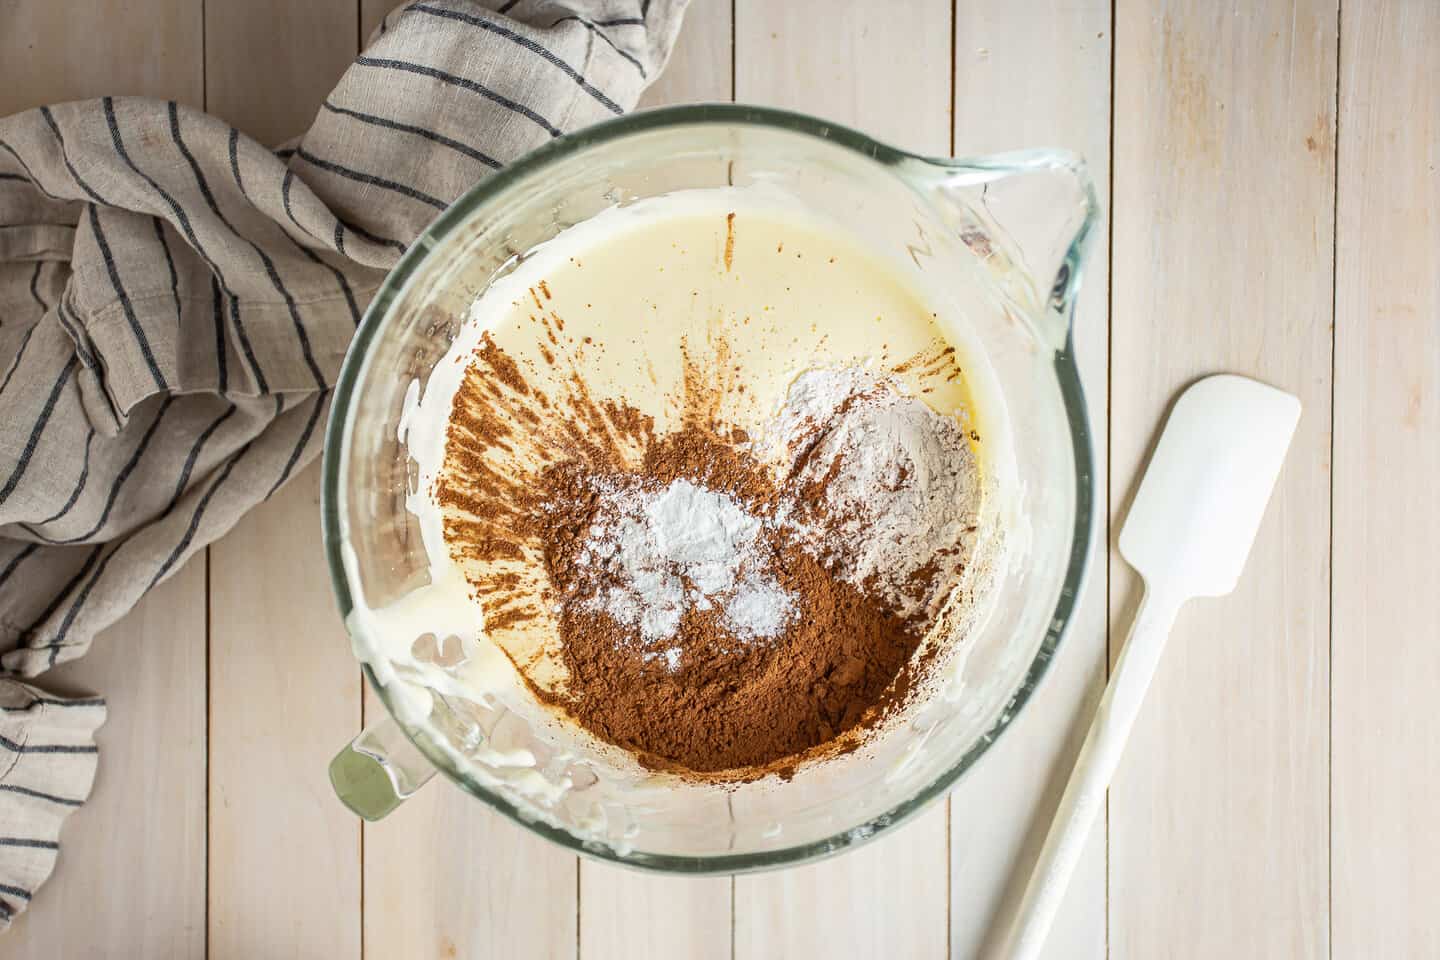
Fold these in gently until just barely combined.

Step 3: Fold in liquid ingredients
Next, stir the melted butter, sour cream, milk, and vanilla extract together.
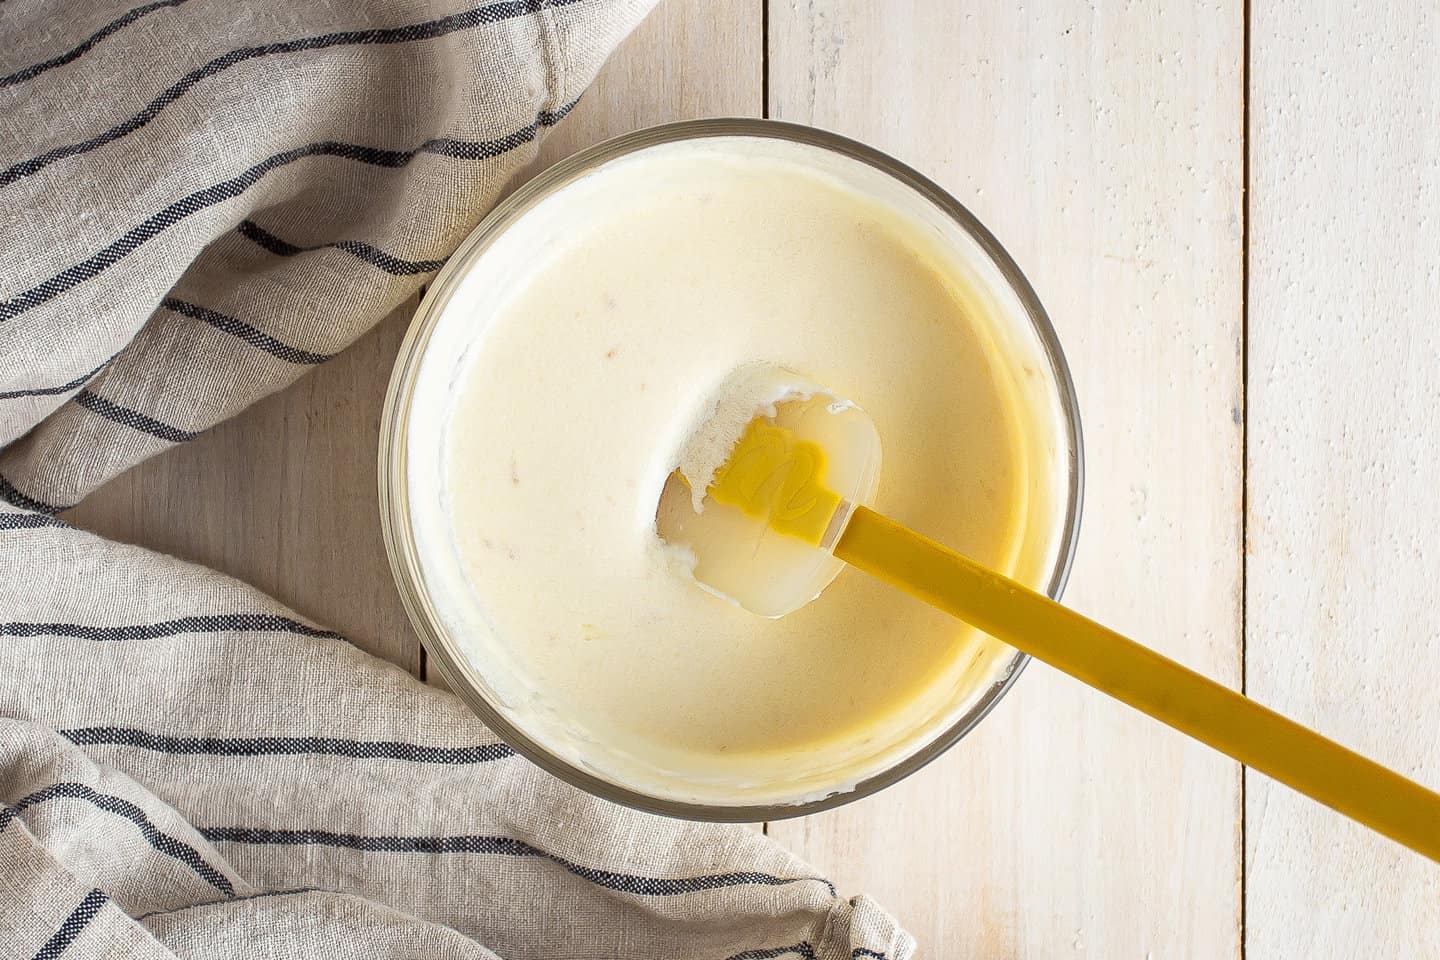
Add this mixture to the batter and fold it in gently.
Step 4: Bake
Transfer the batter to a parchment-lined jelly roll pan.
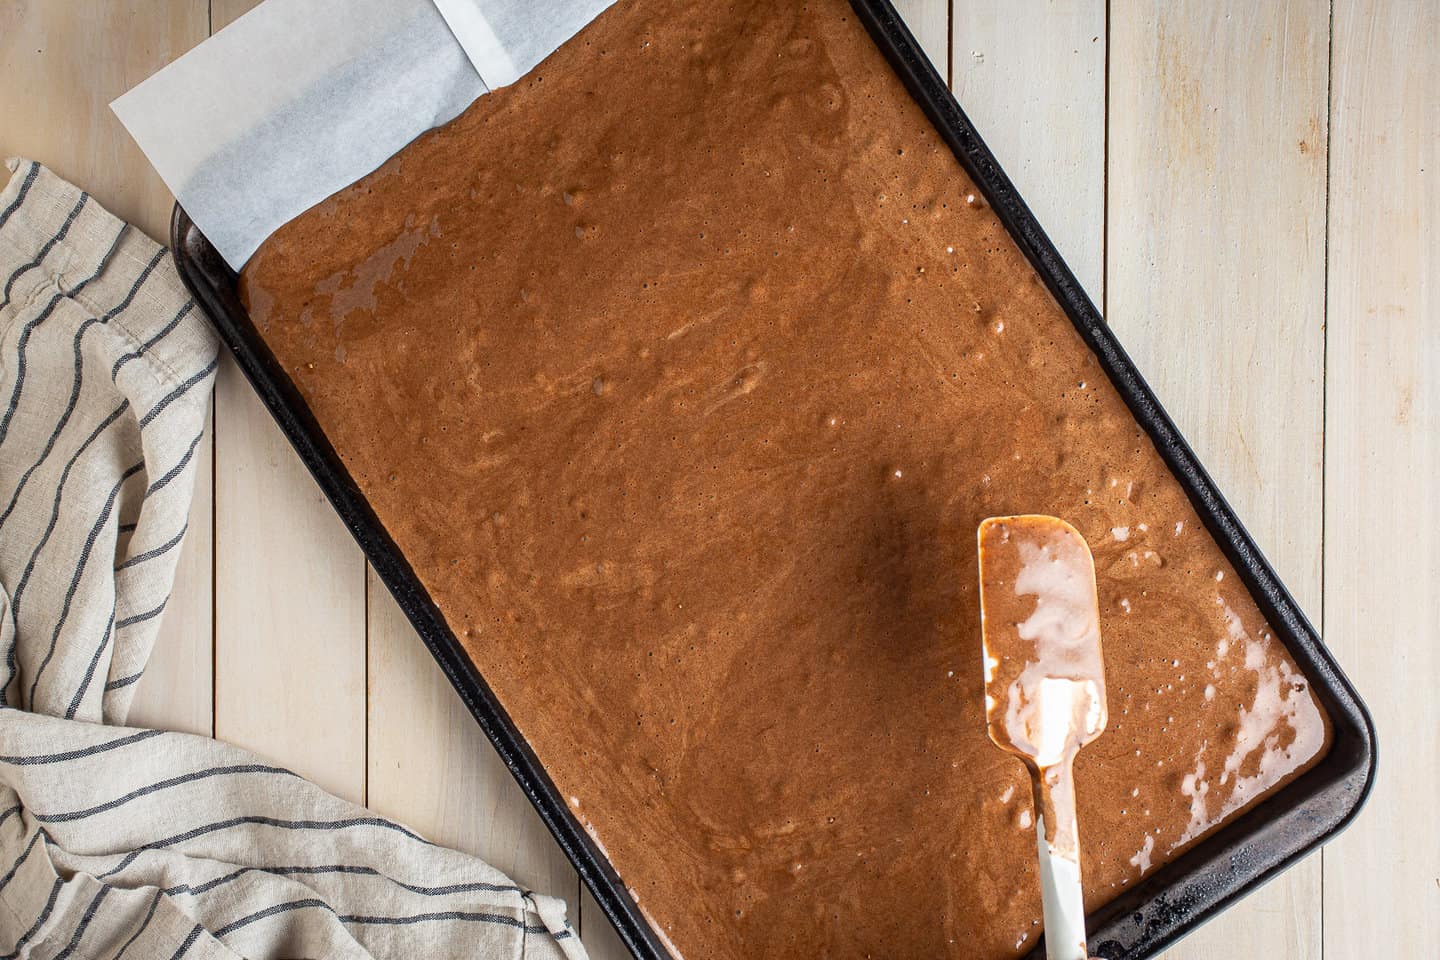
Bake the cake until it's no longer glistening, feels dry and set around the edges, and springy in the center.
Step 5: Cool
While the cake is still warm, dust it liberally with powdered sugar to prevent sticking.
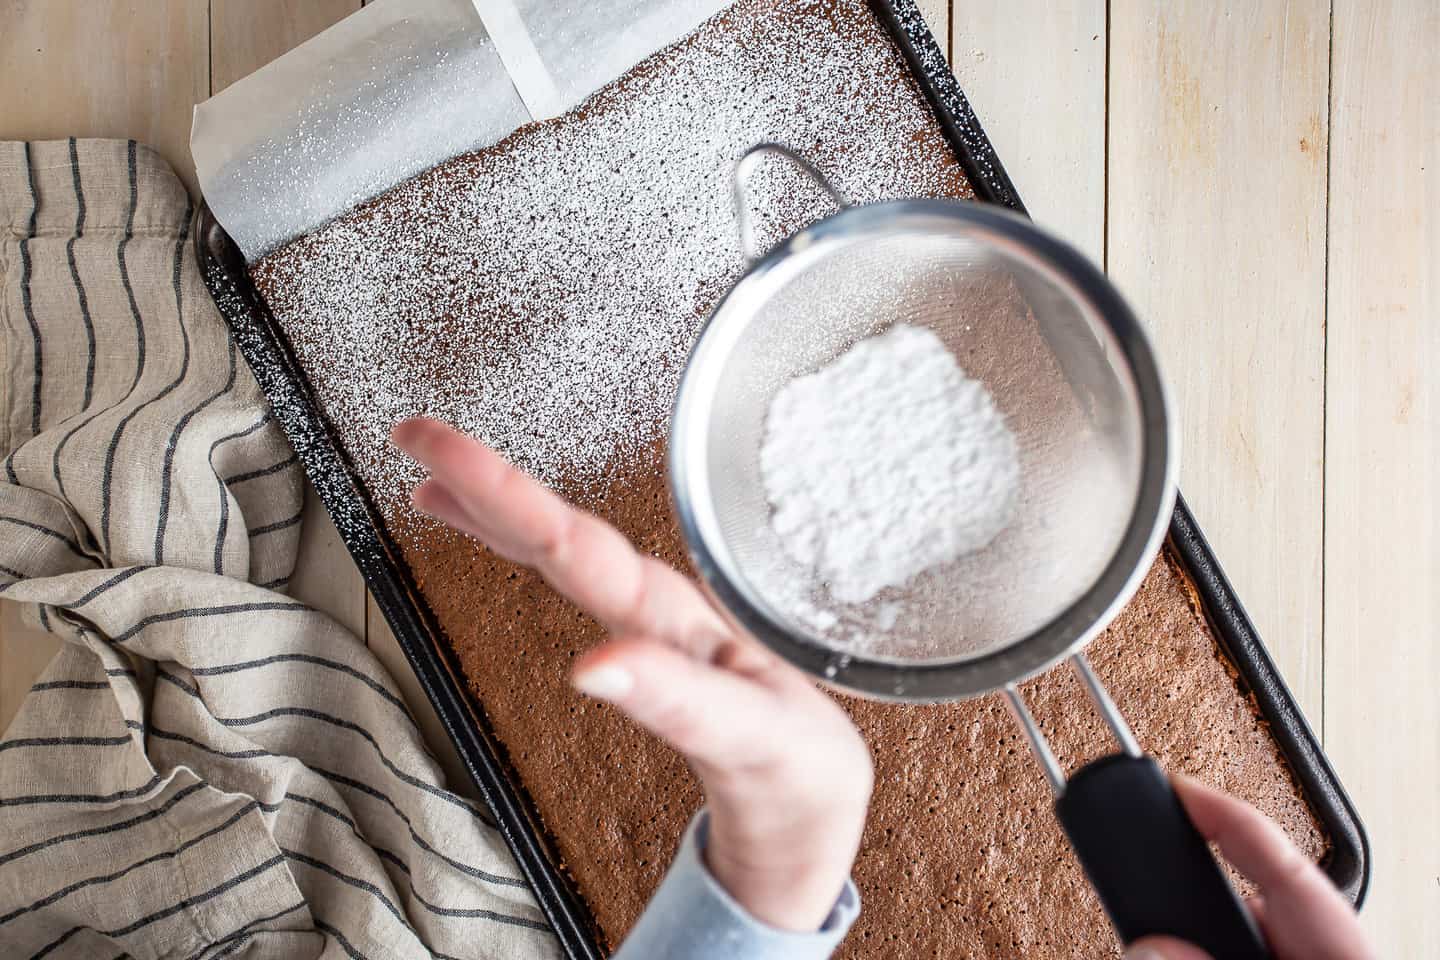
Then lay a clean kitchen towel on top.
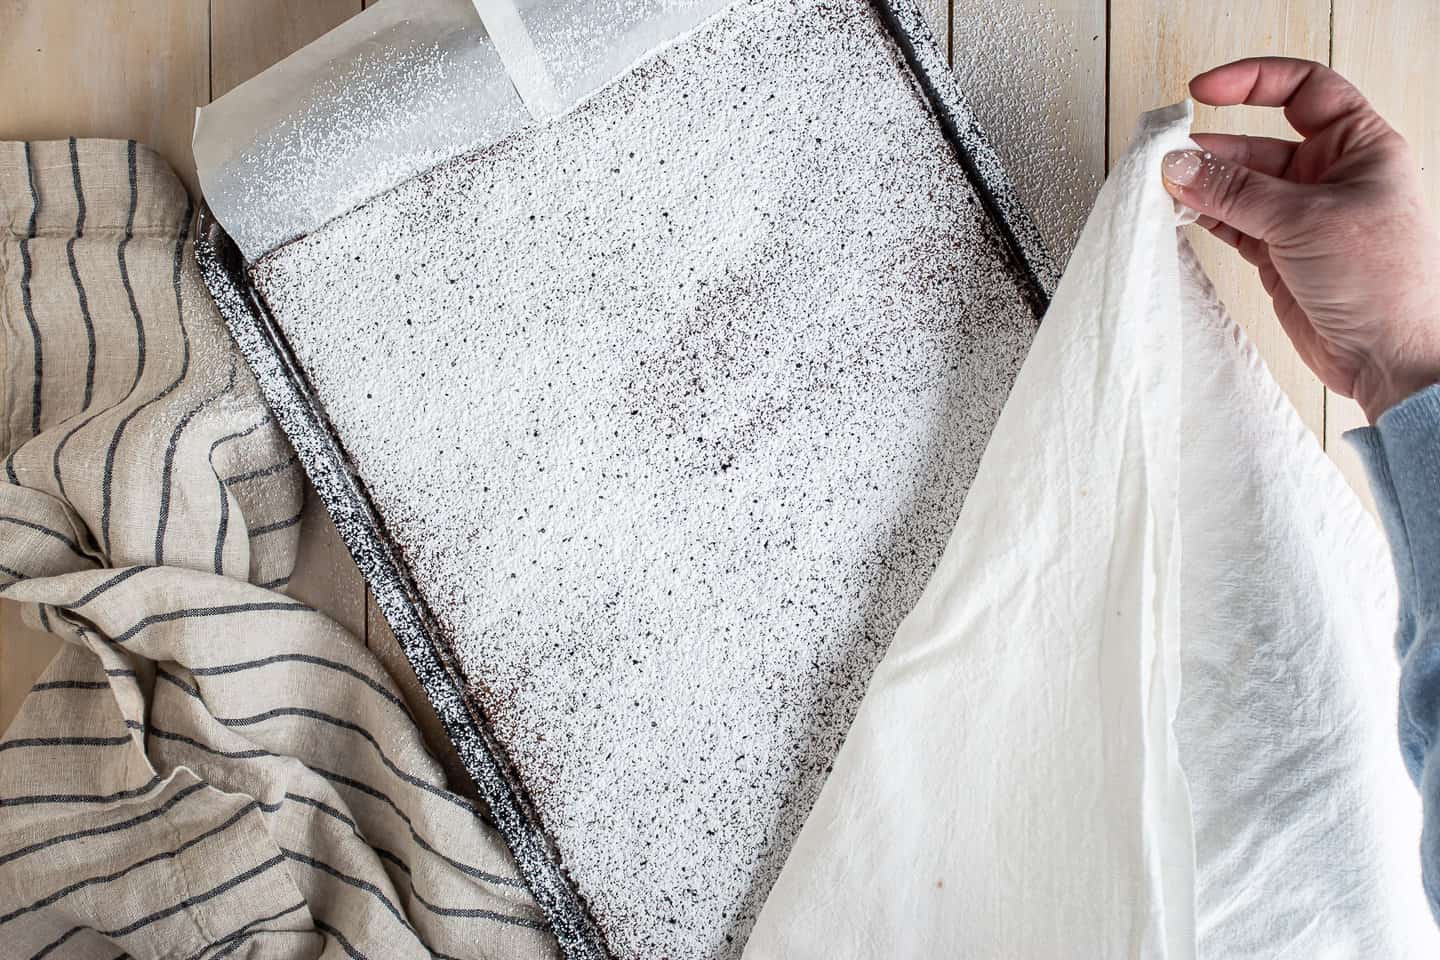
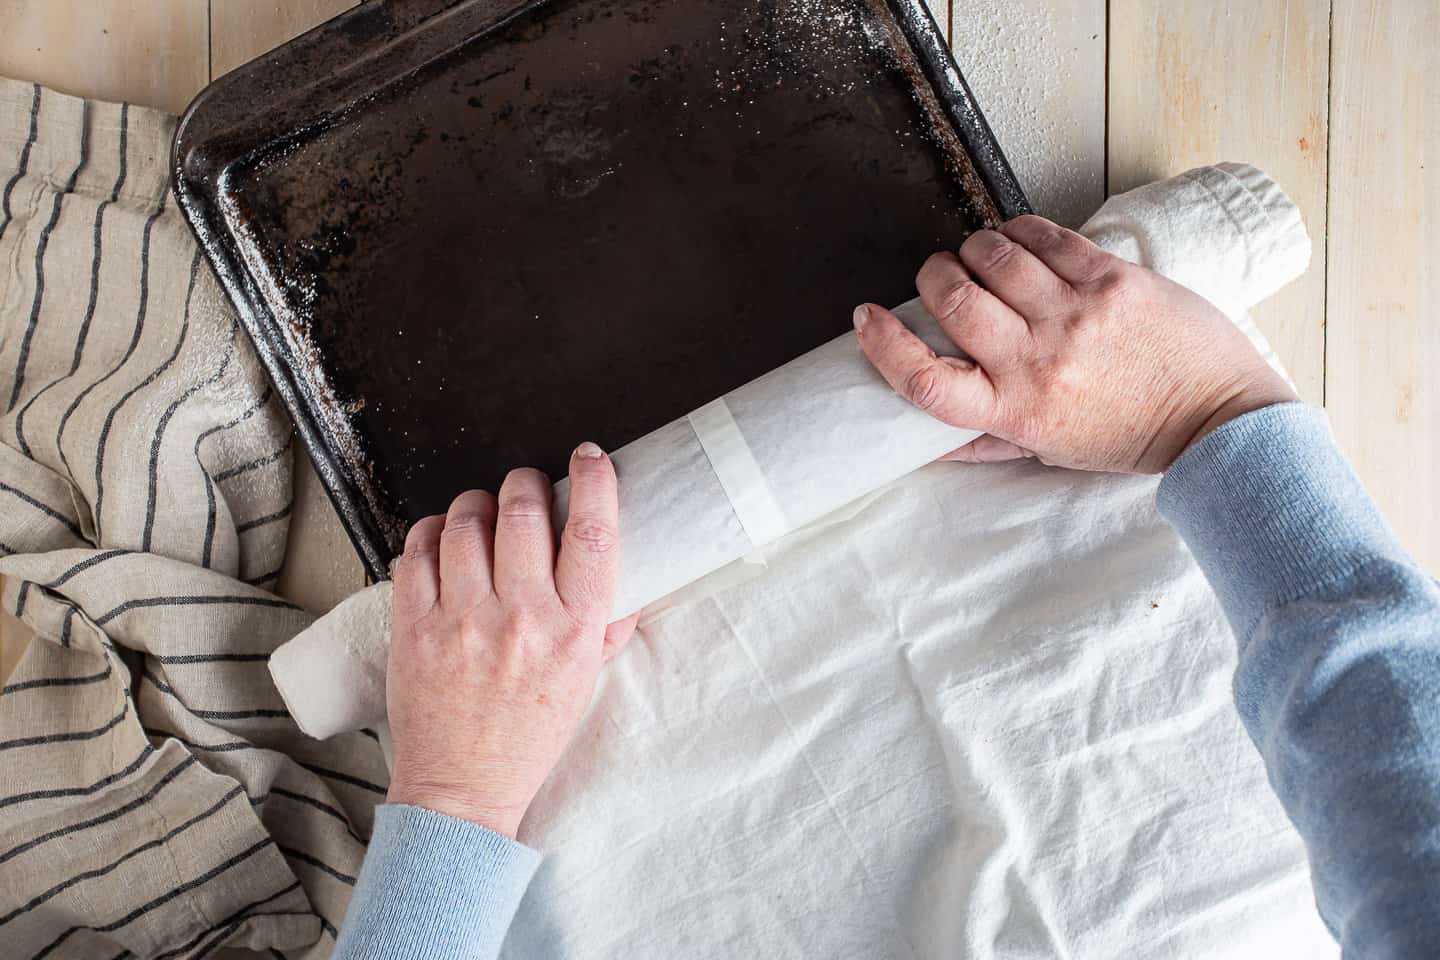
Starting at one of the short sides, roll the cake (along with the towel and the parchment) into a cylinder, and allow it to cool in this shape.
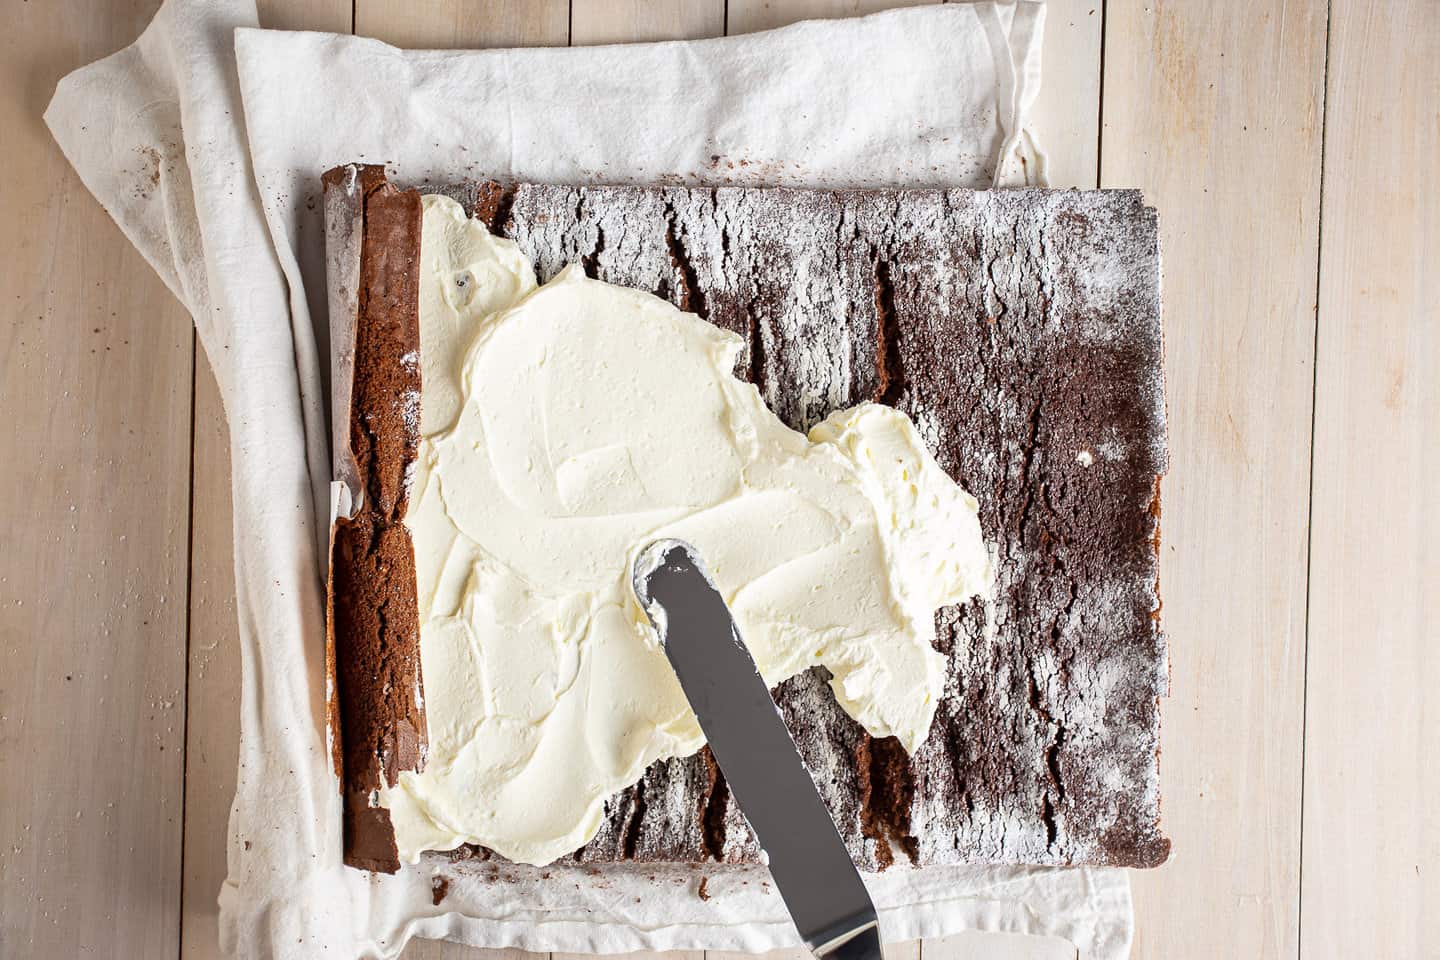
Step 6: Fill
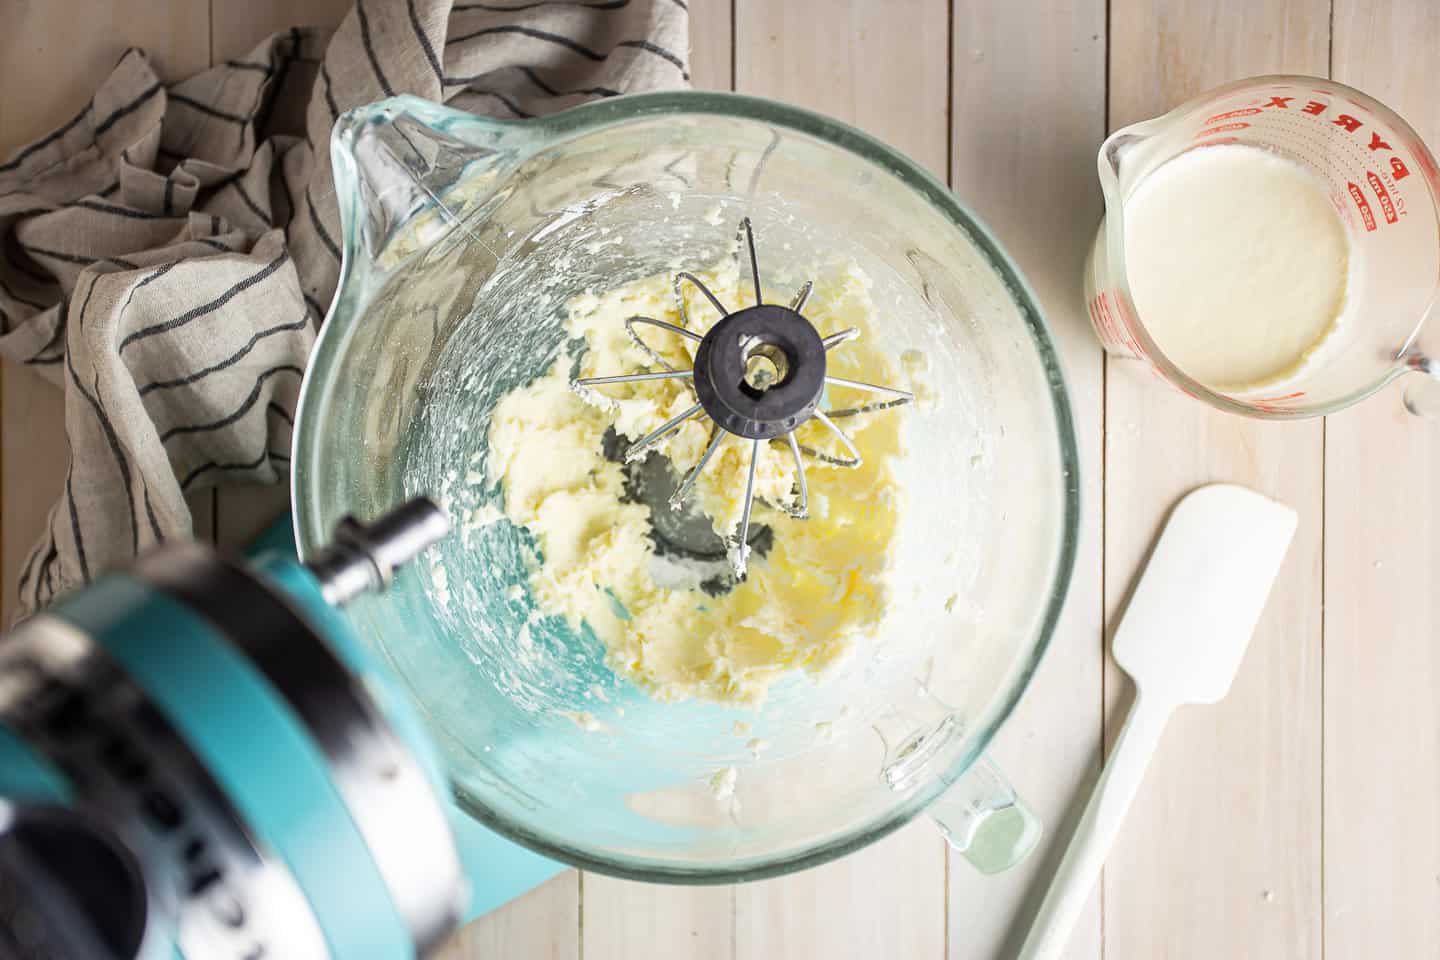
Start by blending the cream cheese and powdered sugar together until smooth.
Scrape the bottom and sides of the bowl with the silicone spatula, then start mixing in the cream on medium speed. Add just a little bit at a time, in a slow, steady drizzle, and stop frequently to scrape the bowl so you don't get lumps.
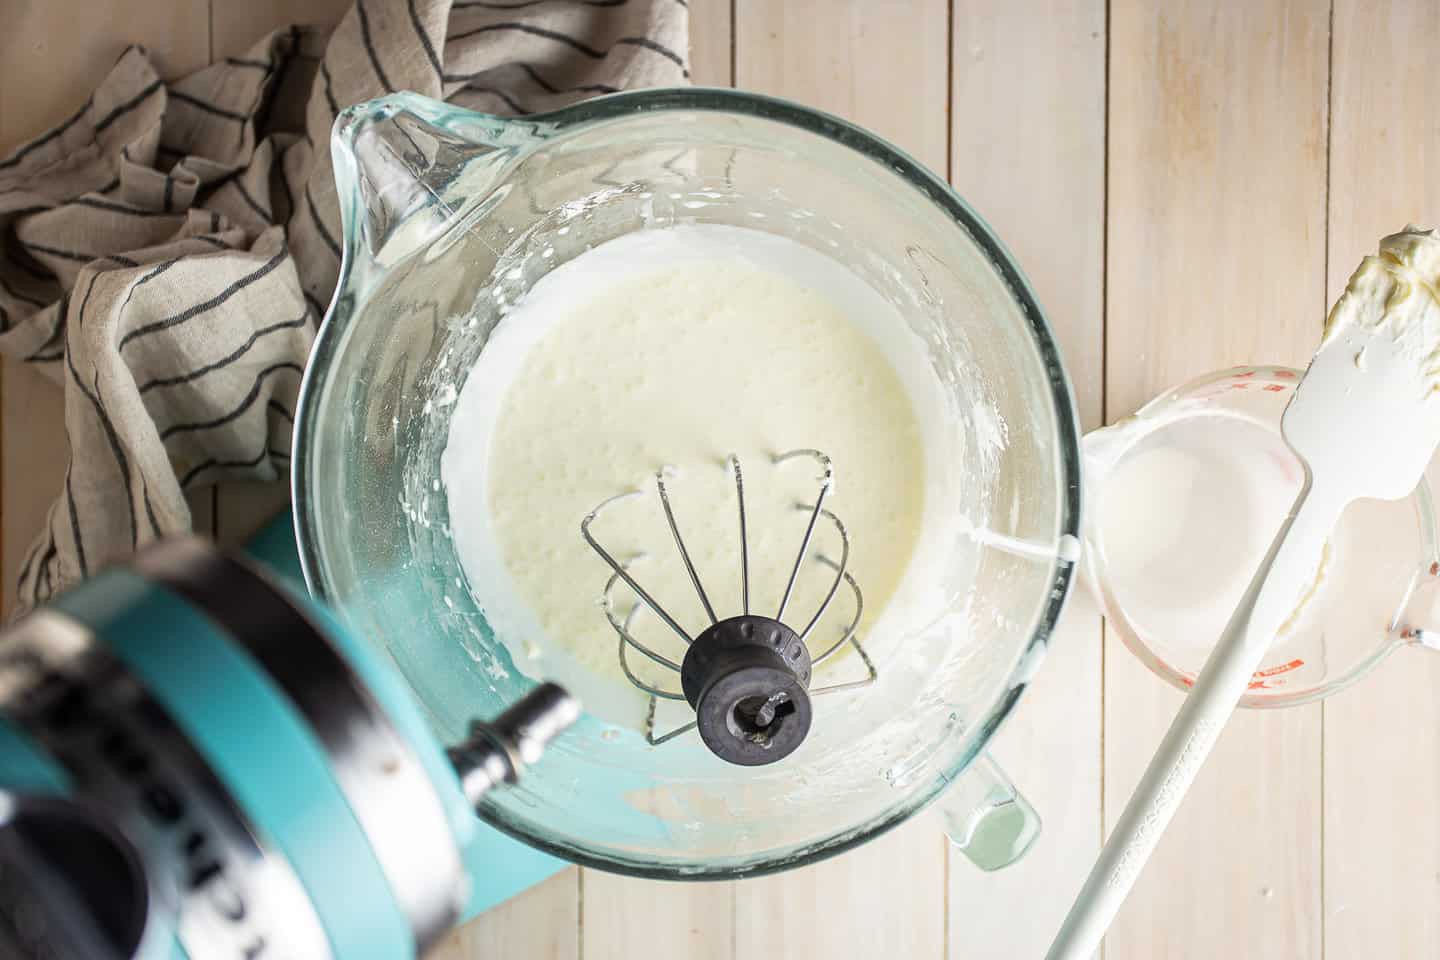
When all the cream has been added, turn the mixer up to medium-high and whip the filling until it can hold stiff peaks.
Gently unroll the cooled cake, and spread the filling on in an even layer.
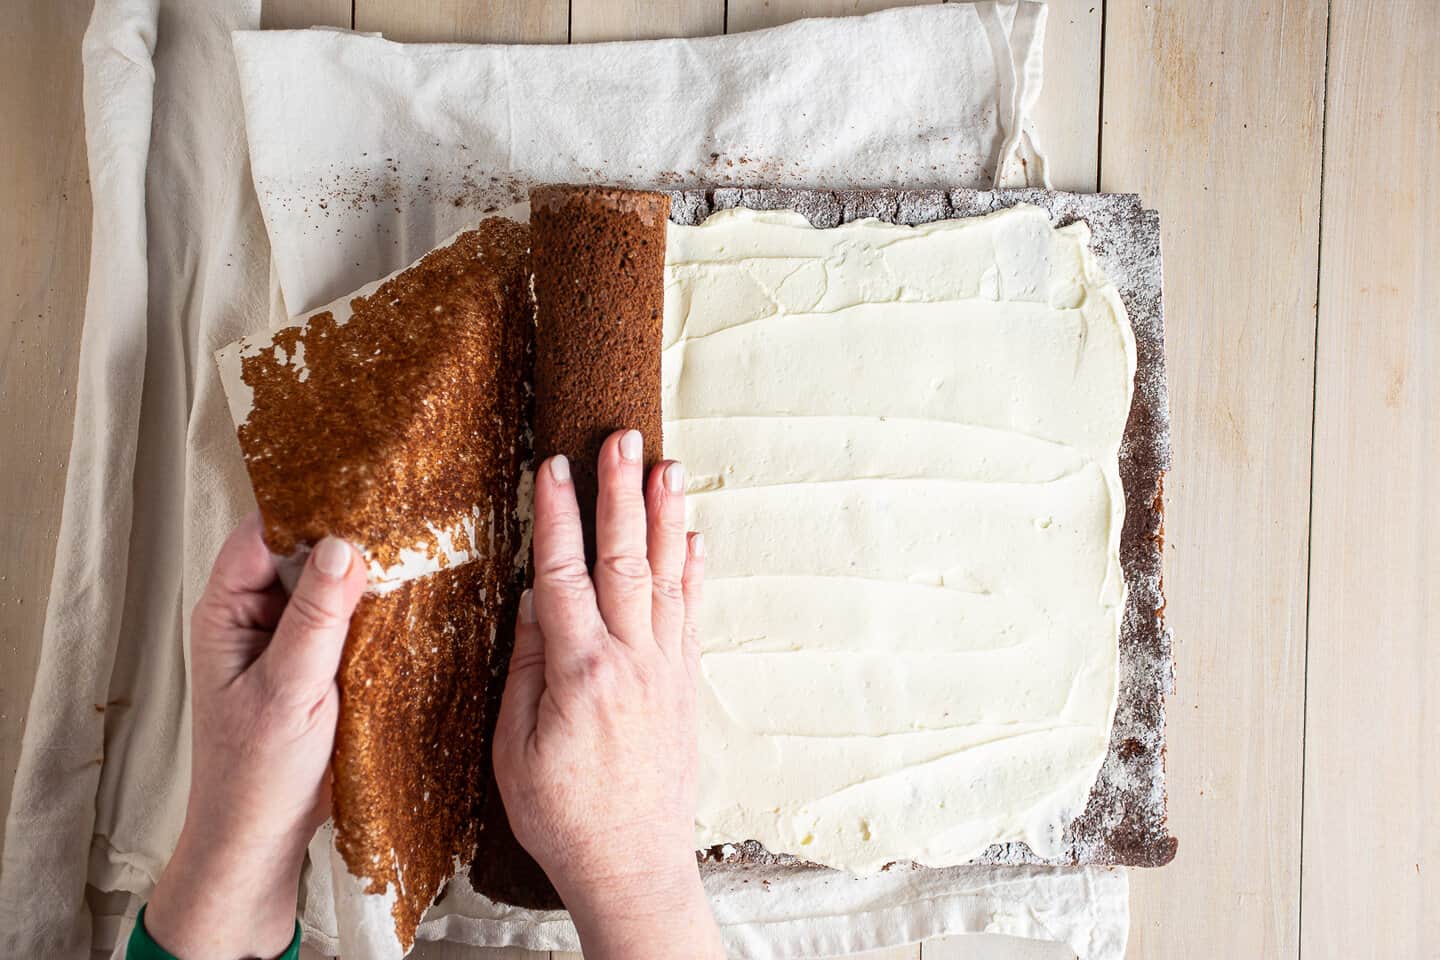
Then re-roll the cake in a tight spiral, removing the parchment as you go.
Step 7: Glaze
Heat the cream until it's steamy, then add the chocolate and corn syrup and allow it to stand for 5 minutes.
Whisk everything together until incorporated.
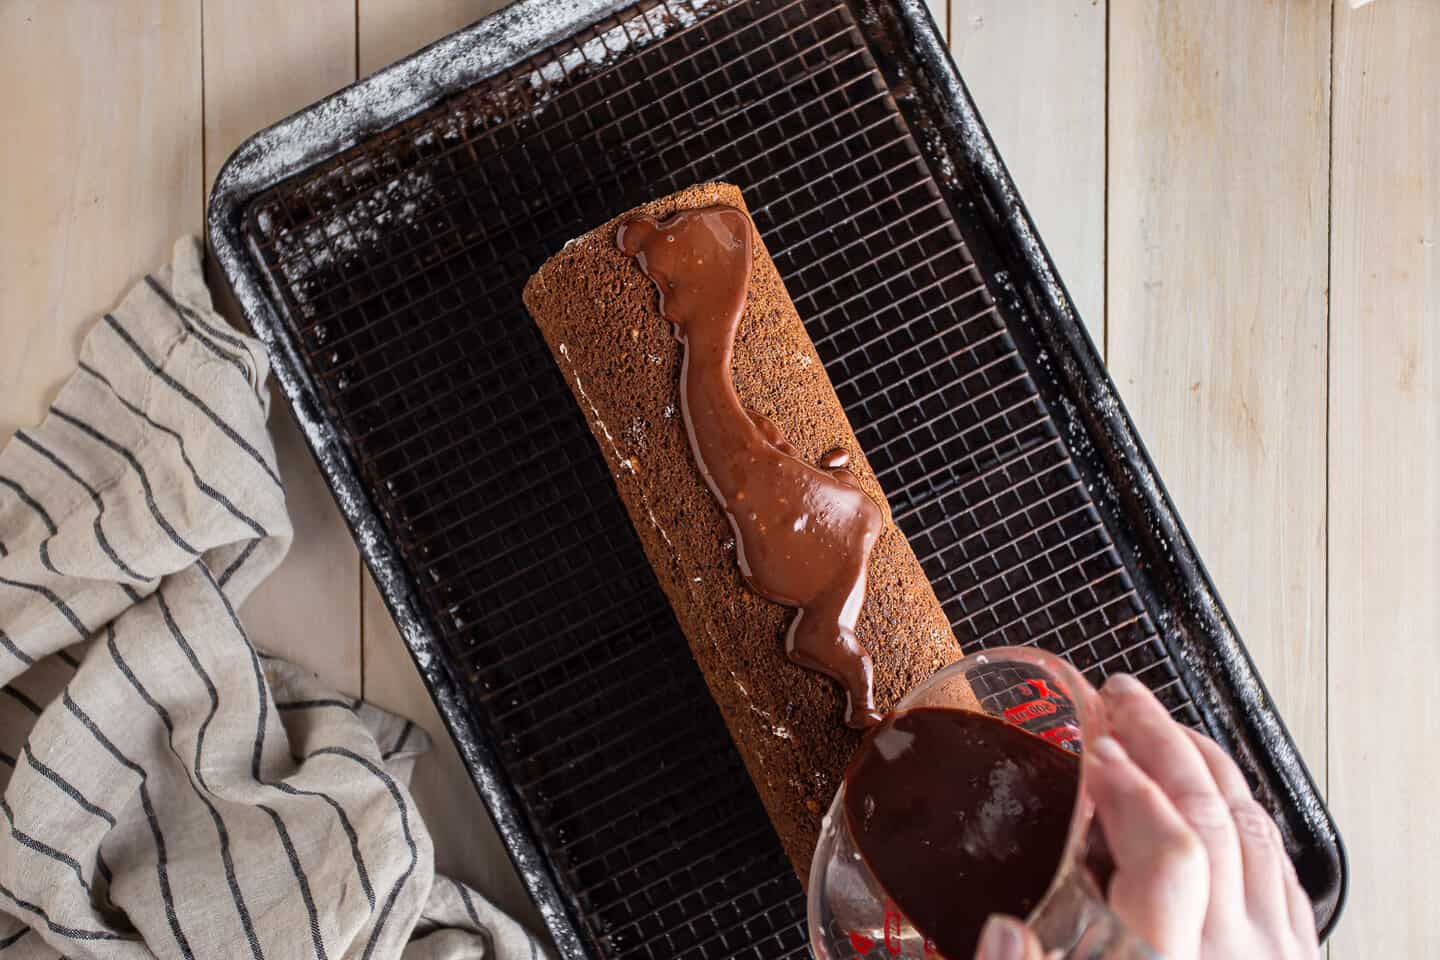
Set your cake roll on a wire rack over a baking sheet, and pour the glaze on top, giving it a little shimmy-shake so that it falls over the sides and coats the cake evenly.
Allow the glaze to firm up before slicing and serving.
How to serve
This chocolate Swiss roll has it all! There's cake, filling, and glaze on every forkful!
It really doesn't need any extra adornment at all, but I will say, it's excellent served with a tall glass of cold milk.
Keep it chilled so it holds its shape. And slice it into rounds for a beautiful presentation.
Expert tips
Use the right pan: You will need a 10x15-inch jelly roll pan to make this recipe. If you use something larger, such as a cookie sheet or half-sheet pan, it will affect the bake time considerably.
Whip it good: It's important to whip a lot of air into the egg and sugar mixture. This will guarantee a really light, springy result. Whip it on medium-high speed for at least 5 full minutes. It should triple in volume.
Fold gently: Once you've worked so hard to aerate the mixture, you want to fold the dry and liquid ingredients in very gently. Slice the blade of your spatula down the center, turn, and flip the batter back onto itself. Repeat this motion all around the bowl to incorporate the ingredients without deflating all the air bubbles out.
Nail the bake time: I think this is the biggest key to success. I've found that if the cake is underbaked, it will most definitely crack. And if it's overbaked, guess what? It will also crack. You really need to hit the sweet spot. Flip the oven light on and peek in on it as it's baking. When it no longer looks wet, crack the door and give it a feel. It should spring back when you press the center. The edges should be very set and even a little bit dry. They may crack a little, but you can easily trim them away. It's much worse if it cracks in the middle part of the cake.
The roll: Roll the cake into a spiral and allow it to fully cool in this shape. This will also help to avoid cracks. I think a loose roll is better than a tight one, at this stage. I had good success when I rolled the cake around something cylindrical, like a small rolling pin.
Cool it well: Give it plenty of time to cool. In my experiments, the cakes that cooled overnight had less cracking than the ones that only cooled for an hour or two.
Shape it as it chills: Once filled, the cake roll should go into the fridge to really firm up. If you just dump it and forget about it, you could end up with a flattened-out Swiss roll. But if you go in every so often and give it a 90-degree turn, pressing it gently into a rounder shape with your hands, you'll get a beautiful, perfectly round cylinder.
Try the dental floss trick: When slicing the cake, it's easy to flatten it with pressure on the knife. Use a gentle sawing motion to prevent this, or use dental floss! Just slide a length of unflavored floss under the cake, bring the two ends up and cross them, then pull them apart. It will cut through the Swiss roll with even pressure, 365 degrees around.
Frequently asked questions
I'm not going to sugarcoat it for you: making a Swiss roll cake that looks perfect and doesn't have any noticeable cracks is not for the faint of heart. It can be challenging!
I've done it a zillion different ways and I find that if you follow my expert tips above, you are much more likely to nail it.
That said, making the individual components (cake, filling, and glaze) is pretty easy even for a novice. It's just the cooling and filling part that can be tricky, but again, I've got some great tips for success!
There are two key factors to avoiding a crack in your roll cake: the bake time and the cooling.
If you underbake it, it will be so delicate it will almost definitely fall apart when you try to unroll and fill it.
If you overbake it, it won't be flexible enough to roll at all.
So check it often as it bakes, and look for a slightly dry but springy texture.
It must then cool in a spiral shape, but not too tight. If it's too tight, it could crack when you unroll it.
Be sure to let it cool completely! The cake is much more likely to crack if it's still got even the slightest hint of warmth in it.
It's definitely a good idea to make Swiss cake roll ahead of time.
Allow yourself plenty of time for everything to chill properly. Ideally, it could use about a half a day just for chilling alone. But the active time is only about a half hour.
The only thing I'd advise against is making the whipped cream filling ahead. It will be at its stiffest and most stable immediately after it's made. So save that bit for last!
This cake can sit out at room temperature for an hour or so, but the warmer it gets the more likely it is to flatten out and lose its shape.
If you have leftovers, cover them lightly and chill them in the fridge or freezer. They will last in the fridge for 5 to 7 days, and in the freezer for a month or two. Thaw in the fridge.
This cake can be cut into 10 generous slices. Each slice is one serving.
The nutritional info below is for 1/10th of the whole batch, and it includes the cake, filling, and glaze. Even the powdered sugar you dust on to prevent sticking!
A few more of my best cake recipes
As an amazon associate I earn from qualifying purchases.
Ingredients
For the chocolate sponge cake
- 4 (176 g) eggs, large (preferably at room temperature)
- ¾ cup (150 g) granulated sugar
- ⅔ cup (83.33 g) all-purpose flour
- ½ cup (43 g) unsweetened cocoa powder
- 1 ¼ teaspoon (5 g) baking powder
- ½ teaspoon (3 g) kosher salt
- ¼ cup (56.75 g) unsalted butter, melted and cooled slightly
- ⅓ cup (76.67 g) sour cream, (unsweetened Greek yogurt or buttermilk can be substituted)
- 2 tablespoons (30 g) milk, (whatever kind you keep on hand)
- 1 teaspoon (4 g) vanilla extract
- 3 tablespoons (24 g) powdered sugar, approximately (for dusting)
For the whipped cream filling
- 4 ounces (113.4 g) cream cheese, cold
- ½ cup (60 g) powdered sugar
- 1 ⅓ cups (317.33 g) heavy whipping cream, cold
For the chocolate glaze
- ⅓ cup (119 g) heavy whipping cream
- 2 ounces (56.7 g) semisweet chocolate, chopped
- 1 tablespoon (22 g) corn syrup, (optional, for shine)
Instructions
To make the chocolate sponge cake
- Preheat the oven to 325 degrees F and line a 10x15-inch jelly roll pan with parchment, leaving one short end slightly overhanging the edge of the pan.
- Place the eggs and sugar in a large bowl and whip on medium-high speed until very pale, very fluffy, and tripled in volume (approximately 5 minutes).
- Add the flour, cocoa, baking powder, and salt, and fold in gently until almost fully combined.
- Stir the melted butter, sour cream, milk, and vanilla together in a small bowl, then fold the mixture into the batter until incorporated.
- Transfer the batter to the prepared pan, and bake until springy and no longer glistening (approximately 22 to 28 minutes).
- Allow the cake to cool for 5 minutes in the pan, then dust the top of it liberally with powdered sugar and cover with a clean kitchen towel.
- Gently roll the cake into a cylinder shape, starting at the shorter side that doesn't have the parchment overhang. (You may want to roll it around something small and cylindrical, such as a child's rolling pin.)
- Allow the cake to cool completely in this shape (approximately 2 hours or overnight).
- Carefully unroll the cake and spread it with an even layer of filling.
- Starting at the short side with the parchment overhang, tightly re-roll the cake back into a cylinder shape and chill for 1 to 2 hours.
- Place the chilled Swiss roll on a wire rack set over a baking sheet, and pour the glaze over it, allowing it to fall over the sides and coat the entire roll (you may want to shake or tap it for encouragement).
- Allow the glaze to set (approximately 1 hour) in the fridge before slicing.
To make the whipped cream filling
- Place the cream cheese and powdered sugar in a large mixing bowl and beat together until smooth.
- Scrape the bottom and sides of the bowl with a silicone spatula, then drizzle the cream in a slow, steady stream while continuing to mix on medium speed (stop as needed to scrape again and avoid lumps).
- When all the cream has been added, turn the mixer up to medium-high and whip until the filling can hold a stiff peak (approx. 2 to 4 minutes).
To make the chocolate glaze
- Heat the cream (either in the microwave or in a pot on the stove) until steamy.
- Add the chocolate and corn syrup (if using) and allow the mixture to stand for 5 minutes.
- Stir the mixture until smoothly incorporated.*


I can’t wait to make this. Love love your recipes. Question ..do you ever use oil in this cake versus butter ? I’ve noticed most chocolate cakes use oil. Thank you for assisting.
Hey Jennie! Thanks so much! I prefer butter in this recipe- I just think it gives a really nice flavor. Oil can work too but I just love the taste of butter.
It's a really heavy cake! Doesn't make it bad, but I'd eat it with tea, coffee, or strawberries!
This was the very best swill roll recipe ever! It turned out perfect and everyone was so impressed with it, there was none left! I recommend reading all the notes as they were very helpful, but all in all it was perfect!
10 out or 10 so special and super easy to make
This was my first ever try at making a rolled cake. My cake cracked a little (but still came out splendidly for my first time) and was not as beautiful as yours, but the sponge was delicious, the filling is delicious, but I do think doubling the chocolate glaze would have been great too.
So happy it worked well for you! Thanks for the great feedback Tina!
Hi! This look ridiculously good.. I’m hoping to try this recipe out as a vertical Swiss roll, and add some coconut flakes to the filling. Anything I need to keep in mind, especially with the sponge? Thank you!
Hey Mav! I've not tried doing it vertically but I'm imagining you'll want to cut the sponge into strips? Otherwise it will be really tall and skinny and maybe wouldn't be able to support its own weight. Other than that I'd just recommend reading all the notes in the post (above the recipe card) as there are a lot of good tips there. This is a tricky one, not gonna lie! But if you read through and understand all that well then you should be good. Good luck!