

Basic Scone Recipe
As an amazon associate I earn from qualifying purchases.
A basic scone recipe for tender, moist, buttery scones that are so quick and easy to make! Perfect as-is with just butter and jam, or you can get creative and add fruit, spices, or chocolate.
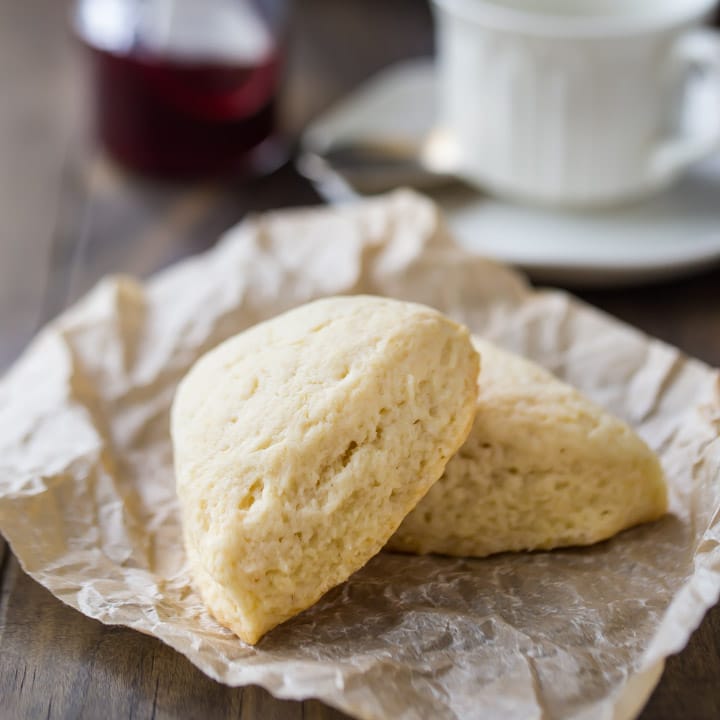
I have been wanting to share this basic scone recipe for so long! I'm so happy to have finally gotten around to it.
Scones are by far my favorite breakfast treat. I love how buttery and tender they are, and they're so versatile! You can add all sorts of fruit, spices, or even chocolate to them and really let your creativity shine.
A great recipe is quick and easy to make. With this one, you can literally throw some flour, sugar, baking powder, and salt into your food processor, work in some butter, stream in the cream, shape the dough, and bake them up in less than a half hour.
Some of my favorite jazzed-up scone recipes include these Raspberry Rose Scones, Double Chocolate Scones, and Cinnamon Peanut Butter Chip Scones with Maple Bacon Glaze.
Nothing is better than freshly baked American scones, warm from the oven with a hot cup of tea, coffee, or cocoa!
And with this basic scone recipe, you can't go wrong. They're quick, easy to make, moist, soft, and delicious.

Why you'll love this scone recipe
Simple: This scones recipe is easy for beginner and experienced bakers to follow. It only requires common pantry ingredients, meaning you can whip up a batch quickly.
Versatile: This recipe serves as a blank canvas for creativity. You can add various ingredients like fruits, nuts, chocolate chips, or spices to customize the flavor to your liking.
Quick to make: These scones come together quickly, making them a convenient choice for breakfast, brunch, or tea time.
Delightful texture: These tender scones are slightly crisp on the outside (like a cookie) and soft and cake-y on the inside.
Ingredients and notes
All-purpose flour
This forms the bulk of the scone dough and provides structure.
Swap it out for any kind of whole-grain option if you like. You may need slightly less if you go that route.
A gluten-free flour blend that can sub 1:1 for regular flour should also work just fine, if you'd like to make gluten-free scones.
Granulated sugar
A small amount of granulated sugar adds sweetness to the scones, aids in browning, and keeps them moist.
Sub for another type of sweetener if you like. As long as it swaps 1:1 for granulated sugar it should work.
Baking powder
The leavening agent that helps the scones rise and become light and fluffy.
Baking powder is a double-acting leavener, so it starts the pastry rising both when liquid is added to it, as well as when it hits the hot oven.
Baking soda will not work in this recipe because there isn't anything acidic to activate it.
Baking powder has a little bit of that acid built in.
Kosher salt
Salt carries the flavors and intensifies them. The end result won't taste salty, but it will make everything so much more flavorful!
I like kosher salt best because it doesn't have any additives (table salt usually contains iodine which can leave a bitter taste), so the flavor is pure. It's also inexpensive and easy to find in a regular grocery store.
Unsalted butter
I like to use unsalted butter because it lets me control the amount of salt in the dish. Different brands of butter can contain different amounts of salt, so this way you get a more consistent result.
For a vegan or dairy-free scone recipe, use a plant-based butter that can substitute for dairy butter 1:1.
This recipe works best if you use cold butter. When cold pastry hits the hot oven, steam is released and that puffs up the pastry, creating a beautifully light, airy texture.
Heavy whipping cream: Heavy cream brings the dough together and provides moisture. Heavy whipping cream provides a richer taste.
Variations and substitutions
Milk: You can use milk if you don't have heavy whipping cream. The scones just won't be as rich.
Flavorings: You can add various flavorings, such as vanilla extract, almond extract, lemon zest, and orange zest, to your scones to enhance their taste.
Savory scones: For a savory twist add shredded cheese and fresh chives, and substitute sour cream for heavy cream.
Add-ins: Customize your scones by adding ingredients like dried fruits, fresh berries, chocolate chips, nuts, or spices like cinnamon.
Egg wash: To give your scones a golden, shiny appearance, you can brush them with a beaten egg or a mixture of egg and milk before baking.
Additional sugar: You can sprinkle the tops of the scones with coarse sugar, for extra sweetness and a slightly crunchy texture.
How to make scones
Step 1: Combine the dry ingredients
Place the flour, sugar, baking powder, and salt in the bowl of a food processor and pulse to combine.
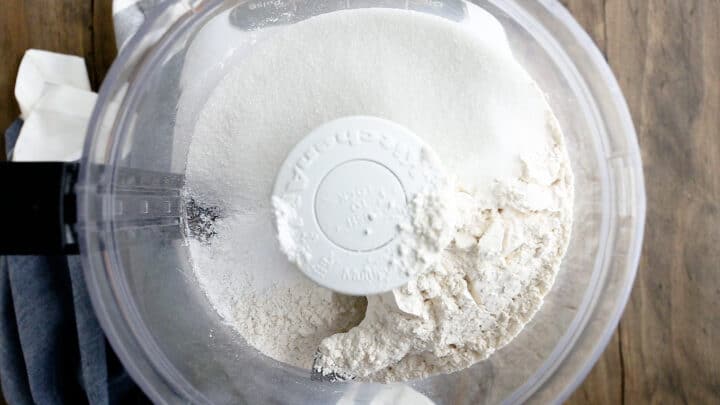
If you don't have a food processor, this can be done in a large mixing bowl with a pastry cutter, two knives, or your clean hands.
Step 2: Work in the butter
Cut the cold butter into pieces and add to the food processor with the flour mixture.
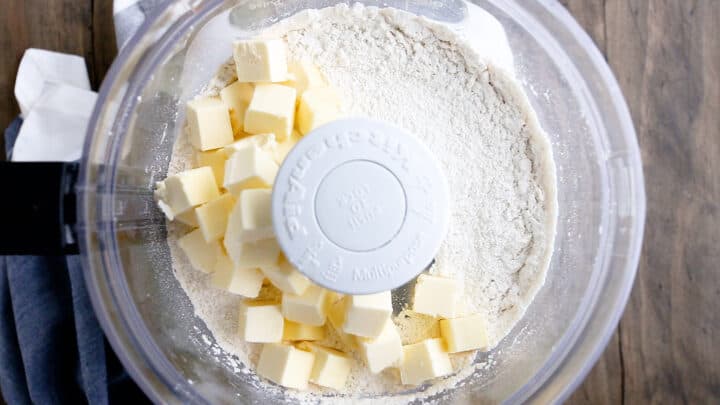
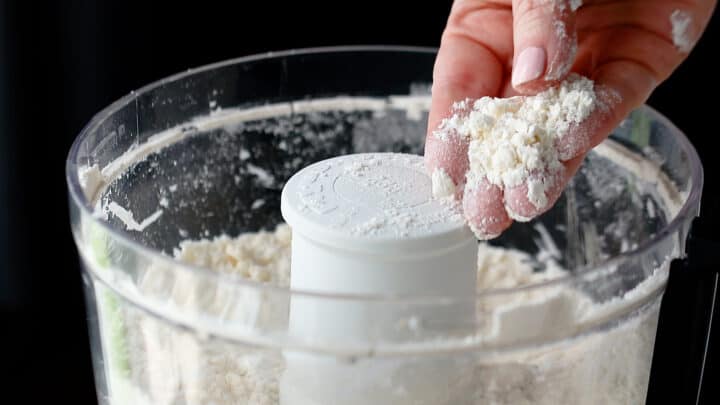
Pulse the food processor until the mixture resembles a coarse meal.
Step 3: Add cream
Stream in the cream with the food processor running at a low speed.
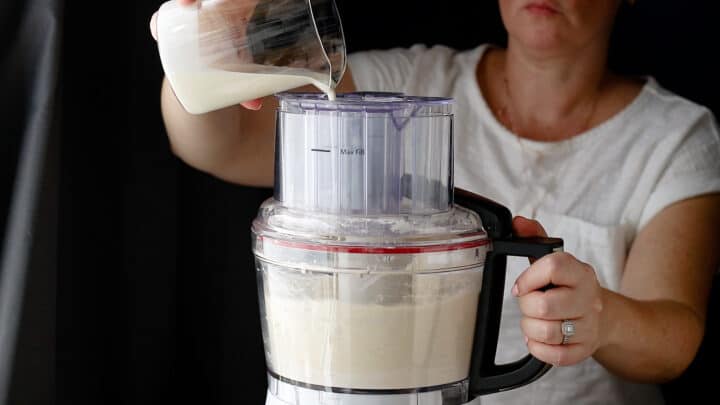
When the dough has gathered itself into a ball, turn off the food processor.
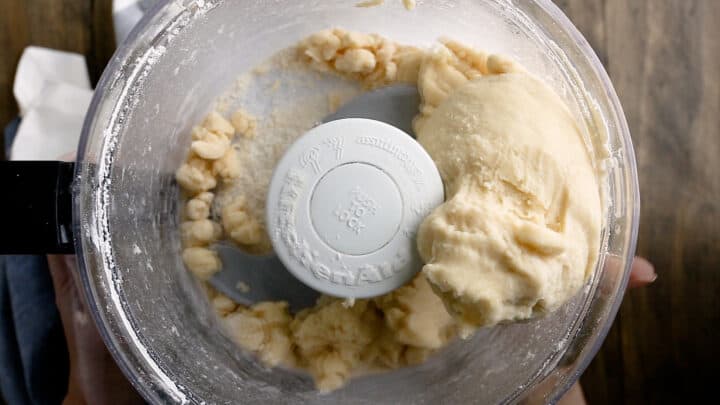
Step 4: Shape
Divide the dough into two equal portions.
On a lightly floured surface, flatten each portion of dough into a disc shape, about 1 ½ inches thick.
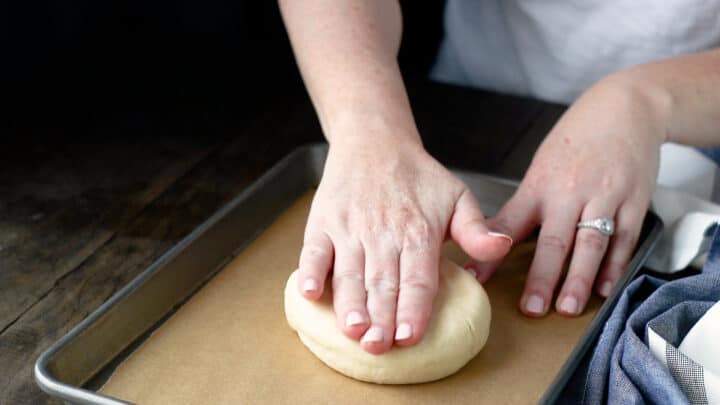
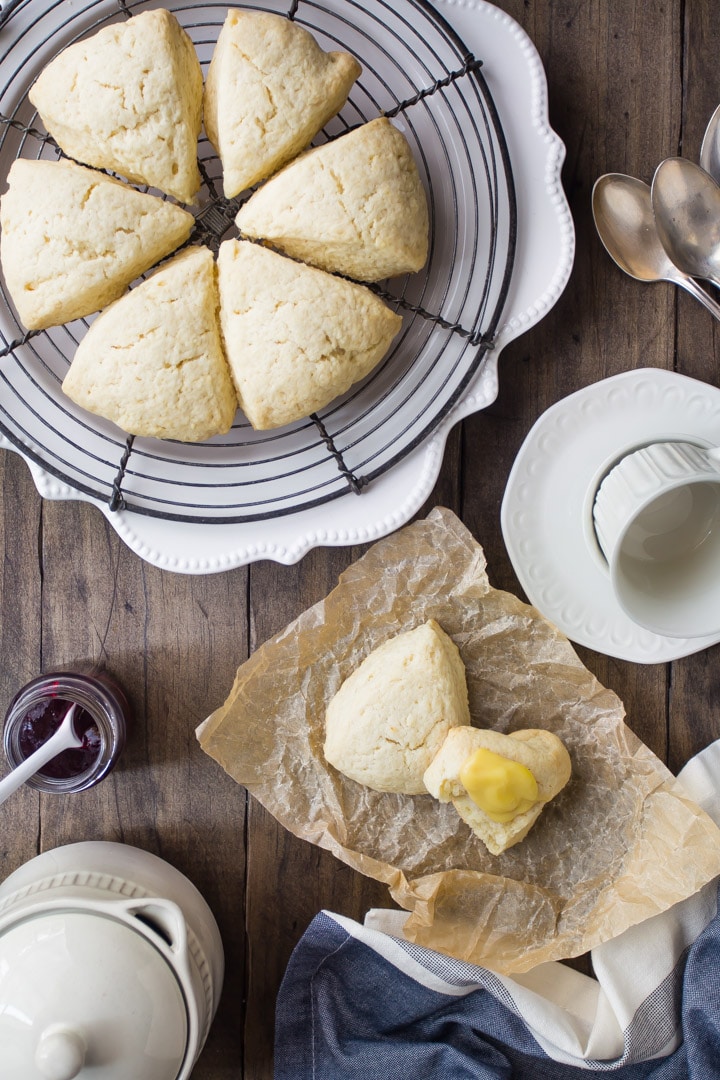
Score each disc into six triangles with a sharp knife or pastry cutter, and pull the triangles slightly away from one another (allowing about ½-inch in between).
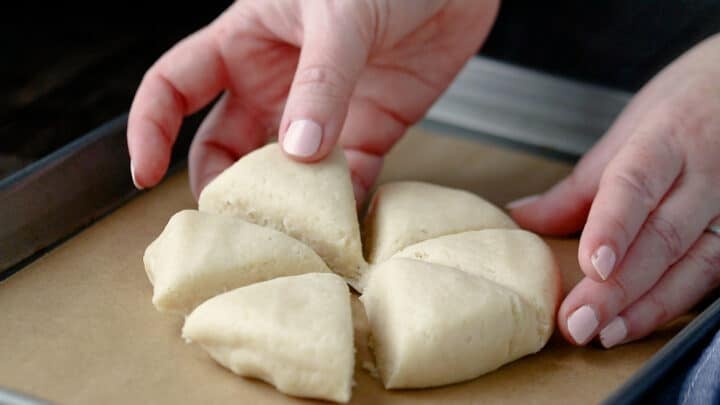
Step 5: Bake
Place the scones on a parchment-lined baking sheet and bake until set in the centers and slightly golden brown on the bottoms.
Recipe FAQS
They're a pastry usually served for breakfast or brunch, but they also make a really lovely afternoon snack.
In the UK, scones come in a circular shape, and they're light and fluffy. They are basically the same as what Americans call a u0022biscuit.u0022
Here in the US, we mainly make our scones in a triangle shape.
They're sort of like a muffin but denser. Even though they aren't really fluffy, they should never be dry or hard. I love a soft, moist, tender, buttery scone.
Yes, scones can be made ahead. They keep very well for several days in a zip-top bag at room temperature.
This recipe makes twelve scones. One scone is one serving, although they are rather petite.
Expert tips
- For the best scones be careful not to overbake. They could come out dry or hard if they stay in the oven too long. That is not a good scone experience.
- Pull them from the oven when the centers are set, and they're just barely beginning to turn golden on the bottoms.
- The food processor produces a moist scone and buttery taste with just a hint of sweetness. And I love how smooth and pretty they bake up.
How to serve scones
This is a very basic, plain scone recipe. You can totally get creative and add anything your heart desires to create savory or sweet scones. Chopped nuts, berries, spices like cinnamon or ginger, citrus zest, and chocolate chips make delicious add-ins.
You can even ice them with a powdered sugar glaze or drizzle them with chocolate glaze.
But they're just as delicious as they are, with a bit of soft butter or jam. Or, my favorite way to top them: homemade lemon curd.
It's so yummy with a cup of tea, coffee, or cocoa! Especially when they're warm. Read on for instructions on how to re-warm scones.
How to store and keep
Room temperature: Fresh baked scones will keep in an airtight container at room temperature for up to 3 days.
Refrigerate: If you think they'll be hanging around longer than a few days, then pop them into the fridge. They should last at least a week.
Freezer: Place the scones in a freezer-safe bag. Label with the date. They will keep for up to a month in the freezer. To defrost them, place them out on the counter overnight then re-warm them in the morning.
Reheat: The best way to re-warm these basic scones, in my opinion, is in the microwave. They only need a few seconds. On my microwave, 15 to 20 seconds is perfect. You don't want to overdo it, because the microwave tends to make things chewy, but if you only keep them in there long enough to just get warm, they'll come out moist, steamy, and tender.
If you don't have a microwave or prefer not to use one, then they can be warmed in the oven at the lowest possible temperature. It's best to wrap them in foil first so they don't dry out. Again, don't leave them in too long! They're already baked, so you don't want to re-bake them- just warm them gently.

More scone recipes
This post contains affiliate sales links.

Ingredients
- 2 cups (250 g) all-purpose flour
- ⅓ cup (66.67 g) granulated sugar
- 1 ½ teaspoons (6 g) baking powder
- ½ teaspoon (3 g) kosher salt
- ½ cup (113.5 g) unsalted butter, cold
- ½ cup (119 g) heavy whipping cream, cold
Instructions
- Preheat the oven to 375 degrees F and line a baking sheet with parchment.
- Place the flour, sugar, baking powder, and salt in the bowl of a food processor, and pulse to combine.
- Cut the butter into pieces, and add to the food processor.
- Pulse the food processor until the mixture resembles coarse meal.
- With the food processor running on low speed, stream in the cream.
- When the dough has gathered itself into a ball, turn off the food processor and divide the dough into two equal portions.
- Flatten each portion of dough into a disc shape, about 1 ½-inches thick.
- Score each disc into 6 triangles with a knife, and pull the triangles slightly away from one another (allowing about ½-inch in between).
- Bake the scones until set in the centers and slightly golden on the bottoms (approx. 14 to 18 minutes).
Notes
Author

More Breakfast and Brunch



Have a question about this recipe? Ask AI:
These were very easy to make and super tasty! My daughters all ate 2 each!
I would say, however, I feel that perhaps the step that calls for dividing the dough into two equal portions is a mistake. I divided our dough before baking it and the scones would have been tiny; miniature sized scones. But when I flattened the entire amount of dough to a 1 1/2 inch thick disc and cut it into 8 wedges they were nicely sized, but not gigantic by any means. And they still cooked in the same time called for in the recipe. Quick and super tasty scones otherwise! Thanks!!
So easy to make and so delicious!! Adding to my list of recipes to keep forever!
Can you use bread flour in the scones instead of All purpose?
You can, but I'm not sure I'd recommend it. Scones are meant to be light and fluffy, not chewy like bread. Good luck!
These are the most moist scones I’ve ever had. I have tried tons of scone recipes, but these are over the top and a keeper. Since my husband loves lemon, both the batter and icing received a zest from 1 lemon each.
Hello! Can we half this recipe? Thanks.
Yes!
Just made these so excited to taste. I cut the recipe in half. And used half & half because I was out of whipping cream.
Thanks for a easy recipe with things easily made from the kitchen cabinet. ?
I don't have food processor & conventional oven, so I used regular whisk and oven toaster. I just worked the butter with spoon. This recipe works and the scones turned out fine & tasty. The outside is crunchy but the inside is soft, thanks again for sharing! I'll keep using this recipe.
These were so easy to make, and taste fantastic! Yum!
So happy you enjoyed! Thanks so much for the positive feedback!
I want to make these with fresh blueberries. When and how should I add the blueberries?
Hey there! I would suggest folding them into the dough just before shaping the scones. Good luck!
So happy this question was asked! I plan to add fresh blueberries and lemon zest to mine in the morning and wasn’t sure when to add them during the process!
Hey Megan! I already have a blueberry lemon scone recipe- you can just follow that: https://bakingamoment.com/lemon-blueberry-scones/. Good luck!
How can I make this without a food processor - I am a novice!!
Hey there! If you don't have a food processor you can just cut the butter in the old fashioned way. Use a pastry blender, 2 knives, or just your fingers to work the butter into the dry ingredients. Good luck!
Just made these and they are diviiiiine! I don't have a food processor so I cubed the butter, used my hands to flake it up in the flour mixture, then added the cream and kneaded it into a dough, folding it over and over. The tops are a little more lumpy since I used my hands, but the insides are moist while still retaining a flake and so buttery and just beautiful! I don't like dry, crumbly scones, and these are the exact opposite of that. Just perfect! I made one set with dried cranberries, orange zest, and pistachios, and the other plain. They are both incredible!
Sounds amazing Angela! I also like my scones moist and buttery. I'm so glad you were pleased! Thank you for the 5-star review!
I had to do these by hand, because I don't have a food processor at home. But they turned out absolutely delicious!! The whole batch was swept off the table for breakfast!
So great to hear that! I'm so happy your family enjoyed!
Thanks for the recipe. I substituted plain Greek yoghurt for the heavy cream and the result was amazing!
Wonderful! So happy you enjoyed!
First time trying to make scones after more than a decade. I had to cook the scones longer than mentioned and they still seem a bit under-done. Maybe I added a tad too much cream to firm up the dough? Also my Food Processor (Cuisinart Prep 11) doesn't have a 'low speed' so I used the 'dough' setting when adding the cream. Still the dough had not firmed up so I had to use my hands to finish the process & did add a bit more cream then. Any suggestions?
Hey Sue! Sorry to hear you are having some difficulty. If you are shaping your scones on the tall/thick side they could need a little more time in the oven. I typically flatten the disc to about 1 1/2 inches thick, and then pull them apart from one another before baking so the heat can circulate and they have room to puff up/spread as they bake. I would pay attention to that and if they still need more time in the oven, then give them what they are asking for. Bake times are always given as a rough guideline only.
I really appreciate your simple, easy to follow directions and the fact that they have both sets of measurements. Always have success. Thanks.
That's so great to hear! Thanks so much for the positive feedback Judith 🙂
I LOVE your scone recipe! It is quick and as I am lazy baker, adding ingredients to the food processor is ideal! Right now, my favorite additions are macadamia/white chocolate. My friends have all benefited from the recipe, too.
My question is this: my husband is now GF. Can I substitute a GF blend and get almost the same results? He hasn’t been able to try any of these glorious goodies and I know he wants too.
Hey Brenda! I'm so happy you've been enjoying this recipe! Personally, I have not tested it with a gluten-free flour blend, but I think it would probably work well. Look for a product that subs 1:1 for regular all-purpose flour. Good luck and I hope your husband enjoys!