Cherry Pie
As an amazon associate I earn from qualifying purchases.
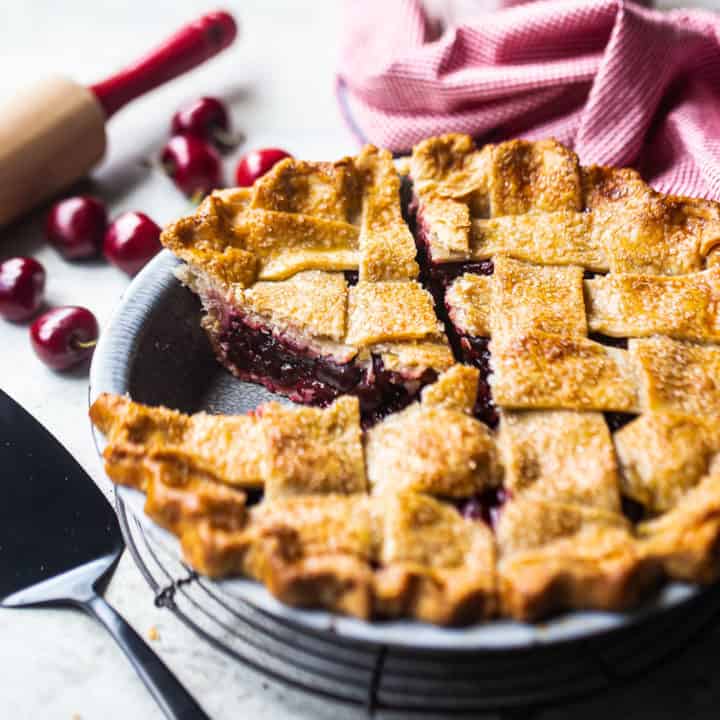
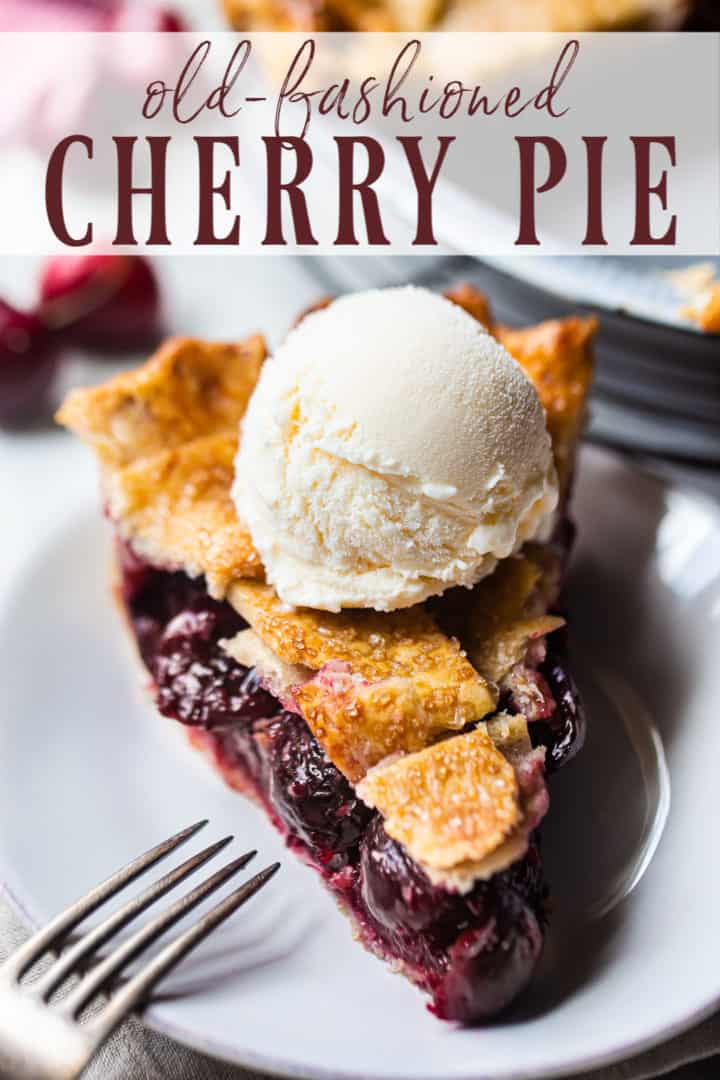
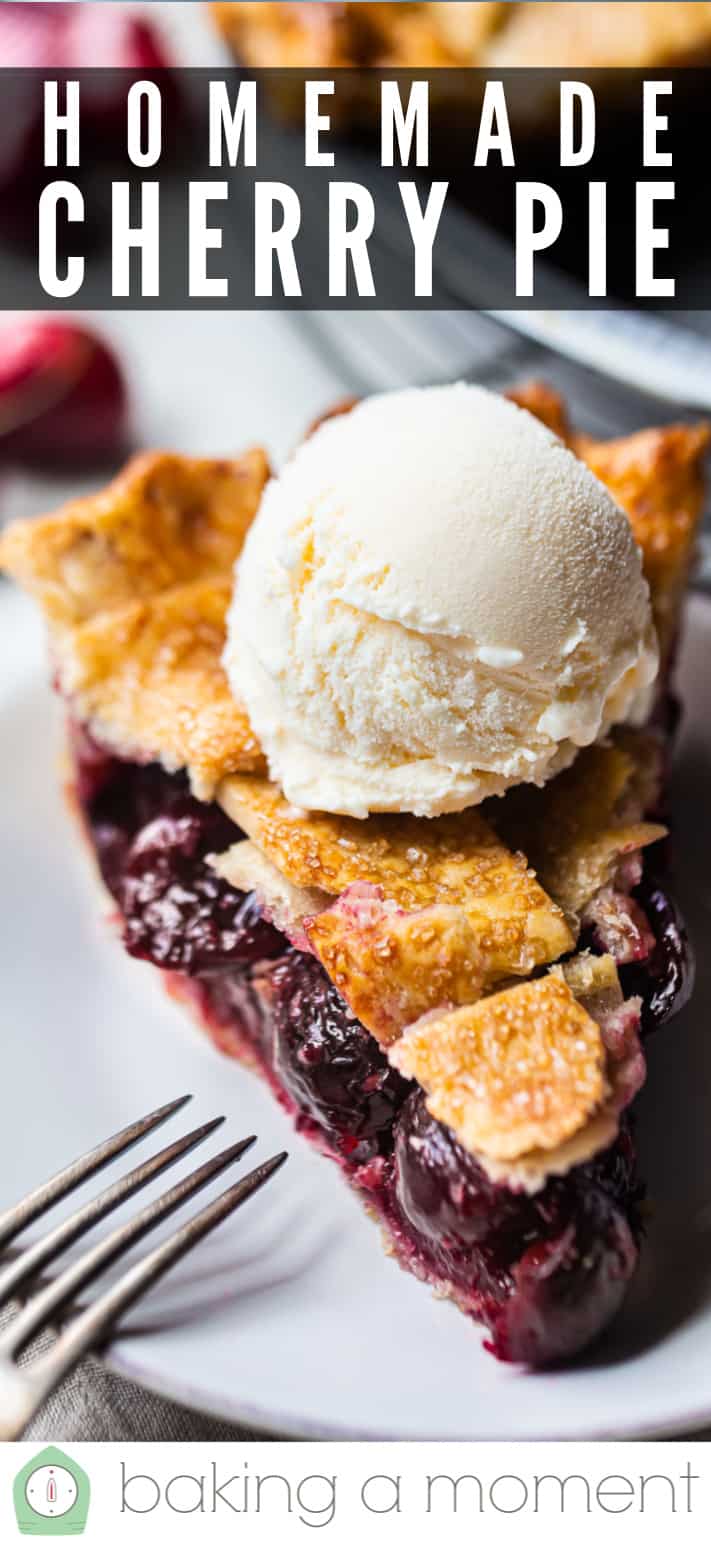
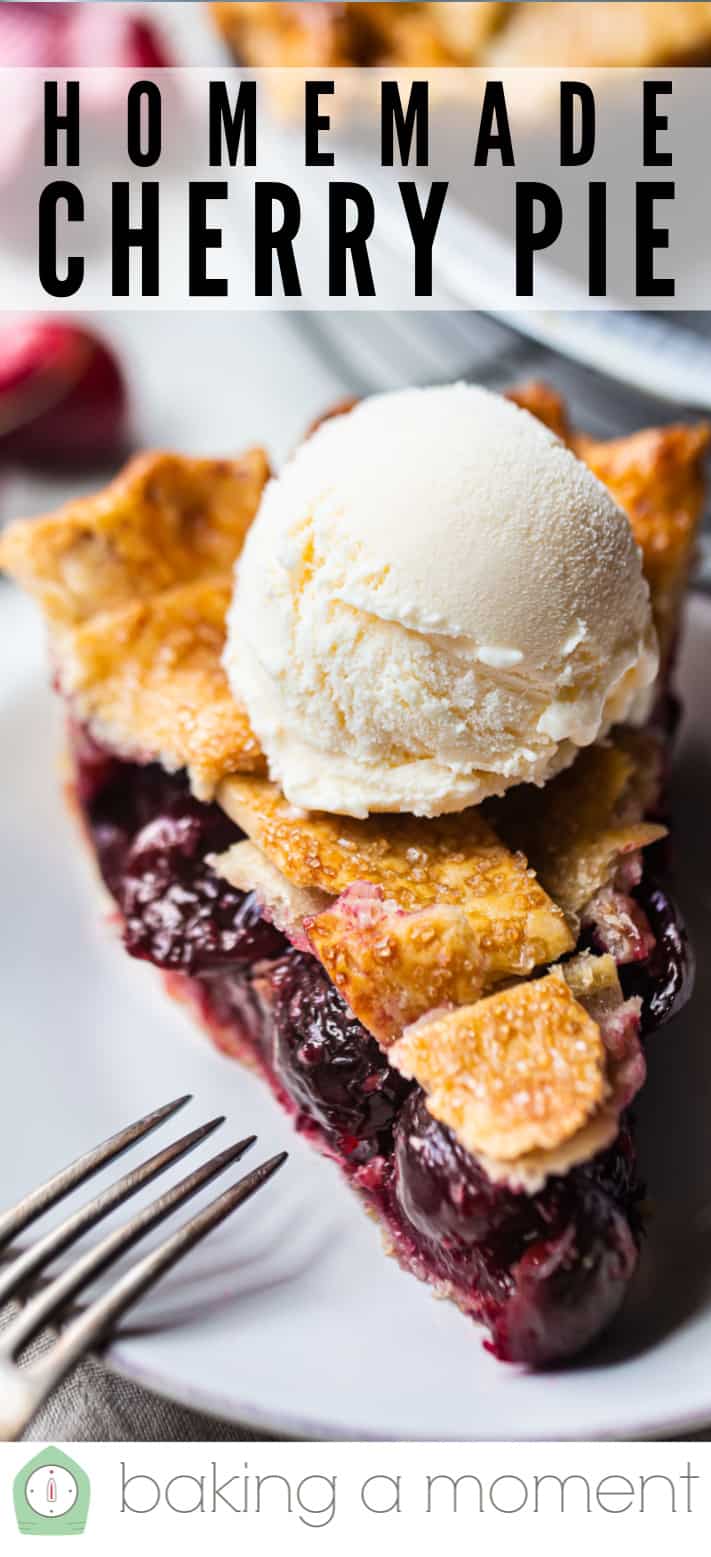
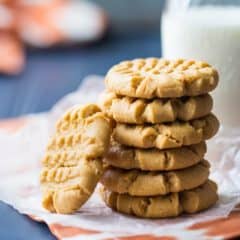
Old-fashioned cherry pie! Loaded with fruit swimming in a jammy glaze, baked in a buttery, flaky crust. Use fresh or frozen fruit, sour or sweet cherries!
Would you believe me if I told you I started this post almost a year ago?
It’s crazy but true. I think it was late last summer that I decided this site needed a really great cherry pie recipe, and I got right on it. But I just kept hitting snag after snag, and before long cherry season was drawing to a close, and I ended up just shelving the whole thing.
So last week, when I started to see fresh cherries at my grocery store, I didn’t hesitate!
Making fruit pies is a summertime tradition for me. I love strawberry rhubarb pie, my husband’s favorite is classic blueberry pie, and my son adores apple pie. These are some of my favorite things to make for my family.
And cherries are one of my favorite fruits, so you can bet I’m a big fan of baking them into a pie! I just love the contrast of sweet, jammy filling, chunky fruit, and buttery, flaky crust. To me, it just wouldn’t be summer if I didn’t bake at least one cherry pie!
HOW TO MAKE CHERRY PIE FROM SCRATCH
This recipe has 2 main components:
- The pie crust
- The cherry pie filling
THE PIE CRUST
Making homemade pie crust is a thing unto itself, so I’ve devoted a whole page just to that.
I really think I have it perfected! The ingredients and their ratio provide a result that is incredibly tender and ridiculously flaky, with a buttery flavor that just can’t be beat. I have made this recipe literally dozens of times, and it always gets rave reviews.
You can learn all about it here: Homemade Pie Crust Recipe.
So that is where you want to begin, because it will need a bit of time in the fridge to chill. You never want to let your pie pastry get warm and soft.
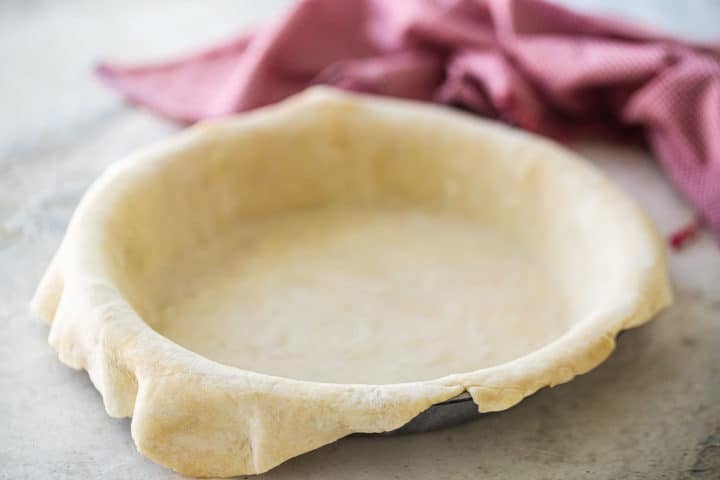
Once you have it made, roll it out to a circle that’s an inch or two bigger than the size of your pie pan. (FYI: the pie pan I’ve used here is a standard-sized 9 1/2-inch diameter metal pie dish.) Place the pie dough in, gently easing it down the sides and into the bottom, allowing the excess to drape over the sides. Then pop it back in the fridge so it stays cold while you work on the filling.
If you’re making a double-crust pie or a lattice-top pie (like I have done here), it’s a good idea to roll that out as well. Again, make it slightly bigger than your pie, then place a sheet of parchment paper on top, roll it into a long cylinder, slip it into a plastic bag, and keep it cold in the fridge.
CHERRY PIE FILLING
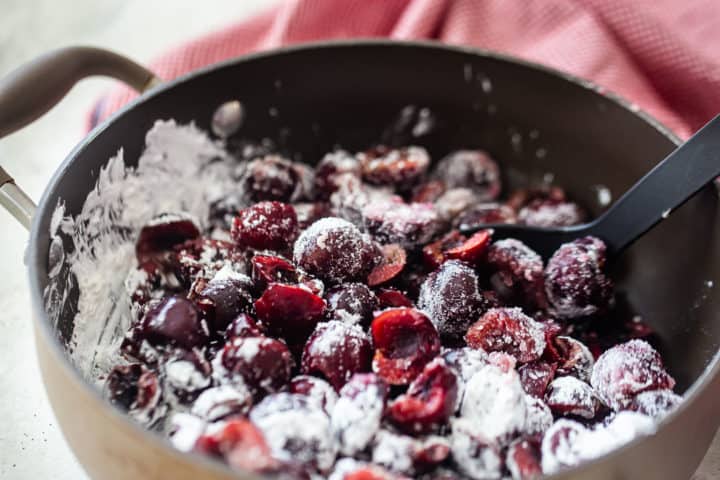
To make the filling, start with the cherries. They will need to be pitted and halved.
I love this cherry pitter, it’s one of the best kitchen gadgets I own: OXO Cherry Pitter. You can use it for olives too!
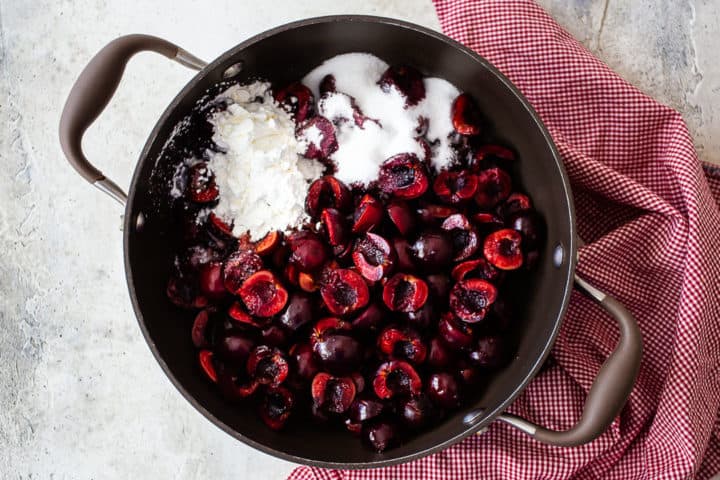
Put them in a big pot and add sugar, cornstarch, lemon juice, almond extract, and a pinch of salt.
Cornstarch is used to thicken the juices. Be sure to use cornstarch, which is a fine, white, flavorless powder, and not cornmeal, which is yellow and gritty and tastes like tortilla chips. To order cornstarch online, click here: Cornstarch.
(To make cherry pie filling without cornstarch, use 6 tablespoons of all-purpose flour instead.)
Gently toss everything together with a spoon until the cherries are coated.
Then cook the mixture over low heat, while stirring, until the juices are thick and syrupy. You’ll notice the liquid goes from pink and cloudy to red and translucent. This should only take a few minutes, as soon as it comes to a low simmer everything will start to thicken.
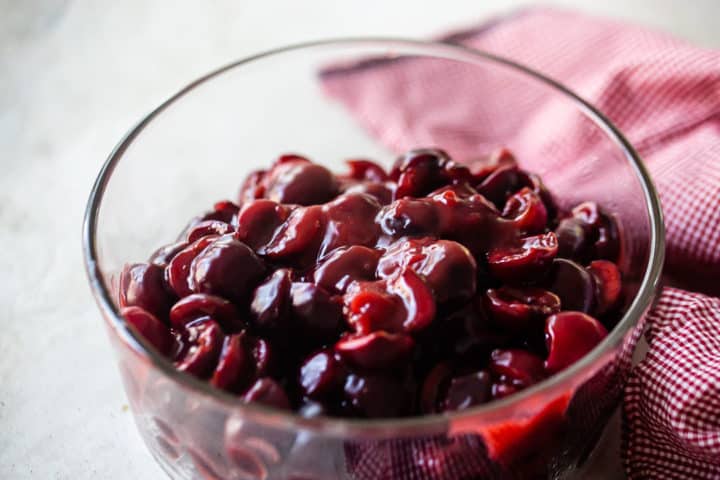
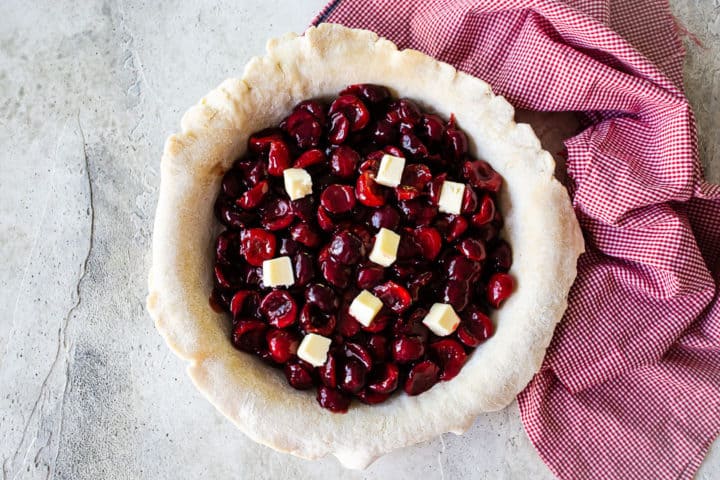
Allow the mixture to cool completely, then grab your bottom crust out of the fridge, transfer the fruit in, and dot the top with butter.
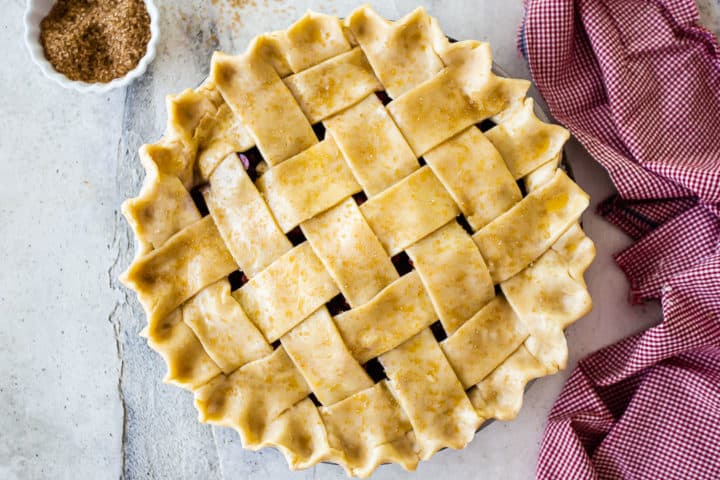
Next, add your topper. You can leave your pie open-faced, or add a crumb topping, do a double-crust pie or a lattice top.
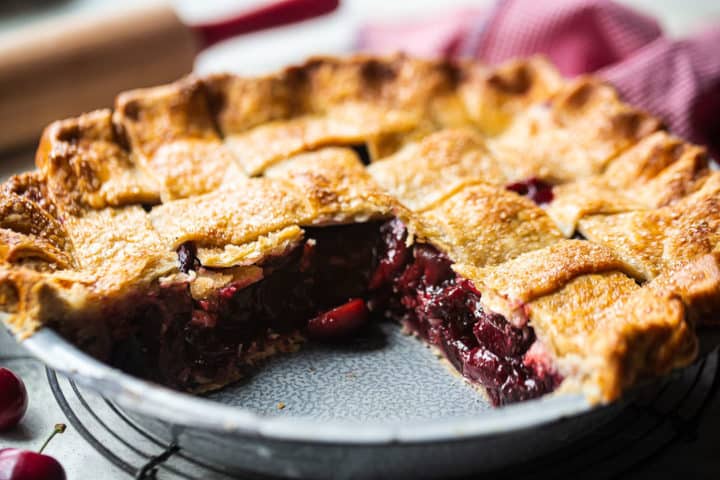
I’ve made a lattice-top pie here- this is a great way to do it because it looks so pretty but it also has built-in vents that allow steam to escape as the pie is baking. If you want to learn how to do this, I have a step-by-step picture and video tutorial for you right here: How to Make a Lattice Pie Crust.
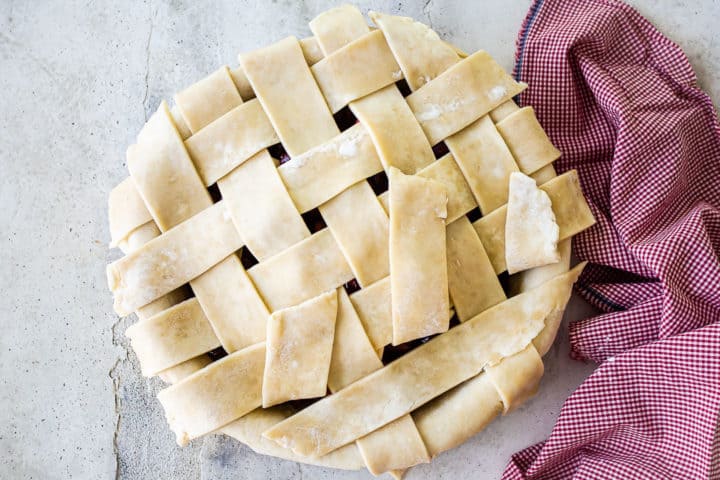
Trim away any excess overhang (I just snip it away with my kitchen shears), fold under, and crimp the edge.
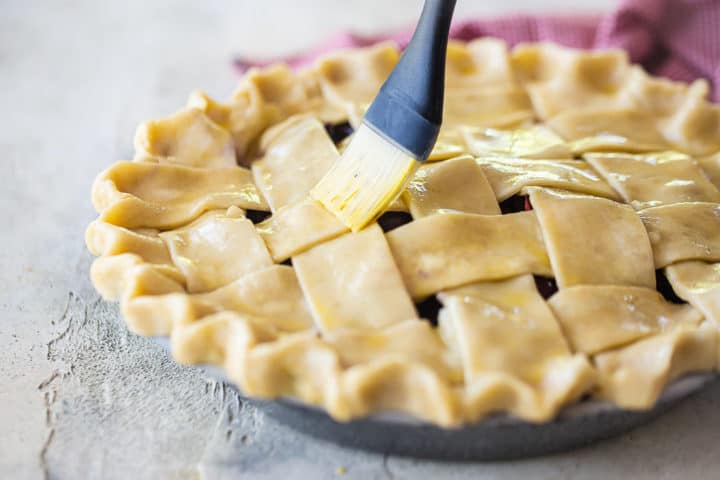
Then brush the top of the pie with egg wash (one egg beaten with a teaspoon or two of water). This will help the crust to brown and give it a little bit of a glossy sheen.
I also like to sprinkle on a little coarse sugar. This is completely optional, but I really like the added sweetness and crunch, and it makes the pie sparkle in the most beautiful way! Look for either demerara (aka: raw) sugar or clear sparkling sugar.
HOW TO BAKE CHERRY PIE
Make sure your pie crust is cold before baking! This will help your crust to be extra flaky. Don’t be afraid to pop it in the freezer for 10 to 15 minutes before putting it in the oven to bake.
Once the oven is good and hot, place the unbaked pie on a baking sheet– this way if the juices bubble over it won’t make a mess of your oven.
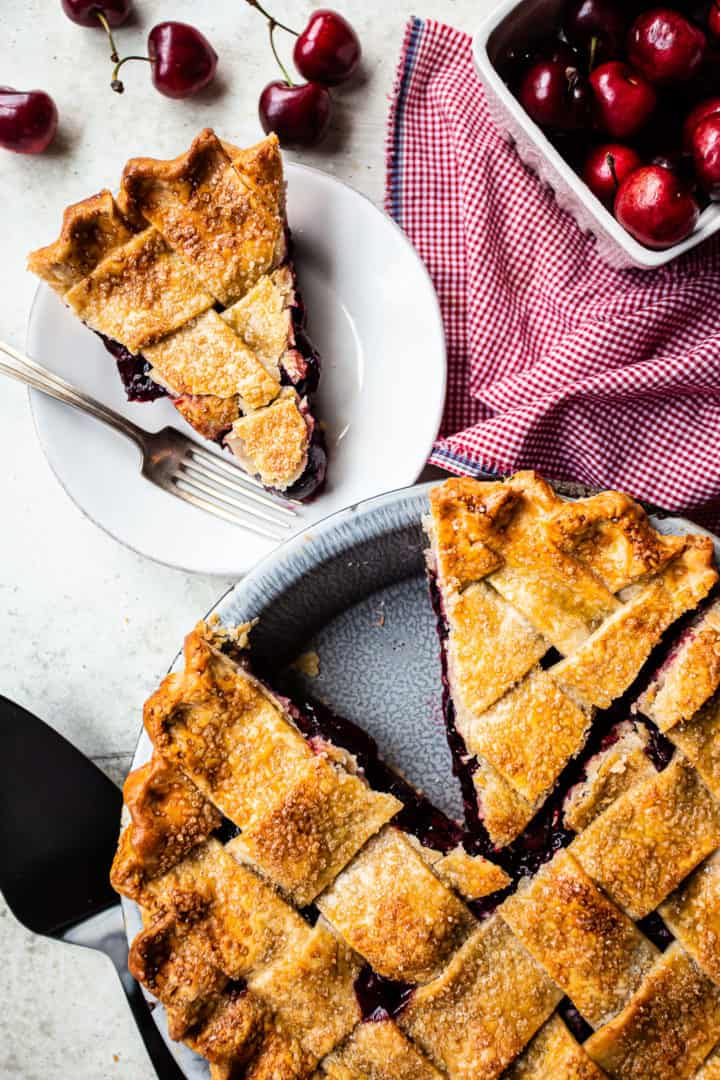
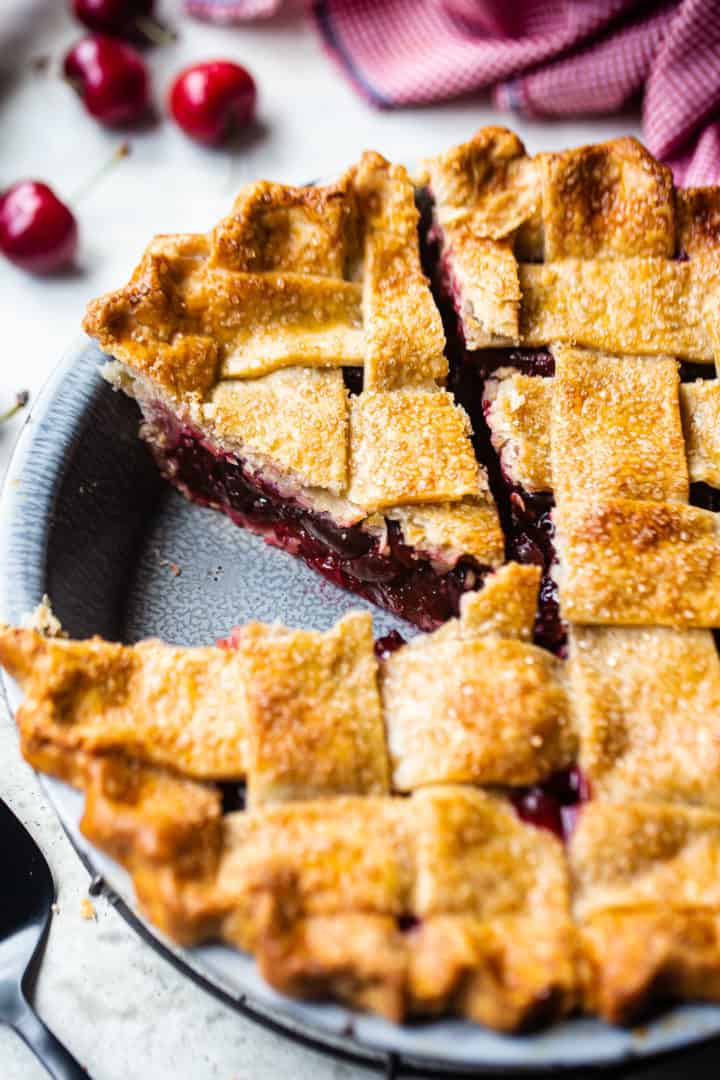
The pie will bake until it’s golden and crisp on top, the juices are thick and bubbly, and the fruit is tender. You can stick a thin knife in between the lattice to check how the cherries feel.
If the edges of your pie are browning too quickly, cover them with foil or with a pie shield.
WHAT KIND OF CHERRIES TO USE
For what you see here, I used fresh sweet cherries, but you could also use thawed frozen cherries or even canned. (Canned cherries, not canned cherry pie filling. Cherry pie filling has added sugar, among other things.)
They can be dark sweet cherries OR sour cherries, or a combination of both. (I recently used a half canned sour cherries + half fresh sweet cherries and it had a really nice, balanced flavor.)
If you decide to use all tart cherries, you might want to use a little more sugar than I have noted in the recipe card below.
CAN THE FILLING BE CANNED?
If you’d like to make homemade canned cherry pie filling, you can definitely use this recipe.
Cook the filling as noted, until it’s syrupy and thick.
Then ladle the filling into sterilized jars, wipe the rims, screw on the lids, and submerge them in boiling water for 10 minutes. As they cool, you should hear the button on the lid popping down. This is how you know you’ve done it right!
For more info on preserving/canning, click here: Strawberry Jam.
CAN YOU MAKE THIS PIE AHEAD
Despite the phrase “easy as pie,” making homemade pie does have quite a few steps and it can seem a little intimidating at first! It’s often a good idea to break it down into easy steps that can be done ahead of time.
I will often make the crust the night before, roll it out, cover it tightly so it doesn’t dry out, and refrigerate it overnight.
Then I can make the filling and bake the pie the next day.
This allows plenty of time for it to cool before serving, which is important. If you cut into a hot pie, it can be very runny and won’t hold its shape well.
HOW TO STORE IT
This pie can be left out at room temperature for several hours. After that, it should probably go into the fridge.
It will last there for probably up to a week, but it does get soggy the longer it sits.
CAN YOU FREEZE CHERRY PIE?
You can- first, bake the pie, allow it to cool, and then pop it into the freezer. Once it’s frozen solid, it can be removed from the pan, tightly wrapped in plastic, and slipped into a zip-top bag.
Or you could just bake your pies in disposable foil pans. That way, your nice pie dish isn’t tied up in the freezer, and you can just wrap it right in the tin.
Thaw at room temperature or in the refrigerator. The bottom crust may get a little soggy through the freeze/thaw process, but it will still taste great!
To reheat, place it in a 170 degree F oven until warmed through.
A FEW MORE OF MY FAVORITE PIE RECIPES
As an amazon associate I earn from qualifying purchases.

Cherry Pie
Ingredients
- 1 batch Perfect Homemade Pie Crust
- 6 cups (828 g) pitted & halved cherries
- 1/3 cup (78.86 g) granulated sugar, (you may need more if using sour cherries)
- 3 tablespoons (44.36 g) cornstarch
- 3 tablespoons (29.57 g) lemon juice
- 1/4 teaspoon (1.23 g) kosher salt
- 1/2 teaspoon (2.46 g) almond extract
- 2 tablespoons (29.57 g) unsalted butter
- egg wash, (1 large egg beaten with 2 teaspoons water)
- clear sparkling sugar, (optional garnish)
Instructions
- Roll out the top and bottom crust to an inch or two larger than your pie dish.
- Place the bottom crust in the pie dish (allowing the excess to drape over the sides), slip into a plastic bag, and chill in the refrigerator.
- Place a sheet of parchment paper over the top crust, roll it into a cylinder, place it in a plastic bag, and chill in the refrigerator.
- Place the cherries, sugar, cornstarch, lemon juice, and salt in a large pot and toss to coat.
- Cook the cherry mixture over low heat until the juices have thickened and the filling is lightly simmering (approximately 5 minutes).
- Transfer the filling to a heat-safe bowl, stir in the almond extract, and allow it to cool completely.
- When the filling is completely cooled, spoon it into the chilled bottom crust, then dot the top with butter.
- Remove the top crust from the refrigerator, unroll it, and cut it into strips.
- Arrange the strips over the filling in a lattice pattern. (For info on how to do this, click here: How to Make a Lattice Pie Crust.)
- Trim away any excess pie dough, turn the edges under, and crimp in a decorative pattern.
- Brush the top crust with egg wash and sprinkle with coarse sugar, if using.
- Chill the unbaked pie for 10 to 15 minutes while preheating the oven to 425 degrees F.
- Bake the pie until the crust is golden brown and crisp, the filling is bubbling and thick, and the cherries are softened (approximately 45 minutes). (If the edges of the pie are browning too quickly, cover them with foil.)
- Allow the pie to cool completely before slicing.


So yummy! Thank you for giving such good recipe
Can frozen cherries be used instead of fresh.
Yes.
Allie, why do we dot the filling with butter instead of stirring it in to melt in the filling? I so enjoyed the way you taught the purpose of each ingredient for the best brownies I’ve ever made.
Oh good, I’m glad! Honestly, I’m not sure what the reasoning is for this, lol! It’s just typically the way it’s done. I imagine you could stir it in too if you’d like?
Also, would I bake for the same amount of time, or any other different instructions. Thanks
The only different instruction would be to top the pie with crumble instead of another pie crust. In that case you would halve the pie crust recipe.
If I use your crumble for topping
What should I add?
What would compliment this pie? I’m thinking the cinnamon would not, what would your recommend or just leave it out?