How to Bake (Easy! and Delicious!) Cutout Cookies with Neat Edges
Learn the secrets to baking cutout cookies with neat edges that won’t spread as they bake! You’ll fall in love with baking and decorating cutout sugar cookies.
*Original published date: 12/15/2012. Updated: 12/4/2016.*
Table of Contents
- Why you’ll love this cutout cookie recipe
- Ingredients and notes
- Variations and substitutions
- Tools and equipment
- How to make cutout cookies that don’t spread
- Recipe FAQ’s
- Expert tips for making cutout sugar cookies that don’t spread
- How to serve
- How to store and keep
- More cutout cookie recipes
With less than a few weeks left ’til the most cookie-centric holiday on the calendar, I’m sure all my baking peeps are knee-deep in flour, sugar, and butter right about now!
So in the spirit of giving, I’m spilling all the secrets for my best cut-out sugar cookies recipe!
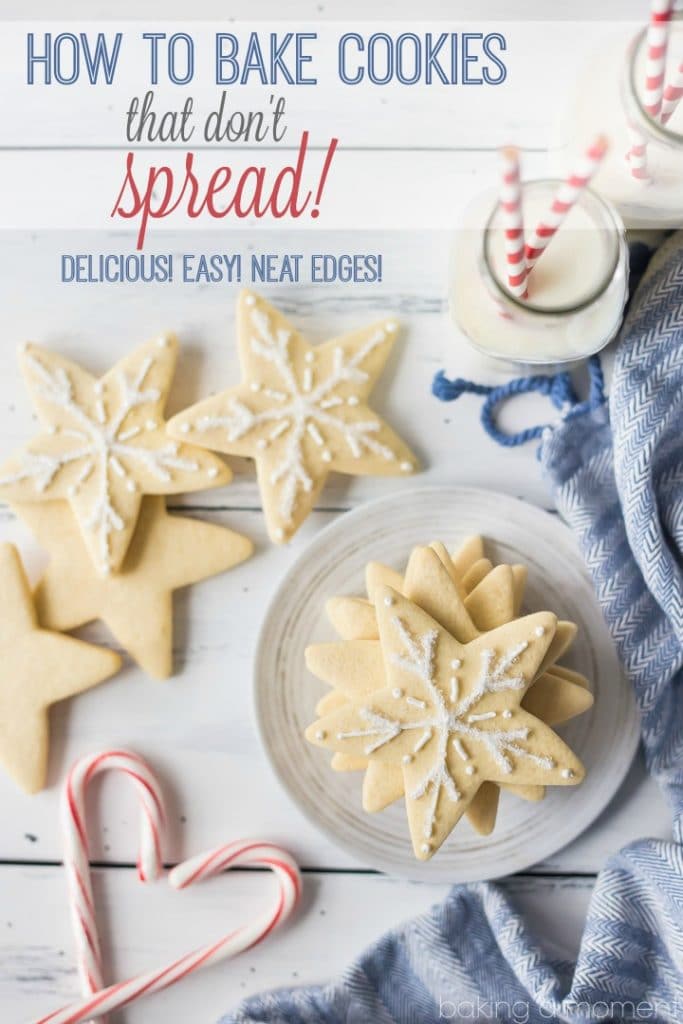
Almost every baking blog I visit has a post or a FAQ devoted to the subject, “How do you bake cutout cookies that don’t spread all over the place in the oven, hold their pretty shape, and have nice, neat edges???”
I searched for the answer to this age-old question not too long ago.
And when I want something, I do not rest until I’ve nailed it!
After much research and experimentation, I’ve decided to put everything I’ve learned on this subject into one comprehensive post.
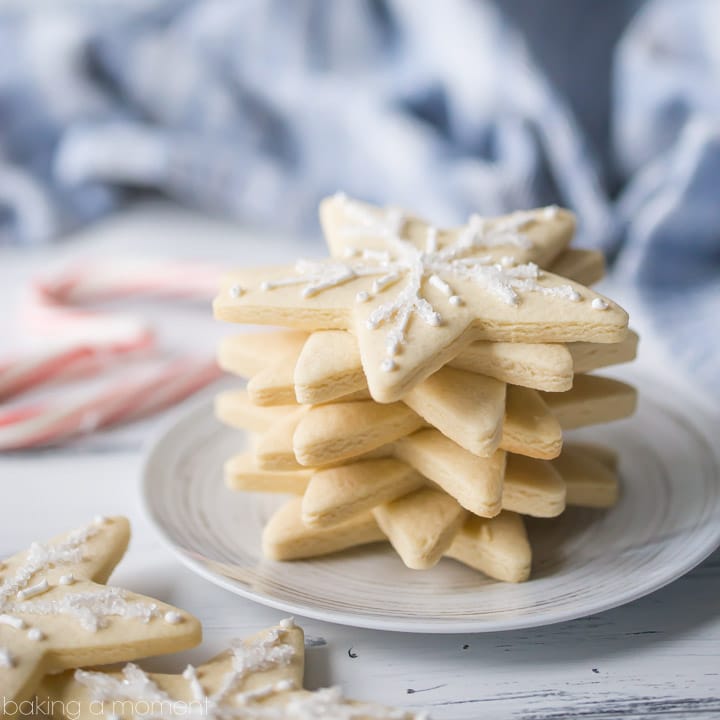
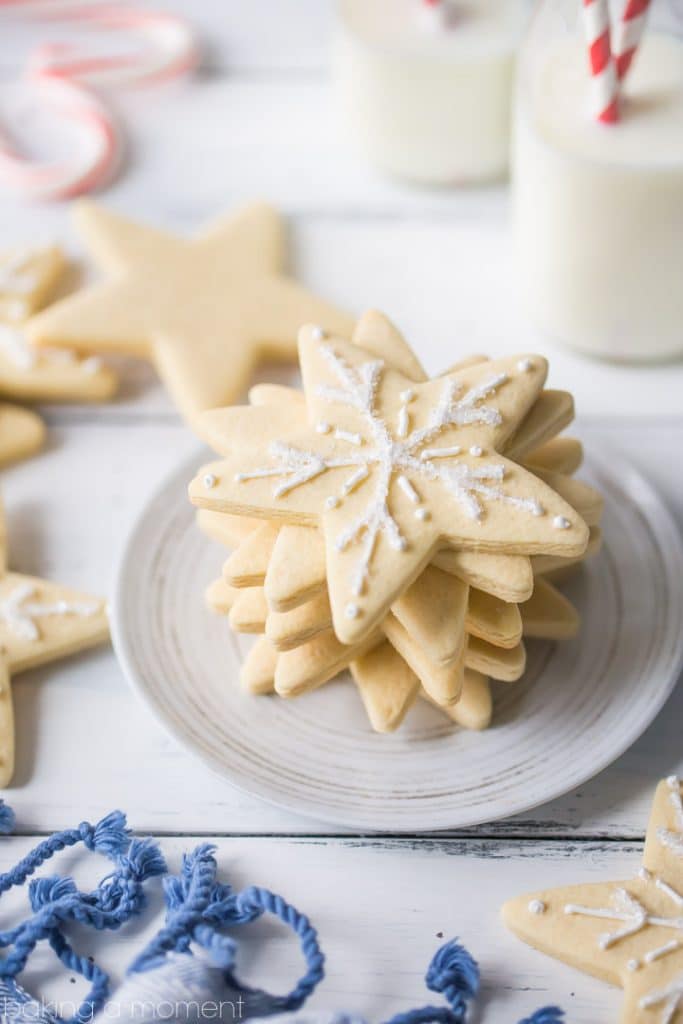
This easy recipe produces cutout cookies that are soft but a little crunchier around the edges, with a mouthfeel somewhere between a sugar cookie and a shortbread.
They’re perfect for decorating!
Why you’ll love this cutout cookie recipe
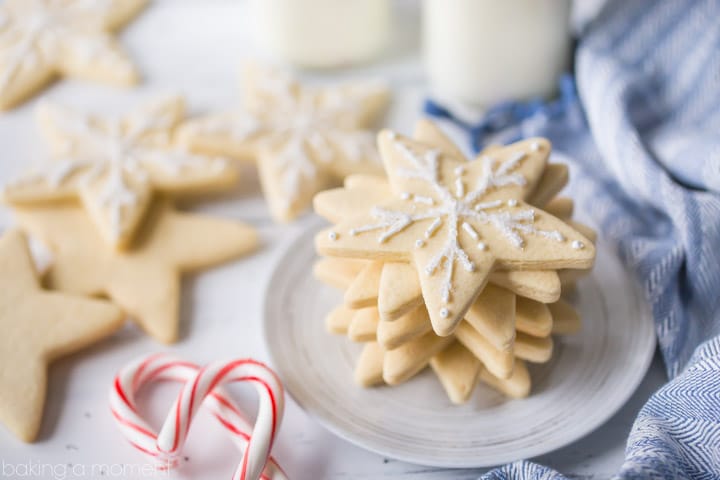
Precise shapes: You can create intricate and precise shapes with this no-spread cutout cookie recipe. Whether you’re making holiday cookies, special occasion treats, or just fun designs, these cookies will maintain their intended shape during baking with crisp, clean edges.
Beautiful presentation: Cookies that hold their shape offer a visually appealing presentation. This is especially important when decorating with icing, sprinkles, or other embellishments, as the designs stay clear and distinct.
Great for cookie decorating: These cookies are perfect for decorating with royal icing, fondant, or edible markers. Their flat surface is a blank canvas for your creative designs, making them great for cookie decorating parties or edible art projects.
Ideal for gifting: When you’re giving cookies as gifts, you want them to look as good as they taste. These cookies retain their shape, making them an excellent choice for packaging and sharing with loved ones.
Balanced flavor: These cookies bake up just sweet enough, with the aromatic fragrance of rich vanilla. They are intentionally a little less sweet, to balance the sugary taste of the royal icing or sparkling sugar they’re decorated with.
Ingredients and notes
Butter: I like to use unsalted butter because it lets me control the amount of salt in the dish. Different brands of butter can contain different amounts of salt, so this way you get a more consistent result. Use cubed cold butter to make the dough. This allows you to skip the step of chilling the dough before baking. For a vegan or dairy-free cutout sugar cookie recipe, use a plant-based butter that can substitute for dairy butter 1:1.
Sugar: Sugar adds sweetness (obvs!) but it also aids in browning and keeps things moist, since it’s hydrophilic (this means it loves water, in other words, it draws moisture in). Regular white sugar is fine, or sub for another type of sweetener if you like. As long as it swaps 1:1 for granulated sugar it should work.
Eggs: Use large eggs. It’s best if they’re at room temperature, but I don’t find this to be critical. For a vegan cutout sugar cookie recipe, swap in your favorite plant-based egg substitute. As long as it can sub 1:1 for chicken eggs, it should work just fine.
Flour: This is the primary dry ingredient that provides structure to the cookies. All-purpose flour is my go-to, but you can swap it out for any kind of whole-grain option if you like. You may need slightly less if you go that route. A gluten-free flour blend that can sub 1:1 for regular flour should also work just fine, if you’d like to make gluten-free sugar cookies.
Cornstarch: The secret ingredient to achieving cutout cookies that don’t spread! It is what creates a really workable cookie dough, and the edges turn out perfectly! Cornstarch is a colorless, odorless, and flavorless starch. Make sure you’re using cornstarch, which is white and powdery, and not cornmeal, which is yellow and gritty and tastes like corn chips.
Salt: Salt carries the flavors and intensifies them. The end result won’t taste salty, but it will make everything so much more flavorful! I like kosher salt best because it doesn’t have any additives (table salt usually contains iodine which can leave a bitter taste), so the flavor is pure. It’s also inexpensive and easy to find in a regular grocery store.
Vanilla: Vanilla extract adds a subtly sweet flavor without being at all sugary. For a more pronounced flavor, try using vanilla bean paste. You could also split a vanilla bean down the center lengthwise, scrape out the seeds, and add those.
Or you could try this with an altogether different type of extract or flavoring, such as:
See the recipe card at the bottom of this post for exact measurements.
Variations and substitutions
Different flavoring: You can also use almond extract or citrus zest if desired.
Spices: Add spices like cinnamon, nutmeg, or ginger for different flavor variations.
Food coloring: If you want to color your cookies, food coloring can be added to the dough. I recommend using gel paste color, since you only need a tiny bit to get a vibrant color. But liquid can work in a pinch too.
Tools and equipment
- Measuring cups and spoons: For measuring ingredients accurately. Follow this guide: How to Measure Ingredients for Baking.
- Mixing bowl: In which to mix up the dough.
- Electric mixer: This recipe creates a very stiff dough, so you’ll need either a stand mixer or a powerful hand mixer.
- Parchment paper sheets: You are going to roll the sugar cookie dough out between two sheets of parchment.
- Rolling pin: For rolling the sugar cookies out flat.
- Baking sheets: On which to bake the sugar cookies.
- Cookie cutters: For cutting out your cute shapes.
How to make cutout cookies that don’t spread
Step 1: Mix butter and sugar
Start by blending the butter and sugar together until smooth.
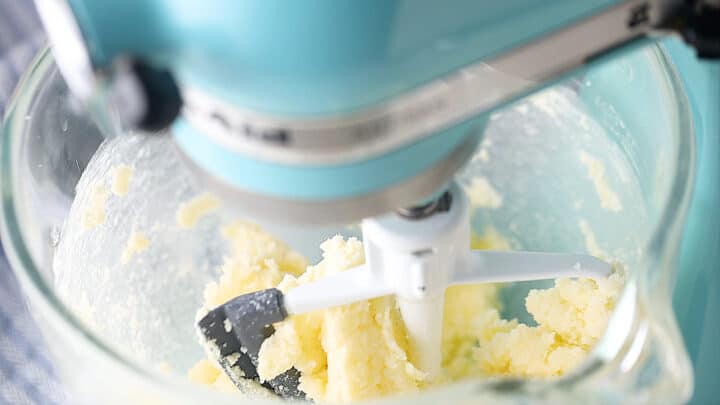
Stop as soon as you have a homogenous mixture. Unlike a lot of other cookie recipes, you don’t want to whip in a lot of air here. That will just expand when it gets hot and cause your cookies to spread.
Step 2: Add eggs
Mix in the eggs, one at a time, until incorporated.
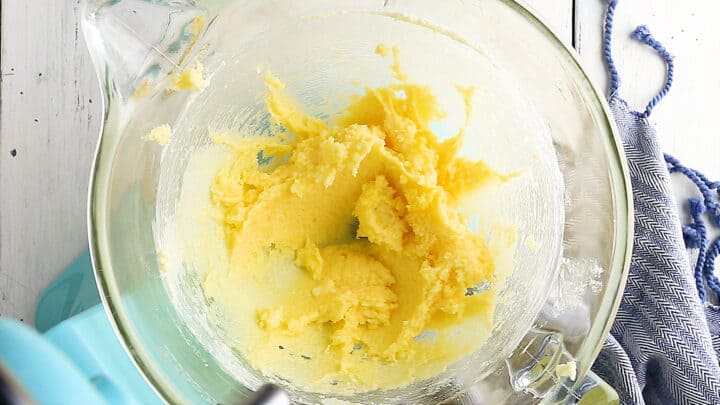
Allow each egg to mix in fully, before adding the next. This will prevent lumps!
Step 3: Stir in dry ingredients
Add the flour, cornstarch, and salt, and mix on medium-low speed.
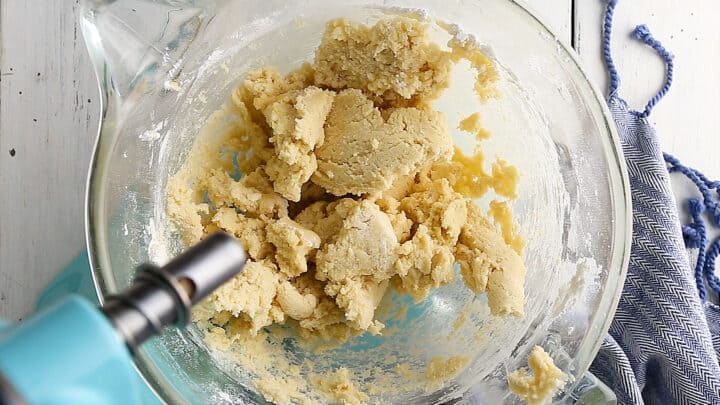
The mixture will initially seem very dry and sandy, but after 3 to 5 minutes in the mixer, it will gather itself into a ball and pull away cleanly from the sides of the bowl.
Step 4: Flavor
Stir in the vanilla. (If you do not have an electric stand mixer with a paddle attachment, you may have to knead the dough by hand to bring it together fully.)
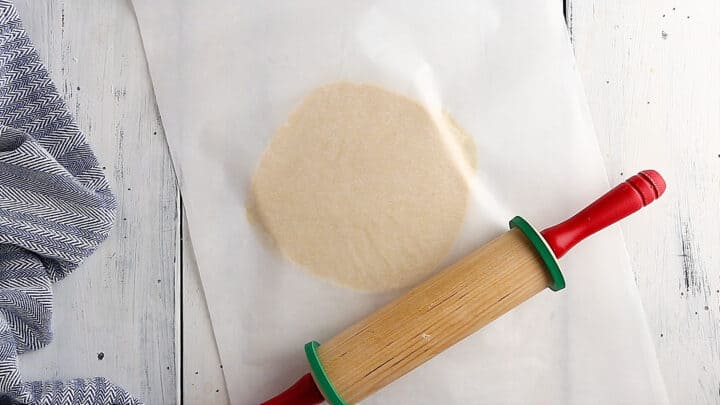
Step 5: Roll
Working with a manageable amount of dough at a time, roll it out between 2 sheets of parchment paper to a thickness of 1/4-inch to 1/2-inch.
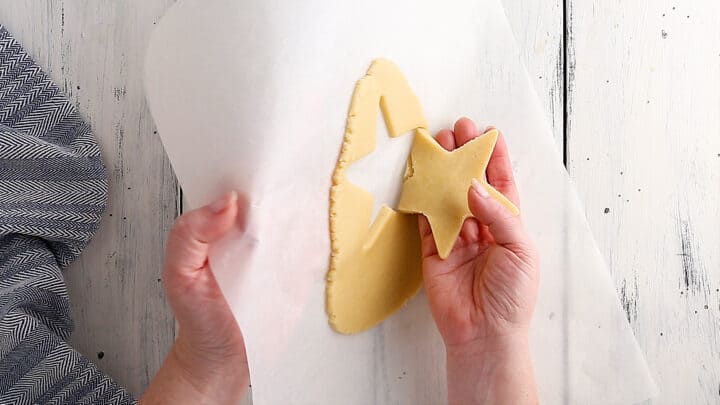
Step 5: Cut
Cut into shapes, then carefully peel each unbaked cookie from the bottom sheet and flip it onto your baking sheet.
Step 6: Bake
You’ll know your cookies are done baking when the edges feel set and the centers are still a little soft.
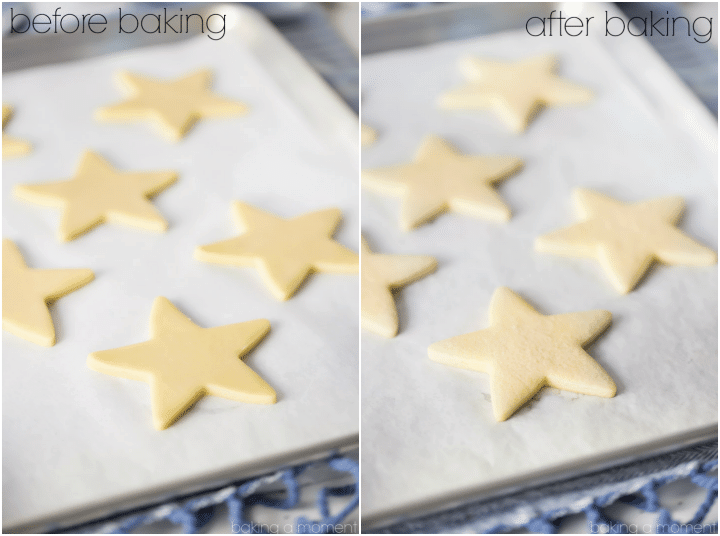
The bake time is going to depend upon how big and thick your cookies are. Larger, thicker cookies will need more oven time than smaller, thinner ones.
Recipe FAQ’s
You can make this dough ahead and keep it in the refrigerator for a day or so, but if you do, you may want to add less flour because the dough will become drier as it sits. If your dough has become too dry and crumbly to work with, it can be moistened with a few drops of heavy cream.
The dough for drop cookies has a soft and sticky consistency. It’s typically spooned or scooped onto a baking sheet, and the cookies maintain the shape they take when dropped onto the sheet. Cutout cookie dough is firmer and more structured. It’s rolled out to a specific thickness, and shapes are cut out using cookie cutters.
The answer depends on how thick you roll the sugar cookie dough, and how big your cookie cutters are. I typically get around 30 cookies from a batch, if I roll the dough to 3/8-inch and use cutters that are around 2 1/2-inches in diameter.
This answer will also depend on the size of the cookie. Larger, thicker cookies will need more time in the oven than thinner, smaller cookies. You’ll know your sugar cookies are done baking when they are set around the edges but still a little soft towards the center. Remember that they will continue to cook for a few minutes, even after they’re removed from the oven. This is called “carry-over cooking,” and if you don’t account for it then your cookies could end up dry.
Absolutely! Wrap them tightly in plastic wrap and they should keep in the freezer for several months. Pop them out and thaw at room temp, and decorate!
Expert tips for making cutout sugar cookies that don’t spread
- Don’t bother softening the butter: I like to use cold, cubed butter when I make the dough. It saves the step of chilling the dough before baking, which is another trick many bakers use to help their cookies keep their shape. If you work quickly, the butter is still pretty cold when it goes into the oven, so the dough holds its shape better and doesn’t get all melty and slide over the baking sheet.
- Mix until just combined: Try not to whip a lot of air into the butter. This can cause spreading.
- Leave out the leavening: Now, you may notice that my recipe contains no leavening of any kind. If you think about the purpose of baking powder in a recipe, it’s to help things puff up and spread out (hello!?) and be light and fluffy. Light and fluffy is great in a muffin or a pancake, but we are talking cookies here, people. They are meant to have a little bite to them. Perhaps they are a little bit more dense, but in this instance, you want that. Most likely, you are either shipping your cookies or delivering them by car, and if they are too light and delicate, they’re more likely to break. So, this will give you a more durable cookie, and I promise you, they are still every bit as delicious.
- The magic ingredient: This is the biggest key to the whole business and maybe the only thing you won’t find on any other blog (that I’ve seen, anyway). THE CORNSTARCH. It’s pure witchcraft. Not only does it lend added structure to the sugar cookies without making them tough, but it also makes the dough SUCH a pleasure to work with! It is NOT sticky at all, nor is it crumbly. It just stays right where you want it. And those edges! I about died…! SO clean and perfect!
- Make parchment your bestie: Also, definitely try rolling your dough between two layers of parchment paper. It is absolutely no-muss, no-fuss! Between this dough’s silky, UNcrumbly texture and the parchment thing, I barely even need to wipe my countertops after making these cookies! **No bench flour!** (Which, by the way, can also make a tougher, less tender cookie.) I also line my baking sheets with it, and besides keeping things from sticking, it keeps the pans cleaner, too! My cookies are baked on parchment, and then I lay them on the same sheets to dry after decorating, so each sheet gets double duty. Here are the baking sheets I use, and here is where I order my parchment.
- Use rolling pin rings: These are a great way to make sure you’re rolling your dough out to a consistent thickness. Which is important for even baking!
- Crank up the oven temperature: Finally, you may notice that I recommend baking the cookies at a higher temperature for a shorter time. This allows the cookie to “set up” more quickly and hold its shape during baking, making it less melty-slidey.
How to serve
Plain and simple: Enjoy the cookies just as they are. Their precise shapes and wonderful flavors can stand alone as a delightful treat.
Decorated masterpieces: Decorate the cookies with royal icing, fondant, or colorful icing gels. Let your creativity run wild by adding intricate designs, patterns, and even personalized messages.
Cookie sandwiches: Make cookie sandwiches by spreading a layer of frosting or jam between two cookies of the same shape. Peanut butter, chocolate ganache, or cream cheese frosting can be excellent fillings.
Cookie pops: Insert sticks or colorful paper straws into the cookies before baking to create cookie pops. These are great for kids’ parties or as edible party favors.
Dipped in chocolate: Melt chocolate (white, dark, or milk) and dip half of each cookie into it. You can even sprinkle crushed nuts, sprinkles, or edible glitter on the chocolate while it’s still wet.
Coffee or tea companions: Serve alongside a cup of coffee, tea, or hot chocolate for a simple pairing.
How to store and keep
Cover the cookies with plastic wrap or store in an airtight container at room temperature.
If you keep them tightly wrapped so they don’t dry out or become stale, they should last for at least a week or two (if not longer!) at room temperature.
More cutout cookie recipes
- Chocolate Cutout Cookie Recipe
- Red Velvet Sugar Cookies
- Gingerbread Cookies
- Soft Cutout Sugar Cookies
This post contains affiliate sales links.
Vanilla Cutout Cookies that Don’t Spread
Ingredients
- 1 cup (227 g) unsalted butter, (2 sticks) cubed, cold
- 1 cup (200 g) granulated sugar
- 2 (88 g) eggs, large
- 3 1/2 cups (437.5 g) all-purpose flour, (you may need as much as 4 cups)
- 1/2 cup (64 g) cornstarch
- 3/4 teaspoon (4.5 g) kosher salt
- 1 teaspoon (4 g) vanilla extract
- 1 teaspoon (5 g) vanilla bean paste, (optional)
Instructions
- Preheat the oven to 375 degrees, and line baking sheets with parchment.
- Cream the butter and sugar, just until smooth and combined (try not to whip in any air).
- Mix in the eggs until incorporated.
- Add the flour**, cornstarch, and salt, and mix on medium low speed. The mixture will seem very dry and sandy at first, but after 3 to 5 minutes in the mixer it should gather itself into a ball and pull away cleanly from the sides of the bowl.
- Stir in the vanilla. (If you do not have an electric stand mixer with a paddle attachment, you may have to knead the dough by hand to fully bring it together.)
- Working with a managable amount at a time, roll the dough out between 2 sheets of parchment paper, to a thickness of 1/4-inch to 1/2-inch.*
- Cut into shapes, peel away from the bottom sheet of parchment carefully (see the video below), flip onto the prepared baking sheets, and bake until set around the edges but still a bit soft in the centers (approx. 9 to 12 minutes for 2 1/2-inch, 3/8-inch thick cookies).
- Cool completely, then decorate with royal icing.


Hi
Wonderful recipe! So awesome that we need not to wait for chilling dough( hate to wait). Need to have acookie fast ! Been my go to recipe. Less ingredients. No fuss baking!
Lots of love to you ?
So glad you’ve been pleased with it Liji! Thanks for the great feedback!
Have you tried adding sprinkles (either the rod or the balls) to this mixture and it still keeps it shape?
I saw your comments about the choc chips and i’m still willing to give that a shot. Even if they look terrible i’m sure the taste will be there. haha
Actually I have yet to try your recipe but given the other comments; its going to be a success so already asking further questions 🙂
I don’t think I’ve ever done that Emma but I see no reason why it would not work! As you said, the mini chocolate chips are fine so sprinkles should be too. Good luck and have fun!
This recipe is absolutely perfect! Cookies come out perfect every time- question: if I was to double this recipe to make quite a large batch do I just double all the ingredients?
Hey Sarah! So happy you like it! I think that should work just fine- as long as your mixer is large enough to handle it. Good luck and thanks so much for the great feedback!
I’ve research all kinds of recipes and your recipe IS the best of all! With my kind of sugar cookie decorations, the cookies need to be on their A Game! And yours is it! I do Japanese style designs such as dainty detailed doily designs, 3D decorations and even 3D sugar cookie houses!
I thank you! Not only they’re pretty and beautiful, they also are great tasting cookies!
Wow that sounds amazing! I would love to see your work. So glad the recipe has been good for you! Thanks so much for reaching out and for the positive feedback!
Aww … Thanks!
If you would be kind to see my work! It’ll be amazing for me to get some input, comment and feedback from a pro like you. You are my idol since I tried your recipe on day 1!
My instagram handle account is: @LaCherieConcept
Can’t wait to see what you think of my decorations!
Soon, I will get to meringue cookies + Macaroons!
Guess who’s recipes that I’ll grab? >yours<
I just popped over to look at your feed- it’s gorgeous! Keep up the amazing work, you are so talented.
Hi! I made your cookies and they have a great taste! Mine were dry and I did not overtake them. Please help!
Try baking them for a shorter time- around 2 to 3 minutes less. They will continue to bake (carry-over cooking) as they cool.
The weights in the metric version of the recipe do not appear to be correct. All purpose flour is 120 gms per cup so 3 1/2 cups would be 420 gms and 4 cups would be 480 gms. I found different weights for cornstarch depending on the manufacturer, but never saw anything as high as 96 gms for 1./2 a cup -> that is the weight for a full cup per the King Arthur Flour site.
I just love your recipe! I found it quite by accident and am so glad. Never had any spreading issues at all. And the cookies taste delicious! Thank you for sharing!
My pleasure Jenny! I’m so happy you like it. Thanks so much for the positive feedback!
could crisco be used instead of butter?
I think it probably could, but I definitely prefer the flavor that real butter gives.
I just moved to TN and it is HUMID! I moved from NM so my dry climate recipe was not working. So I was trying everything and couldn’t get it right. I was searching online to get some ideas. I read about adding cornstarch and taking out leavening but I needed help putting it together. This worked perfectly! My cutouts came out crisp and clean and I couldn’t be happier with the results. Thank you for the recipe! 🙂
It’s my pleasure Anika! I’m so happy it worked well for you. Thanks for the positive feedback and congrats on the move!
Hi Allie,
I love the recipe is the one that I use every time that I have to do cookie.
I will like to do a modification and add the tiny chocolate ship do you think is can be done?
Yes that should work no problem! Good luck and enjoy!
I want to make these cookies, but I won’t have time to bake and decorate them the day I need them. Can I make these cookies one day, decorate with royal icing the next, and have them ready for a party on the following day? Will they good bad?
I just made these and love how they came out! I even mixed the dough in a food processor and let the dough sit an extra 10mins in the freezer before cutting shapes but the cookies came out amazing! Thanks for great recipe! Would have liked chewy middle but at just 9 mins they came out a tinge brown on the sides not enough to make me complain they are still perfect!
Love it plain-also added lime zest, fresh lime juice to make mini key lime tarts. Was thinking of making peanut butter flavor-just substitute 1/2c peanut butter for regular butter?
That sounds fantastic Julia! Actually, you can just add the peanut butter to the cookie dough, without decreasing the amount of regular butter. 1/2 cup is good but you can probably add as much as 1 cup and still have the cookies come out. Good luck!
I have not tried your recipe yet but my question is can you taste the cornstarch in the cookie?
BTW the recipe sounds divine.
Not at all- just be sure you use cornSTARCH and not cornMEAL. Cornstarch is a flavorless white powder, cornmeal tastes like cornbread or corn chips.
FINALLY!!! An awesome cut out cookie recipe that doesn’t spread!!! Plus, so easy to roll, and I love the texture, and also taste very good!! It’s a keeper, ajond I thank you very much!!!
That’s so great to hear! Thanks for the great feedback Joan!
Oh my god. Thank you, thank you!!!! These are exactly what I was going for.
I made a half recipe to test it and it works! Gorgeous!
So glad to hear it! Thanks for the 5-star rating!
Hi I want to use your recipe for my daughters wedding favours . I am using a dove cutter and applying a fondant white overlay .
They will be bagged and tied with ribbon .
How long before the day can I bake them and still have them taste freash . Was going to bake them on the Wednesday for the Saturday wedding ?
Thanks Sue
I think that should be just fine Susan. Good luck and congratulations!
I’ve got a question. I make them with cream cheese and tartar but I’m planning on using cornstarch to make them hold their shape. If I do, would I have to substitute any of the above ingredients?
This recipe does not contain cream cheese. If you’re looking for a cream cheese sugar cookie recipe that contains cornstarch, you might be better off just using this one: https://bakingamoment.com/soft-cut-out-sugar-cookies/