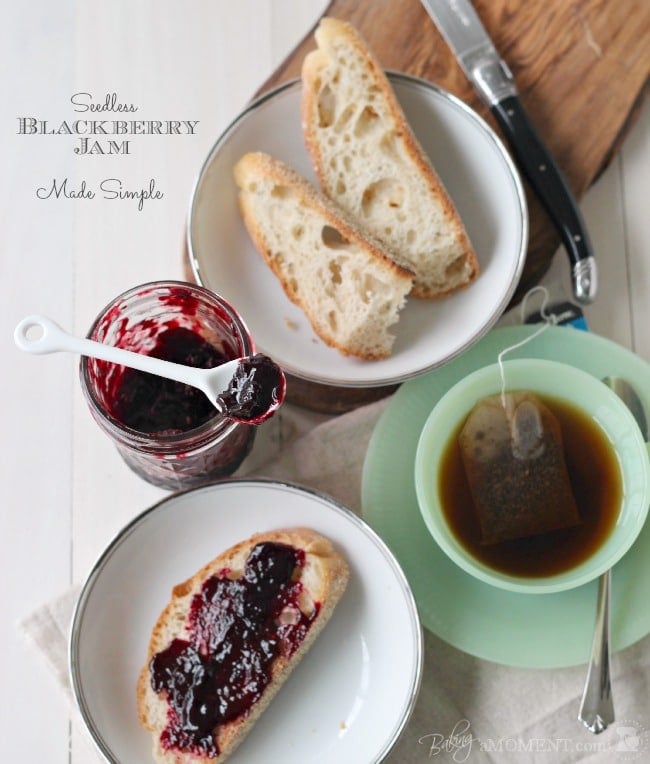
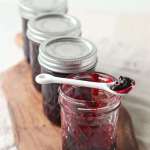
How to Make Seedless Blackberry Jam (No Pectin)
Don’t be afraid of canning! A few simple steps will have you enjoying homemade fruit preserves, no pectin or special equipment needed.
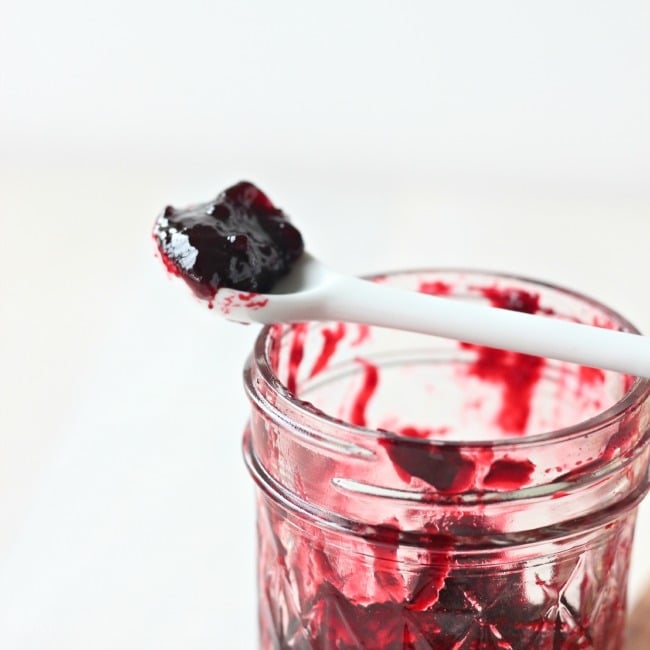
I made jam!
Woot!
This was a first for me. I always thought the idea of canning and preserving seemed so complicated and scary, and I was too intimidated to make any attempt. Daunted!
Well, sometimes the most wonderful things have a way of just falling into your lap, and before you know it, you’re knee-deep in a water bath, sterilizing jars…
We enjoyed our last summer shore weekend this past, and it was so nice to relax, enjoy a little sun and cool breeze, and catch up with family for a few days. (And my older son lost his first tooth! Please excuse my hollering like a lunatic…)
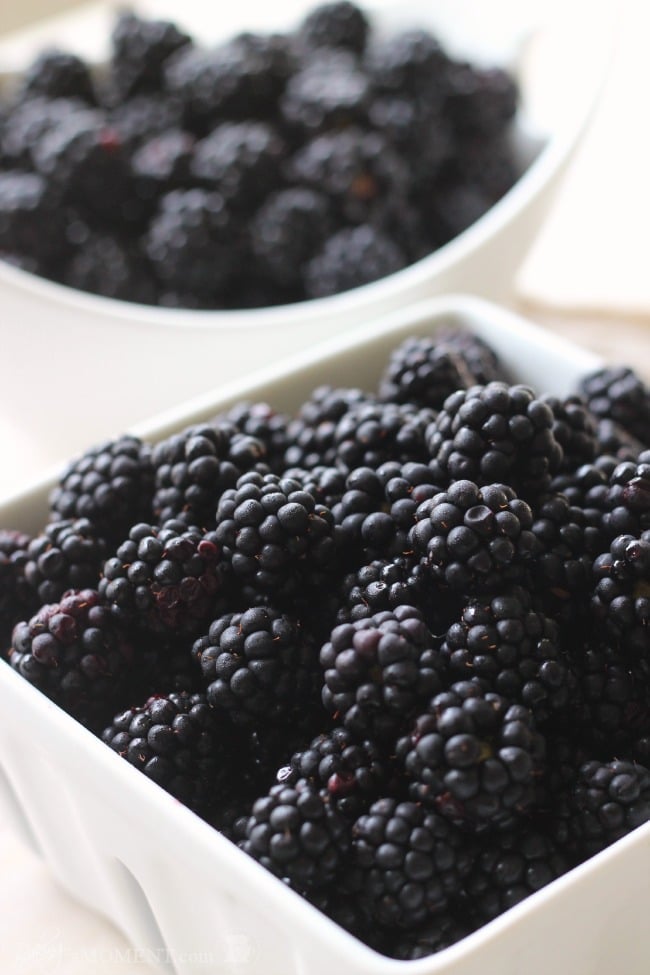
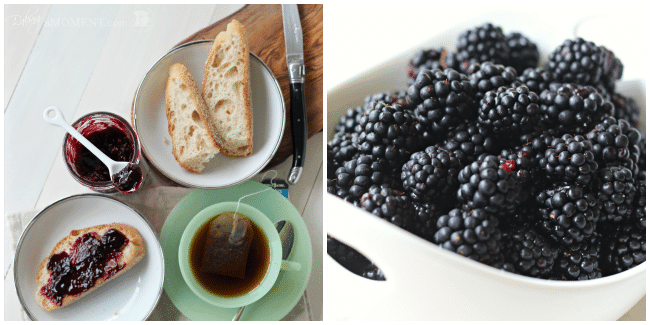
My brother- and sister-in-law showed up with a mahoosive bucket of blackberries they had picked at a local farm. (Remember just a couple of weeks ago, I was griping about how expensive blackberries are in PA? What a stroke of luck!) Many of them went straight into our hungry mouths, but by the end of the weekend, there were still over two pounds remaining. My husband and I bounced a few ideas around for what I could do with them, but I soon realized there were just way too many to simply bake into a recipe.
And what better way to repay my dear in-laws for their blackberry generosity, than to offer them a jar or two of homemade preserves at our next holiday gathering?
There’s a lot of info on home canning out there on the interwebs, so I spent a solid morning just familiarizing myself with the process. I decided to go the non-pectin route. Just seemed a little more rustic to me. Plus, I didn’t feel like making a trip to the store. Truth.
I learned that you can be super specific about it, or you can be more relaxed, and add sugar/flavor enhancers by taste and feel. Contrary to my uber-perfectionist, Virgo (read: anal) tendencies, I decided to just go with the flow. Worrying about sterilization and sanitation is enough of a fuss for me, being a first-timer and all.
Before I launch into the nitty-gritty, let me put your mind at ease. Jam, or preserves, are nothing more than reduced and thickened fruit. If you can make a sauce, you’ve got jam in the bag. And if you don’t mind keeping it in the fridge, you don’t even have to bother with the boiling and sterilizing. I wanted to go ahead and take a proper crack at it, so here’s how it all went down.
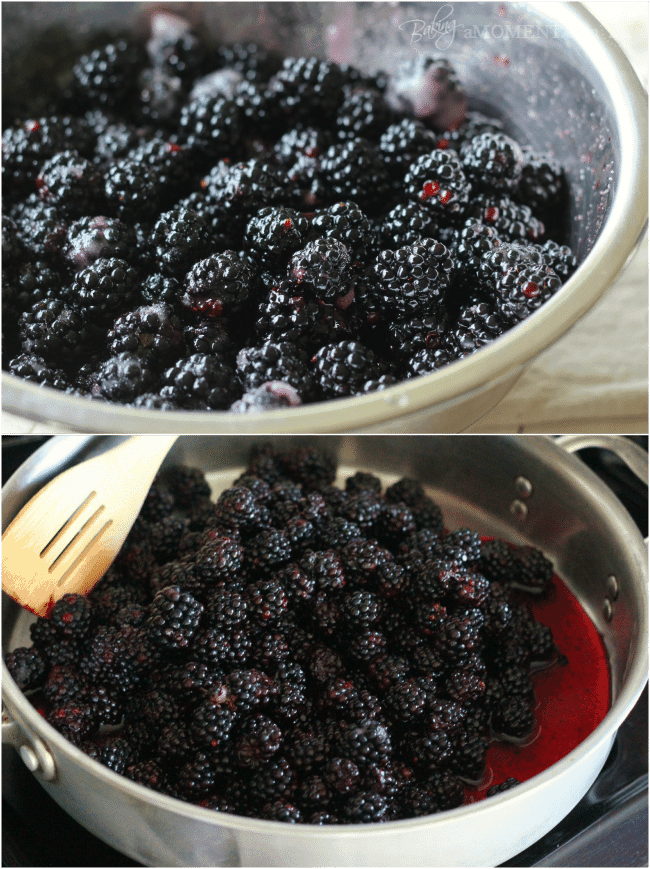
After giving them a cool-water rinse, I macerated the berries in sugar overnight, sweetening them and helping them to give up a lot of juice.
I didn’t really bother to pick over the berries, removing stems/leaves, etc., because I knew I’d be straining them anyway. I’m not a fan of seedy jam so I took the extra step. Any other kind of fruit, and I would have loved big chunks, but I just find those big blackberry seeds to be super-annoying. No thanks.
Speaking of de-seeding blackberries, I remember receiving a food-mill as a wedding gift, oh, about an eternity or so ago. This would have been the perfect time to crack it out, but here’s a glimpse into our mad basement organization skillz:
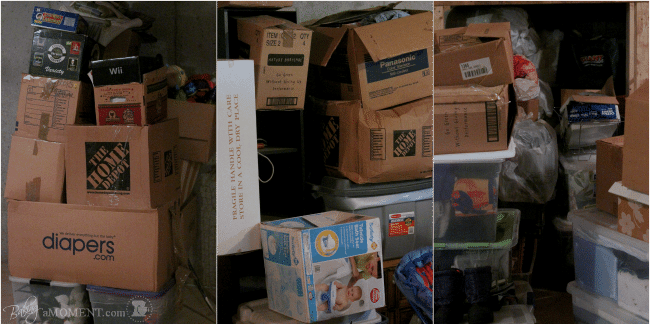
Um, ya. Maybe I’ll just use my seive, mmmmkay?
Back to jam. I let the berries soften up over medium heat, and then I strained them. It was a tedious process, but don’t let that deter you from jam-making. If not for this step, the whole business would have been a snap. And after a little while it became kinda meditative… Scoop in soft berries, push, push, swirl… push, push, swirl… the ladle worked great for this.
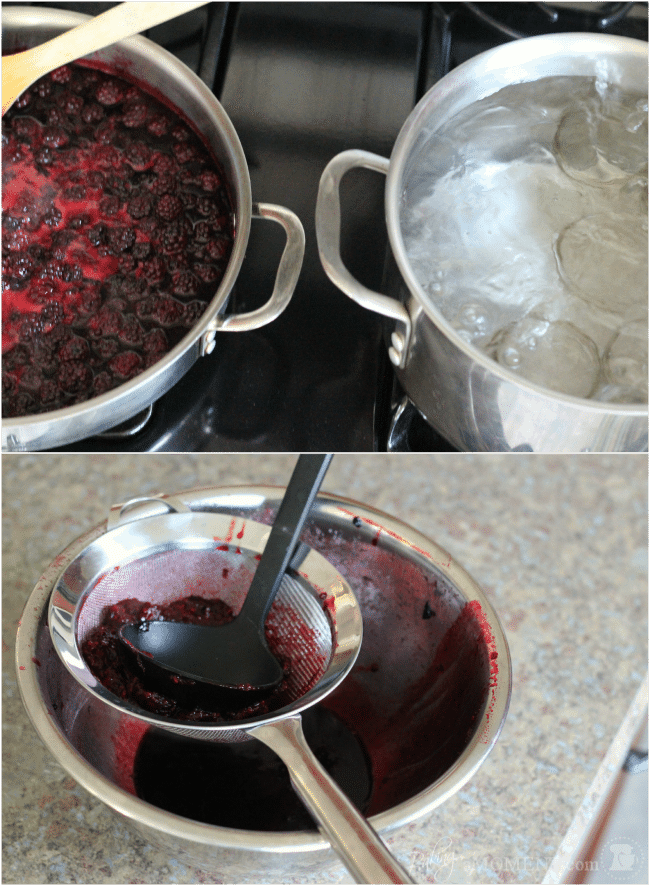
I submerged the jars in boiling water for 10 minutes while all this was going on. (Keep them warm so they don’t crack when the hot jam goes in!)
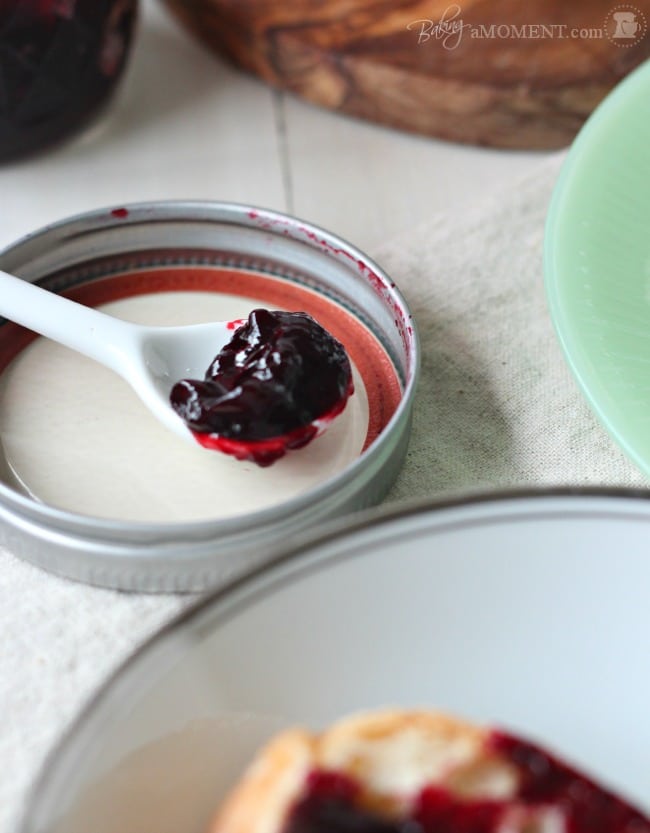
Once the blackberries were de-seeded, I just whacked the puree on the stove and (slowly) brought it up to a bubble, stirring. I also threw the lids into some simmering water to soften up that ring of gummy gunk that makes the seal airtight.
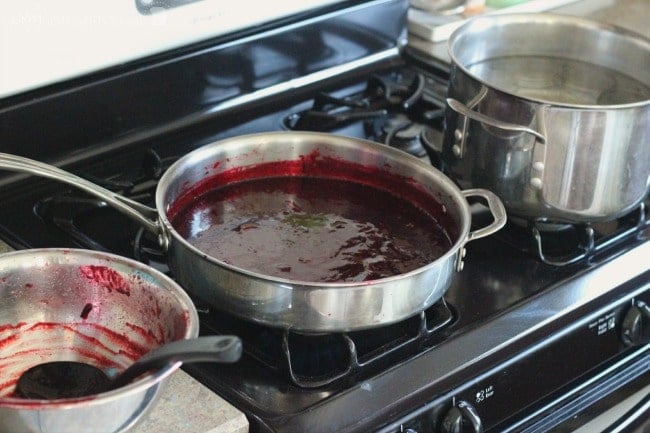
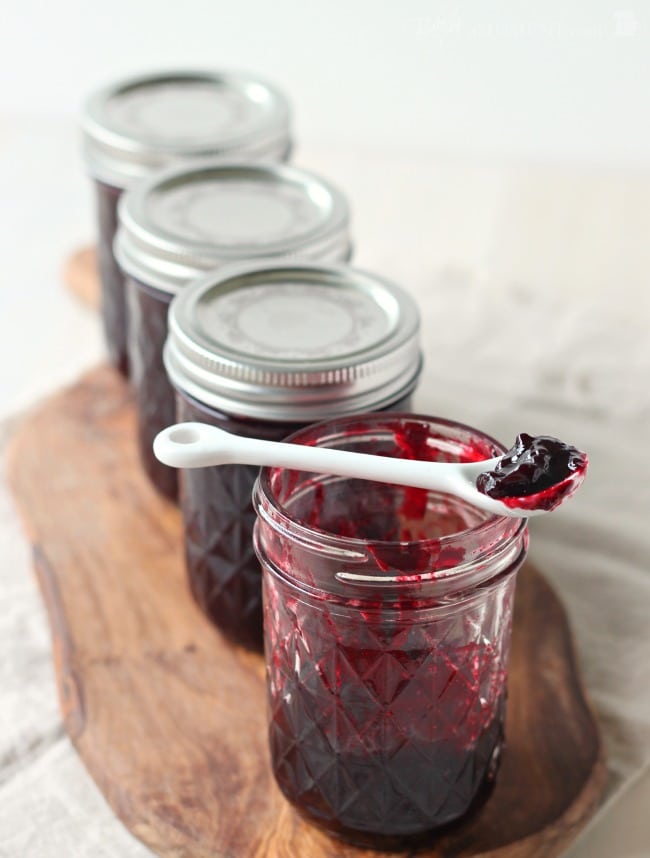
A squeeze of fresh lime, a quick taste for sweetness and maybe a little more sugar or citrus, and once it looked dark, shiny, and thickened, it was ladled into hot, sterilized jars.
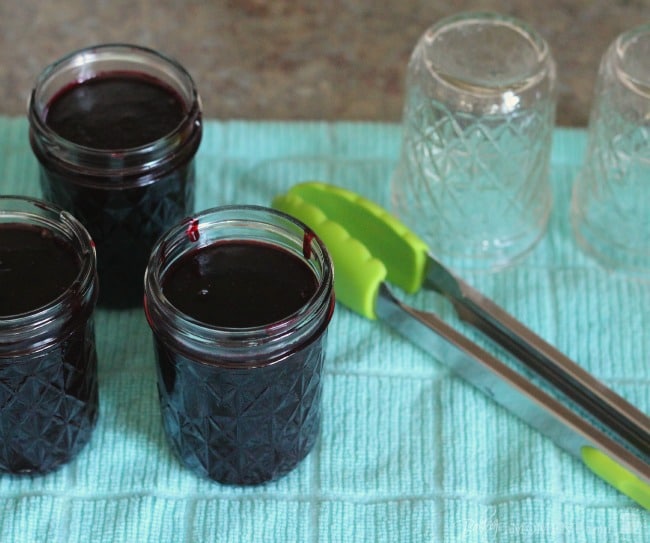
Wipe around the rim, lids go on, and the jars are placed back in the big pot of water and boiled for 10 minutes.
Once they’ve cooled completely, you can check the seals. If the “button” pops up and down, then they didn’t seal properly. It’s ok though. Those’ll keep in the fridge for a couple of weeks. But if it’s a tight seal, they’ll keep in a cupboard for MONTHS! Perfect homemade gift!
This wasn’t so hard. I’d do it again. As a matter of fact, I’ve got an itch to make a big batch of tomato jam… so keep an eye out for another possible canning post, guys. 😉
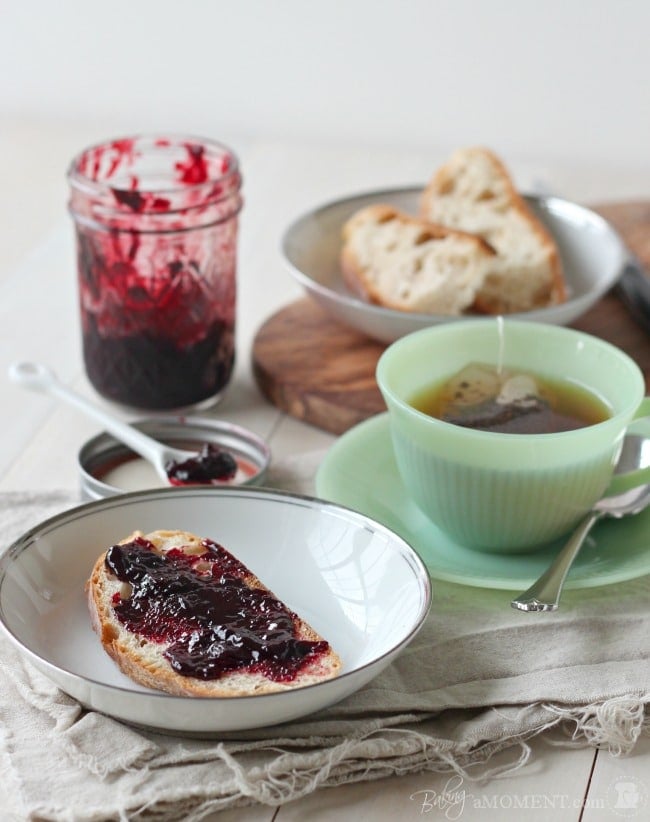
And, I’ve got a scrumptious recipe up my sleeve to utilize these sweet and luscious preserves! So stay tuned! I’m totally psyched to get baking again!
A very handy chart, for your reference: http://pubs.ext.vt.edu/348/348-594/348-594.html
PS- I didn’t buy any special equipment, other than the jars. A lot of websites/stores will make you think that you need a whole arsenal of task-specific canning equipment, but I just was not interested in making the investment (of time, storage space, or money). A well-stocked kitchen already includes a stockpot and a pair of tongs, and mine’s no exception. I’m sure a wide-mouth funnel, pair of canning tongs, magnetized lid-grabber, and jar-lifter-outer-basket would have been nice, but unless you think you’ll be doing a buttload of canning in the future, I think you’ll get by ok without.
Have you ever tried canning? Do you enjoy it? Are you a pectin-using, recipe following type, or do you just taste and adjust? Have you ever done any interesting flavor combos? (I toyed around with the idea of adding a little gin to my blackberry-lime concoction.) Or are you just completely intimidated by the whole idea? I have to say, that for me, once I gave it a go I realized it’s not so scary. Just keep everything warm and boil it well and you’re golden.
How do you like to use fruit preserves in your baking? Would love to hear your thoughts/ideas; as always, your comments are the bright spot in my day! 😉
As an amazon associate I earn from qualifying purchases.
Seedless Blackberry Jam (No Pectin)
Ingredients
For the jam
- 2 1/2 pounds fresh blackberries
- 1 1/2 cups granulated sugar
- 1 tablespoon lemon or lime juice, (juice of half a lime or lemon)
Equipment
- 3 8-ounce canning jars with fresh lids
- Large Saute Pan
- Sieve
- Tongs
Instructions
- Rinse the berries in cool water, and toss in sugar. Allow to macerate, refrigerated, overnight.
- In a large saute pan, warm the berries over medium heat, until softened.
- Press the mixture through a fine mesh sieve or food mill, to remove the seeds.
- Submerge the jars in a large pot of boiling water, for 10 minutes. Keep warm.
- Place the puree back in the saute pan, and heat, over medium heat, until thickened.
- Place the lids into simmering water to soften the seal.
- Stir in the citrus juice, taste the jam, and adjust seasoning, if needed. When it has reached the desired consistency, spoon it into the hot jars.
- Wipe the edge of each jar with a clean cloth, and place the lid on. Screw on the rings and submerge in boiling water for 10 minutes.
- Remove with tongs, and allow to cool.
Notes
- Allowing the berries to sit overnight in the fridge with the sugar allows them to sweeten and release their juices.
- You don't need to pick over the berries and remove leaves or stems since you will use a sieve later to remove the seeds.
- Allow the berries to soften in a large saute pan over medium heat before you strain them.
- Add the softened berries a scoop at a time to the sieve, push them down, and swirl using the bottom of the ladle to release the juices into a separate bowl.
- To save yourself time, submerge the glass canning jars into the boiling water for about 10 minutes while you strain the juice from the berries.
- Keep the jars warm so when the hot jam is added, they don't crack.
- Once everything is strained, it goes back into the pot to thicken.
- Check the seals on the lids. If they pop up and down, they do not seal properly.
- If correctly sealed, the jars will last for months in your pantry.
- Many websites and stores will make you think you need a whole arsenal of task-specific canning equipment, but you don't! Besides the mason jars for canning, you should have everything in your kitchen.
- Any leftover jam (that does not fill a jar within 1/4" of the rim) can be kept refrigerated for 2-3 weeks.
- Jam that has been appropriately processed (the button on the lid should not pop up and down) can be kept in a cupboard for several months.


We had a bit of a misstep when trying this. I macerated the berries then pushed through a sieve (I long to have a food mill but just thought today to try the electric juicer!). It was getting late so I placed the juice in a container and placed in the fridge to can the next day. Life happened and the next day turned into 3 days later. When we took the lid of, it was a bit frothy with just the tiniest taste of alcohol! I guess we were starting to get blackberry wine (made have been the raw honey I used instead of sugar). I dumped it all into the crock pot and heated it up for a while. The frothiness went away so we continued on and processed the jars in a water bath for nearly 15 mins. Not sure how it will turn out…..may just be a sauce for ice cream as it seems pretty thin still.
That’s really interesting Angie! It sounds like you had the start of a shrub happening. I’m surprised it happened that fast in the fridge. I think it will probably still come out ok, just be sure to really boil it down quite a bit if you want a thicker jam. That’s really the key to it all! Good luck 🙂
Just finished 2 batches – the jars are cooling now. This is the 2nd year I’ve used your recipe and instructions. I just wanted to say thanks! I am so proud of those little jars, I can’t even tell you!
Aw, that makes me feel proud too! I’m so happy you like this recipe Cecily! Enjoy your jam 🙂
I am making your jam right now! It looks great! Can this recipe be tripled? And once we can the jam, how many months will it be good for? And, if you don’t take the seeds out, do you cook for the 25 + 45? Thank you so much!
I think it should triple no problem, Denise! It should keep for up to a year in the pantry (unopened), and for 6 weeks to 2 months in the fridge after opening. As for the cook time, it can vary by the water content in your berries, so I’d say just keep an eye on it and once it’s reduced/thickened you can take it off the heat. Just keep in mind it will become even thicker once it cools. I hope that helps! Enjoy 🙂
Thank you Allie very much. The jam tastes great but this morning is pretty thick, so i think next time i will do what you said and take it off the heat as soon as it thickens, maybe just the 45 minutes would be better. I appreciate all your help!
My pleasure, Denise! If it’s too thick you could always add a little hot water to loosen it up. Just a teaspoon or so at a time until you have the consistency you like. Thanks so much for reading!
Love this recipe! I left it on the stove a little too long, so I have very thick jam, but next time I’ll know better. This was my first attempt at homemade jam and at canning and I couldn’t be more pleased. Thanks so much!
I’m so glad you like it Kristen! If it’s too thick for you, you could always warm it up slightly and stir in a few tablespoons of water. Thanks so much for the awesome feedback!
Just wondering, can jars be sterilized in the micro?
Hi Newell! I must say I’m not familiar with that method. If it’s something you’ve done in the past though, and had success with, I don’t see why not! Thanks so much for reading 🙂
One can also, just wash the jars well and put them in a 200 degree oven for 20 minutes to sterilize them. The lemon is to up the acidity in your final product which helps to preserve it and activate the pectin to gel it. Hasn’t anyone heard of a jelly bag to put your fruit slurry in ?. Just hang it and the juice drains out leaving the seeds, etc. in the bag.
Great tips Randa- thanks so much for sharing!
beautiful sounding recipe! can’t wait to test this. have you tried adding some apples in? and if so, at what point should that happen? i’ve got 1,5kg of organic berries waiting with org apples to companion them! thanks for brilliant tips!!
My pleasure Helka! I have not tried it any other way but the way it’s written here, but apples do sound like a lovely addition. I would imagine the apples might take a little longer to soften up than the berries, so I would probably give them a bit of a head start just to make sure all the fruit is done cooking at the same time. If that makes sense! Good luck and I hope you enjoy!
Thanks for a wonderful recipe 🙂 I too try and reduce sugar in my baking as much as possible, both for health reasons and to avoid my products being overly sweet! I have one comment and one question for you:
* Comment: I noticed a lot of people had trouble with the recipe thickening enough. In addition to the suggestion by one commenter to add lemon peel, you can also add a bundle of lemon pips tied in muslin/cheesecloth to your pot while the jam is cooking. They release a lot of pectin for a firm-set jam, and you should have them on hand if you’ve been juicing lemons anyway 🙂
* Question: I love making curds and other preserves to give as gifts, but always get scared by the warnings about requiring certain levels of acid and sugar to ensure safe preservation. The officially sanctioned “safe” recipe for lemon curd by the National Center for Food Preservation uses a LOT more sugar than I normally would, and even stipulates you must use bottled lemon juice, not fresh lemon juice, to ensure consistent and adequate acidity (I refuse to use bottled juice, but I do up my sugar to meet the minimum because I don’t want to poison anyone). I notice you don’t seem overly concerned with your sugar content from a food preservation perspective – can I ask where you got the information to ensure you could safely process and store at room temperature with your low sugar content? I love the information in the link you provided (in fact it’s some of the best and most comprehensive I’ve seen – thank you), but it doesn’t specify a minimum sugar content other than to say that sugar is necessary for the preservation process in jams and jellies. I would love to be able to confidently reduce the sugar in my canning recipes so they are more to my taste (at the moment I have one recipe for gifting and another that I refrigerate and cook with, that is much less sweet).
Thank you! And thanks for a wonderful recipe – duly bookmarked 🙂
Hi Rachel! I’m so happy that you like the recipe and that is such a great suggestion about the lemon seeds! I will definitely try that the next time I’m making jam 🙂
I will do my best to answer your very excellent question:
You are right, I am not overly concerned, however, I am not making batches of jam on a very large scale either. I make maybe (4) 8-ounce jars at a time, and I give most of them away, so they aren’t likely to be sitting on shelves for a terribly long period of time. I process them in a hot water bath, creating a vacuum, which inhibits bacteria growth. Once the jar’s been opened, it’s stored in the fridge. If I ever opened a jar and thought it looked or smelled off, it would go straight into the bin. You can’t believe everything you read online, of course, but this article states that sugar isn’t even necessary to prevent spoilage. On the other hand, according to this article, the recommended sugar content is 65%. However that can be difficult to gauge properly when you’re just making it in your home kitchen. You don’t know the exact sugar content of the fruit you’re using; that can vary quite a bit. Another thing to keep in mind is that people have been canning tomatoes for generations, usually with very little sugar added, if any at all. This article discusses that, and how the pH level of foods is also a factor in safe canning. So I would imagine that in your case, with something like a citrus curd, your acidity levels would likely be well below the safe maximum of 4.6.
I hope that helps to answer your question. I really can’t make any guarantees, I’m no food scientist, and I’m not canning in a lab or anything. But between the water bath, some measure of sugar, and the acidity from the fruit + citrus, we try to cover the bases. 😉
Hey Allie, I have a similar type of berry here in Scotland and I think this recipe will work well with it. Can I also ask where you got your jars they look fantastic 🙂 Many thanks for the recipe.
Oh thanks Matthew! They’re just quilted ball jars, here’s a link: http://www.amazon.com/Ball-Jar-Crystal-8-Ounce-Quilted/dp/B00B80TJUI/ref=sr_1_1?ie=UTF8&qid=1441661004&sr=8-1&keywords=quilted+ball+jars&pebp=1441661019308&perid=07J3M9EVBPTF4Z43TYX9. Here in the US you can get them at the supermarket. I hope your jam comes out well! Enjoy, and thanks for reading. 🙂
this jam did not set, cooked it for over an hour, will not make this again
I live in the Great Northwest of Washington State, about an hour from the border. Blackberries are like dandelions up here – they’re EVERYWHERE. ;o) I pick a few here and there to eat while wandering with the goats or weeding the garden, but never in bulk because no one in my family likes pie or crumble or cobbler. Weird, right?
My mum grew up during the Depression and HAD to bottle, can, and bake everything they grew and ate. She hated it by the time she married and had kids and refused to ever do it again. So I really never grew up around that sort of cooking. And it sounds intimidating, to be sure, especially to a newbie.
But then I decided to try making jam from all these luscious dark gems just hanging there on those deadly vines (and if you’ve picked blackberries, you know exactly what I’m talking about). I found your recipe since I really just wanted berries and sugar; I didn’t want to mess with pectin.
It looked scary at first but after reading your description and step by step directions, I thought, “if I can carry four bags of groceries and two toddlers at the same time, I can manage this.”
As the morning light dawned, I see four little jars of seedless homemade organic blackberry jam, who’s lids all popped in. YEAH!!!! I start the second batch tonight.
Thank you so much.
ps …. you might want to add (for those who don’t cook a lot) in your directions somewhere, to wear an apron whilst preparing this creation; the juice of this stuff is like permanent ink. :o) The most perfect lip stain.
Thank you so much for this, Kristi! I’m so glad you took a crack at it and had such great success! I hope you enjoy those pretty little jars and many more. And thanks for the great tip about wearing an apron! You couldn’t be more right 😉
Hello Allie,
If I wanted to turn this into freezer jam – would I just bypass the boiling / sealing part and let it sit for 24 hours then put in the freezer?
Yes- that is exactly what I would do! Thanks so much for reading Chelsey and I hope you enjoy 🙂
I’ve read and reread the recipe instructions, and I don’t see where in them you put in the lemon or lime juice. I’m leaning toward the beginning with the sugar, but then, I’m not sure. I see no reference in the comments but there are too many to read all of them!
Hey there! It goes in at the end. Citrus juice always goes in last because it tends to get bitter if cooked. I’ve got it in the head notes but I will add it to the recipe card as well. Thanks for the heads up!
i just made this jam and only got 1 and another 3/4 full.8oz jars. did i cook it too long or should i have added water@ how much juice did u end up with before cooking the jam?
As long as you are happy with the consistency Kathy. If it seems to runny you can cook it longer or if you feel it’s too thick you can always add a few drops of water. Hope that helps!
you dont add water in the beginning do you
Nope there’s no water in this recipe. I made it exactly as stated on the recipe card. 😉
Hi Allie, I made my no-pectin blackberry jam prior to reading your blog, which was too bad, as I would have strained the mixture otherwise.
For my jam, I put kumquats and fresh mint in a cheesecloth and dropped that in the pot along with the jam mixture. I also used fresh vanilla bean, dropping in the scraped out pods at the beginning of the cooking process and adding the seeds at the very end (remove pods before canning). The kumquats, mint, and vanilla added a lovely depth of flavor.
Lemon rind helps to thicken the mixture, so it can be added to a cheesecloth to move the process along. Using a thermometer and letting the temperature reach 217–220 degrees helps to ensure a perfect consistency, but what I loved about your recipe was the ease in which you prepared your jam. It can be an intimidating process otherwise, but you showed that it needn’t be.
Finally, I made orange scones, which were a perfect accompaniment to my blackberry jam. Yum!
Oh my gosh, everything just sounds wonderful! I love that you added vanilla and citrus and herbs. And that’s a great tip about the lemon rind. Thanks so much for the awesome feedback!
Nice! Where did you buy the jars?
Thanks Keesy! They’re just quilted Ball jars. I got them at my local supermarket. 🙂
Hi Allie I am standing here in my nightie trying to get this jam made in time to take some to my son. We are over flowing with blackberries here in Melbourne, Australia and am needing new ideas. I love the seedless idea and went a step further and processed the maceration, then sieved it. It worked like a dream and not hard at all. I thought it might make the jam a little cloudy but it hasn’t. As I am making seeded or “pippy” jam as my children call it at the same time I put the pulp into that pot…. no waste. So happy to have found your site. Tanks Suz
Hooray! Thanks so much for reading and for the great info, Suz! I’m so happy the recipe worked out for you. Hugs to you and your kiddos!