

Banana Pudding
As an amazon associate I earn from qualifying purchases.
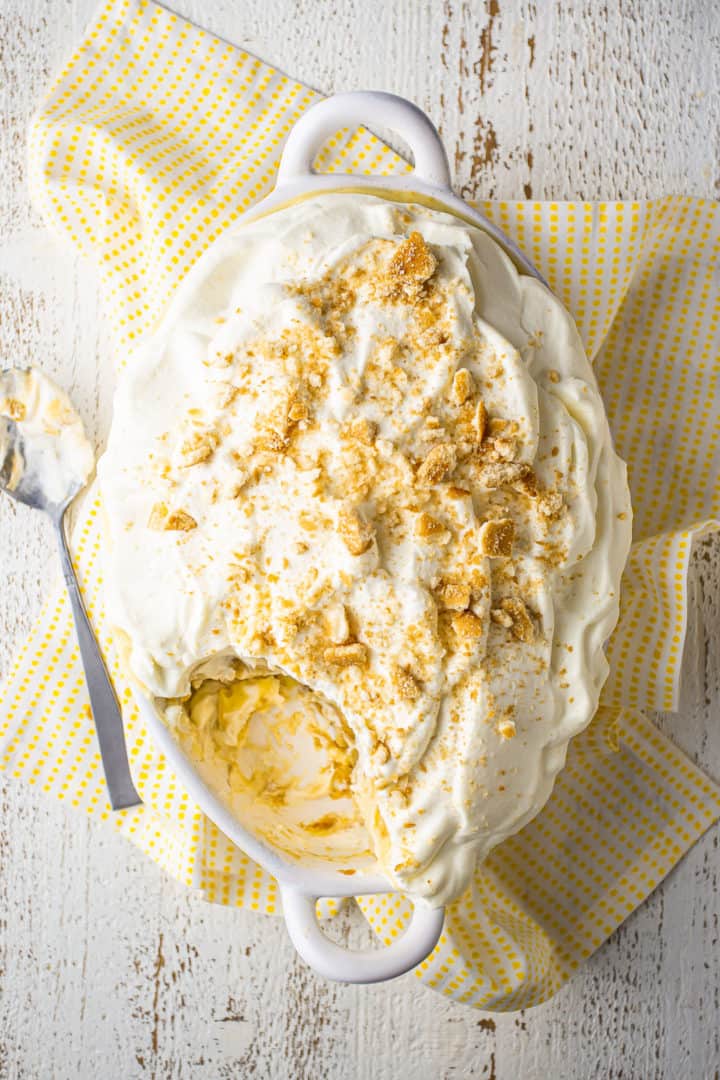
This Banana Pudding Recipe really takes things up a notch. It has layers of vanilla wafers, creamy homemade vanilla pudding, sweet bananas, and fluffy whipped cream.
As it chills, the cookies soften, the bananas turn sweet and mellow, and the homemade pudding ties it all together. This classic dessert always goes quickly!
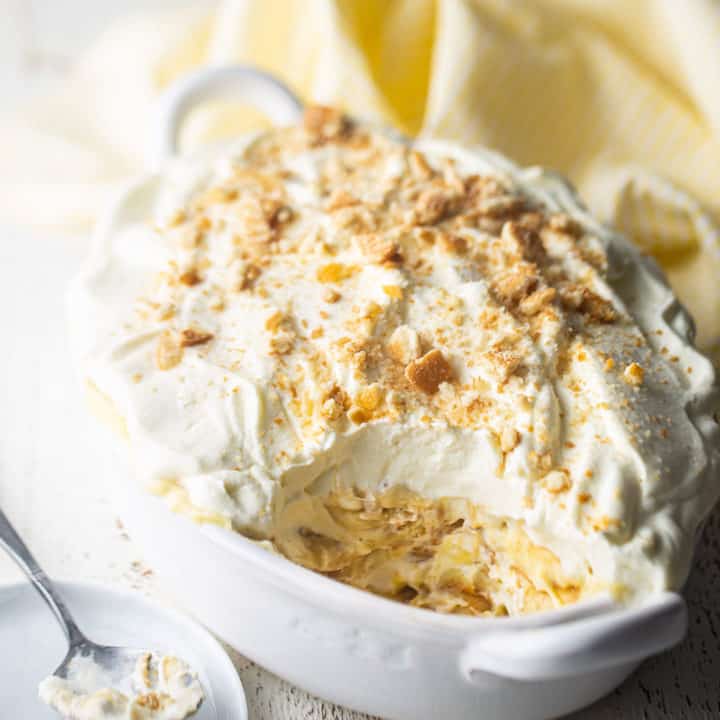
Now that things are warming up, I'm really ready to lean into no-bake dessert recipes. Not only is it nice not to have to turn on the oven on an already warm day, but nothing's more refreshing than an ice-cold sweet treat. A dish of chocolate mousse, or a little panna cotta or no-bake cheesecake can really be the perfect ending to a warm night.
This banana pudding is a total classic, bumped up to the next level. It's made from scratch, and I know I don't have to convince you how much better things taste when they're made from scratch! Wholesome ingredients like fresh eggs, milk, cream, and real vanilla give this dessert the most incredibly authentic flavor that no box mix could ever top!
And it's honestly very simple to make. While there are a few hours of chilling time involved, that's completely hands-off and you can get the whole thing made in less than an hour of active time.
So if you're craving a cool, creamy, and tropical treat, look no further!
Here's Why You'll Love This Recipe
- Banana pudding is a true comfort dessert. It's simple, familiar, and always a crowd-pleaser.
- This version stands out because it starts with rich homemade vanilla pudding. Made with real vanilla bean, eggs, milk, cream, and butter, the flavor is deep, creamy, and much better than boxed pudding.
- Next, you layer in crisp vanilla wafers, fresh banana slices, and lightly sweetened whipped cream. After a few hours in the fridge, it all softens into a creamy, spoonable dessert.
- It's great for potlucks, holidays, cookouts, birthdays, or any time you want a cozy, make-ahead dessert.
Ingredients You'll Need
The recipe card at the bottom of the post contains the full list with all of the amounts. Refer to that when you're cooking.
- Granulated sugar: Sweetens the pudding and helps create that classic dessert flavor.
- Cornstarch: Thickens the pudding so it sets up beautifully for layering.
- Kosher salt: Balances the sweetness and brings out the vanilla and banana flavors.
- Eggs and egg yolk: Add richness, color, and structure to the homemade pudding.
- Milk: This is the creamy base of the pudding. You can use any kind you usually have at home.
- Heavy whipping cream: Adds richness to the pudding and creates the fluffy whipped cream topping.
- Vanilla bean: Adds a deep, fragrant vanilla flavor and those nice little specks.
- Vanilla extract: Boosts the vanilla flavor even more.
- Unsalted butter: Makes the pudding smooth, glossy, and extra luscious.
- Vanilla wafers: These classic cookies make the base layer. They soften as the pudding chills and turn tender and cake-like.
- Bananas: Choose ripe bananas that are yellow with a few brown spots. They should be sweet but still firm for slicing.
- Lemon juice: This helps slow down browning and adds a little brightness.
- Powdered sugar: Sweetens the whipped cream and helps it hold its shape.
In Photos: How To Make Homemade Banana Pudding
This recipe has 4 simple components:
- Vanilla Pudding
- Vanilla Wafers
- Whipped Cream
- Bananas
If you want to be a total superstar, you can make your own vanilla wafers. I've got a great recipe for those here: Homemade Vanilla Wafers.
But for what you see in these pics and video, I used store-bought vanilla wafers, and whipped cream is pretty basic, so mostly I'm going to focus on the pudding component.)
I have a homemade vanilla pudding recipe here, but for the best banana pudding, I wanted to incorporate some eggs for added richness and that signature buttery yellow color. So I've created a sort of hybrid between that vanilla pudding and this pastry cream recipe.
It was perfection! I can't recommend it highly enough. The flavor is truly off-the-charts, rich and creamy, with heaps and heaps of sweet, fragrant real vanilla. You'll fall in love, pinky promise!
Step 1: Make Pudding Base
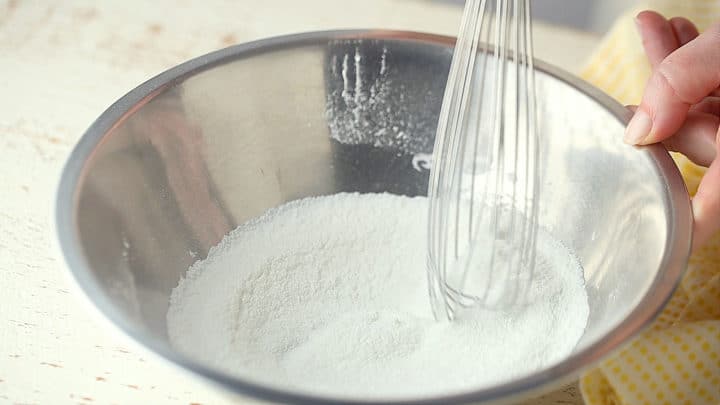
Start by whisking sugar, cornstarch, and salt together, just to get them combined.
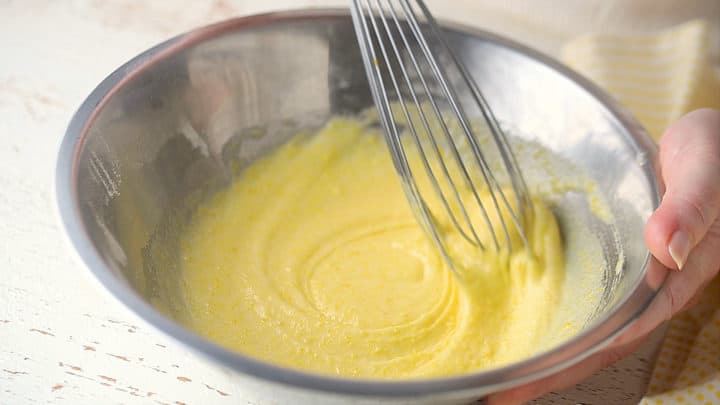
Next, whisk in the eggs. You'll have a stiff mixture that should be well blended, but you will notice the grittiness of the sugar. Don't worry, it will melt and smooth out in the next few steps!
Step 2: Cook
In a small pot, heat milk, cream, and the pod and seeds from a whole vanilla bean.
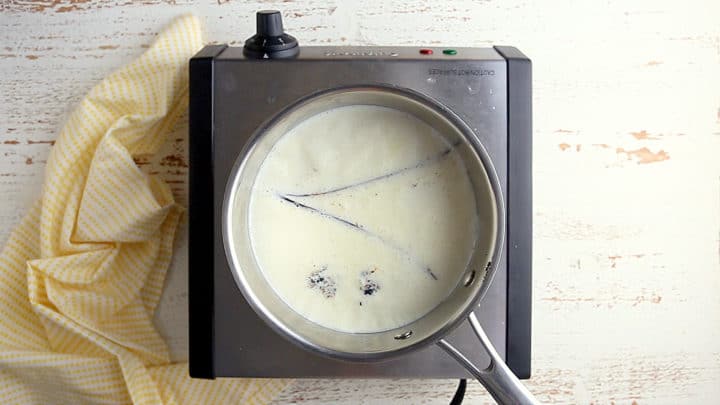
If you've never split and scraped out a vanilla bean before, you can watch how that's done in the video on this no-churn ice cream post.
Vanilla beans are pretty easy to get. They're usually sold in the regular grocery store, right in the baking aisle near the spices and extracts. Or you can do like me and just order them online. Here's the source I use: Vanilla Products USA Bourbon Madagascar Vanilla Beans.
Allow this liquid to get hot and steamy, then pour a little bit over the egg/sugar mixture and whisk it in. This will gently heat the eggs so that they don't scramble. Whisk in the hot liquid in a few additions, until the side of the bowl feels very warm to the touch.
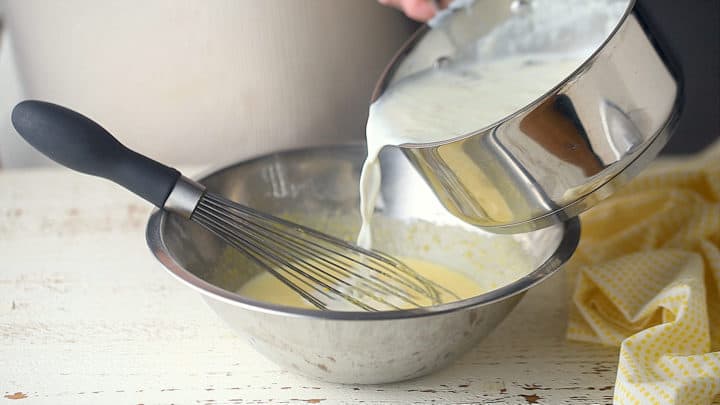
Then pour it all back into the pot and set it over low heat to cook some more.
When the custard comes to a slow bubble, you should notice that it thickens up quite a lot. It will become even thicker as it cools back down!
Immediately pour it through a fine-mesh sieve and into a heat-safe bowl, to get out any lumps.
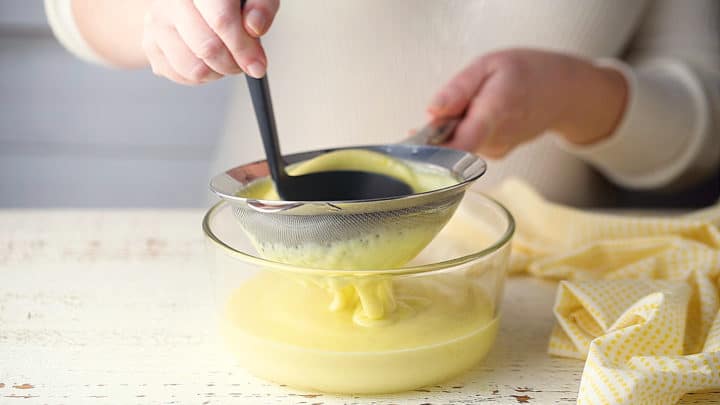
Whisk in the vanilla extract and butter, press a sheet of plastic wrap directly onto the surface of the pudding (to prevent a skin from forming) and pop it into the fridge to chill.
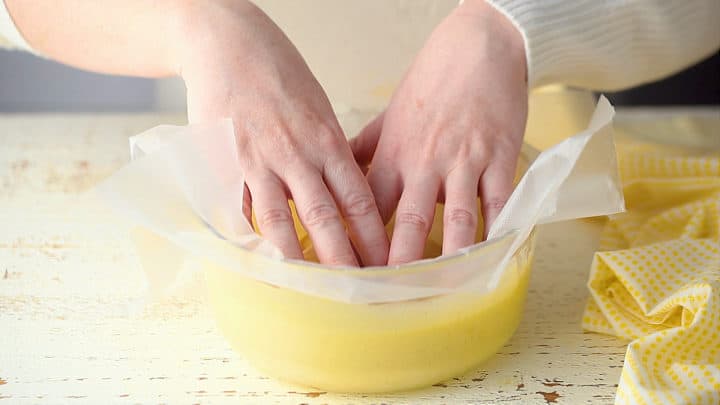
Step 3: Assemble
You can really do this however you like, there's no wrong way!
But of course I have an opinion on the matter, lol! So here's how I like it to go and then I will explain why:
- Vanilla Wafers
- Pudding
- Bananas
- Whipped Cream
- Vanilla Wafers
- Pudding
- Bananas
- Whipped Cream
- Crushed-up Cookie Garnish
And now here's why:
First of all, I like the cookies on the bottom because then they remain a little more firm, at least initially. If they had something wet underneath and on top, they'd get very soft. Of course, this is what happens in the second layer of cookies and it's fantastic! But for the bottom layer, it's nice if they still have a bit of bite to them.
Second, I want the sliced bananas to be completely surrounded and sort of "air tight," to prevent browning/discoloration. Once a banana is peeled and exposed to air, it's going to turn color. It's just a matter of time. But the less exposure to air, the longer that will take. And I feel like tucking it in between the pudding and the whipped cream, which will both sort of puddle around and in between all the nooks and crannies, surrounding the bananas and preventing air exposure, that will buy you some more time.
And last of all, you want to end with whipped cream because it's just so prettyyyyyy! I mean, just look at those puffy billows! Like a soft cloud on a summer day!
Step 4: Enjoy
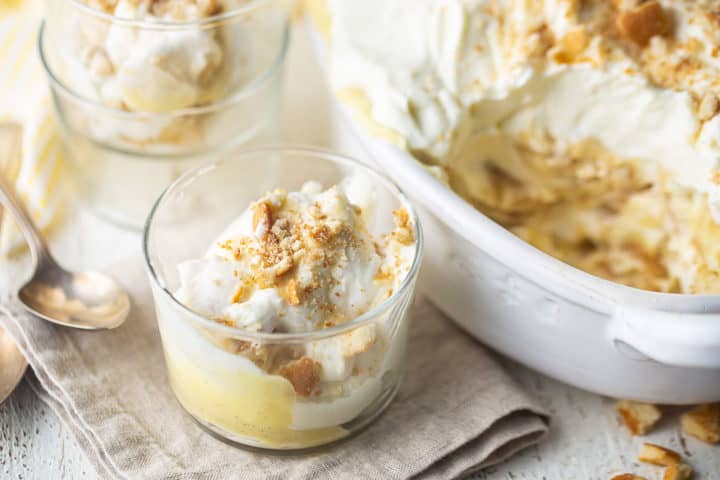
Helpful Tips and Tricks
- Cook the pudding slowly and keep whisking the whole time. This helps it stay smooth and prevents burning.
- Don't skip the strainer. It catches any small bits of cooked egg and makes the pudding extra silky.
- Put the plastic wrap right on the surface of the pudding while it chills. This keeps a skin from forming.
- Pick bananas that are ripe but not too soft. If they're overripe, they can get mushy after chilling.
- Let the finished dessert chill long enough. The vanilla wafers need time to soften and soak up the pudding's flavor.
Recipe FAQ
Why is my pudding runny?
Please know that when you're making the pudding it is going to look a lot runnier in the pot than it will after it's completely chilled. If it's made properly, it will probably be twice as firm coming out of the fridge as it was going in.
Just be sure you cook it until it comes to a slow simmer. This will ensure that the cornstarch achieves its full thickening power. You can see what this looks like when you watch the video embedded in the recipe card below.
You also want to allow the final layered dessert a nice long nap in the fridge. This enables the cookies and whipped cream to meld, so that the cookies absorb some moisture from the whipped cream and custard and become soft and almost cake-like. Conversely, some of the starch from the cookies will get into the whipped cream so the whipped cream firms up as well.
How long does this keep?
Keep this dessert chilled in the fridge and you should get at least 4 days out of it, especially if you toss the banana slices in lemon juice to prevent discoloration. Around the 4-day mark, you will probably start to see some browning. It doesn't really affect the taste at all, and it won't make you sick or anything, but it just doesn't look quite as appetizing.
Sadly, you can't really freeze banana pudding without it separating, so if you're looking to make this more than 4 days ahead of time, I'd suggest making all the components and keeping them separate until time allows you to assemble and chill.
More Banana Recipes
Ingredients
- ¾ cup (150 g) granulated sugar
- 3 tablespoons (44.36 g) cornstarch
- ¼ teaspoon (1.23 g) kosher salt
- 2 (88 g) eggs, (large)
- 1 (18 g) egg yolk, (from a large egg)
- 2 cups (488 g) milk, (whatever kind you keep on hand)
- ½ cup (119 g) heavy whipping cream
- 1 (5 g) vanilla bean,, split & scraped of seeds
- 2 tablespoons (29.57 g) vanilla extract
- 1 tablespoon (14.79 g) unsalted butter
- 11 ounces (311.85 g) vanilla wafers, (1 box)
- 5 (590 g) bananas, (medium), sliced
- 2 tablespoons (29.57 g) lemon juice
- 2 ½ cups (595 g) heavy whipping cream
- ½ cup (60 g) powdered sugar
Instructions
- Place the sugar, cornstarch, and salt in a medium bowl and whisk to combine.
- Whisk in the eggs until the mixture is combined.
- Place the milk, cream, vanilla pod, and vanilla seeds in a small pot and place over low heat until steamy and just beginning to simmer.
- Temper the egg mixture by whisking in a little of the hot liquid in, until it becomes very warm.
- Transfer the mixture back to the pot and continue to cook, whisking constantly, until it becomes thick and comes to a slow bubble.
- Immediately pour the pudding through a fine mesh strainer and into a heat-safe bowl, using the back of a ladle to push the mixture through the sieve.
- Whisk in the vanilla extract and butter, then press plastic wrap directly onto the surface of the pudding (this prevents a skin from forming), and chill for 4 hours.
- Line the bottom of a 1.5-quart serving dish with about half the vanilla wafers, then spread half the pudding in an even layer on top.
- Peel & slice the bananas and toss them in the lemon juice, then arrange about half the slices over the pudding.
- Whip the cream and powdered sugar together until medium peaks form, then spread about half the whipped cream over the sliced bananas.
- Repeat, layering vanilla wafers, pudding, bananas, and whipped cream.
- Crush a handful of vanilla wafers into crumbs, and sprinkle them on top of the whipped cream, for garnish.
- Chill the banana pudding until the cookies have gone soft (about 4 hours).
Author

More No Bake Desserts

Have a question about this recipe? Ask AI:
If I opt not to use the vanilla beans, but instead use only vanilla extract, how much more vanilla extract would be required do you think?
Hey David! It's really up to you and your personal taste. I'd suggest using somewhere between 1/2 teaspoon and 2 teaspoons. Good luck and thanks for reading!
Can the pudding part be made a day ahead ? This looks divine and I love that it does not use boxed pudding mix.
Hey Jennie! It absolutely can and that is a great way to help make the prep a little more manageable. Good luck! I hope you enjoy!
It looks like it was three egg yolks used in the video… But the recipe calls for two whole eggs and one egg yolk. Can you please clarify this? It looks delicious and I really want to make it!
2 whole eggs and 1 yolk. Videos are often trimmed down a lot, just to show the key steps of the recipe so you always want to follow what's on the card. Good luck and I hope you enjoy!
I love everything what I tried, using your recipes.
I tried bread, croissant and banquette And cookies.
Thank you, I think you are amazing!
Looking forward to try some more.