Challah Bread
As an amazon associate I earn from qualifying purchases.
Soft, fluffy, and golden with a hint of sweetness, this traditional braided Challah Bread is just as lovely to look at as it is to eat. If you're preparing this for Shabbat or want to fill your kitchen with the comforting smells of fresh, homemade bread, this recipe is easy enough to make in an afternoon and so satisfying from start to finish.
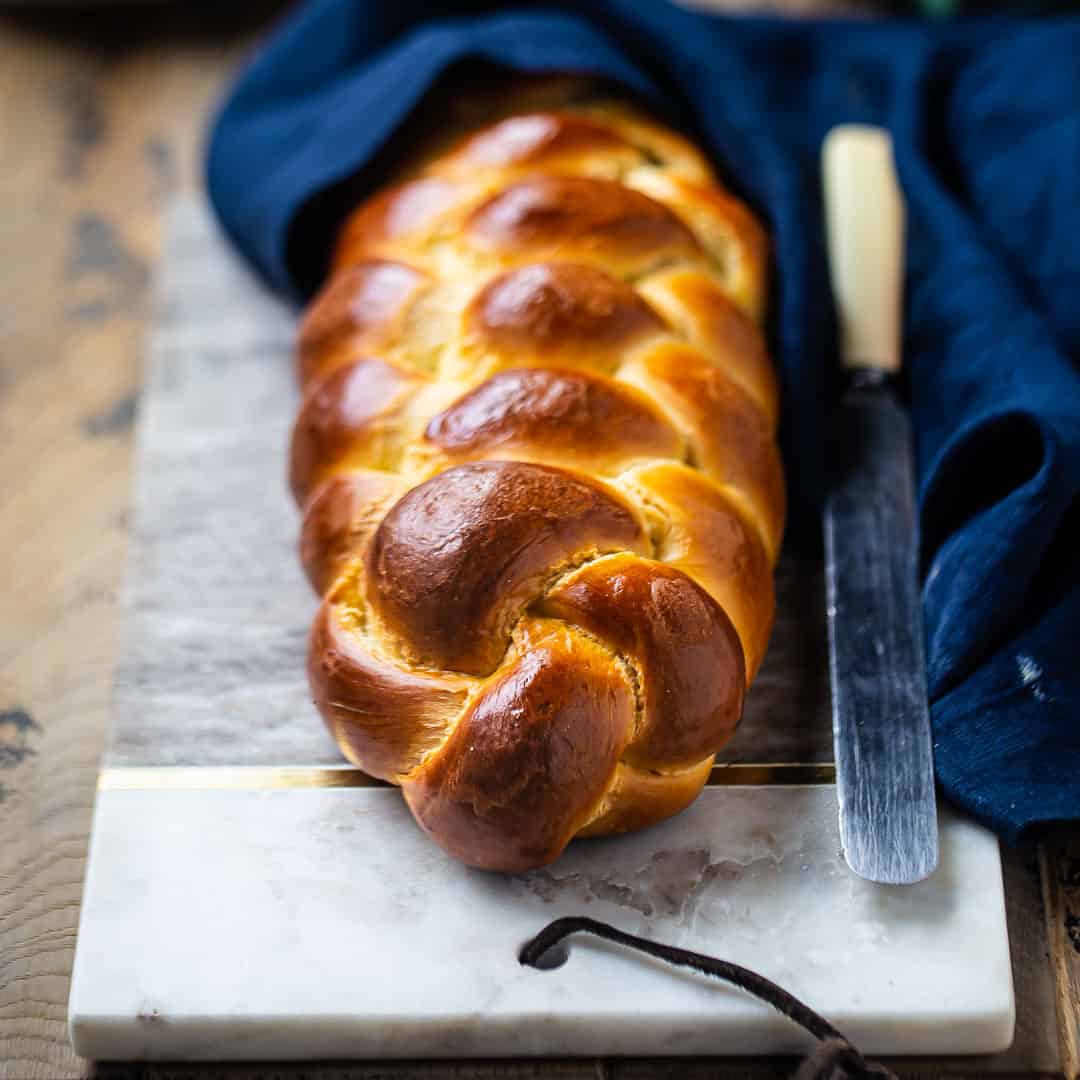
Table of Contents
- Here's Why You'll Love This Recipe
- Ingredients You'll Need
- In Photos: How To Make Challah Bread
- Helpful Tips and Tricks
- Challah Bread FAQ
- More Delicious Yeast Bread Recipes
Today I am so happy to be sharing one of my top favorites: Challah bread!
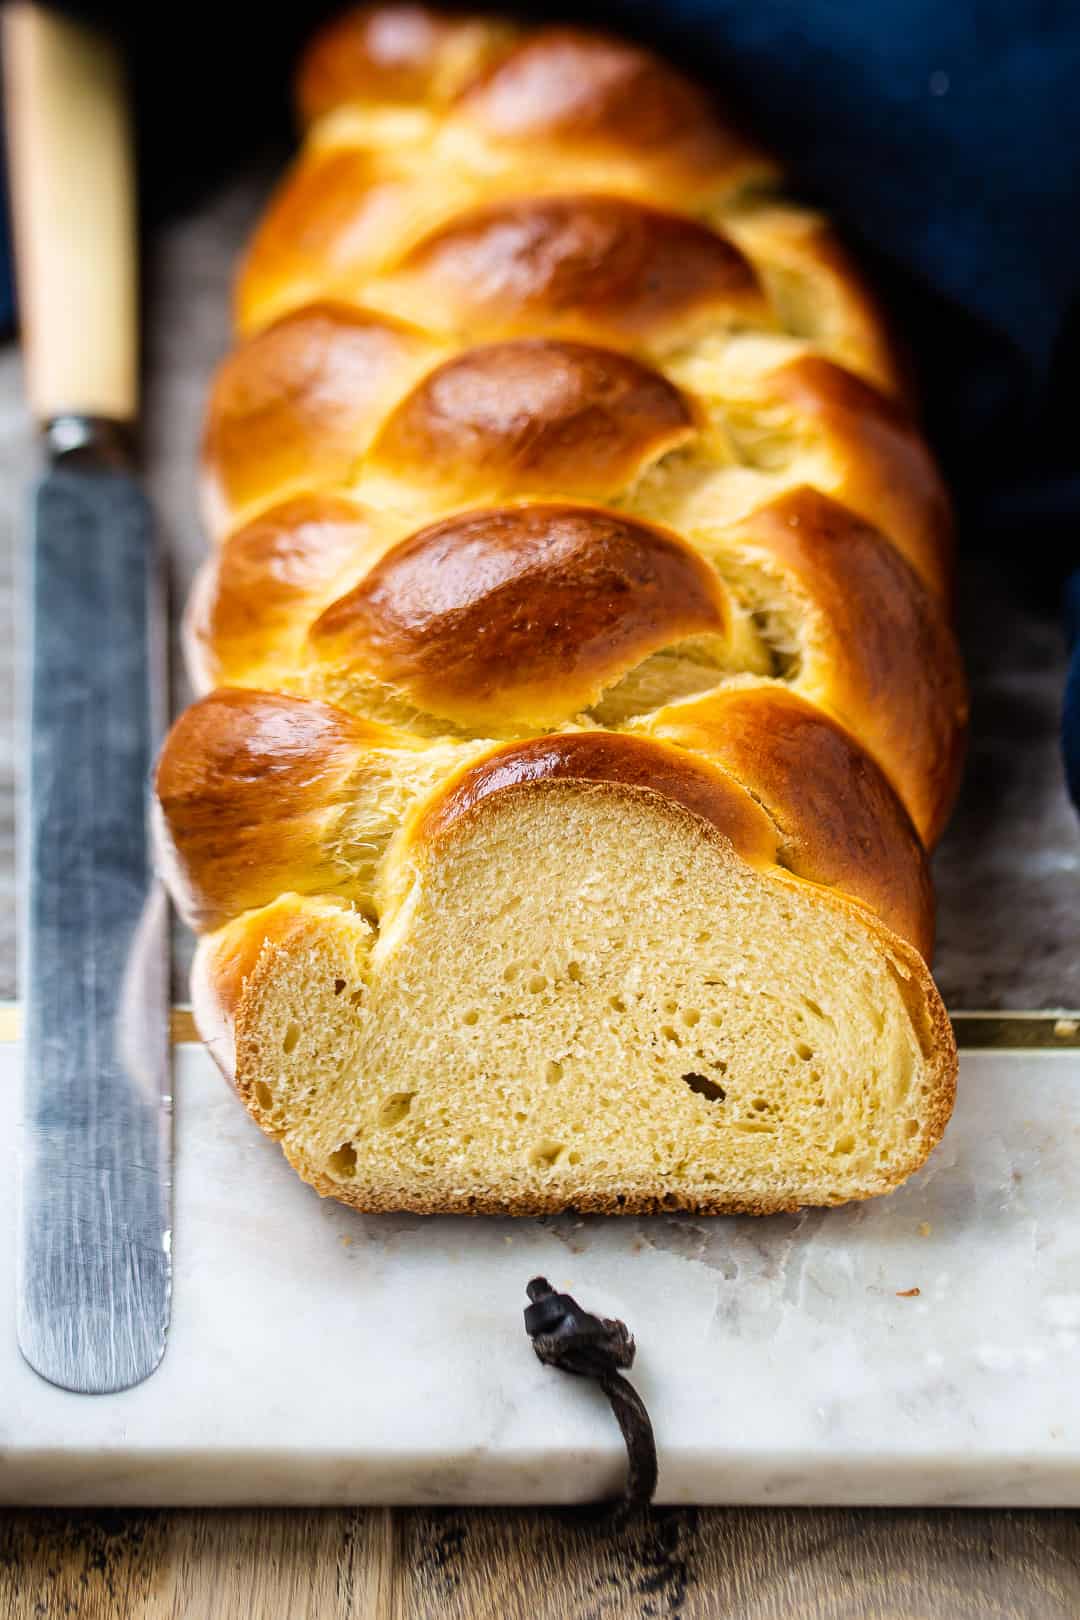
I love this bread so much, for so many reasons! It's soft and a little sweet, with a golden yellow color and an airy, springy texture. Not to mention it's just gorgeous to look at. You'll know challah when you see it- by its distinctive braided loaf shape.
Challah is an enriched bread, which means that in addition to water, yeast, and flour, it also has eggs and additional fat added to it. It's similar to Hawaiian rolls, babka, and sticky buns in this way.
It's these added ingredients that give enriched breads their moist, soft, and extra-flavorful quality
What Is Challah Bread?
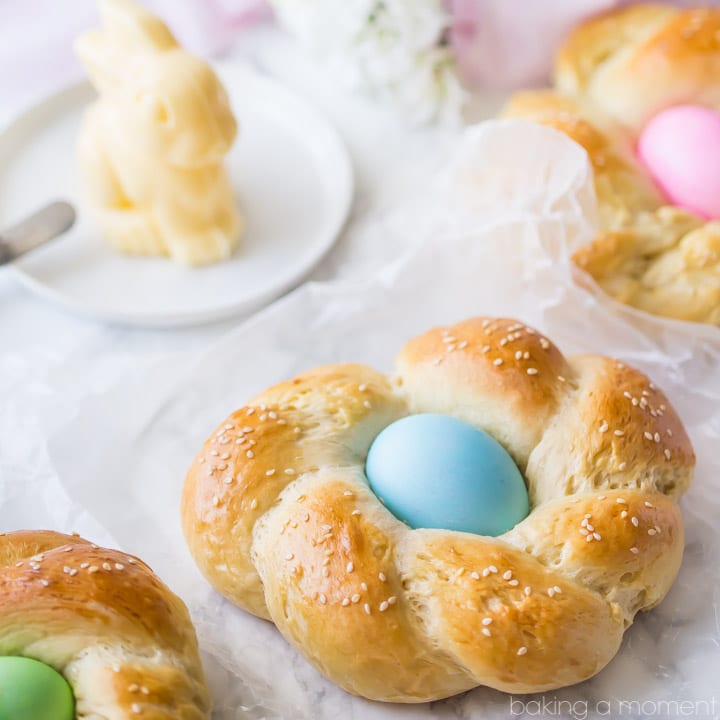
Challah is a soft, slightly sweet enriched bread that is typically shaped into a braid. Sometimes it's a long braid; sometimes the braid is circled around to make a round shape.
It's similar to brioche, but without any dairy. This is because of its Jewish origin. In the Jewish culture, families often keep Kosher and therefore do not eat dairy and meat at the same meal.
Many times, challah is served at shabbat or for holiday meals, especially for Rosh Hashanah (aka: Jewish new year).
But it doesn't have to be a special occasion to make challah bread! You can eat it all year 'round, and you don't have to be Jewish either! It's just a delicious and beautiful bread, and I think you'll love making it, and eating it too!
Here's Why You'll Love This Recipe
- Beautifully Braided: The classic 4-strand braid creates a loaf that's impressive yet surprisingly simple to do.
- Soft and Slightly Sweet: Just the right balance of richness and lightness for everything from toast to sandwiches.
- Perfect for Beginners: No special equipment required-just your hands, a bowl, and some patience while it rises.
- Freezer-Friendly: Make a loaf (or two) ahead of time and freeze for later.
Ingredients You'll Need
The recipe card at the bottom of the post contains the full list with all of the amounts. Refer to that when you're cooking.
- Warm water: Activates the yeast; should feel like a warm bath, around 105°F.
- Honey: Adds a mild sweetness and helps feed the yeast.
- Active dry yeast: Gives the bread its rise; instant yeast can be substituted if needed.
- Large egg and egg yolk: Enrich the dough for a soft, tender texture.
- Neutral oil: Vegetable, canola, or any mild-flavored oil keeps the crumb moist.
- All-purpose flour: Provides structure-start with less and add as needed until the dough comes together.
- Kosher salt: Balances the sweetness and boosts flavor.
- Egg wash: A beaten egg with a splash of water adds shine and helps the crust brown beautifully.
In Photos: How To Make Challah Bread
Step 1: Make The Dough
To make the bread dough, start by combining honey and warm water in a large mixing bowl. The water should be warm to the touch, but not hot. Aim for the temperature of a baby's bath, or around 105 degrees F. Here's a link to the thermometer I like to use: candy thermometer.
Next just sprinkle your dry active yeast all over the top and allow it to dissolve.

If you'd like to substitute instant yeast you can, just pay close attention to your rise times because instant yeast usually proofs a lot faster. I've got info on how to know your bread dough is perfectly proofed below.
You can also use sourdough starter in place of the yeast. There are instructions for that in the notes section of the recipe card.
Give the mixture a quick stir and set it aside for 5 to 10 minutes. It should start to form little bubbles on the surface. This lets you know the yeast is alive and thriving.
If you don't see bubbles or foam, your yeast is probably dead. Discard the mixture and start again, making sure it's not past its expiration date and that the water isn't too hot.
Step 2: Add Eggs & Oil
Now it's time for flour. I use all-purpose flour, but bread flour is also a solid option.
Once you're sure the yeast is alive, go ahead and whisk in the eggs and oil.

I usually use vegetable oil, but you can use any kind of oil that is liquid at room temperature and has a neutral flavor. Here are a few other suggestions:
- Grapeseed Oil - a great choice, if you can get your hands on it.
- Canola Oil
- Avocado Oil
- Light Olive Oil
The amount of flour you're going to need can vary based on environmental factors. It's not a hard and fast rule. The first time I made this I needed 2 ½ cups of flour, but the second time I only needed 1 ¾ cups.
Step 3: Add Flour
Start by mixing in about a cup. Once that is incorporated, add more, slowly- just a little at a time, until the dough gathers itself into a ball and pulls away cleanly from the sides of the bowl.


And finally, work in the salt.
Step 4: Knead Dough
Once you have a nice, smooth dough, it's time to knead. Kneading will develop the glutens in the flour and give you that stretchy, elastic texture.
You'll probably want to knead the dough anywhere from 5 to 10 minutes, but the best way to know for sure is to do the windowpane test: Pinch off a small bit of dough and flatten it a little with your fingertips. Then, pull from the center outwards. If the dough can stretch tissue-thin without tearing, and you can see the light passing through it, then you're good to go onto the next step!

Step 5: First Rise
Lightly mist your mixing bowl with non-stick spray, then put the ball of dough in and cover it with plastic wrap. Set it aside in a warm place so that it can rise.
The dough will take anywhere from 1 to 2 hours to rise, depending on the temperature in your kitchen. You'll know it's ready when you can stick 2 fingers into it, up to the second knuckle, and when you pull them out the indentations keep their form with just a little bit of refilling.
Once you're there, punch it down and knead it a few times to get rid of any big air pockets. Now you can shape the braid!
Step 6: Shape Dough
I created a 4-strand braid for the bread you see in these photos. It's as easy as dividing the dough into 4 equal portions, rolling them out into long ropes, connecting them at the top, and then weaving the left-most strand over and under, across and to the right. You can see what this looks like by watching the video in the recipe card below.

Step 7: Egg Wash
When you get all the way to the bottom of the braid, pinch the ends together and then brush the loaf with egg wash. (Egg wash is just an egg beaten with a little bit of water.) This will help your bread to have a deep, golden color and a pretty, glossy sheen.

Loosely cover the bread with greased plastic wrap, and give it its second rise.
Step 8: Second Rise
The second rise is really critical. If your bread is underproofed, it will not puff up enough, the inside could be gummy, and the crumb may be "close" or "tight." In other words, it won't be airy and light. It may also form cracks on the surface as it bakes.
Overproofed bread will collapse in on itself as it bakes. The glutens are just way too stretched out, and they have no strength left. Overproofed bread will often come out flat or leaden.
One clue as to whether or not your bread is perfectly proofed is if it's doubled in size. But this can be hard to judge, so a better test is to find an inconspicuous place to press your fingertip in, just up to the first knuckle. If the indentation holds its form, the dough is done rising and is ready to bake.
Step 9: Bake
Brush the loaf with egg wash one more time, then into the preheated oven it goes. You'll know it's done baking when it's puffy and tall, with a deep golden color.

Helpful Tips and Tricks
- As you can see in the video embedded in the recipe card below, I use a stand mixer when I make this bread. But you don't have to! It can also be mixed and kneaded by hand, or in a bread machine.
Can you make Challah for special diets?
This recipe is naturally dairy-free, so if you or someone you love has a sensitivity to dairy, they can enjoy this challah bread without a problem.
It does however contain eggs and honey, so if you're looking for a vegan challah recipe, try replacing the honey with an equal amount of sugar. And any egg substitute that swaps 1:1 for regular chicken eggs should work just fine.
For gluten-free challah, look for a gluten-free flour blend that subs 1:1 for regular flour.
Here are a few good options:
- King Arthur Flour Gluten-Free Measure for Measure Flour
- Bob's Red Mill Gluten-Free All-Purpose Baking Flour
- Cup4Cup Multi-Purpose Gluten-Free Flour
Challah Bread FAQ
Yes! Use the overnight method to make this recipe ahead of time. To make this bread in advance, complete all the steps right through to shaping the bread and brushing it with egg wash. Then, cover it loosely with greased plastic wrap and place it in the refrigerator overnight, or for up to 48 hours.
If you need more time than that, the unbaked loaf can be frozen for up to 2 weeks. Put it in the freezer on a tray, and then once it's frozen solid it can be transferred to a bag.
When you're ready to bake, remove the challah from the fridge or freezer and allow it to come to room temperature. Once it has grown to double its original size and it passes the fingertip test (noted above), brush it with egg wash a second time and bake it as per the recipe directions.
Once your bread has completely cooled, wrap it tightly in plastic wrap, store it in an airtight container, or slip it into a zip-top bag, pressing out as much of the air as possible. This will prevent it from becoming dried out or stale.
It should keep this way (at room temperature) for several days.
To extend its life even longer, store it in the refrigerator. It should stay good there for up to 2 weeks.
Challah bread also freezes very well. Again, keep it tightly wrapped, and it should keep (frozen) for a few months at least. Thaw it at room temperature or in a warm oven before serving.
If you're looking for interesting ways to jazz up your challah, here are a few ideas:
-> Golden Raisins
-> Sesame Seeds, Poppy Seeds, Flaky Sea Salt, or Everything Bagel Seasoning
-> Shredded Cheese (cheddar, parmesan, feta, etc.)
-> Dried or Fresh Herbs (rosemary, thyme, basil, etc.)
-> Chopped Chocolate
-> Spices (cinnamon, cayenne, saffron, etc.)
These add-ins can be kneaded into the dough or sprinkled on top, to taste.
Besides just eating it slathered with butter and jam, I love making sandwiches with challah bread. It's really good with thin-sliced roast beef or turkey, or with tuna, egg, or chicken salad.
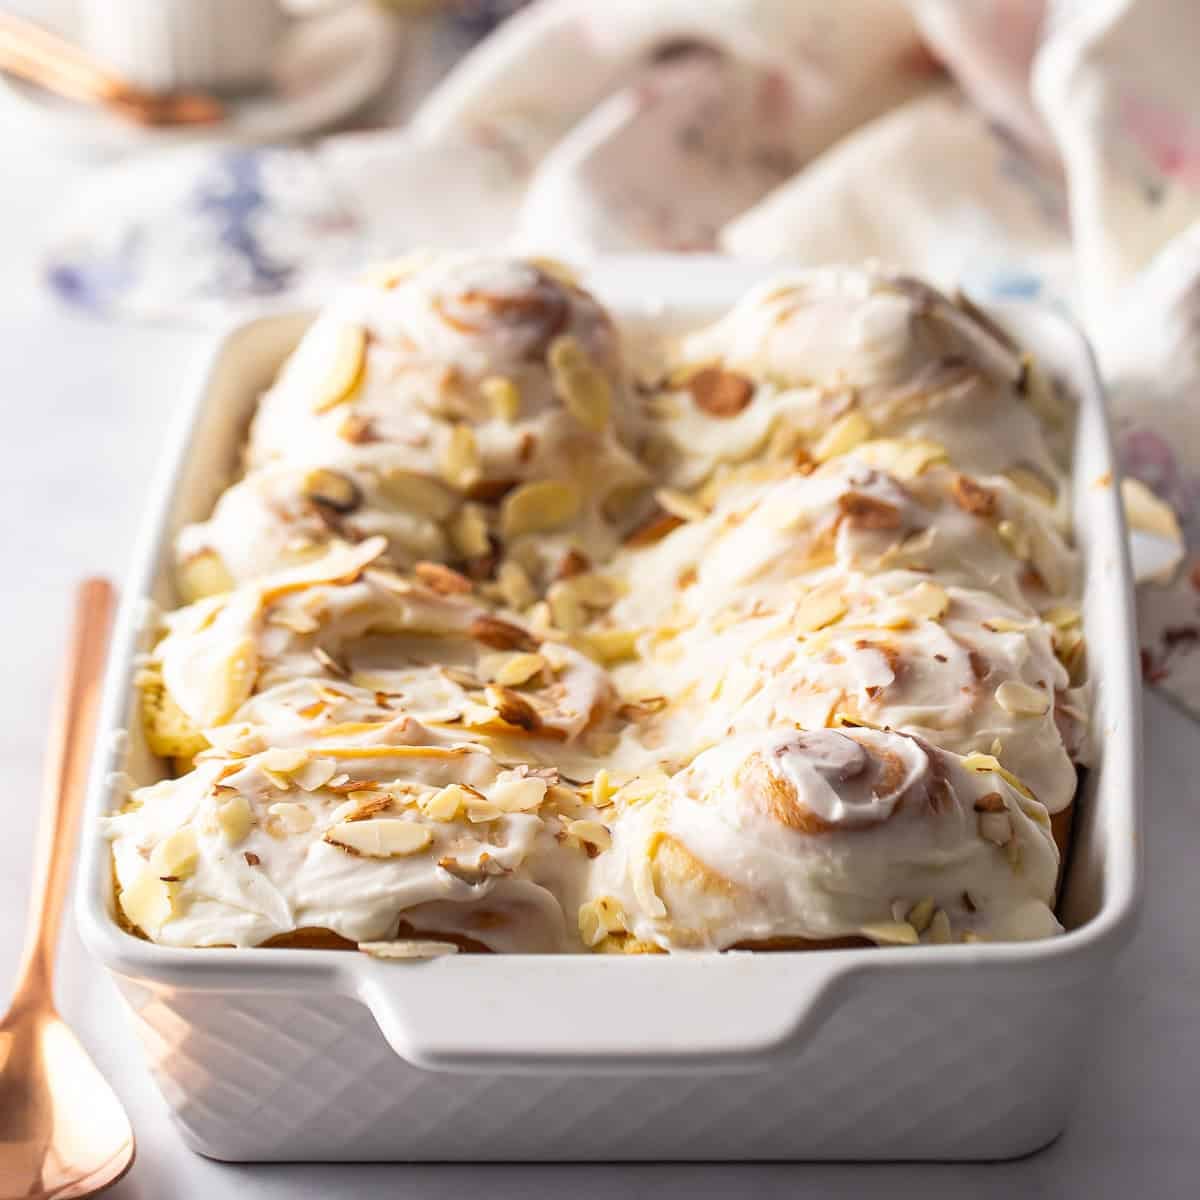
It's also really good as French toast! Or try baking it up into this delicious casserole- it's a great way to serve a crowd for breakfast or brunch, with minimal effort: French Toast Casserole.
More Delicious Yeast Bread Recipes
Ingredients
- ⅓ cup (59.15 g) warm water*
- 2 tablespoons (29.57 g) honey
- 1 teaspoon (4.93 g) active dry yeast**
- 1 (44 g) egg , (large)
- 1 (18 g) egg yolk, (large)
- 3 tablespoons (29.57 g) oil, (I use vegetable oil, but any neutral-tasting oil will work)
- 1 ¾ cups (187.5 g) all-purpose flour, (you may need as much as 2 ¼ cups)
- 1 teaspoon (4.93 g) kosher salt
- egg wash, (1 egg beaten with a few teaspoons of water)
Instructions
- Place the warm water and honey in a large mixing bowl and sprinkle the yeast on top.
- Stir in the yeast until it's dissolved, and set it aside until small bubbles start to form.
- When the mixture is bubbly or foamy on top,*** stir in the egg, egg yolk, and oil.
- Add about half the flour, mixing on medium-low speed until incorporated.
- While continuing to mix, add small amounts of flour, just until the dough gathers itself into a ball and pulls cleanly away from the sides of the bowl. (You may need more or less flour depending on environmental conditions; use your best judgement.)
- Mix in the salt.
- Knead the dough (by hand or by machine) until it passes the windowpane test**** (about 5 to 10 minutes).
- Place the dough in a greased bowl, cover with plastic wrap, and allow to rest in a warm place until doubled in volume (about 1 to 2 hours).
- When the dough has grown to twice its original size, punch it down, knead it a few times, and divide it into 4 equal portions.
- Roll each portion of dough into a long rope, and pinch all 4 ropes together at the top.
- Starting with the left-most rope, weave it over and under each of the other ropes, moving across to the right. (See video.)
- Repeat this step until the end of the braid has been reached, then pinch together at the bottom.
- Transfer the braid to a parchment-lined baking sheet, brush with egg wash, and cover loosely with greased plastic wrap.
- Allow the loaf to rise a second time,***** until doubled in bulk (1 to 2 hours).
- Preheat the oven to 350 degrees and brush the loaf with egg wash a second time.
- Bake the challah bread for 20 to 30 minutes, or until puffed and deeply golden.


Beautiful bread. The double egg wash process makes this loaf super shiny. Great recipe. I measure in grams and found it too salty and not sweet at all. I will increase the honey and cut the salt in half next time. I think it is a wonderful recipe, otherwise.
Hi. This looks great, but compared to other recipes, has significantly less flour. Many call for 4-6 cups for one loaf. How big does this challah turn out? Also, can I add a little extra honey? I prefer a sweeter challah. Thank you!
I like a sweet challah too.... definitely feel free to experiment with more honey if you like. It makes a decent-sized loaf. Starts out small but rises a ton. I think you can probably judge well by looking at the video in the recipe card. My hands are on the smaller side. I'm a 5'-2" tall, smaller framed woman.
It is delicious and nutritious. Your recipe is awesome. I followed it. After that, I did better than I expected. Before, I rarely made this dish but now I love to make it. Thank you very much for your great sharing. Hope you will have more amazing articles.