

Chocolate Molten Lava Cakes
As an amazon associate I earn from qualifying purchases.
Chocolate Molten Lava Cakes are a rich treat that feels special but is simple enough to make any day. They have a deep chocolate taste and a warm, gooey center that flows out when you dig in. If you're looking forward to Valentine's Day, this dessert can make any night feel like a date night at home. It's quick, looks impressive, and has a fun, slightly decadent feel.
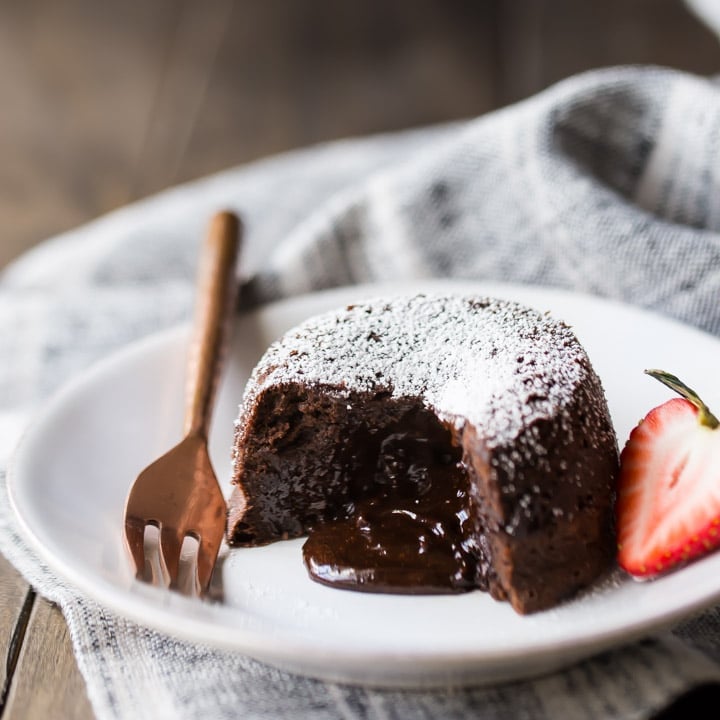
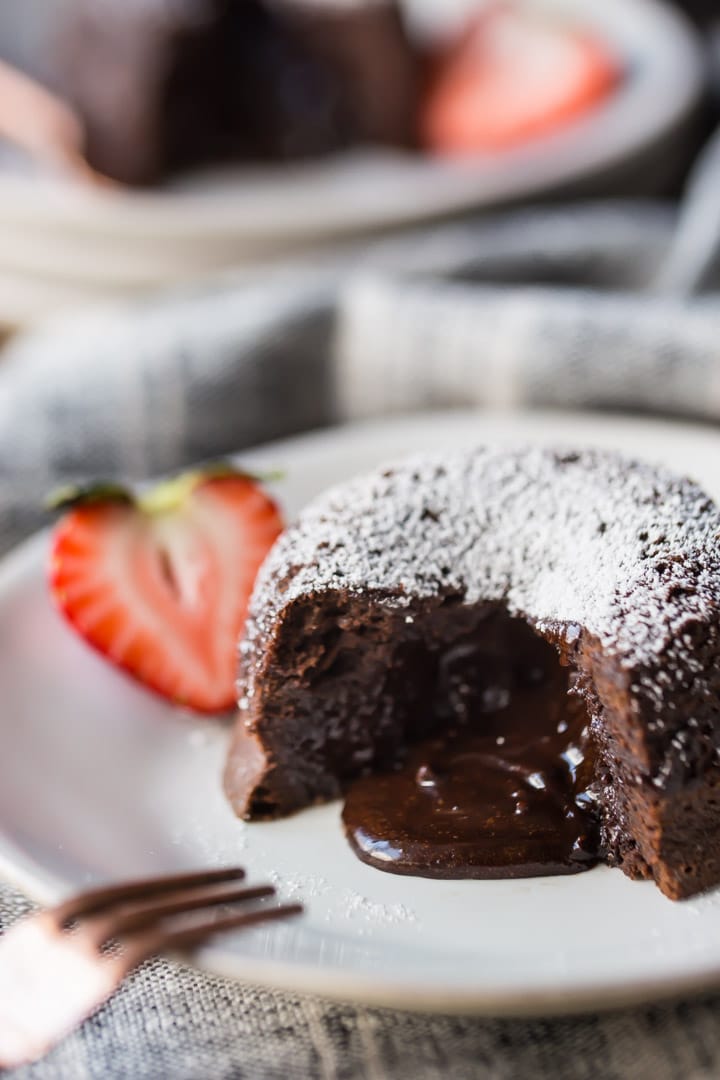
Chocolate molten lava cakes are single-serving chocolate cakes with a soft outside and a rich, gooey center that flows out when you cut into them.
They were very popular in the 90s, and they're still worth making today. These cakes are rich and special, yet feel fancy without being complicated.
Valentine's Day desserts usually fall into two groups. The "kids' class parties" kind (cupcakes, thumbprints, blossoms, pudding jars), and then there are desserts for a romantic dinner at home.
Chocolate molten lava cakes are definitely in the second group.
Here are a few suggestions for the "kids' class parties" kind:
- Strawberry Cupcakes with Strawberry Buttercream
- Cherry Cheesecake Thumbprint Cookies
- Chocolate Heart Blossoms
- Chocolate Pudding Pie Jars
Here's Why You'll Love This Recipe
- Make-ahead friendly so you can focus on dinner, not dessert.
- They have a deep chocolate flavor from both melted chocolate and cocoa.
- Molten centers that stay gloriously warm and liquid.
- They're quick to make with simple ingredients and need very little prep.
- They look like something from a restaurant, but you can easily make them on a weeknight.
Ingredients You'll Need
The recipe card at the bottom of the post contains the full list with all of the amounts. Refer to that when you're cooking.
- Unsalted butter: Adds richness and creates a tender cake. Salted butter works too; just reduce added salt slightly.
- Bittersweet chocolate chips: Gives the bold, deep chocolate base. Semisweet is fine if you want it a little sweeter.
- Powdered sugar: Sweetens and helps maintain a soft, smooth texture.
- Large eggs: Provide structure so the edges set while the centers stay molten.
- Egg yolks: Add extra richness and a silkier "lava" texture.
- Vanilla extract: Rounds out the chocolate flavor and adds warmth.
- All-purpose flour: Gives the cakes structure without making them dense.
- Unsweetened cocoa powder: Boosts the chocolate flavor and gives that classic dark color.
- Dutch-processed cocoa powder (dark cocoa): Deepens color and adds a more intense, smooth cocoa taste. If you don't have it, use more regular cocoa.
- Kosher salt: Balances sweetness, making the chocolate taste even richer.
- Powdered sugar (for garnish): A simple, classic finish. Optional, but it makes them feel extra special.
In Photos: How To Make Chocolate Molten Lava Cakes
Make these cakes in individual portions. Use six 4-ounce ramekins and coat them with non-stick spray.
Step 1: Melt Butter & Chocolate
Melt the butter and chocolate together in the microwave or over a double boiler, stirring until smooth.
Step 2: Add Powdered Sugar
Stir in the powdered sugar until fully incorporated.
Step 3: Add Eggs & Vanilla
Add the eggs and yolks, one at a time, mixing well after each addition. Mix in the vanilla extract.
Step 4: Fold In Dry Ingredients
Gently fold in the flour, cocoa powders, and salt until everything is just mixed.
Step 5: Portion
Divide the batter between the prepared ramekins.
Step 6: Bake
Bake the cakes until the edges are set, but the centers still look a little wobbly.
Step 7: Cool
Cool for exactly 20 minutes, then invert onto plates and dust with powdered sugar.
Helpful Tips and Tricks
Timing Matters
- Cooling is very important for this recipe.
- If you cool them for less than 20 minutes, the cakes might break when you take them out of the ramekins.
- If you cool them for more than 20 minutes, the centers may become too firm.
How to Know When They're Done
Don't use the usual toothpick test in the center, since the middle should stay wet.
- The edges should look firm.
- The centers should still wobble slightly.
- If you use a toothpick, test near the edge. You should see a few moist crumbs there, while the center stays molten.
Remember, the cakes will continue to cook a bit as they cool.
- Grease the ramekins well to make it easy to remove the cakes.
- Don't overmix after adding the flour, or the cakes may lose their light texture.
- Use good-quality chocolate since it's the main flavor in these cakes.
- Serve immediately after unmolding for the best warm, flowing center.
More Dessert Recipes
- White Chocolate Raspberry Cheesecake
- Chocolate Covered Strawberries
- Creme Brulee
- Chocolate Red Wine Pot de Creme
Ingredients
- ½ cup unsalted butter
- ⅔ cup bittersweet chocolate chips
- 1 ½ cups powdered sugar
- 4 large eggs
- 2 large egg yolks
- 2 teaspoons vanilla extract
- ½ cup all-purpose flour
- ¼ cup unsweetened cocoa powder
- 2 tablespoons Dutch-processed cocoa powder, (dark cocoa)
- ½ teaspoon kosher salt
- 2 teaspoons powdered sugar, (for garnish)
Instructions
- Preheat the oven to 350 degrees F, and mist six 4-ounce ramekins with non-stick spray.
- Place the butter and chocolate chips in a large microwave-safe bowl, and microwave in 30-second increments, stirring, until completely melted.
- Add the powdered sugar, and stir until smooth.
- Stir in the eggs and yolks, one at a time, until completely incorporated.
- Stir in the vanilla.
- Add the flour, cocoa, and salt, and stir until blended.
- Transfer the batter to the prepared ramekins, and bake for 16 to 20 minutes, or until set around the edges but still wobbly in the centers.
- Cool for 20 minutes, then invert the cakes onto serving plates and dust with powdered sugar.
Author

More Cakes and Cupcakes
Have a question about this recipe? Ask AI:
when do you put the chocolate in , I'm so confused
Please read step 2 of the recipe instructions.
Hi, I’m having a large party and need to make upwards of 40 cakes and will be using disposable paper baking cups (not cupcake liners), will I need to adjust time and temperature?
Thank you in advance,
Amelia
I'm not really sure Amelia. I would advise that you test the recipe and see what works best with the baking cups you plan to use. Good luck!
So question, can I make the batter to take to a dinner party, grease the ramekins there, cook & serve? Will the batter hold?
I think that should work- since there isn't any leavening there shouldn't be a problem with doing that. Good luck!
Do you store the batter at room temperature or in the refrigerator? Also, how long will the batter hold? This recipe sounds and looks perfect and I want to serve it tomorrow to my guests.
Thank you very much.
Hi Linda! How far in advance are you thinking of making the batter? If it's only a couple of hours, I'd say keep it at room temp. Much longer than that and it should probably go into the fridge. But you'd have to bring it back down to room temperature before baking it. Hope that's helpful!
Hey Allie,
These look great! I wanted to know if I made them a day before serving would it be okay to store them in a container and reheat when I want to serve them?
Hi Michelle! It's definitely preferable to bake them just before serving. I have not tried so I can't say for sure, but I would worry that they might not be as liquid in the center if they're cooled and then reheated. If you give it a try, will you let me know how that works out?
It didn’t ooze out like I thought but it was good
If it’s left at room temp too long, it won’t. You need to serve it warm from the oven. Glad you enjoyed!
I want to make these for a birthday but I have to make them the day before. Will the center still be running being that they will be room temperature. Any hints that you have would be appreciated. Thank you!!!
Probably won’t be liquid if you’re serving at room temperature. They’re meant to be served warm. Maybe if you reheat them gently?
I have heard that you can prepare the batter ahead of time and refrigerate it. Then when it is time to eat them, you can quickly pop the batter (room temp) into the oven for fast convenient lava cakes!
Yes, I do that often! Just make sure you allow the batter to come to room temp before it goes into the oven. Great tip!
These were perfect, and much easier and tastier than the King Arthur Flour lava cake, which I made yesterday.
I halved the recipe and filled 5 muffin cups. I subbed semisweet chips because that was what we had, and they still tasted great, although I think bittersweet will be even better. I’ll definitely make these again! Thank you!
So happy you liked the recipe Mindy! Thank you so much for the positive feedback!
still one of my all time fave desserts <3
Yay! Definitely mine too! Thanks Kayle!
Hey Allie,
I made these the other day for a friend's birthday and we all loved them! It's my first time trying to bake molten-anything but these turned out perfectly. One thing - the instructions never say when to add the vanilla. I'm a pretty experienced baker so I just threw it in with the eggs, but for someone less experienced this might be an issue. Just a thought!
Thanks again for the recipe!
Lauren
Thanks for the heads up Lauren! That was definitely an oversight on my part. Going back in to correct it now!
There is nothing better than a really good lava cake, and it looks as though this one hits the mark! Can't resist that melted chocolate.
These were perfectly molten in the center. I'm excited to make them again!
So happy you liked them Joanne! Thank you for the positive feedback!
I love this the mostest!
Molten chocolate cakes are me FAVORITE! These look lovely!
My all time favorite dessert!
Love lava cakes! These look amazing!
Lava cakes are the best!