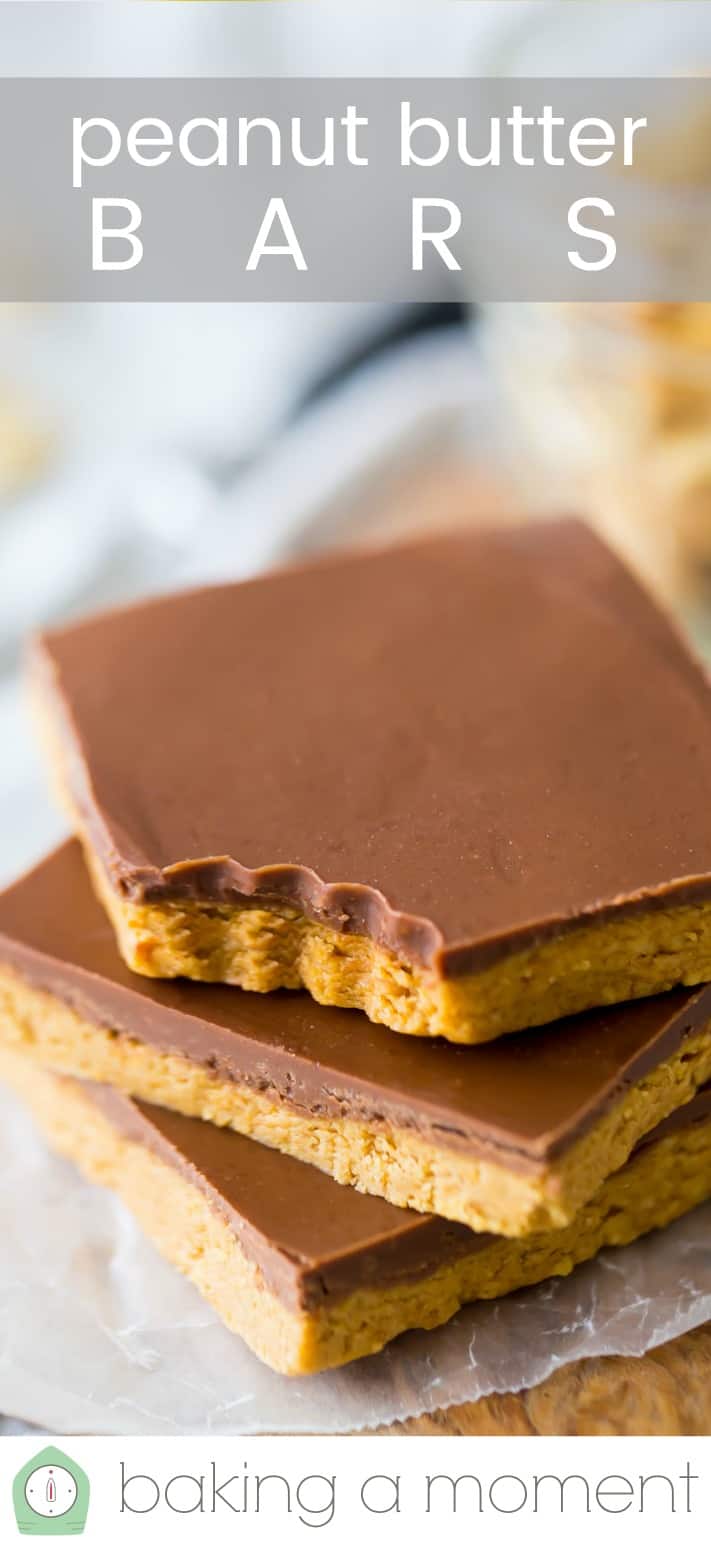
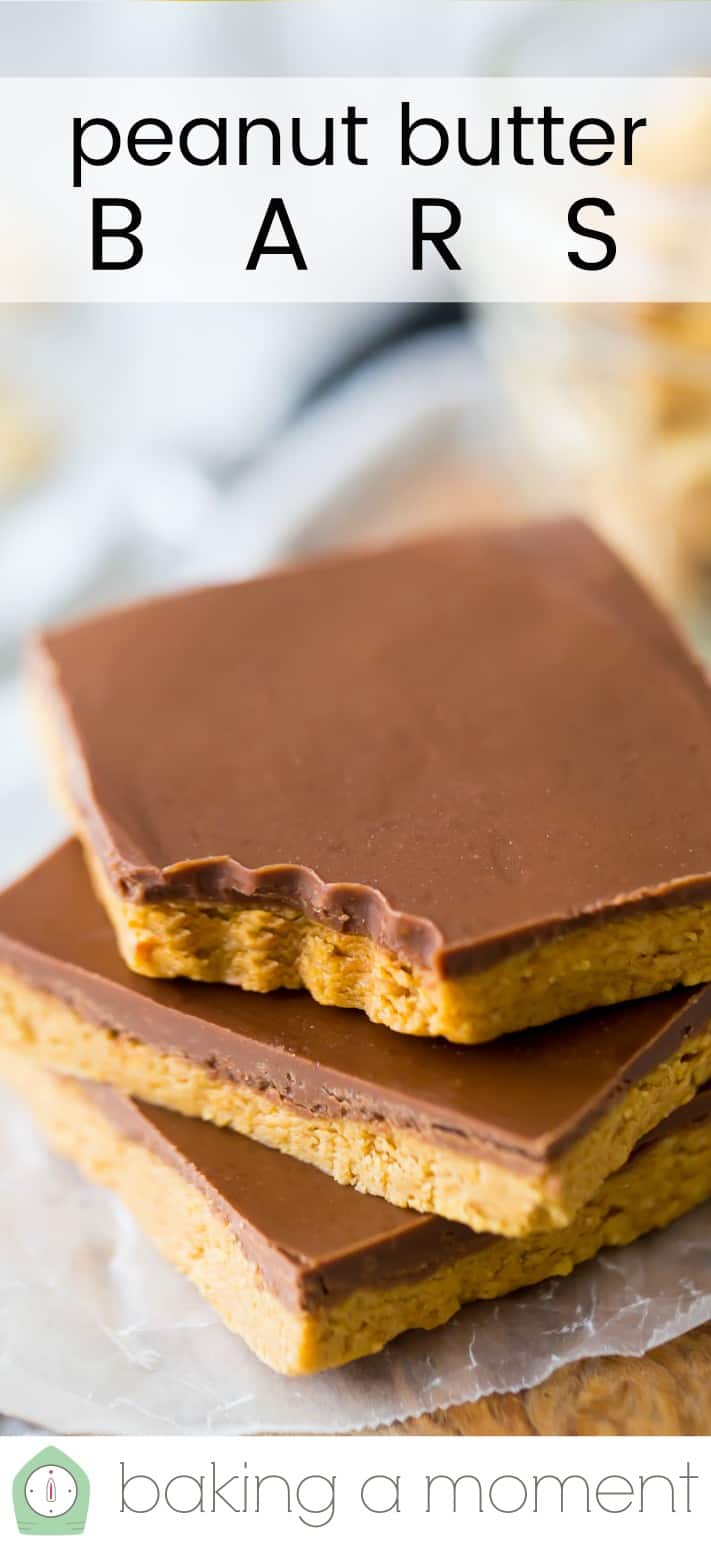
No-Bake Peanut Butter Bars
As an amazon associate I earn from qualifying purchases.
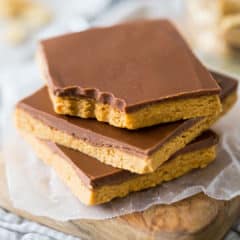
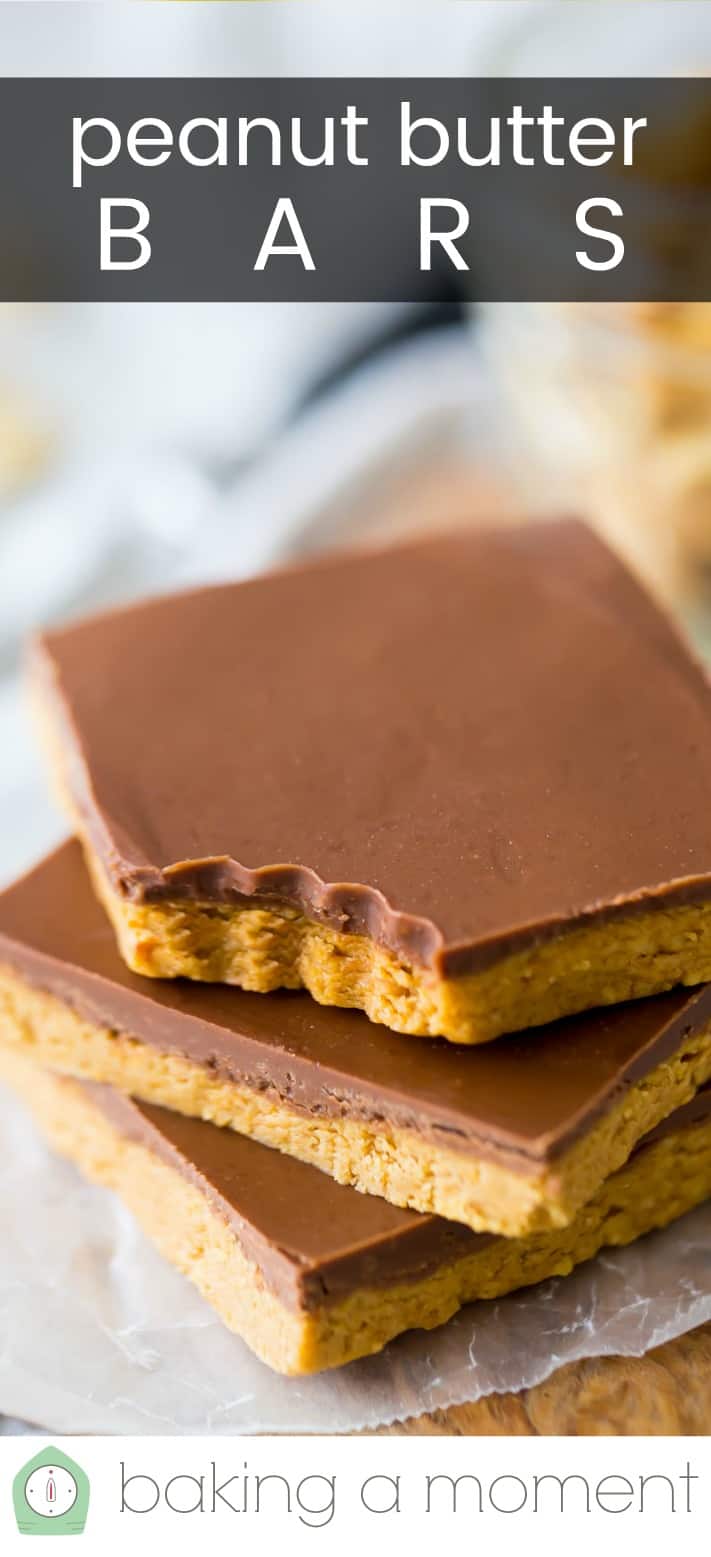
These no-bake peanut butter bars are such a delicious treat! So easy to make and they taste just like Reese's, but better because they're homemade.

We are almost at the end of the week!
This is the 2nd week since my kids finished up school, so we've definitely gotten into the summer groove.
It's not easy working from home when you've got 2 energetic boys to look after, but I think I'm doing ok. Quick and easy recipes have been my salvation!
And whether you're doing it as a business or just for fun, those quick and easy recipes are perfect for summer. Who wants to be stuck inside making food when the weather is sunny and gorgeous?
Not me- I'd rather be lounging on a deck chair at the pool!
This site has lots of fun and easy no-bake dessert recipes. Like this fluffy, creamy no-bake cheesecake, or these adorable Oreo balls, or how about this edible cookie dough? All of these recipes come together in a snap, with no baking required.
And today, I'm adding a new one to the list: these fantastic peanut butter bars.
I'm telling you, they take just 10 minutes to make and there are only 4 ingredients.
Plus, they taste just like Reese's peanut butter cups. Only better! Because you made them yourself.
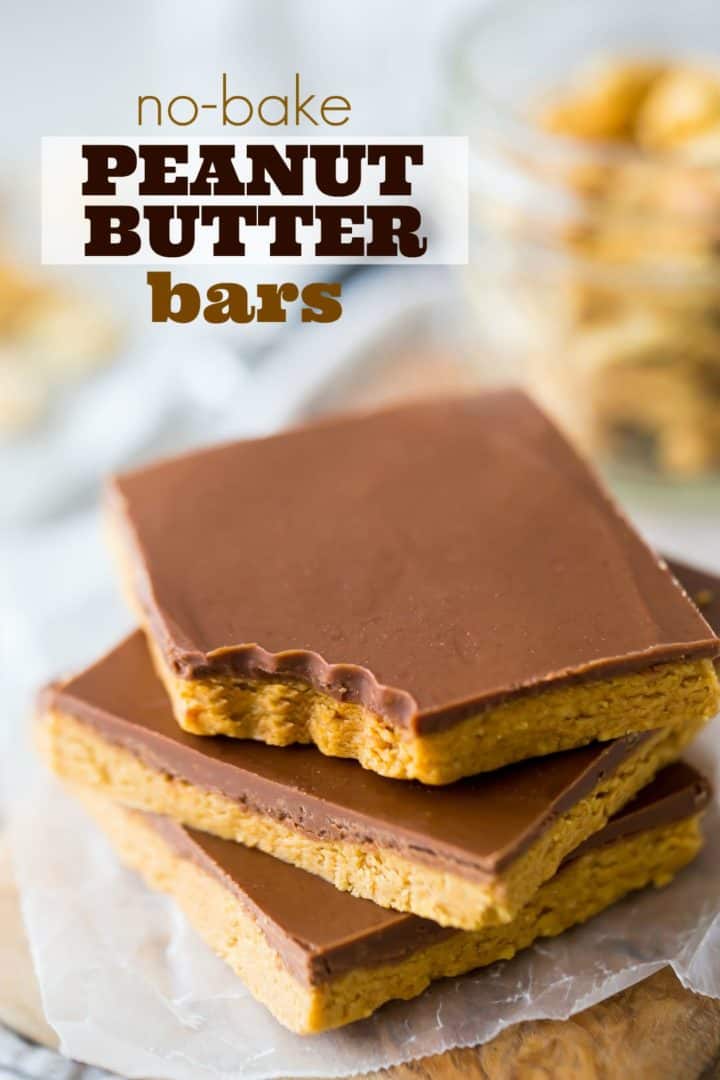
Table of Contents
- What are chocolate peanut butter bars?
- Why you'll love these peanut butter bars
- Ingredients and notes
- Key equipment
- How to make peanut butter bars
- Expert tips
- Recipe FAQ'S's
- How to serve
- How to store and keep
- Serving Size
- A few more of my favorite peanut butter recipes
What are chocolate peanut butter bars?
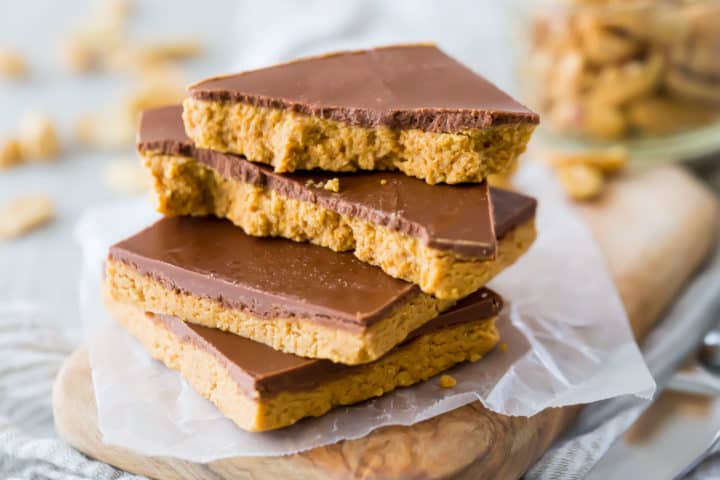
These scrummy bars consist of 2 layers: the peanut butter base and the chocolate peanut butter topping.
The base is so peanut-butter-y! If you have a peanut butter lover in your life, you've gotta make them these bars.
They're not overly sweet, and there's just a little hint of crunch.
The topping is smooth, creamy chocolate blended with just a little more peanut butter.
They make a perfect dessert or mid-afternoon treat!
Why you'll love these peanut butter bars
- Irresistible flavor combination: Chocolate and peanut butter are a classic pairing that so many of us just adore!
- Amazing texture: Chocolate peanut butter bars have a soft, creamy chocolate top layer and a thick, creamy peanut butter base with just a little bit of crunch.
- Energy boost: Chocolate and peanut butter are both excellent sources of energy. The natural sugars and healthy fats in these bars give you a quick pick-me-up!
- Easy to make: This chocolate peanut butter bar recipe is so simple! It only requires a few ingredients and the prep time is minimal.
- Crowd pleasing: Chocolate peanut butter bars are always a big hit! Whether you're hosting a party or bringing a dessert to a gathering, these bars will likely please everyone's sweet tooth and get you tons of compliments.
Ingredients and notes
This yummy treat is made with just 4 simple ingredients.
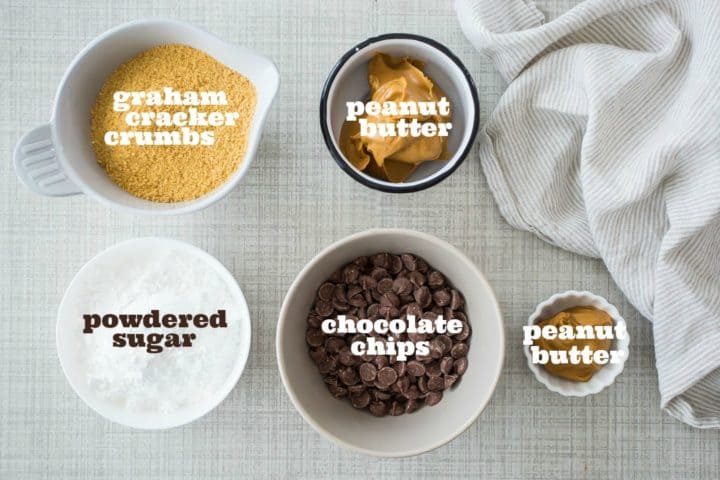
Graham Cracker crumbs
Graham crackers are sweet, mildly flavored crackers made from whole wheat flour, sugar, and honey.
When crushed into crumbs, they serve as a base for these peanut butter bars.
The crumbs add a slightly crunchy texture and a subtle sweetness to the bars.
You can grind up your graham crackers in the food processor or buy the pre-ground crumbs in a box. Since I'm all about easy recipes right now, I went for the box.
I find them in my regular grocery store, right in the baking aisle. Or you can order them online. Here's a link: graham cracker crumbs.
Powdered sugar
Powdered sugar is used in the peanut butter filling to add sweetness and make it creamy.
Chocolate chips
Chocolate chips are used in the topping for the top layer providing a rich, melty, and chocolaty element to the dessert.
Peanut butter
Serves as the main ingredient in the filling, giving a creamy and slightly savory taste that pairs exceptionally well with chocolate.
Peanut butter also provides healthy fats, protein, and other nutrients.
I use regular creamy peanut butter.
You could probably use the crunchy kind, too, if you like.
I haven't tried using natural peanut butter, but I think it would probably work if you're looking for a healthier option.
Key equipment
- Large mixing bowl: In which to make the base layer.
- Electric mixer: Optional, but handy! Fit it with the paddle attachment.
- 9×13 inch pan: To chill the bars in.
- Parchment paper sheet: Makes it easy to lift the bars out of the pan and onto a cutting board.
- Medium mixing bowl: In which to melt and mix up the topping.
- Silicone spatula: Helps get every last bit from the bowl.
- Offset spatula: Smooths out the topping.
How to make peanut butter bars
Step 1: Make the base layer
Start by tossing the graham cracker crumbs, peanut butter, and powdered sugar in a large mixing bowl.

Stir everything together on low speed to get it combined.
At first, the mixture may look dry. But if you keep going, it will come together!
Once everything's fully incorporated it will have a texture almost like a firm cookie dough.
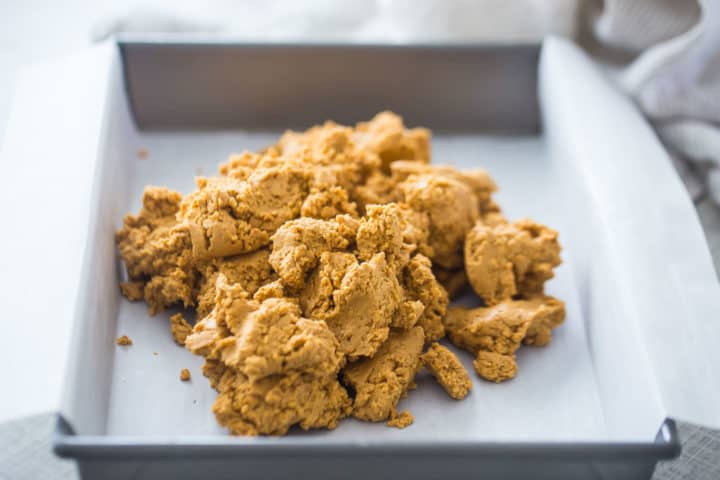
Next, just tip the mixture into a parchment-lined 9×13 inch pan.
You can do it in an 8×8 or 9×9 pan, too- your bars will just come out thicker.
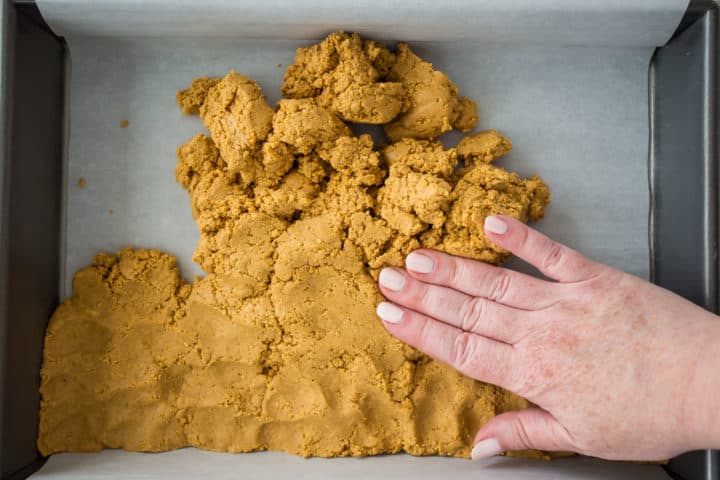
Press this mixture into an even layer.
Step 2: Make the topping
The topping is made by melting chocolate with peanut butter.

You can do this in a double boiler or the microwave.
I chose to do it in the microwave. It only took about a minute. Just hit it with quick, 20-second bursts, stirring after each, until the mixture is smooth and luscious.
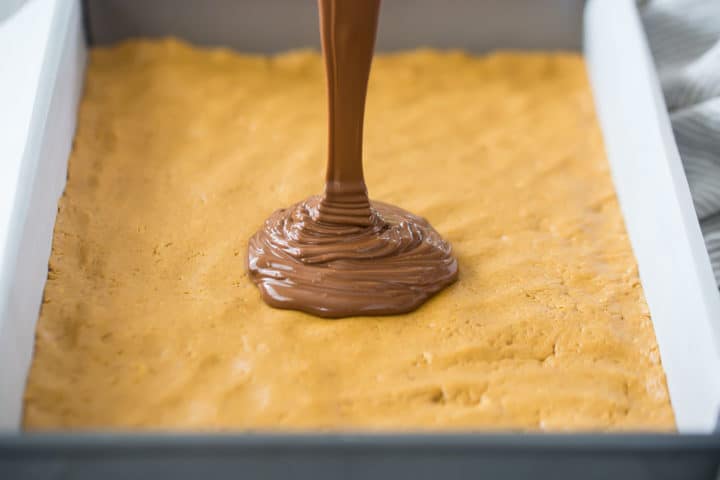
Pour the mixture over the base. And then smooth it out with a spatula.
Step 3: Chill
Allow the bars to chill until the top layer is set.
In my fridge, this took about 1 hour. Once they're set, they can be cut into bars and enjoyed!

Expert tips
Use high-quality ingredients
Using high-quality ingredients such as good peanut butter, high-quality chocolate chips, and fresh graham crackers can significantly improve the taste and overall quality of your peanut butter bars.
Optimize peanut butter consistency
Depending on the recipe, you may need to adjust the consistency of the peanut butter.
If it's too thick, you can heat it slightly or mix in a small amount of oil to thin it out.
If it's too runny, you can add a bit more powdered sugar or graham cracker crumbs to thicken it.
Mix thoroughly
Ensure all the ingredients are thoroughly combined when making the peanut butter filling. This will yield a smooth and consistent texture throughout the bars.
Take your time to mix well and work out any lumps.
Chill properly
After assembling the peanut butter bars, it's important to refrigerate them until the topping is set.
Recipe FAQ'S's
These are made with simple ingredients, including graham cracker crumbs, powdered sugar, peanut butter, and chocolate chips.
You don't need any butter.
Some recipes incorporate additional mix-ins to add texture or flavor variations. These can include chocolate chips, chopped nuts (such as peanuts), shredded coconut, or even oats.
To make a gluten-free version of this recipe, look for gluten-free graham cracker crumbs.
These can also be made dairy-free if you use dairy-free chocolate chips.
How to serve
- Enjoy the peanut butter bars as they are, straight from the pan or platter. Serve them at room temperature or slightly chilled.
- Crumble peanut butter bars over a scoop of vanilla or chocolate ice cream. The combination of the creamy ice cream, rich peanut butter flavors, and crunchy texture of the bars is so good!
- Slice the peanut butter bars in half horizontally and spread a layer of additional peanut butter or chocolate hazelnut spread in the center. Sandwich them back together and enjoy a truly indulgent treat!
- Warm the peanut butter bars slightly in the microwave or oven and serve them with a scoop of ice cream or a drizzle of warm caramel or chocolate sauce. The warm and melty bars and cold ice cream create a delightful contrast.
- Cut the peanut butter bars into small squares or rectangles, wrap them in decorative packaging, place them in individual treat bags, and give them as gifts or party favors.
How to store and keep
As long as it's not too hot in your house, these peanut butter bars can be wrapped and kept on the counter for several days.
They should be ok to sit out without melting.
Once they've chilled in the fridge and the chocolate is set, they should stay that way, although they will be slightly softer at room temperature.
They should last for around two weeks in the fridge when stored in an airtight container.
Serving Size
This recipe makes 20 bars when prepared in a 9x13 pan.
A few more of my favorite peanut butter recipes
Ingredients
For the peanut butter base
- 2 cups (168 g) graham cracker crumbs
- 1 ½ cups (387 g) peanut butter
- 1 ½ cups (180 g) powdered sugar
For the chocolate peanut butter topping
- 1 ½ cups (270 g) milk chocolate chips*
- ¼ cup (64.5 g) peanut butter
Instructions
To make the peanut butter base
- Place the graham cracker crumbs, peanut butter, and powdered sugar in a large mixing bowl and stir together until combined.
- Press the mixture into an even layer in the bottom of a parchment-lined 9x13" pan.**
To make the chocolate peanut butter topping
- Place the milk chocolate chips* and peanut butter in a medium bowl and microwave*** in short, 20-second bursts, stirring until smooth.
- Pour the mixture over the peanut butter base and smooth into an even layer with a spatula.
- Chill for 1 hour, or until set, before cutting into bars.
Notes
**Can also be made in an 8x8" or 9x9" square pan (bars will be thicker).
***May also be done over a double boiler.

My peanut butter chocolate friends enjoyed this. Better than a Reese's. The chocolate with the peanut butter is a brilliant idea.
So happy you enjoyed!
Do you think it would be okay to use protein powder instead of powdered sugar?
If the protein powder is sweetened I do think that could work!
So fast and easy ...and 😋!
Could I Use semi-sweet chocolate chips?
I can't imagine why not! Good luck!
I have chocolate gram craker can I use them in it this is what I have on hand.
I'm sure it would change the taste but that might be a really nice thing! I say go for it!
Thank you for sharing the recipe! Can I put it in the freezer or refrigerator when it's setting to speed up the process? 🙂
Yes, absolutely!
It looks amazing cant wait to try it
Hope you enjoy!
Great recipe. I’ve used it dozens of times successfully. I don’t recommend natural peanut butter, like the kind with the oil on top. It’s too thin. The bars don’t set up very well. End up being a mess.
Thanks for the great tip, Amanda!
I tired it last weekend and it was liked by my kids. They are just waiting for a new dish. Thanks a lot for sharing this recipe and I am eagerly waiting for the next one....
That's so great to hear! I'm so glad your kids liked them!
I first want to say thank you for posting a Peanut Butter Recipe(PBR) like this online. I developed an allergy to peanuts and treenuts in my adulthood (around the time I hit 30) and have been craving peanut butter treats like this for nearly 10 years now. So I used my Peanut Butter Subsitute WowButter. I gave it an hour and a half before I checked on it. And even though there is room for improvement on my end, you just cannot fathom the sensation I had after going almost a decade not being able to have bars like this! I do have to admit I did add a little salt to it, because the last time I did a PBR with WowButter someone suggested adding salt to it to make it taste like Reese's (don't really know about that... yet), but I now can reclaim part of my childhood and kill cravings for treats like this. Will it be the same as the squares I use to get with lunch during Middle and Highschool (96-02) with the soft chocolate cover and nearly gooey peanut butter underneath, no but I can live with that, just having the treat again just makes me happy.
Once again, THANK YOU for posting this recipe.
My pleasure! I'm so happy you like the recipe. I'll have to check into WowButter, sounds interesting. Thanks so much for the positive feedback.
These are the best! Thank you for sharing!
After making the crust I spread a layer of pb on top. Then I melt the choc (without the pb) and pour that ontop.
Sounds like a delicious twist! Love it. Thanks so much for sharing!