Pretzel Bun Recipe
As an amazon associate I earn from qualifying purchases.
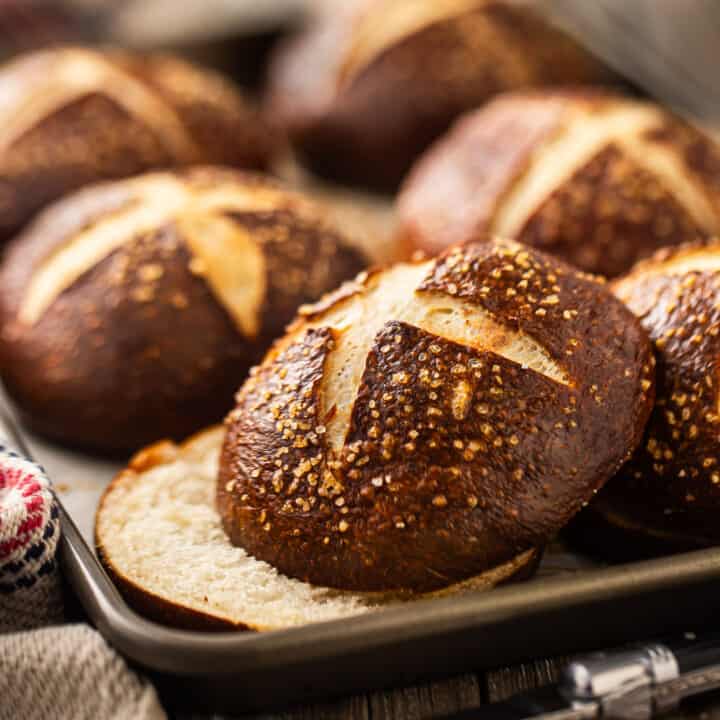
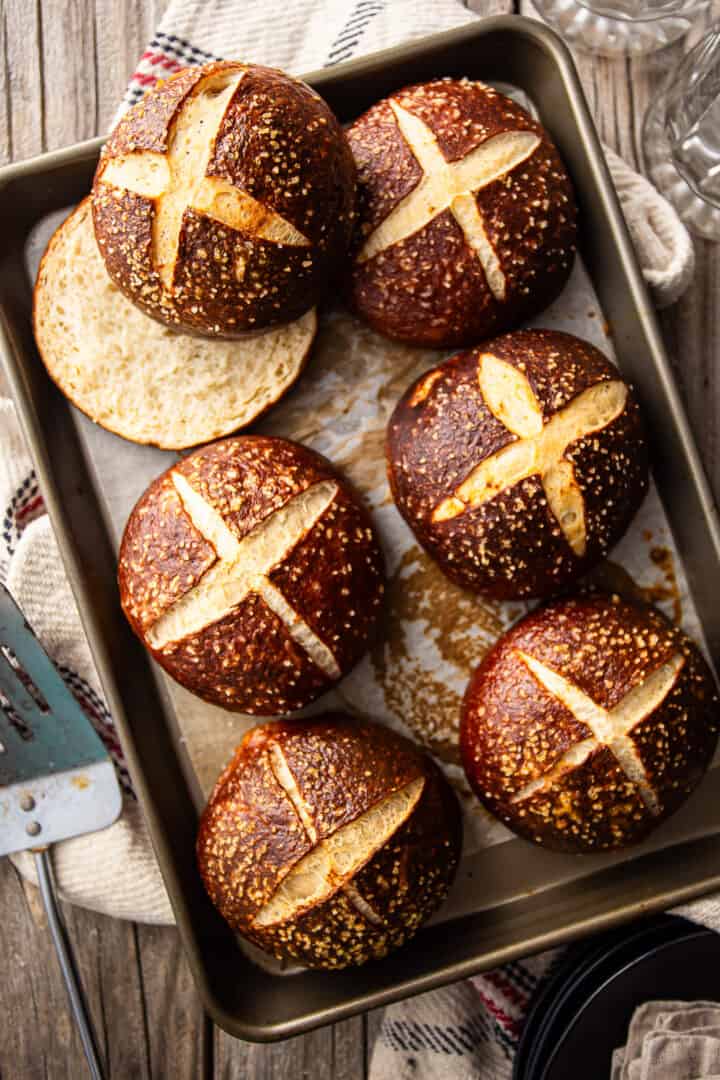
This easy pretzel bun recipe bakes up crusty & chewy, with the most pillowy-soft centers! So good for burgers & sandwiches!
If you are looking for a way to step up your burger and sandwich game, then boy have you come to the right place!
How does a homemade pretzel bun sound to you?
I'm talking crusty and toasty on the outside, soft and pillowy in the middle, with the perfect amount of chewiness.
There are lots of amazing bread recipes on this site, including these garlic knots, this homemade cinnamon bread, and this easy ciabatta bread. I keep sharing them and you keep loving them! Yeast breads are some of the most popular recipes on this site!
So today I've got another one for ya. It's about as easy as pretzel buns can get, and I think you're really going to love it.
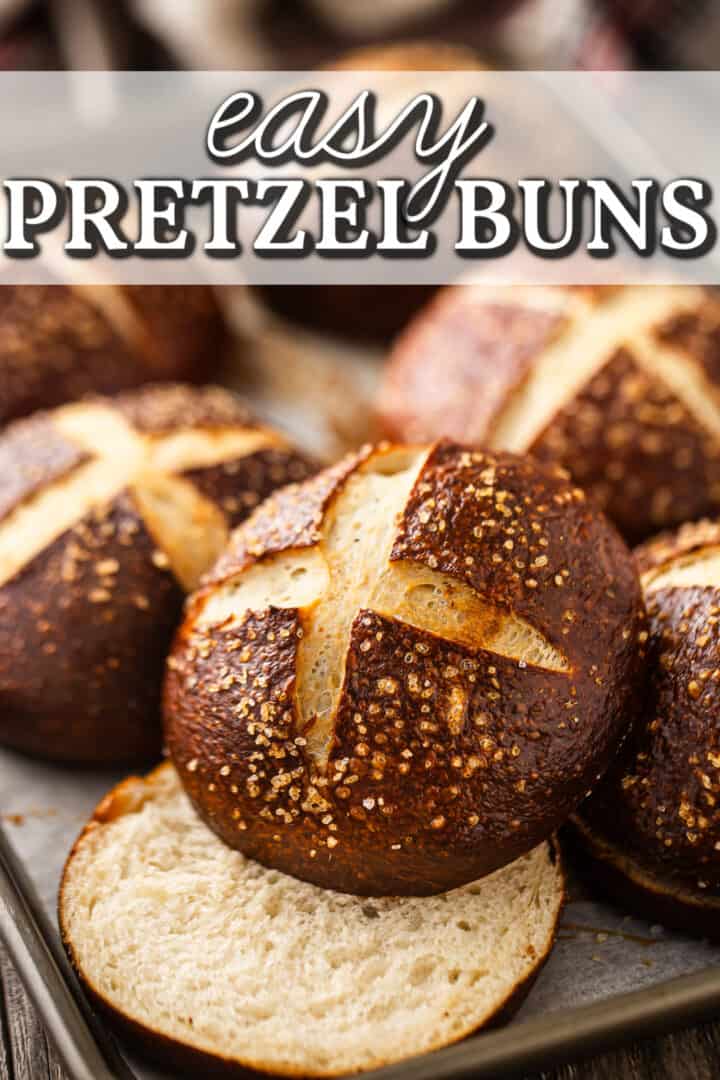
Table of Contents
- What are pretzel buns?
- What do pretzel buns taste like?
- Pretzel Bun Ingredients
- How to make pretzel buns
- How to serve pretzel buns
- Expert tips
- Frequently asked questions
- How to store homemade pretzel buns
What are pretzel buns?
If you've ever had a soft pretzel, then this concept should be pretty self-explanatory: It's like a soft pretzel, but in bun form!
All the great flavor and texture of a homemade soft pretzel, but shaped and baked like a sandwich roll.
And that's what it's great for. If you want to add a little extra pizazz to your burgers, pulled pork, hot ham & cheese, or crispy chicken sandwich, then this is the best way to do it.
Just on the off-chance you don't know what a soft pretzel is, here's a quick explanation:
Soft pretzels are a type of yeast bread that have been around for centuries. There's some debate as to where they were invented, but it was most definitely somewhere in Europe, likely by clergy people of some kind.
The shape is meant to resemble hands clasped in prayer.
They have a yeasty, savory taste, with a soft, pillowy interior and a chewy, toasty outside crust.
And they're usually sprinkled with coarse salt so they make a really satisfying savory snack.
What's great about this pretzel bun recipe
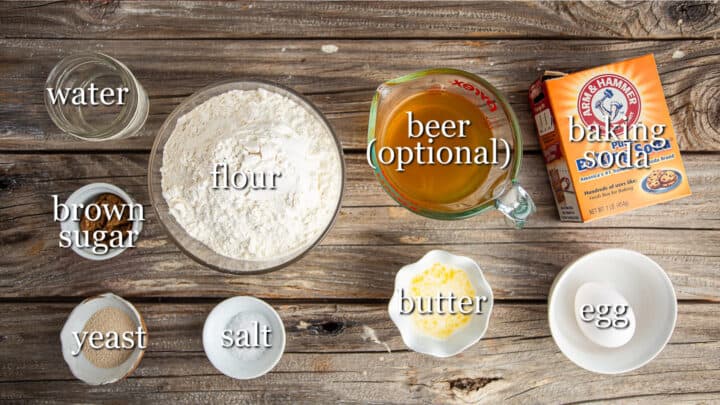
- Few ingredients: You can make these pretzel buns with just 7 basic pantry staples, plus water.
- Easy to make: I've simplified the method down to its essence, so there's very little active time here. It's a relatively easy process that's mostly downtime.
- Tastes amazing: You can find everything you want in a pretzel bun here. The flavor is on-point and so is the texture. I've modified the basic soft pretzel recipe to make it rise sky-high and incredibly airy, while still maintaining that satisfying chew we all crave!
- Versatile: Shape the dough any way you like! I've made pretzel burger buns but you could elongate the shape for hot dog buns, or make them smaller for sliders.
What do pretzel buns taste like?
There is a certain flavor that pretzels have that's unmistakable, but it can be hard to describe.
It's very toasty-brown, if that makes sense.
And this recipe also has added complexity from beer. The beer is optional (you can swap it out for water), but if you add it your pretzel buns will take on the flavors of whatever kind you choose to use.
So if you use a malty beer your pretzel buns will have more of a sweet, caramel-y flavor, if you use a hoppy beer there could be some floral bitterness.
These also have a pronounced yeasty, fresh-baked bread flavor that's just so home-y and comforting!
And the coarse salt on top just brings out all of these delicious flavors.
Pretzel Bun Ingredients
You'll only need a few simple ingredients to make these pretzel buns.
Sugar
Sugar feeds the yeast and adds sweetness (obvs!) but it also aids in browning and keeps things moist, since it's hydrophilic (this means it loves water, in other words, it draws moisture in).
I used dark brown sugar here, but really any type of sweetener would be fine. Regular granulated sugar, light brown sugar, honey, or maple syrup would all work well too.
Water
You'll need water twice in this recipe. First to dissolve the yeast and then again to boil the pretzel buns.
When you dissolve the yeast, the water should be warm but not hot, like a baby's bath. Aim for around 105 degrees F. If the water is too hot, it can kill the yeast.
Yeast
I prefer dry active yeast for bread baking. It allows a slow enough rise for the flavor to really develop, and it's easy and convenient to buy and store.
Instant yeast is another option. If you go this route, you'll only need 0.75x the amount, and you can cut the rise times down by 15 to 20 minutes.
Either way, be sure to check the expiration date on the packet and make sure it hasn't past. If it has, the yeast could be dead and your bread won't rise properly.
Flour
Bread flour is my favorite for this recipe, because it has a higher protein content and therefore yields a strong crumb and a chewy texture.
If you don't want to use bread flour, all-purpose flour will work. You may just have to knead it a little longer to develop the glutens needed for that chewy texture.
Beer
Beer is optional in this recipe. You can sub it out for water if you prefer.
But I really love the added flavor it imparts. Use any kind you want, but know that the taste will come through a little in the final product.
So a hoppy beer will yield that floral, slightly bitter flavor, a malty beer will be a little sweeter, a dark beer will have that chocolate-y quality, etc.
Butter
Adding melted butter to the dough helps the bread to bake up soft and pillowy on the inside.
I like to use unsalted butter because it lets me control the amount of salt in the dish. Different brands of butter can contain different amounts of salt, so this way you get a more consistent result.
Salt
Salt carries all the flavors and intensifies them.
I like kosher salt best because it doesn't have any additives (table salt usually contains iodine and that can leave a bitter taste), so the flavor is pure. It's also inexpensive and easy to find in a regular grocery store.
This recipe calls for salt in the dough as well as to top the buns before baking. Pretzel salt is traditional as the topping. You can order it here: Pretzel Salt, or just use coarse kosher salt like I did.
Baking Soda
Baking soda is the magic ingredient to create that signature brown pretzel crust.
Add it to the water you boil them in, but be careful! It will fizz up a ton when it hits the hot water.
Egg
Beat a whole egg with a few teaspoons of water to make an egg wash to brush on the unbaked pretzel buns. This will help to create that gorgeous shiny brown crust on the outside.
I've tried making these without the egg wash and they just don't get that same burnished color.
Special equipment
You don't need any special equipment to make this recipe. Just a few standard kitchen tools:
- Mixing bowl: To make the dough
- Plastic wrap: To cover the dough while it's rising
- Non-stick spray: So the plastic doesn't stick to the dough
- Knife or bench scraper: To divide the dough into equal portions
- Parchment paper sheets: To line the baking pans
- Sheet pans: The pretzel buns will rise and bake on these
- Large pot: For boiling
- Pastry brush: To paint on the egg wash
How to make pretzel buns
You can make this pretzel bun recipe in 5 easy steps.
Step 1: Make the dough
Start by dissolving the brown sugar in warm water.
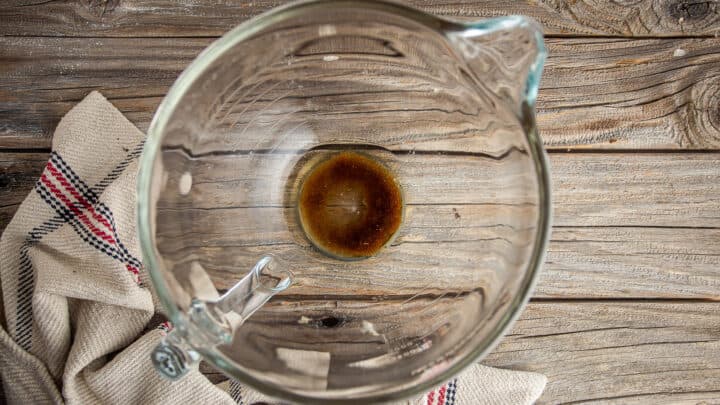
Then, stir in the yeast and allow it to dissolve.
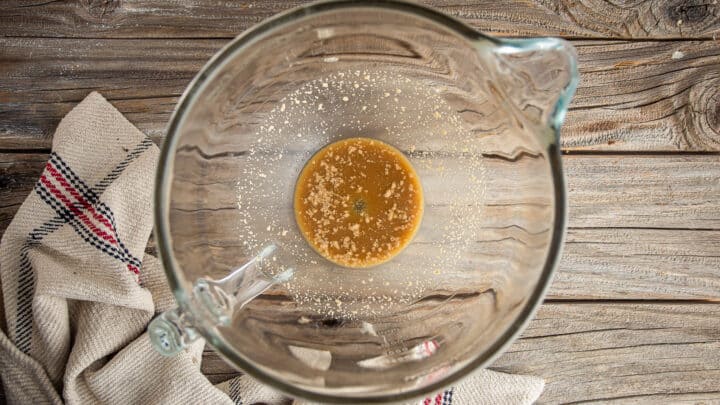
After the yeast has dissolved, it should start to look foamy. If it's not foamy, it could be dead. Your pretzel buns won't rise properly if the yeast is dead.
Perhaps the water was too hot? Or maybe it was just past its expiration date.
If the yeast foams and proves itself alive, stir in the flour, salt, beer, and melted butter.
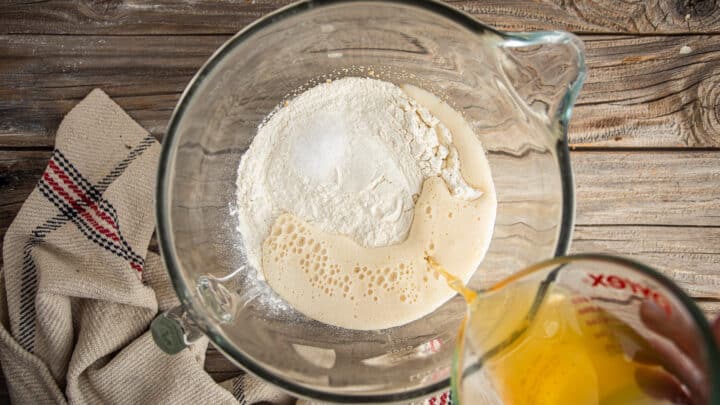
Start with about 2 ½ cups of flour. You should end up with a stiff dough that gathers itself into a ball and pulls cleanly away from the sides of the mixing bowl.
If your dough is too sticky, add a little more flour.
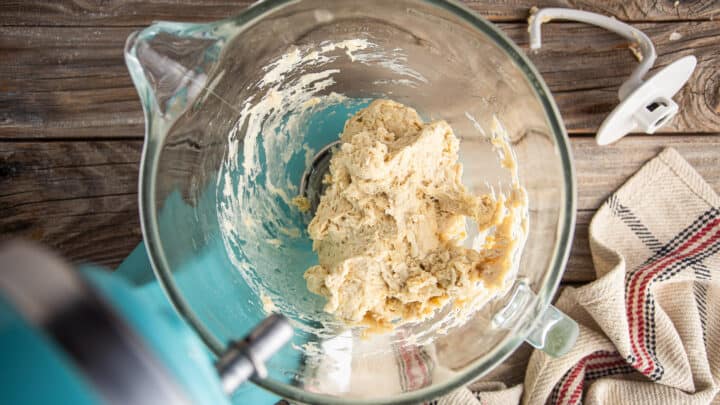
Step 2: Knead the dough & let it rise
Kneading the dough is especially important in this recipe.
It's what creates that chewy, elastic texture that's so satisfying!
If you don't knead the dough for long enough, your bread will be crumbly.
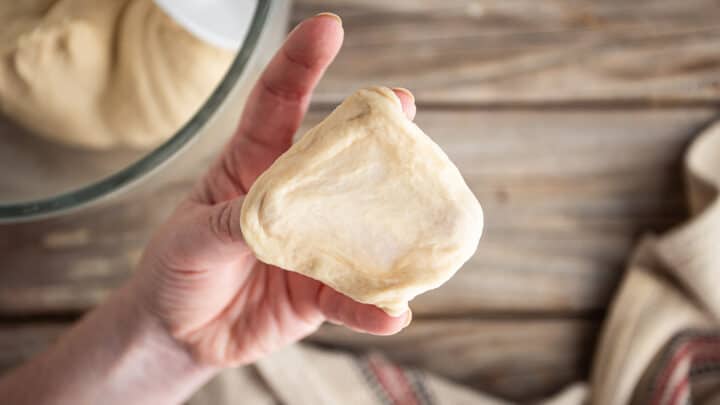
This is what properly kneaded bread dough should look like:
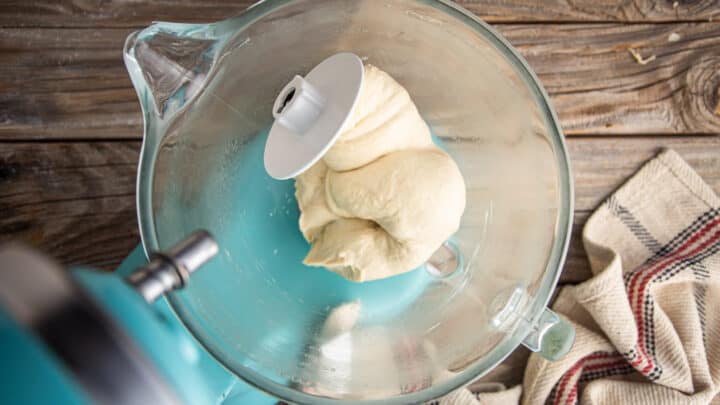
Notice how different that looks from the previous image? It's silky-smooth and stretchy.
Now give it the windowpane test: Pinch off a little piece of dough and using your fingertips, stretch it gently from the center outward. You should be able to pull it tissue-thin without it tearing. It should be so thin you can see light passing through it, just like a windowpane.
If it doesn't pass the test, keep on kneading until it does. You'll be glad you took the extra time later, when you have that awesome chew factor!
Next just mist your bowl with a little non-stick spray, pop the dough back in, cover it tightly, and allow it to rise until it's twice its original size.
Step 3: Shape the buns & let them rise again
Once your dough is nice and puffy and full of air, punch it down.
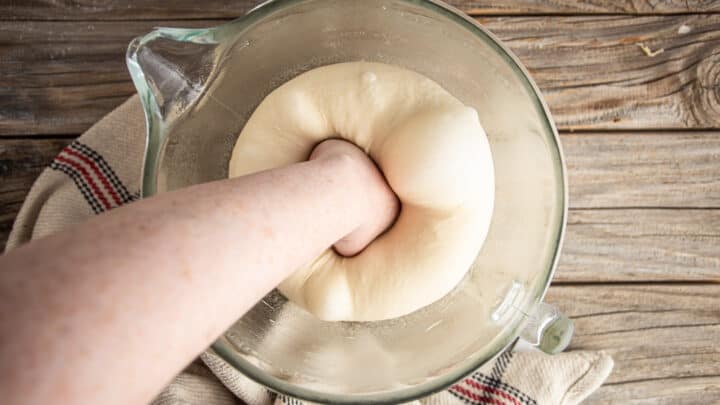
And divide it into 8 equal portions.
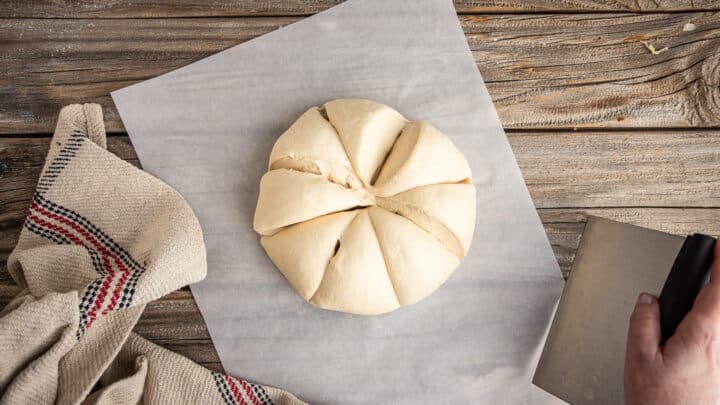
Roll each portion into a tight, smooth ball, and pat it down to flatten it slightly.
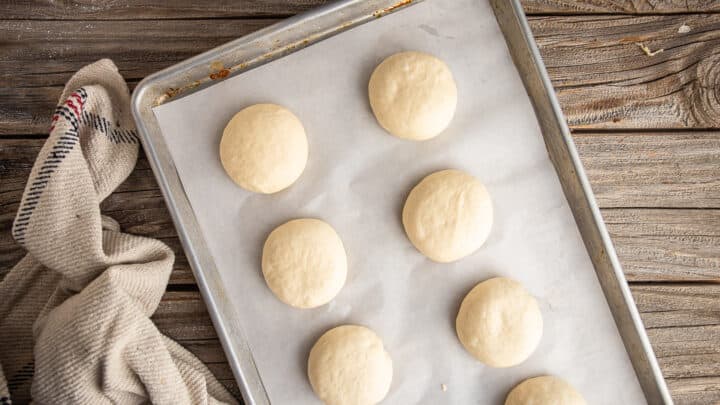
Once all your buns are shaped, cover them with a sheet of plastic wrap that's been misted with non-stick spray, and allow them to rise a second time.
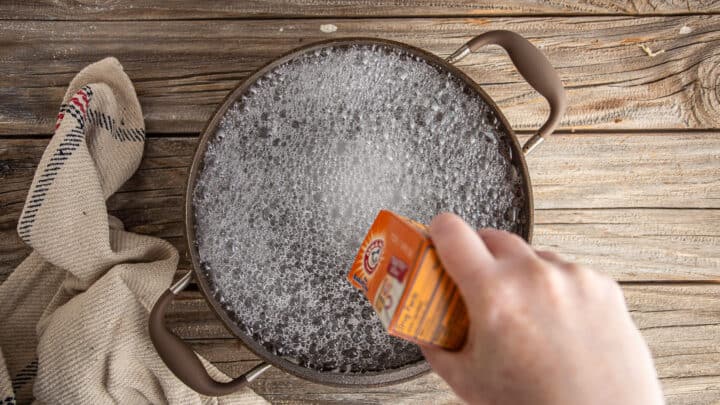
Step 4: Boil the pretzel buns
Once the unbaked pretzel buns have doubled in size, preheat the oven and bring a large pot of water to a boil.
Add in the baking soda. Remember to step back, it will bubble up like crazy!
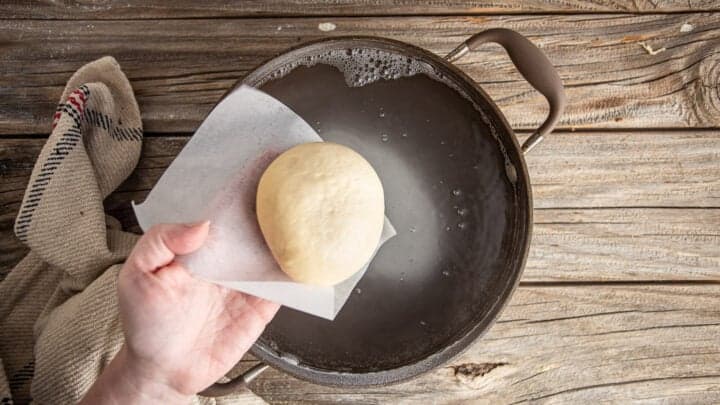
Drop the buns into the simmering water very gently, taking care not to knock the air out of them.
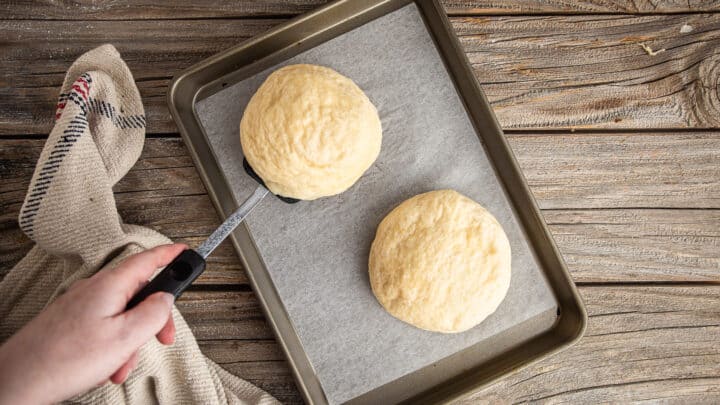
Allow them to boil for about a minute on each side, then fish them out, drain them on clean towels, and place them back on the baking sheet.
Step 5: Bake the pretzel buns
Beat an egg together with a little water to create an egg wash.
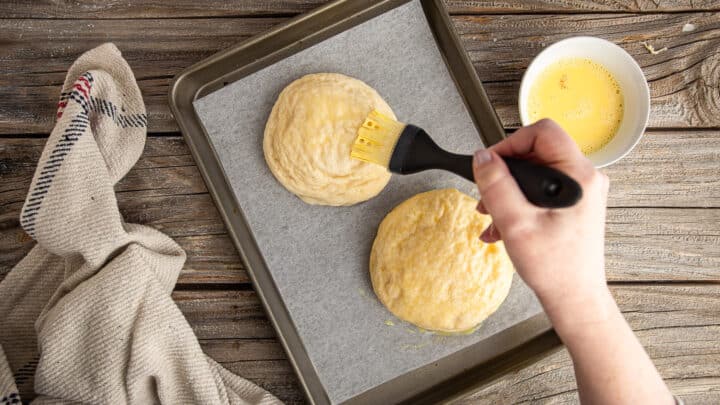
Brush the buns with egg wash and then sprinkle on the salt.
Scoring the pretzel buns with an "x" shape will help them to release steam and crack in a more controlled way. Plus it looks pretty cute!
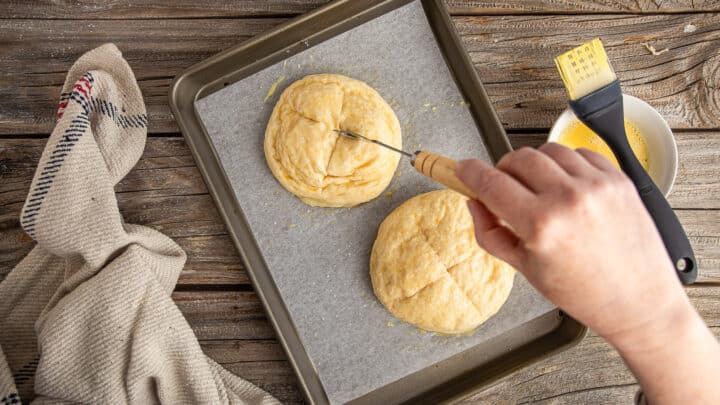
Slide the trays into the oven and allow them to bake until deeply bronzed, puffy, and light.
How to serve pretzel buns
These are perfect for burgers, brats, or any kind of sandwich really.
Especially anything that you'd put mustard on. Mustard and pretzels are a classic combination!
Split the buns horizontally with a bread knife. If you want you can toast them too!
You could also make pretzel dogs by rolling the dough into a long rope and then winding it around the hot dog. Boil, bake, and serve with your favorite dipper! (I'm a big fan of this beer cheese dip or this jalapeno popper dip!)
Expert tips
Add the flour in gradually
When making bread, the amount of flour called for is only an estimate. It can vary based on several different factors.
You'll probably need anywhere from 2 ½ cups to 3 ½ cups flour to make this bread. Start with 2 ½ cups and add more if the dough is too sticky. Once it gathers itself into a ball and pulls cleanly away from the sides of the bowl, stop adding flour.
Use a beer you like the taste of
The flavor of the beer definitely comes through in this bread! So make sure you use one who's flavor you really enjoy.
Knead the dough well
Make sure you give this bread dough a full 10 minutes of kneading, minimum! If you don't knead the dough enough, the pretzel buns will come out crumbly and dense instead of chewy and light.
You'll know you've kneaded enough when it passes the windowpane test.
Keep an eye on the dough as it rises
The rise time can vary by quite a bit. Be sure to keep a close eye on it.
You'll know it's time to move on to the next step when the dough looks twice as big as it was when it started out.
If it doesn't get enough time to rise, it will have a tight, gummy texture. If it rises for too long, the gluten structure will weaken and the bread won't puff up as it bakes.
Either way, the bread will bake up smaller than it should, so just keep your eye on it and when it's twice its original size, it's time to move on to the next step.
Make overnight pretzel buns
If you'd like to break up the prep a little bit, this recipe can be made as overnight pretzel buns.
Once the buns have been shaped, cover them with oiled plastic wrap and keep them in the fridge for up to 48 hours, or in the freezer for up to 2 weeks.
On the day you'd like to bake them, take them out, allow them to come to room temperature then rise to twice their original size, and go on with the recipe as usual from there.
Maintain maximum puffiness
After the buns have been shaped and had their second rise, they need to be boiled.
Excessive handling can deflate them! Sad face.
So I recommend placing each pretzel bun on it's own piece of parchment after it's been shaped. This way, you can just grab it by a corner and flip it gently into the hot water, peeling the paper away in one swift motion. See what this looks like when you watch this video: Soft Pretzel Recipe Video.
No messing around trying to pick it up with your hands or with a spatula. Just pinch a corner of parchment and slide the risen dough onto the palm of your hand without disturbing or deflating it.
Create steam in your oven
When you preheat your oven, place an oven-safe dish filled with water on the bottom rack.
This will create a steam bath for your pretzel buns that will result in the crackliest crust!
Frequently asked questions
How can I make vegan pretzel buns?
Swap in any kind of plant-based butter that can sub 1:1 for dairy butter.
And instead of egg wash, use aquafaba (the liquid canned chickpeas are packed in), melted vegan butter, maple syrup, or any kind of plant-based milk or cream.
How can I make gluten-free pretzel buns?
A gluten-free flour blend that can sub 1:1 for all-purpose flour should work well here.
Do I have to use a stand mixer?
A stand mixer makes this recipe really easy, but if you don't have one you can make this recipe by hand or use a bread machine.
How to store homemade pretzel buns
I recommend storing pretzel buns in a paper bag. They need to breathe a little bit, or else they'll shrivel.
If you put them in a completely airtight bag or container, the moisture inside the bread gets trapped in there, and the surface of the pretzel rolls becomes wet and wrinkly.
Stored in this way, they should keep for around 3 days at room temperature, or a week or so in the fridge.
You can also freeze them! Place them in a zip-top freezer bag, but take them out of the bag before you thaw them back out.
A few more of my favorite savory recipes
As an amazon associate I earn from qualifying purchases.
Ingredients
To Make the Pretzel Bun Dough
- 3 tablespoons (36 g) dark brown sugar
- ¼ cup (59.15 g) warm water
- ¼ ounce (7.09 g) active dry yeast, (approx. 2 teaspoons)
- 3 cups (375 g) bread flour, (approx.)
- ¾ teaspoons (4.5 g) kosher salt, plus extra for garnish
- 1 cup (236 g) beer, (or water)
- ¼ cup (56.75 g) unsalted butter, melted
Additionally
- egg wash, (1 large egg whisked with 2 teaspoons or so of water)
- water, for boiling
- ⅓ cup (40 g) baking soda
Instructions
- Place the brown sugar in a large bowl and pour in the warm water.
- Sprinkle the yeast on top and allow it to become foamy (approx. 5 to 10 minutes).
- Stir in about 2 ½ cups of flour along with the salt, beer, and melted butter.
- Continue adding flour as needed, until a stiff dough forms. (The dough should gather itself into a ball and pull cleanly away from the sides of the bowl.)
- Knead the dough until it passes the windowpane test (approx. 10 to 15 minutes).*
- Remove the dough from the bowl, mist the bowl with non-stick spray, then return the dough to the bowl and cover it with plastic wrap.
- Allow the dough to rise until doubled in volume (approx. 90 minutes).
- Punch the dough down and divide it into 8 equal portions.
- Roll each portion of dough into a tight ball, press it slightly flatter, and place it on a parchment-lined baking sheet.
- Mist a sheet of plastic wrap with non-stick spray and allow the shaped rolls to rise until doubled in volume (approx. 30 minutes).**
- Preheat the oven to 425 degrees F and bring a large pot of water to a boil.
- Add the baking soda to the boiling water (be careful, it will fizz up!).
- Gently place the unbaked rolls in the water (taking care not to deflate them) and allow them to simmer gently for about a minute on each side.
- Drain the boiled rolls and place them on a parchment-lined baking sheet.
- Brush the rolls with egg wash and sprinkle with additional salt for garnish.
- Score the unbaked buns with an "x" shape, using a sharp knife or baker's lame.
- Bake the pretzel buns until deeply browned and shiny (approx. 20 to 24 minutes).


I just remade these and you were right! Boiling them on high was causing all the problems but on a simmer they came out great! Thanks so much!!
Yay! I'm so glad I was able to help!
I've made this recipe twice and both times the top came out not smooth like I was looking for, instead it was very textured. But the main issue is that when I put some of the rolls in the boiling water/baking soda the first half come out decent but halfway through the water almost boils over and gets cloudy. After that the pretzel rolls start to split on the sides and turn to mush on the inside. Sometimes they disintegrate altogether. What is happening here and how do I solve the issue?
Hm that is really strange I have not had that happen and I've made this recipe several times. I'm wondering if maybe you have the heat turned up a little too high on your burner? The water should be at a gentle simmer. Hopefully this helps!
Easy to follow, clear directions and amazing buns.
One thing I would add is 'modifications' for people who don't have a robot to knead thw dough with.