Cheese Danish
As an amazon associate I earn from qualifying purchases.
This easy cheese Danish recipe couldn't be more authentic! Creamy filling & flaky, buttery pastry, but streamlined, simplified, and so yummy!

So I got the idea to make cheese Danish, and initially I thought I was going to do a shortcut version with puff pastry. It's very similar, and you can buy it pre-made at the grocery store.
I gave it a go, and... well... I was pretty disappointed. Not gonna lie.
They barely puffed up, looked anemic, they were heavy, and the flavor was pretty meh.
I've made Danish pastry dough before, so I know what it's supposed to be like. When done properly, Danish pastries should be puffy and light as air, golden brown and buttery, and made up of countless layers of flaky yet soft pastry, with a sweet puddle of filling in the middle.
These were not that.
So I knew I had to buckle down and just make the real deal. I mean, if you're going to go to the trouble, you may as well do it right. The shortcut version is so disappointing, but proper Danish are amazing! If I'm going to indulge like that, I want it to be amazing!
In this cheese Danish recipe, I've really stripped it down and simplified it as much as possible. Kinda like my puff pastry recipe and my croissant recipe!
Laminated doughs can be overwhelmingly complicated, but I try my best to streamline them so they're more approachable. They don't have to be that fussy!
So read on to learn all about how to make authentic Danish cheese pastry, with none of the fuss!

Table of Contents
- What are cheese Danish?
- Why this is the best cheese Danish recipe
- What do cream cheese Danish taste like?
- Ingredients
- Special equipment
- How to make Danish cheese pastry
- How to serve
- Expert tips
- Frequently asked questions
- A few more of my best breakfast recipes
What are cheese Danish?
These are a soft, slightly sweet, flaky pastry, topped with a cheesecake filling.
Danish are generally eaten for breakfast, brunch, or as a snack. They're really good with coffee!
They are a laminated pastry, meaning the dough gets rolled out and folded to create hundreds of lovely layers. Similar to puff pastry or croissant dough! The difference being Danish dough contains sugar, egg, and yeast. Puff pastry has none of those; croissant dough has yeast but no sugar or egg.
Why this is the best cheese Danish recipe
- Tastes amazing: The pastry is incredibly light, soft and flaky, and it has a slightly sweet, buttery flavor like nothing else!
- Wholesome ingredients: It's made entirely with real ingredients, like fresh butter, eggs, and flour.
- Easier to make: I've simplified the method so it's quicker, easier, and a lot less scary to make.
- Versatile: Make your Danish any size or shape, and add whatever garnishes strike your fancy!
What do cream cheese Danish taste like?
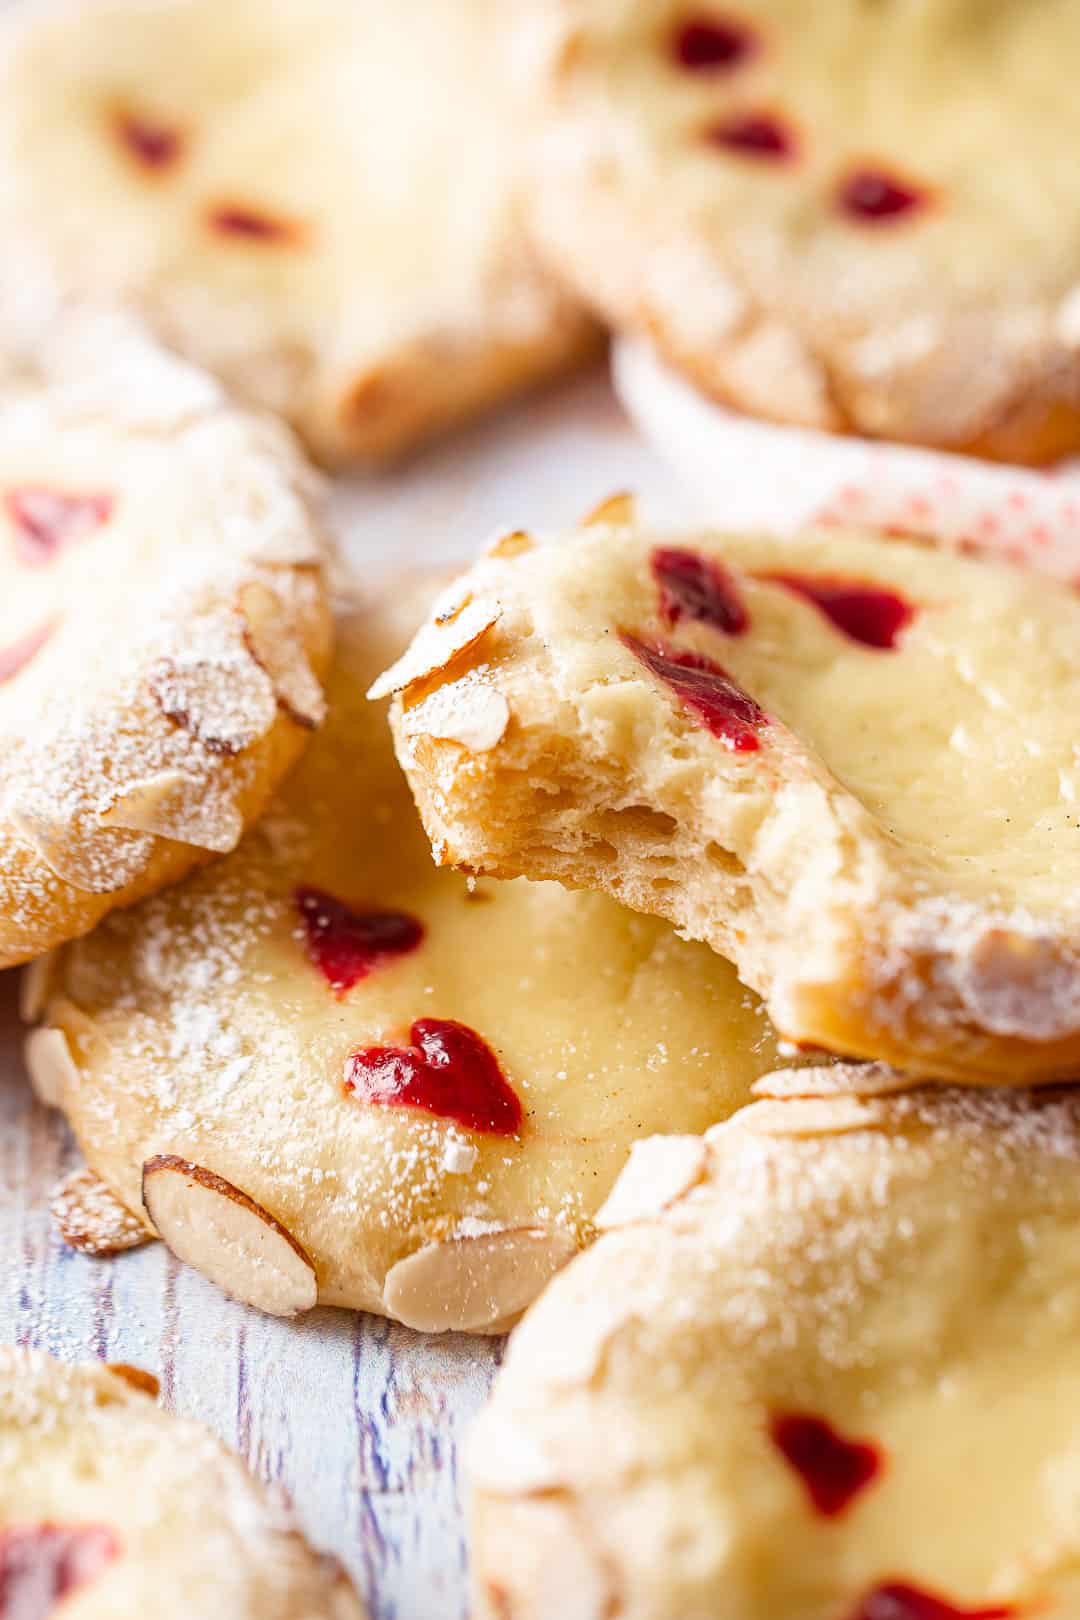
These pastries bake up puffy, light, and buttery, with a smooth, creamy dollop of cheesecake in the center. They're slightly sweet and yeasty, and a little crisp around the edges, but soft as a cloud inside.
Ingredients
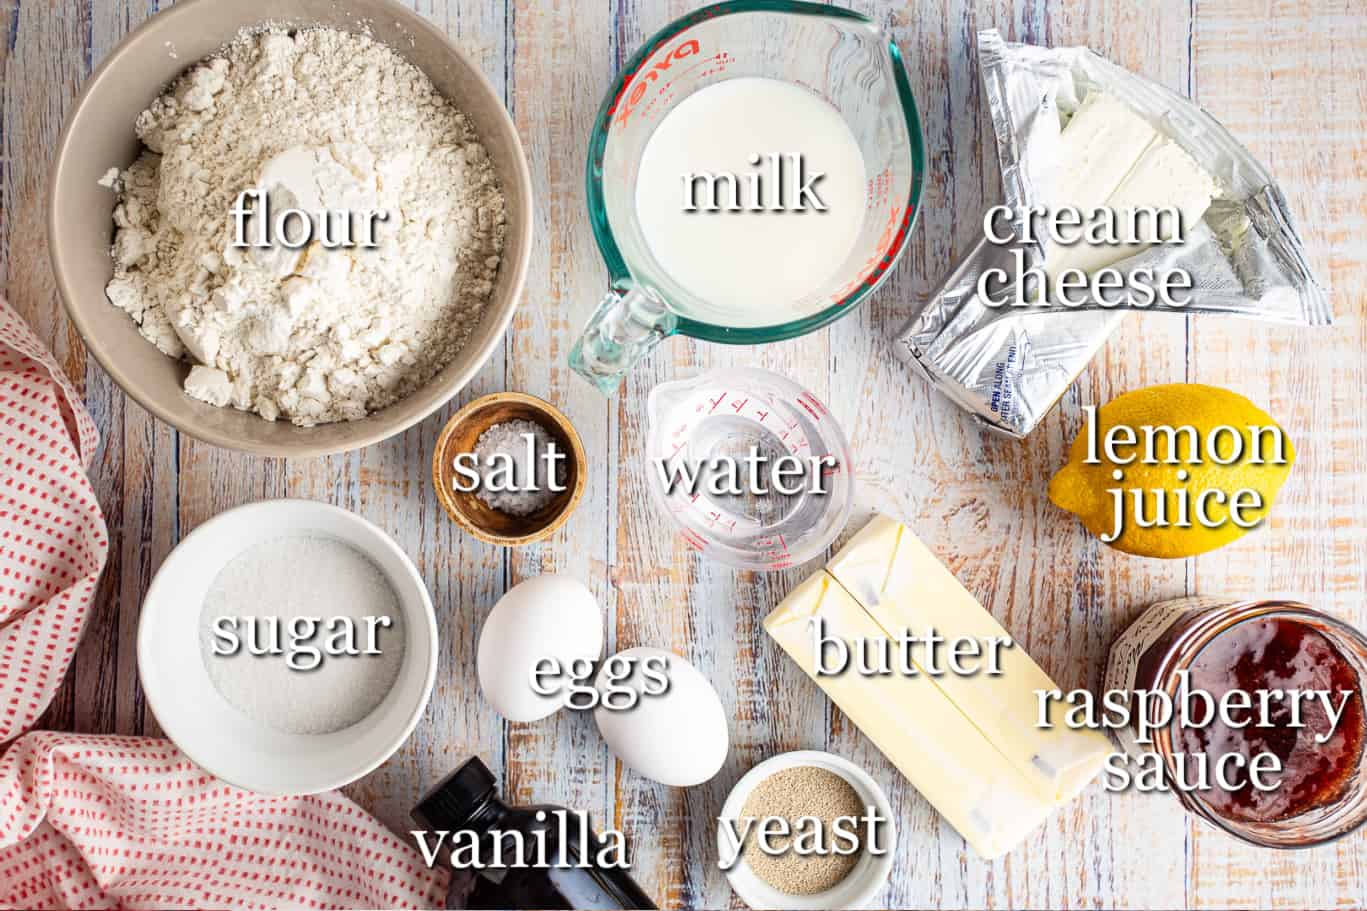
Flour: Just regular all-purpose flour is fine, and you don't have to sift it.
Sugar: Granulated white sugar sweetens both the dough and the filling, and also keeps them moist and aids in browning.
Salt: Kosher salt has a pure flavor (no additives like table salt!) and it's easy and inexpensive to source. It carries all the flavors and intensifies them, making everything so much more flavorful!
Butter: Unsalted butter is best because it lets you control the amount of salt in the dish. Different brands of butter can contain different amounts of salt, so this way you get a more consistent result. The butter should be chilled ice cold for this recipe.
Milk: Whatever kind you typically keep on hand. Allow it to come to room temperature or heat it gently to around 105 degrees F.
Water: Also warm, around 105 degrees F or the temperature of a baby's bath.
Eggs: Large chicken eggs. It's best if they're at room temperature but this isn't critical.
Vanilla: Vanilla perfumes the Danishes with a sweet aroma. I like extract in the dough and vanilla bean paste in the filling.
Yeast: Active dry yeast allows for a slower rise that develops a deeper flavor. Make sure you don't accidentally grab instant yeast!
Cream cheese: This is the base of the filling. Allow it to come to room temperature so it blends smoothly with the other ingredients.
Lemon juice: Just a tiny bit, to bring out the tanginess of the cream cheese.
Optional garnishes
Raspberry sauce: If you want to make little red hearts like I did, you'll need a small amount of raspberry sauce. Find the recipe here: Raspberry Sauce (it's easy don't worry!).
Almonds: Sliced almonds add a nutty crunch around the outside of the pastries.
Powdered sugar: A light dusting around the edge makes them extra pretty!
Special equipment
- Measuring cups and spoons: Precise measuring is very important. Follow this guide: How to Measure Ingredients.
- Bowl: I like my stand mixer for this recipe, it does all the kneading for me!
- Knife: I love my bench scraper for dividing the dough.
- Rolling pin: We will be rolling the dough out flat and folding it together with cold butter.
- Piping bag or squeeze bottle: If you choose to add the raspberry garnish.
- Bamboo skewer or toothpick: Again, for the garnish.
- Pastry brush: For applying the egg wash.
- Foil: Tent the cheese Danish with foil while they rest, so they don't dry out.
How to make Danish cheese pastry
This recipe comes together in 6 simple steps. You've got this!
Step 1: Make the dough
Flour, sugar, salt, and 2 tablespoons of butter go into the bowl first.
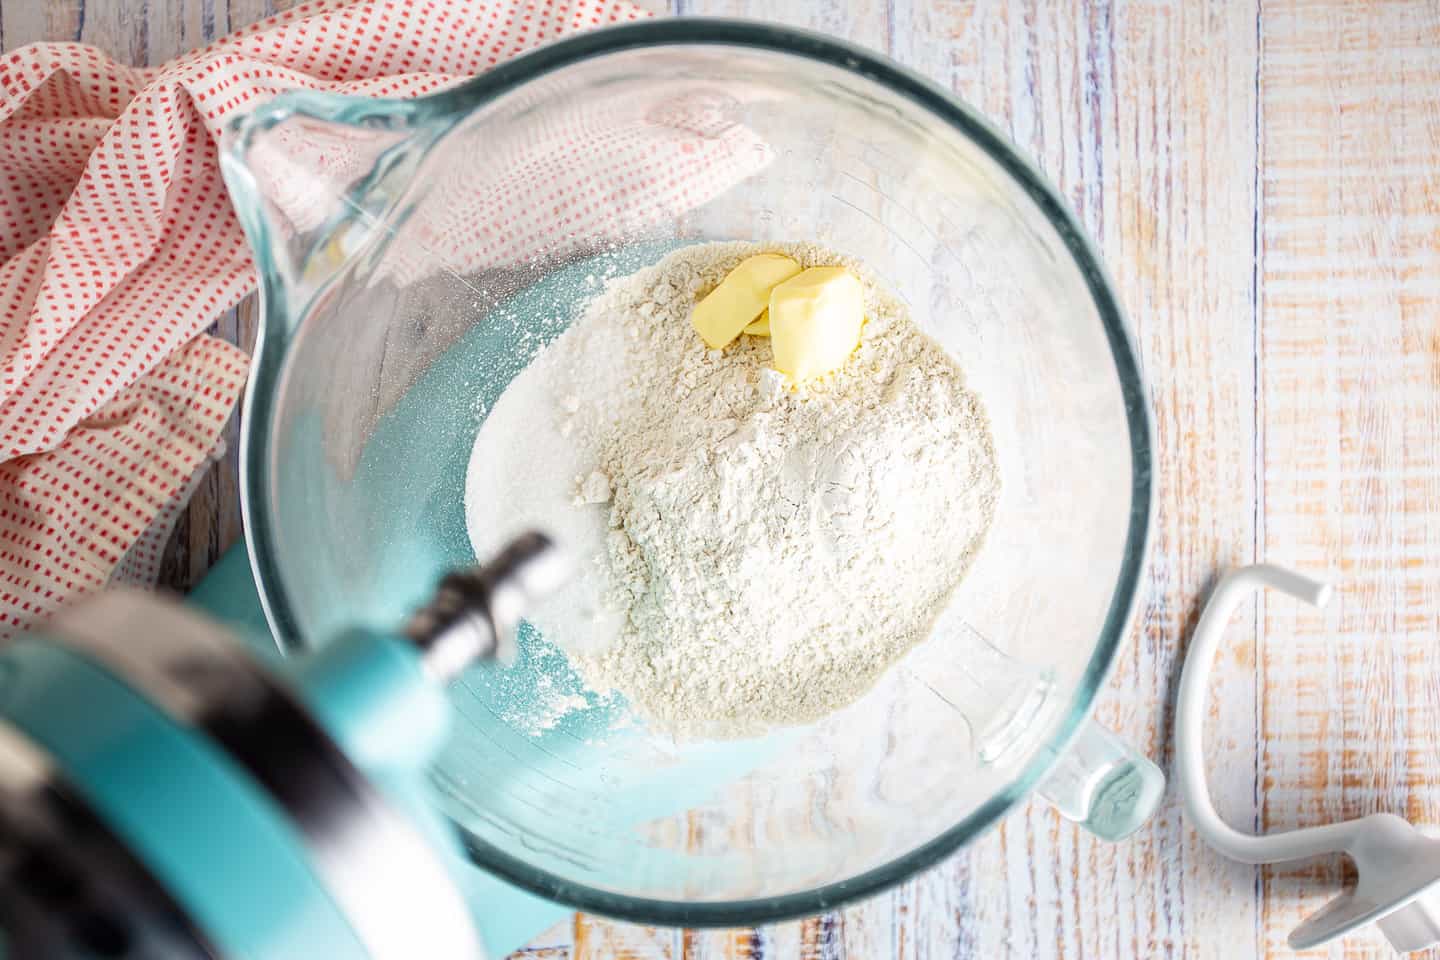
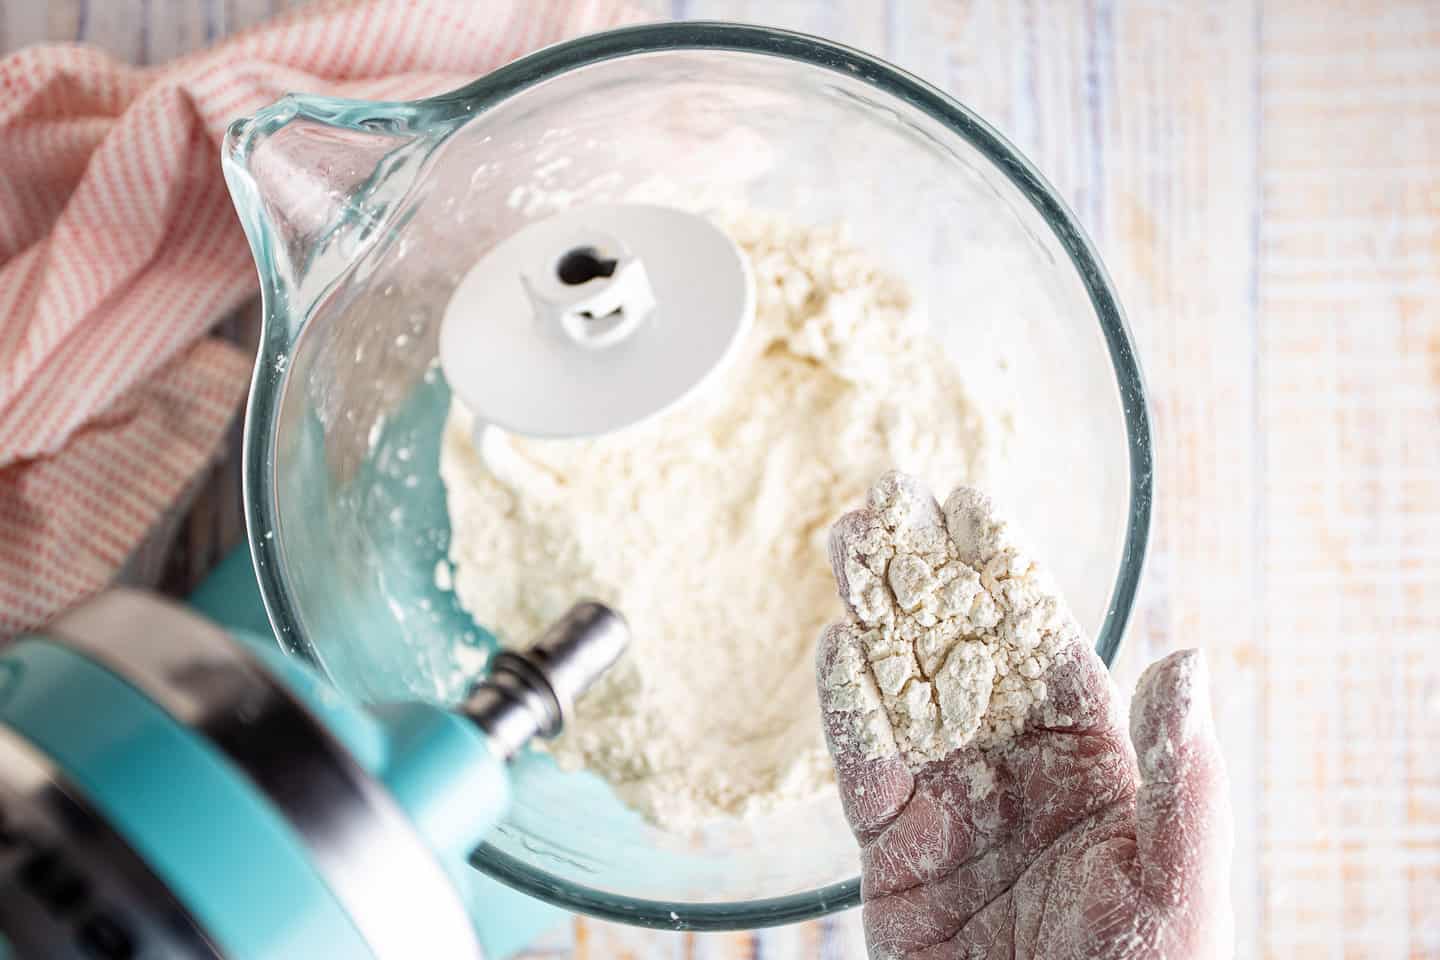
Blend everything together with the mixer, a pastry cutter, or your clean hands. Make sure there are no pieces of butter that are larger than a pea. The mixture should resemble coarse crumbs.
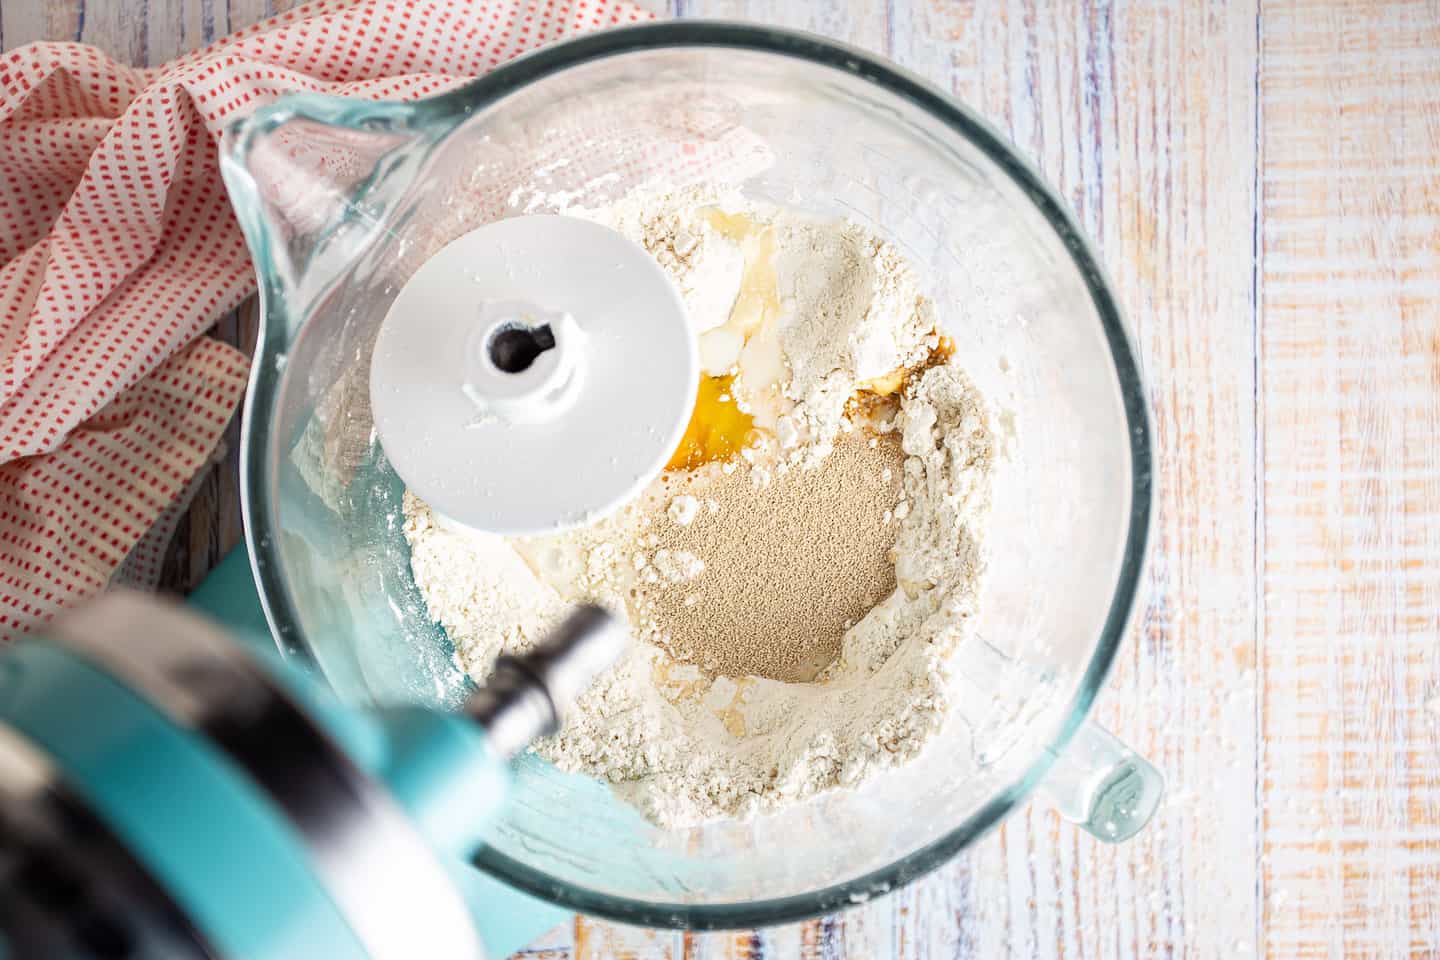
Make a well in the center of the bowl, and to that, add the milk, water, egg, and vanilla. Then sprinkle the yeast on top and give it around 5 minutes to dissolve.
Once the yeast has dissolved, mix everything up until you have a sticky dough.
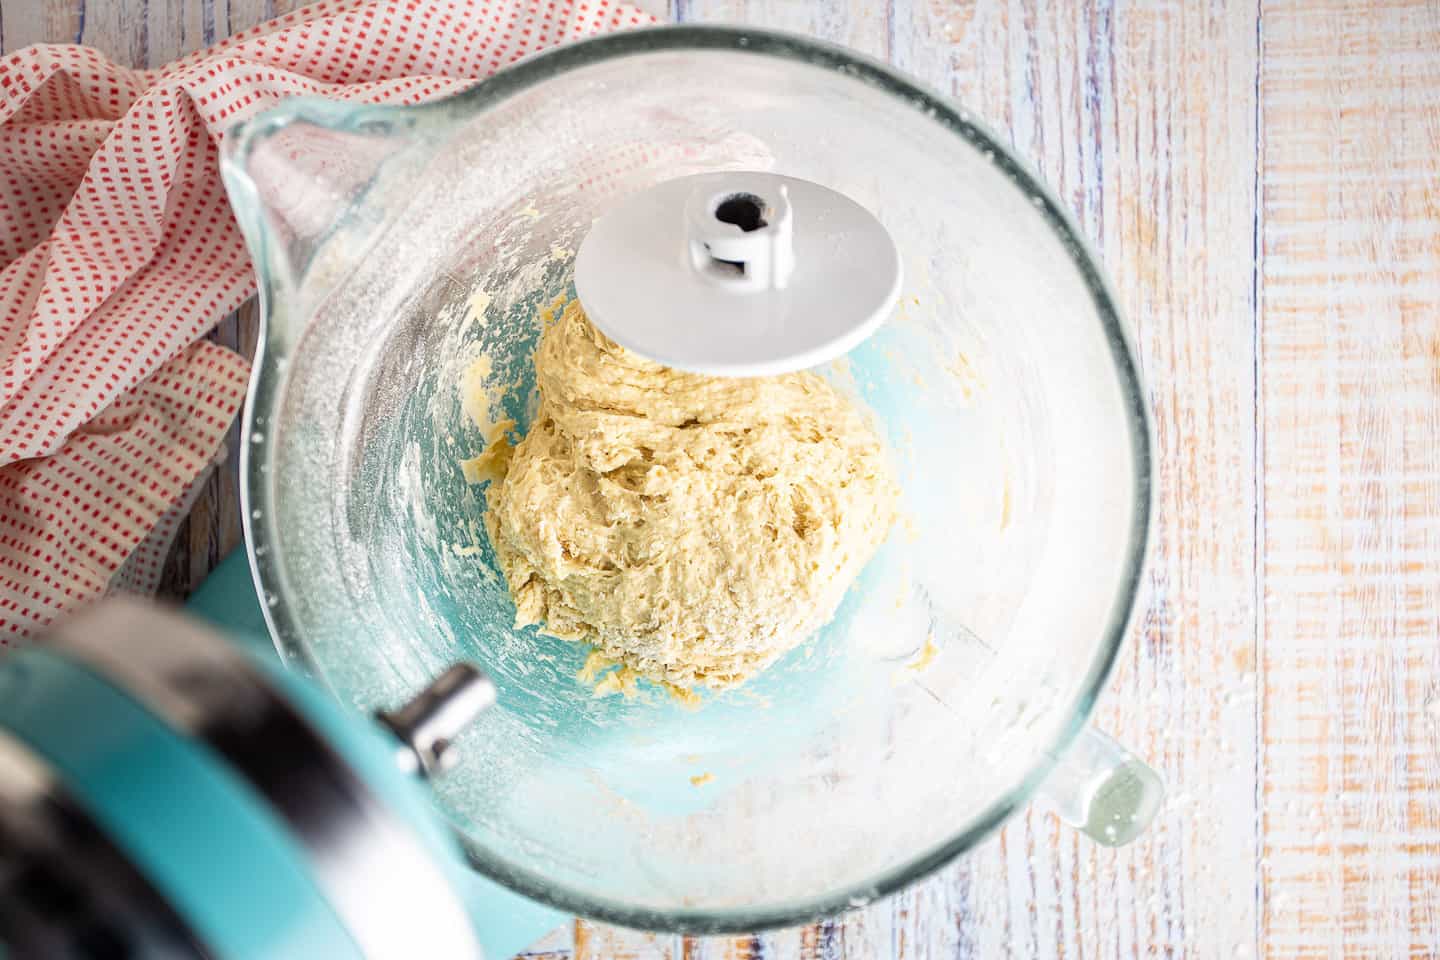
Then knead it for a full 10 minutes.
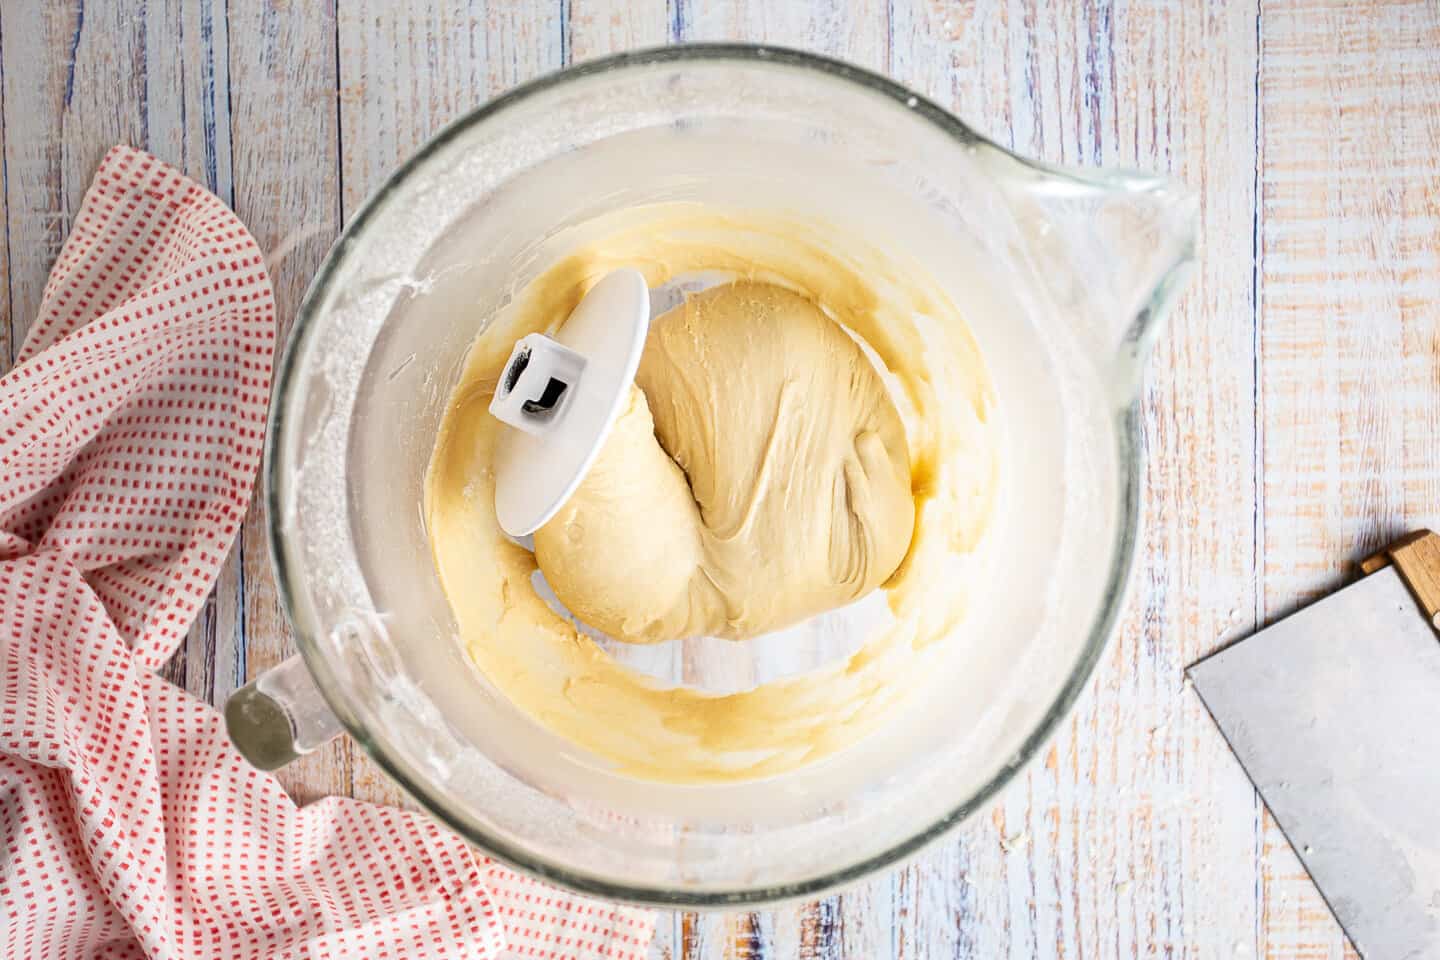
See how much different it looks after a long knead? It's smoother, more elastic, and easier to work with.
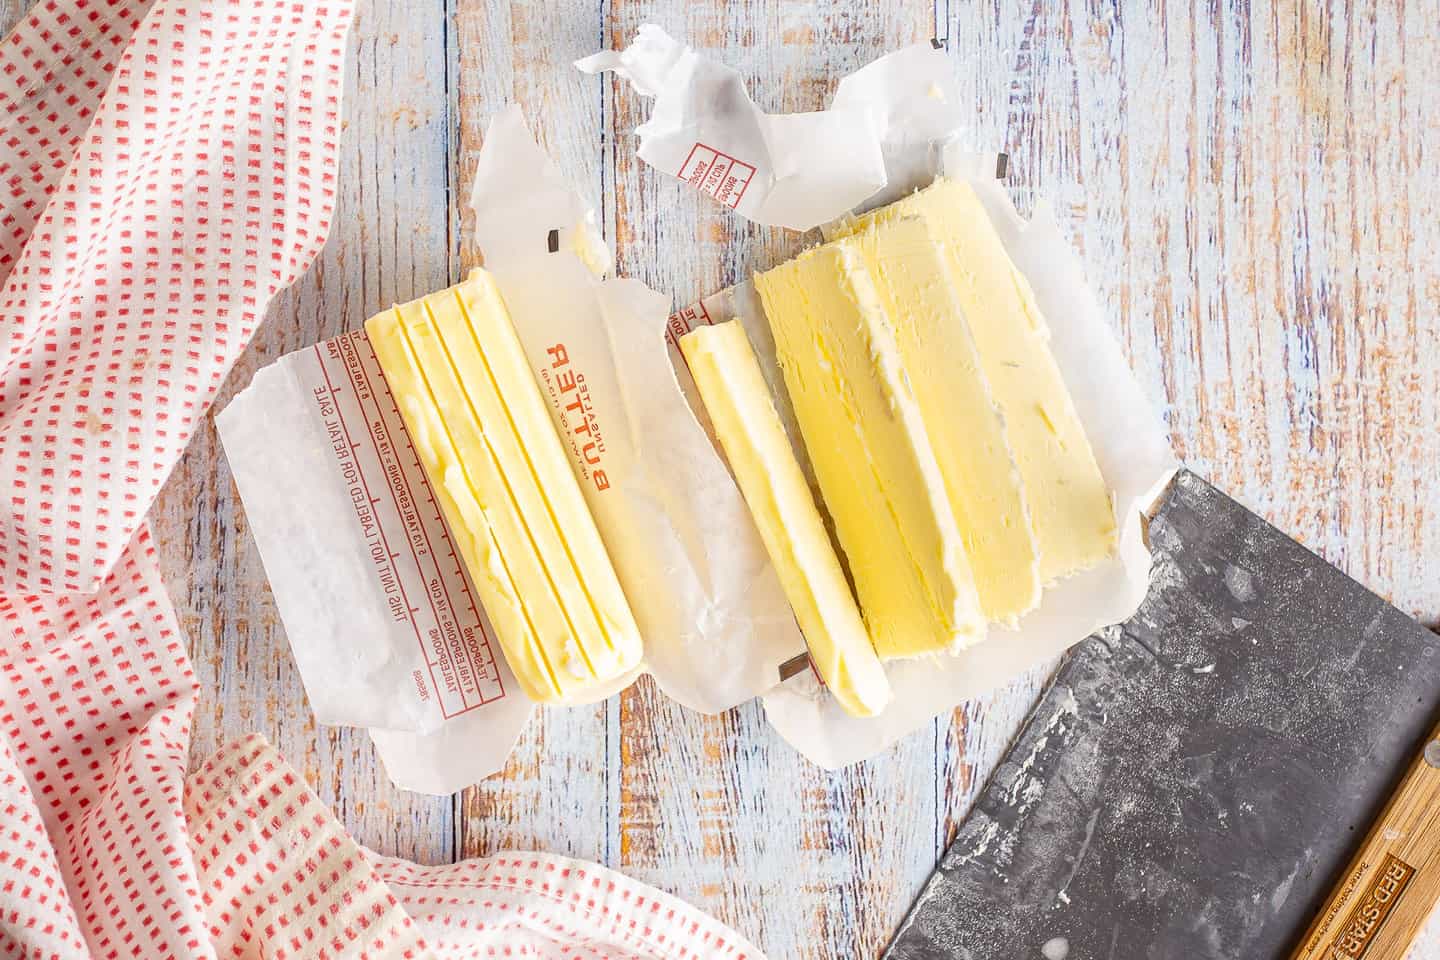
Step 2: Laminate
Take what's left of the butter and cut it into long, thin slabs.
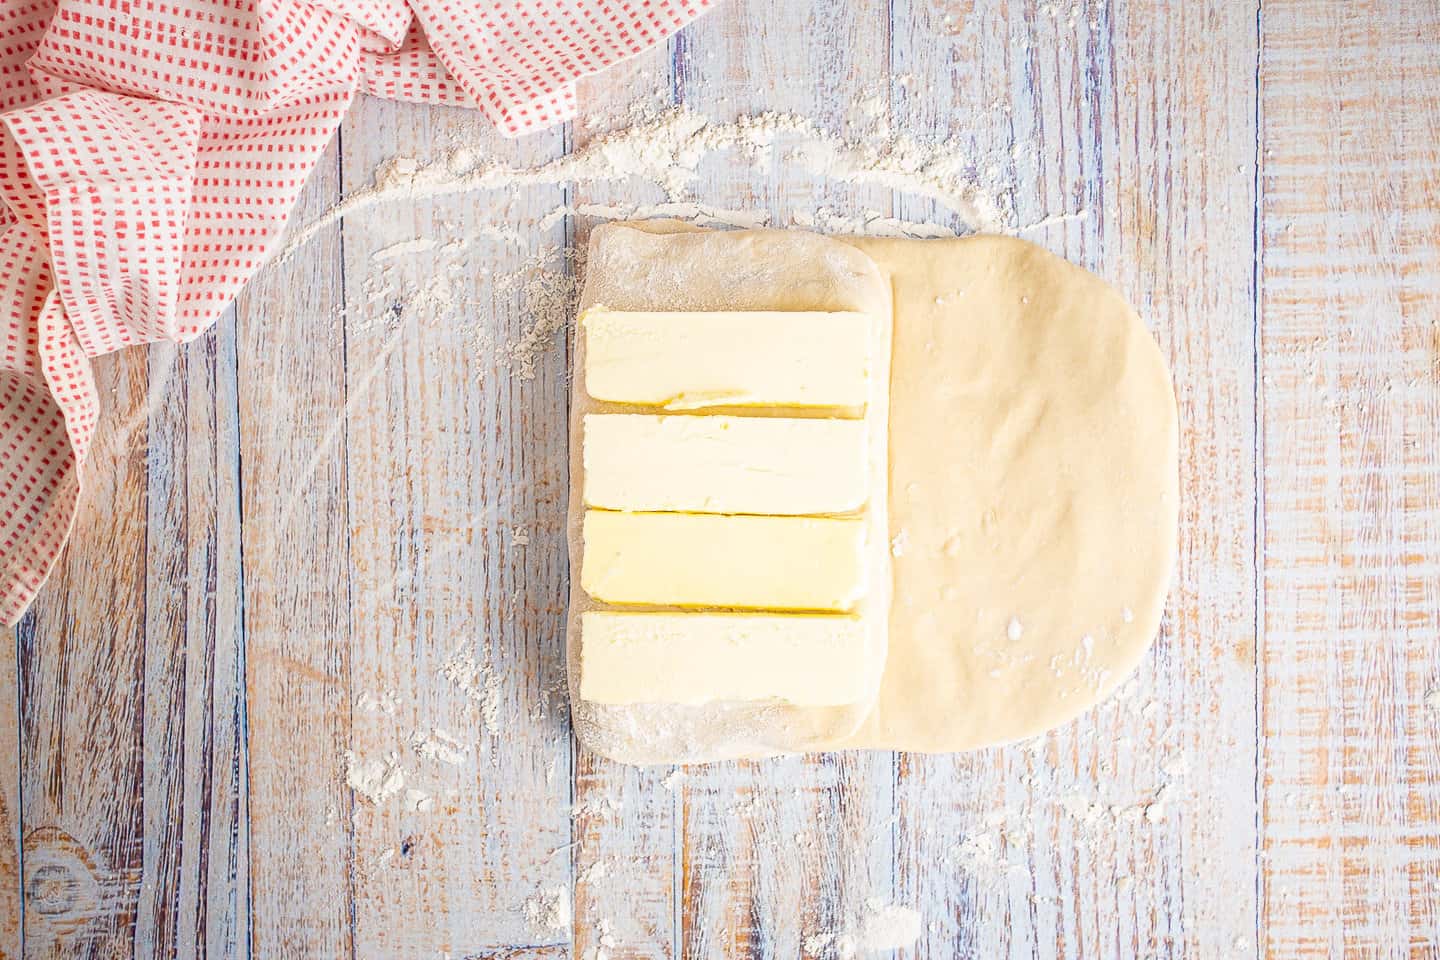
Then, on a lightly floured surface, roll out the dough into a long rectangle shape.
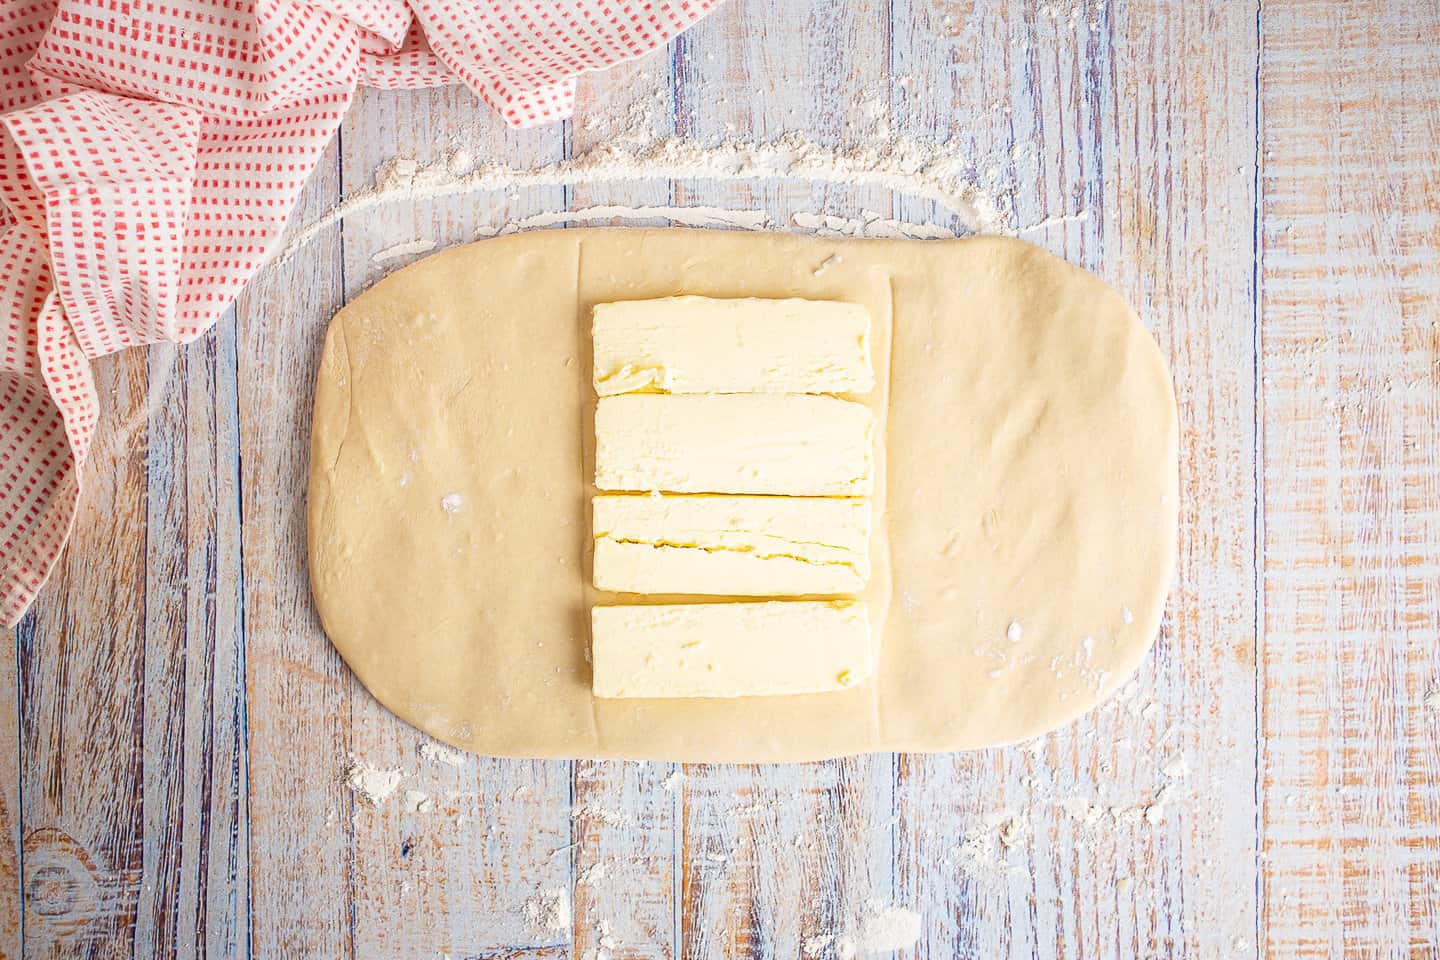
Line up half the butter slabs in a square, right in the center of the rectangle.
Then, pull the left third of the dough up and over the butter.

Lay the remaining butter slabs on top.
And bring the right side over those.
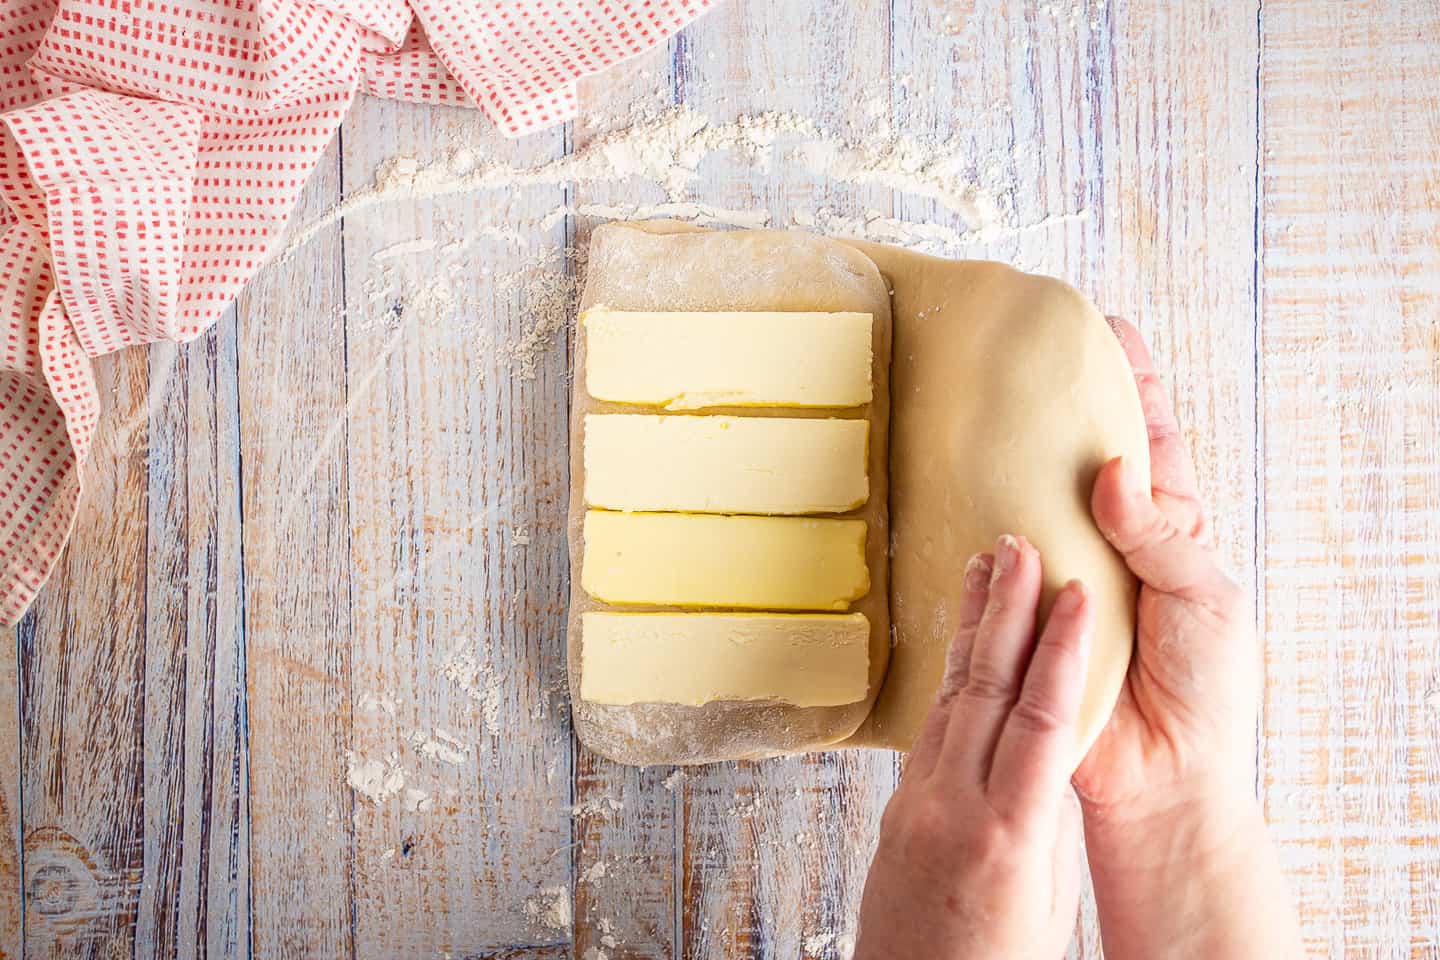
Pinch the sides all around, to seal the two layers of butter inside.
Then, continue rolling into a long rectangle and folding into thirds.
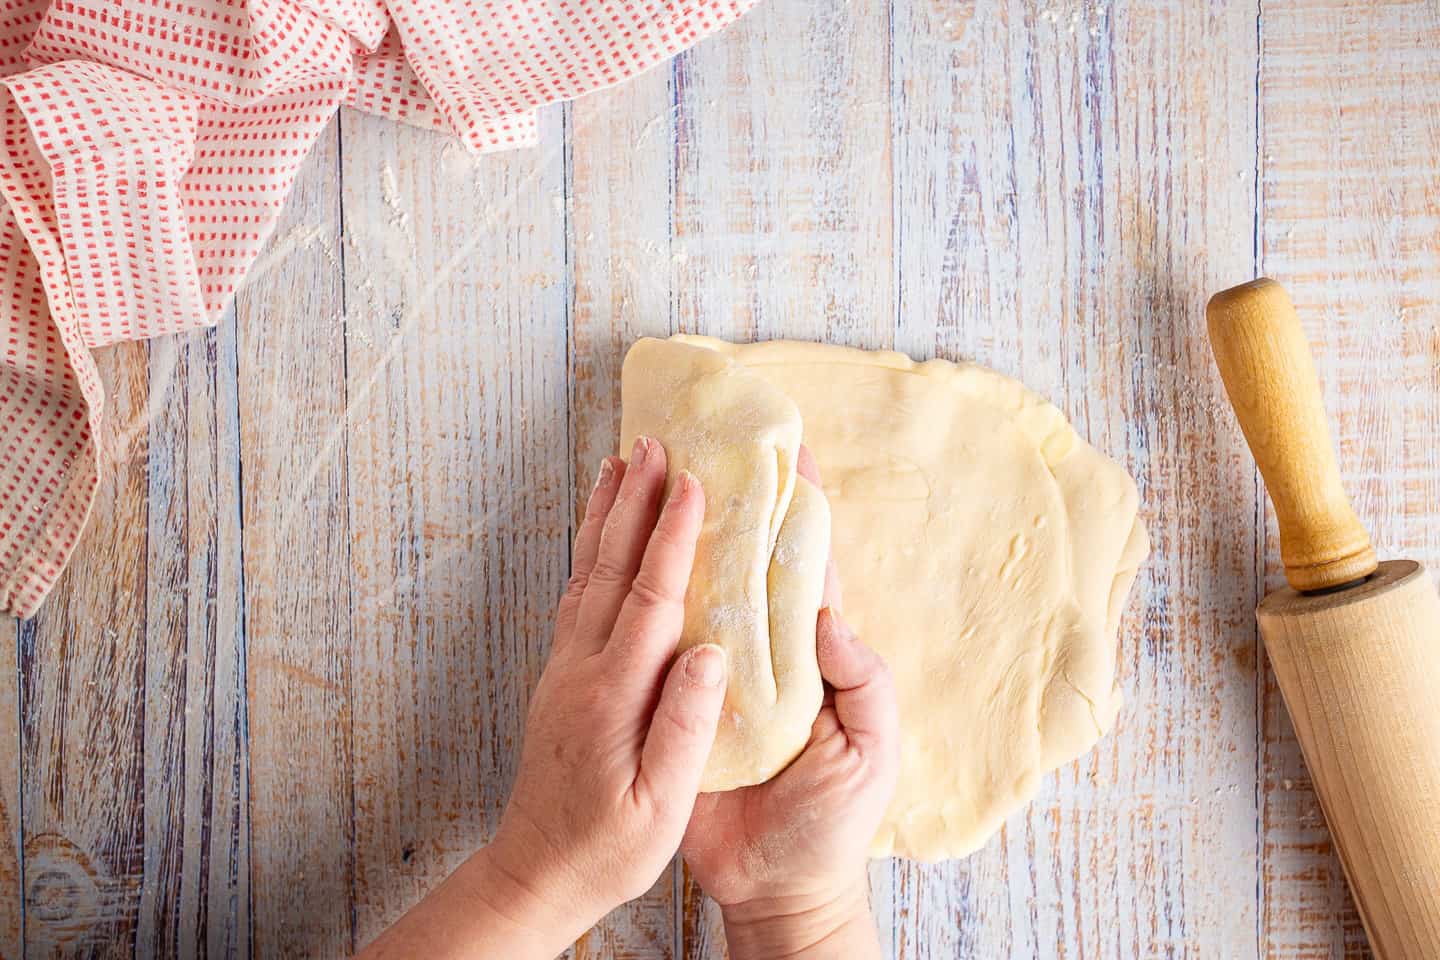
You will roll and fold (with the butter inside) 3x total.
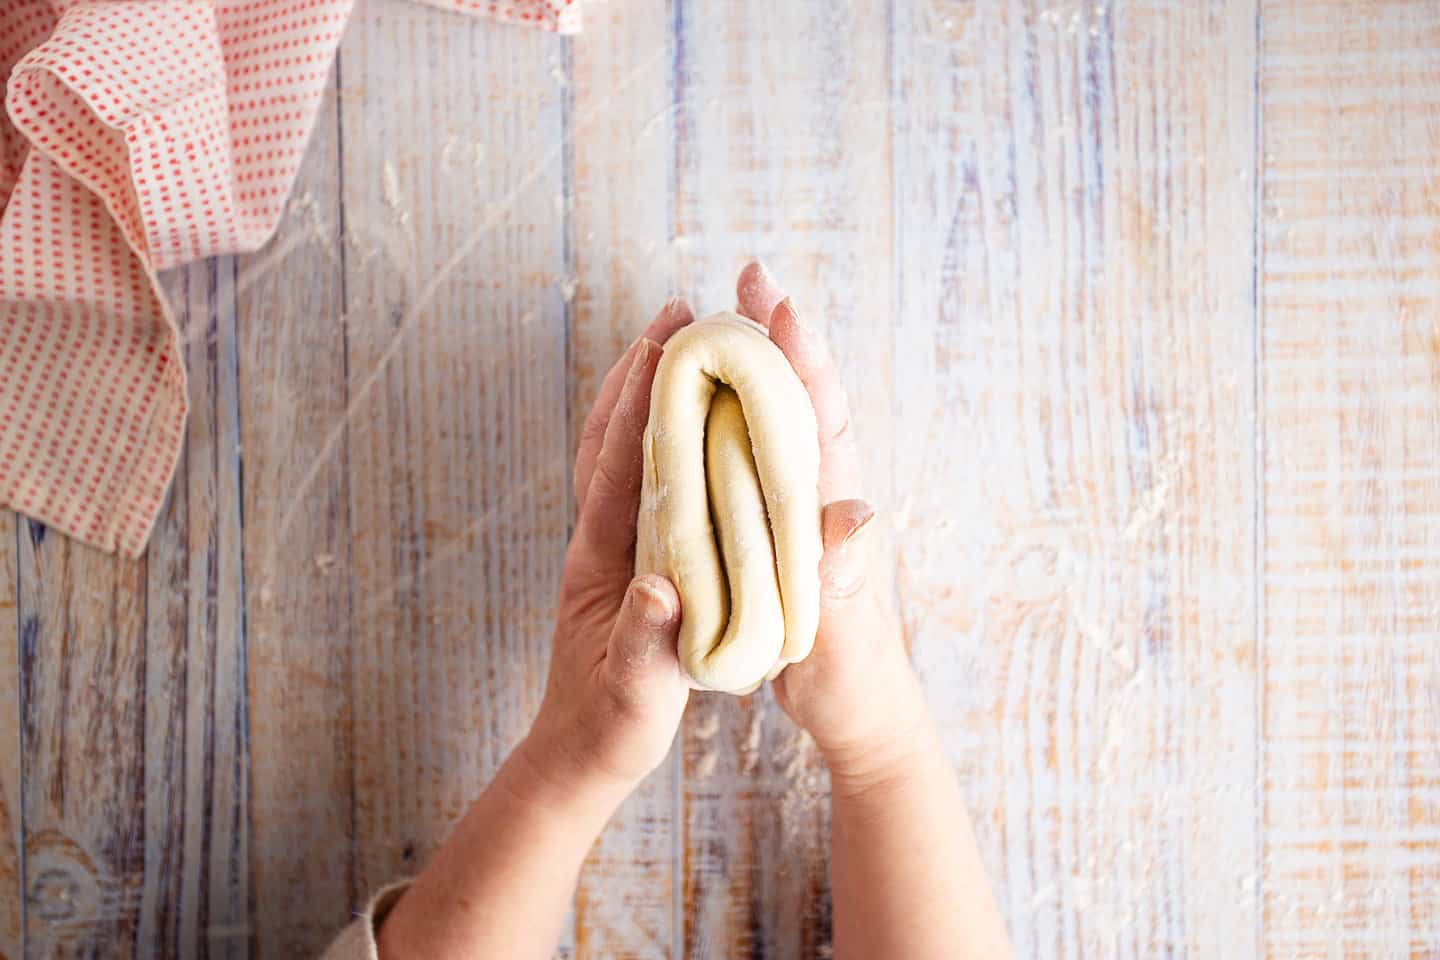
Then the dough can go into the fridge (covered) to rest.
Step 3: Make the filling
While the dough has its nap, you can mix up the filling.
It's just cream cheese, sugar, egg, and a few drops of lemon juice and vanilla.
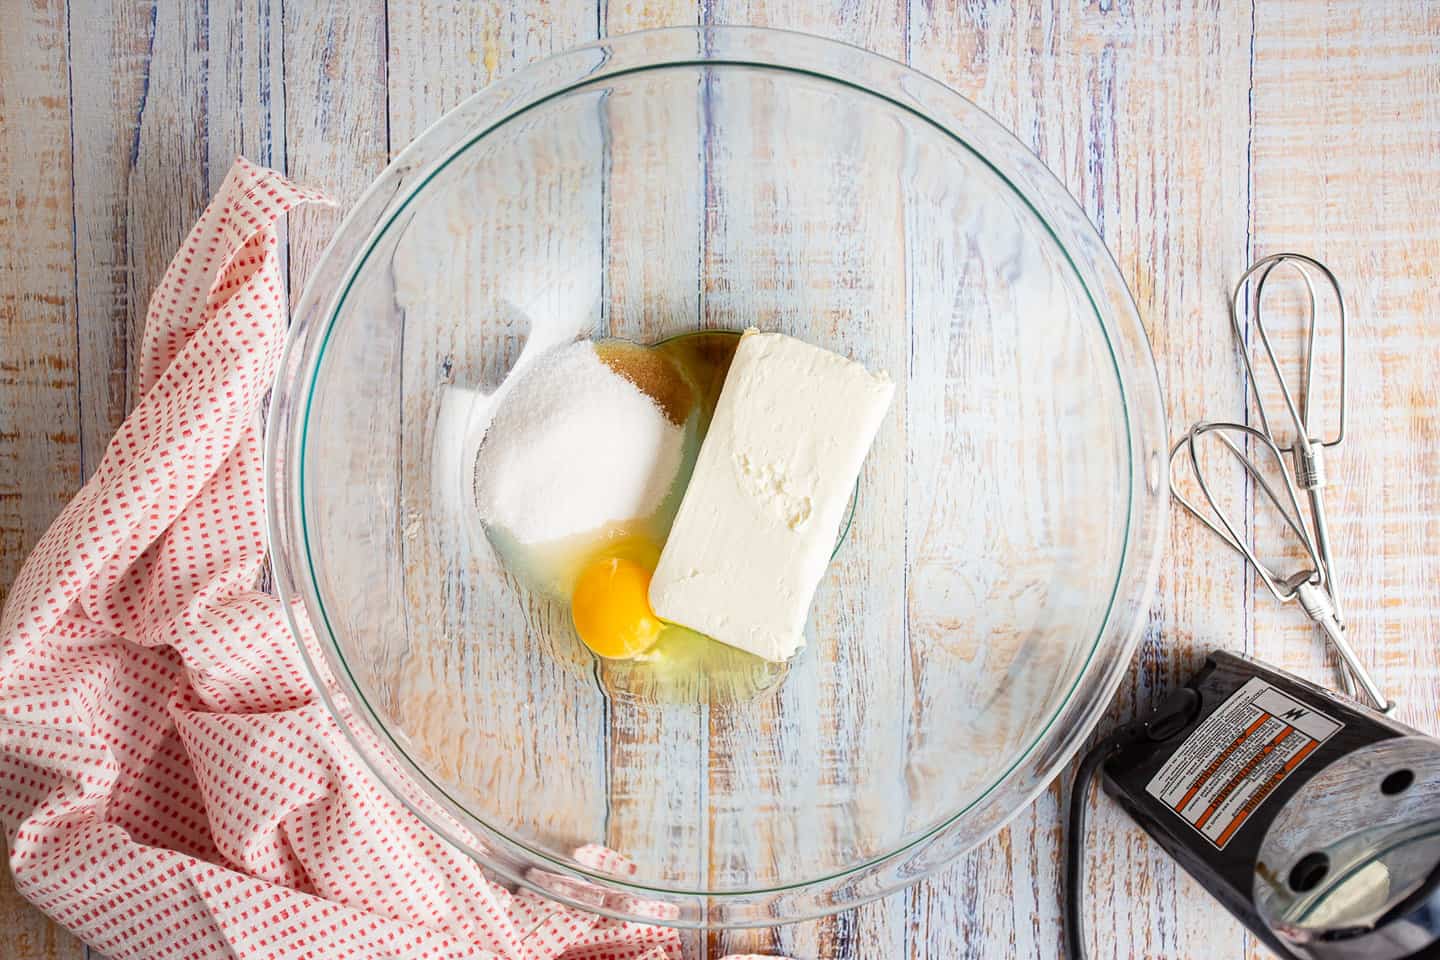
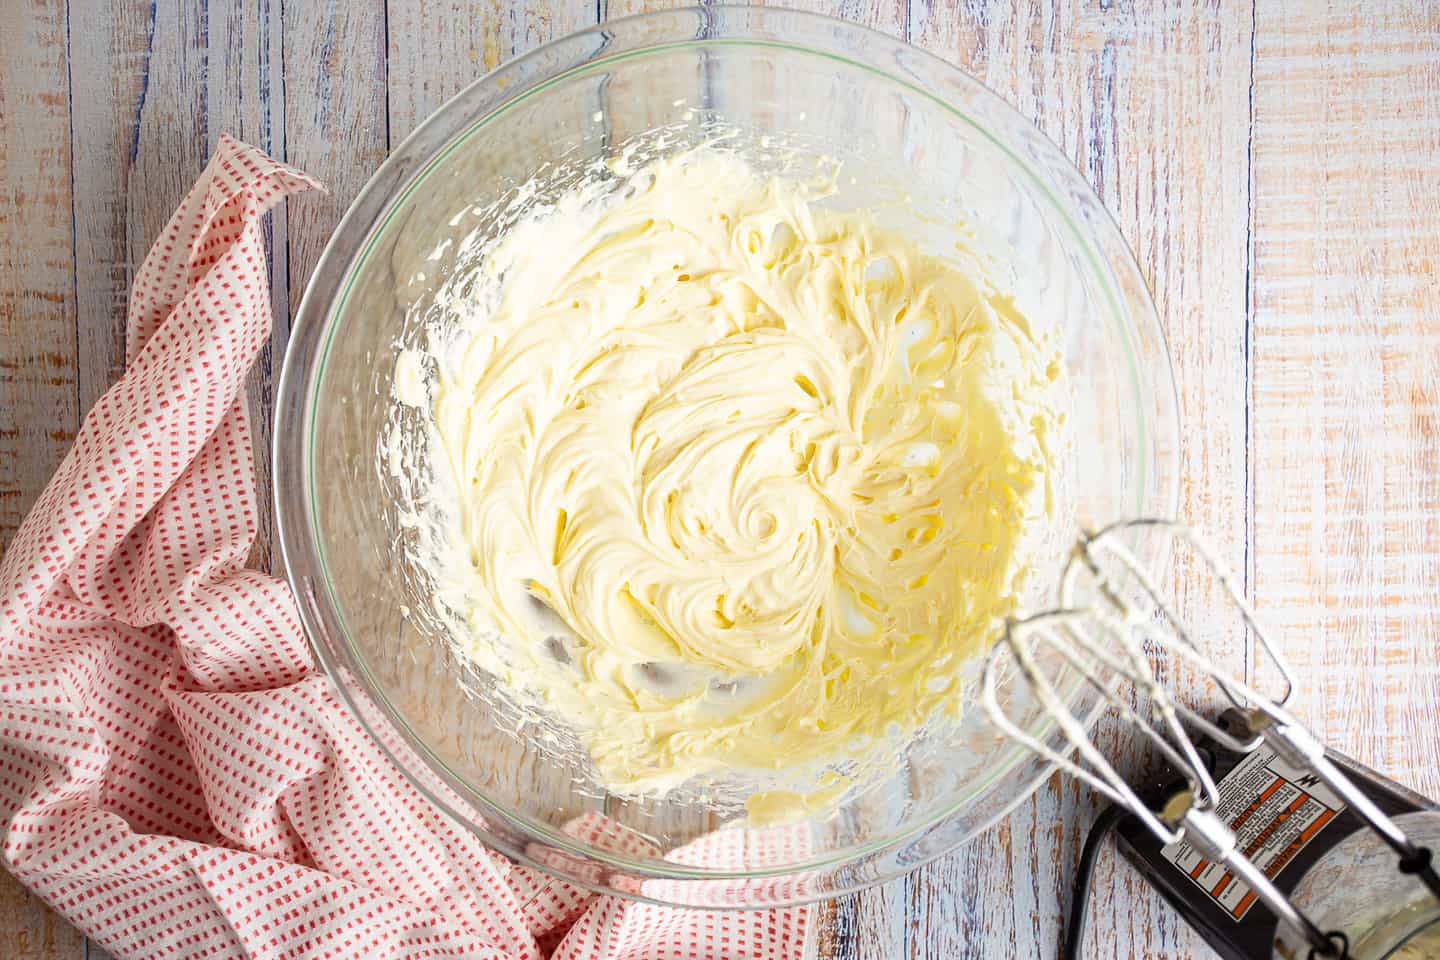
Get it nice and velvety smooth!
Step 4: Shape
After the dough has rested, divide it first in half, then each half into thirds, and each third into thirds again.
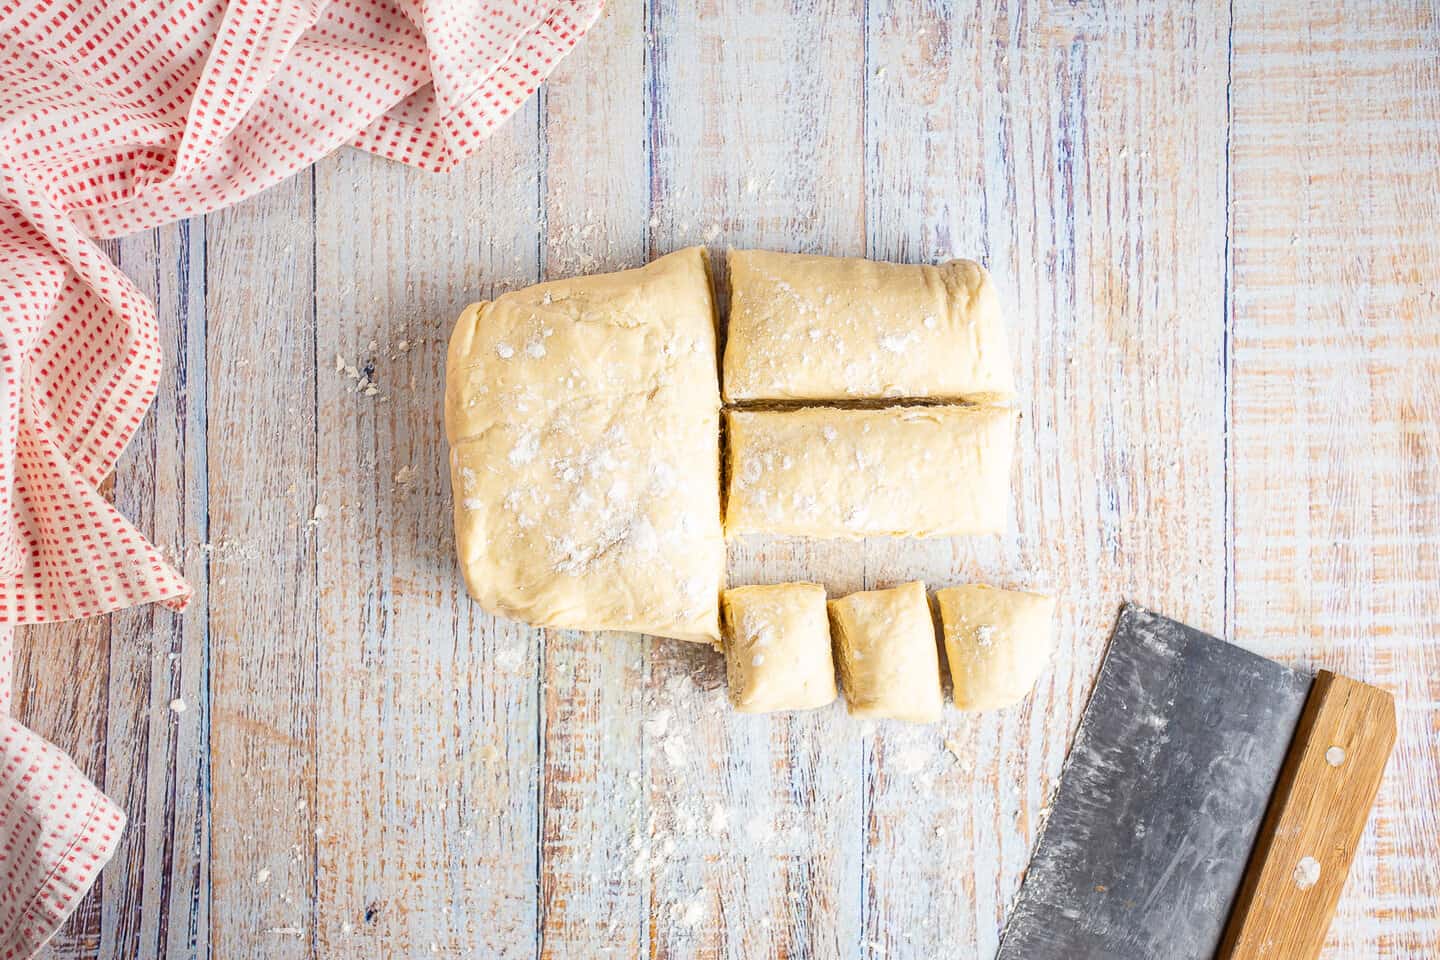
This will give you 18 equal portions.
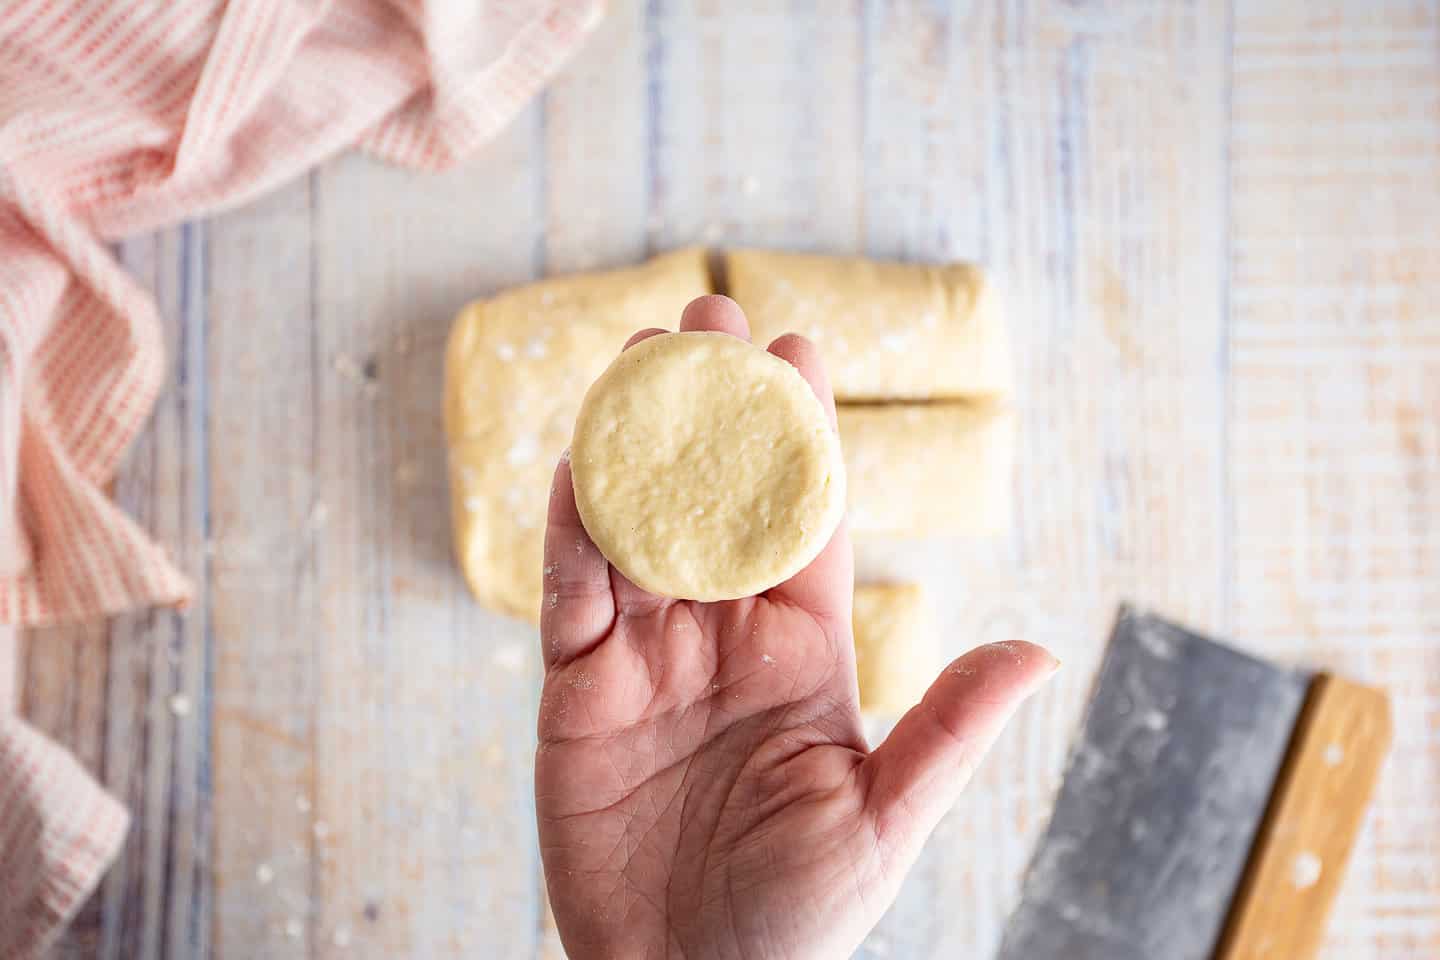
Shape them into flat discs, and prick them in their centers with a fork or skewer. This is called "docking" the dough, and it prevents it from puffing up too much in the middle.
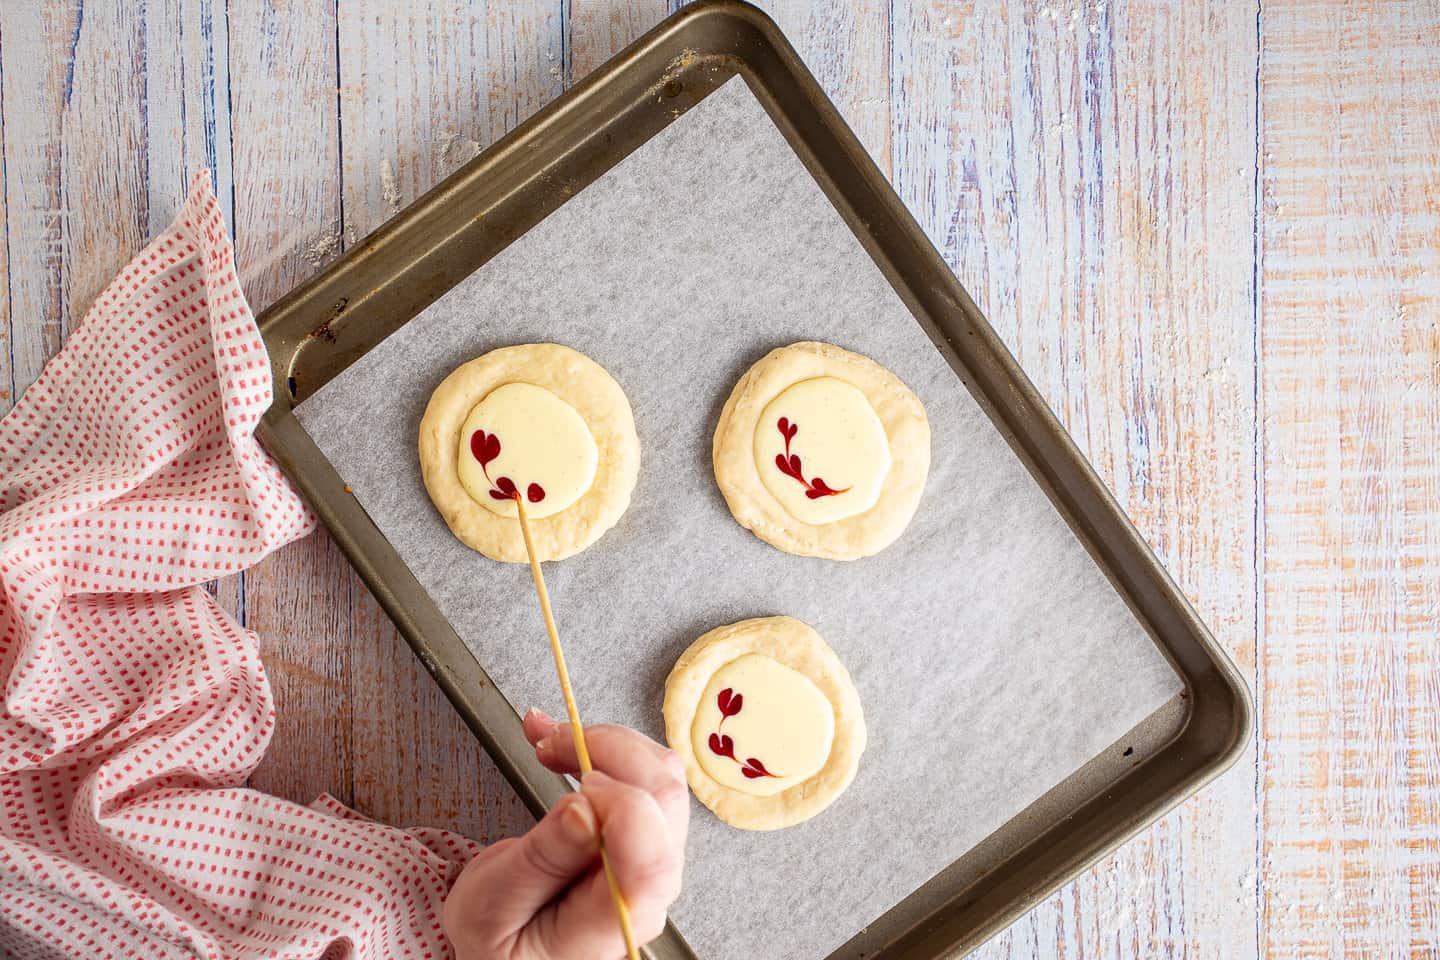
Step 5: Fill
Spoon about a teaspoon of filling into the centers of each disc. Then, if you like, squeeze a few drops of raspberry sauce on and draw a skewer through to make the hearts.
Tent the unbaked pastries with foil, and allow them to rest at room temperature for another hour.
Step 6: Bake
Start preheating your oven, and while you wait, brush the outside edges with egg wash.
You can also sprinkle on a pinch of sliced almonds, if you like.
These will bake in a hot oven until puffy and golden brown.
How to serve
I love the look of a light snowfall of powdered sugar around the edges of these beautiful pastries!
They can be eaten warm, cold, or at room temperature. They're especially nice with your morning coffee!
Expert tips
Check the expiration date: Make sure your yeast hasn't past its expiration date. If it has, your cheese Danish may not rise properly.
Proof in warm liquid: The milk and water should be warm but not hot. This will help to dissolve and activate the yeast.
Use plenty of flour: As you're rolling and folding, you'll want to keep the dough lightly floured so it doesn't stick to the work surface. If at any point butter starts to break through the dough, just hit it with more flour.
Rest in a warm place: The second rest should happen in a somewhat warm place, like on a sunny windowsill or on top of the fridge. Yeast really likes warmth and it will puff up faster if it's warm. But don't let it get too warm, or the butter in the dough will melt!
Preheat the oven: Make sure the oven is hot when the Danish go in. The sudden blast of heat will create steam inside the pastry, helping it to puff up into countless flaky layers.
Frequently asked questions
Don't worry if your cheese Danish don't puff up a ton as they rest. The dough is very rich with sugar, butter, and eggs, and these ingredients will inhibit the rise. They should puff up a lot though once they go into the oven.
If they don't, it could be because your yeast was dead. This happens when it gets too old or if the liquids you add it to are too hot. Aim for an ideal temperature of around 105 degrees F.
These Danish can be filled with any kind of jam, marmalade, curd, or even nut butter! Feel free to get creative!
Shape these however you like! I think a cheese Danish braid would be especially nice!
Just keep in mind that you may have to adjust the bake time for larger or smaller Danish.
You'll want to allow yourself plenty of time to make these. There's a total of 2 hours of resting time involved.
Breaking up the prep over a few days can make things a lot easier. The dough will keep in the fridge for 48 hours or in the freezer for 2 weeks. After that the yeast starts to die off.
For overnight cheese Danish, make the dough, allow it to rest, divide, shape, and fill it, then cover and refrigerate for up to 48 hours or freeze for up to 2 weeks. When you're ready, allow the pastries to come up to room temperature, then bake off as usual.
This recipe makes 18 cheese Danish. Each Danish counts as 1 serving.
The nutritional info in the recipe card is for 1 Danish. It includes the raspberry hearts, almonds, and powdered sugar.

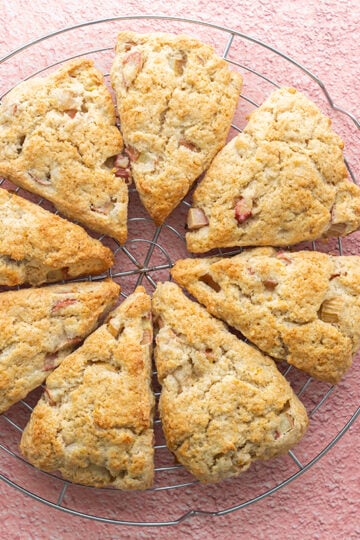
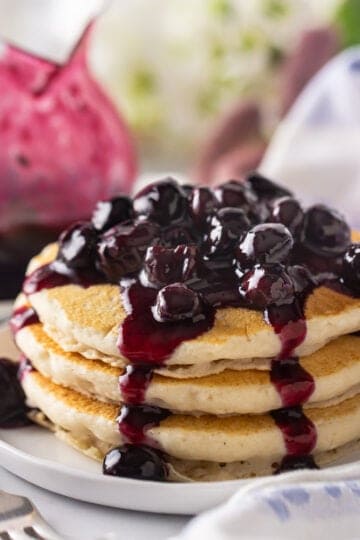
A few more of my best breakfast recipes
As an amazon associate I earn from qualifying purchases.

Ingredients
For the pastry
- 2 ¾ cup (343.75 g) all-purpose flour
- 3 tablespoons (36 g) granulated sugar
- 1 ¼ teaspoons (7.5 g) kosher salt
- 1 cup (227 g) unsalted butter, (divided), cold
- ½ cup (122 g) milk, (whatever kind you keep on hand), warm
- ¼ cup (59.15 g) water, warm
- 1 (44 g) egg, large
- 1 teaspoon (4 g) vanilla extract
- 2 ¼ teaspoons (7 g) dry active yeast, (1 packet)
- egg wash, (1 egg beaten with a teaspoon of water)
- ½ cup (46 g) sliced almonds, (optional garnish)
- 2 teaspoons (4 g) powdered sugar, (optional garnish)
For the filling
- 8 ounces (226.8 g) cream cheese, softened
- ⅓ cup (66.67 g) granulated sugar
- 1 (44 g) egg, large
- 1 teaspoon (5 g) lemon juice
- 1 teaspoon (5 g) vanilla bean paste, (extract can be substituted)
- 2 teaspoons (18 g) raspberry sauce, (optional garnish)
Instructions
To make the pastry
- Stir the flour, sugar, and salt together in a large bowl.
- Cut or rub in 2 tablespoons of the cold butter, until the mixture resembles coarse crumbs.
- Make a well in the center, and pour in the milk, water, egg, and vanilla.
- Sprinkle the yeast on top and allow it to dissolve (approx. 5 minutes).
- Stir everything together until combined, then knead the dough until smooth and elastic (a full 10 minutes).
- Transfer the dough to a lightly floured surface and roll/pat it into a rectangle shape.
- Cut the remaining cold butter lengthwise into several long, thin slices, and line half of them up in a flat square in the middle of the rectangle.
- Fold one side of the rectangle over the butter, and stack the remaining butter on top in the same way.
- Fold the other side of the rectangle over the second square of butter, pinching around the edges to seal the 2 butter squares inside the dough.
- Sprinkle flour on the dough as needed to prevent sticking, and flatten and roll the dough and butter into a rectangle shape again, folding into thirds and repeating 3 times.
- Chill the dough (covered) for one hour.
- Divide the dough in half, then divide each half into thirds and each third into thirds again (you should have 18 equal portions).
- Shape each portion of dough into a flat disc with a slight depression in the middle, and prick the depression with the tines of a fork to dock the dough and prevent it rising in the middle.
- Fill with the cream cheese mixture, garnish with raspberry sauce, and tent with foil.
- Rest the pastries for one hour.
- Preheat the oven to 400 degrees F.
- Brush with egg wash, sprinkle sliced almonds around the edge, and bake until puffed and golden (approx. 8 to 15 minutes).
- Dust around the edges with powdered sugar, if desired.
To make the cream cheese filling
- Beat the cream cheese, sugar, egg, lemon juice, and vanilla together until smooth.

Hi thankyou for the recipe- just one question- when you say make flat round disks, do I just roll the small rectangles into balls and then squash them or will this ruin the dough? If not then what to do?
Hey Ver! I didn't roll them into balls, just pushed the corners in and rounded them off. Hope this answers your question! Good luck!
Hi!,
I'm hoping to make these with homemade jam alongside the cream cheese.
Do you think that will mess up the consistency or something about the dough?
Not at all! I say go for it!
Good day just had a quick question. Why is this recipe asking me to “ log in with email and password” to print the recipe? I’ve been subscribed for some time now and wondering why it’s asking me to log in when I’ve never had to or know how to as I don’t have a password for your sight. Is this a new thing for your recipes? Thank you and have a wonderful day.
Hey Mem! It's a new thing yes. If you log in with the same email address you used to subscribe you should stop seeing that message. Sorry for the bother!
Hi Allie! Thank you for this recipe- it looks amazing. I have made your danish dough before and loved it. I'm excited to try the cream cheese filling. How would you recommend storing the leftovers(should I have any)? I know technically the cream cheese is baked, therefore it no longer truly requires refrigeration, but would you say to store in the fridge after a day or two? Thanks!!
Hey Olivia! I'm so happy you like these! And yes your instincts are dead on. Just pop them into the fridge or freezer to extend their shelf life. Good luck!