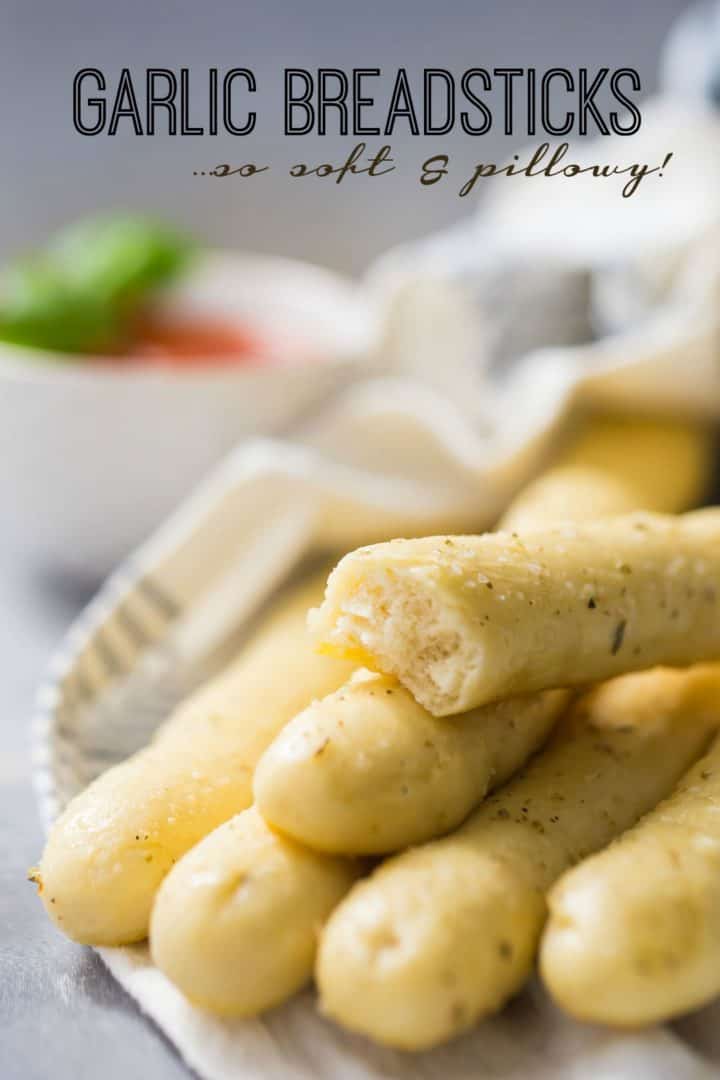
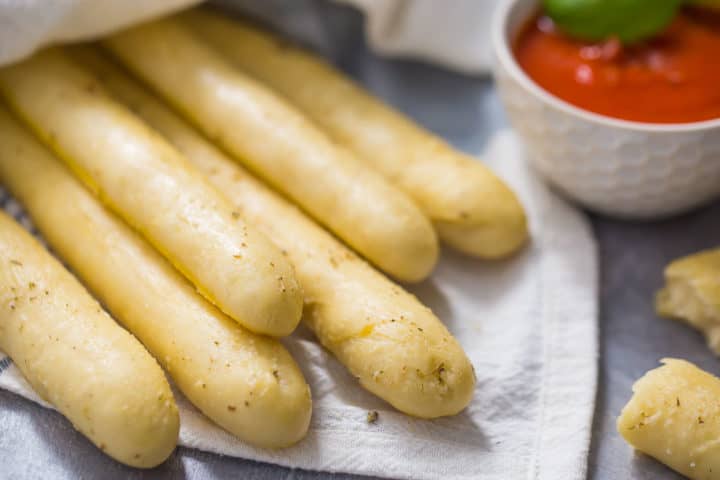
Soft Italian Breadsticks
As an amazon associate I earn from qualifying purchases.
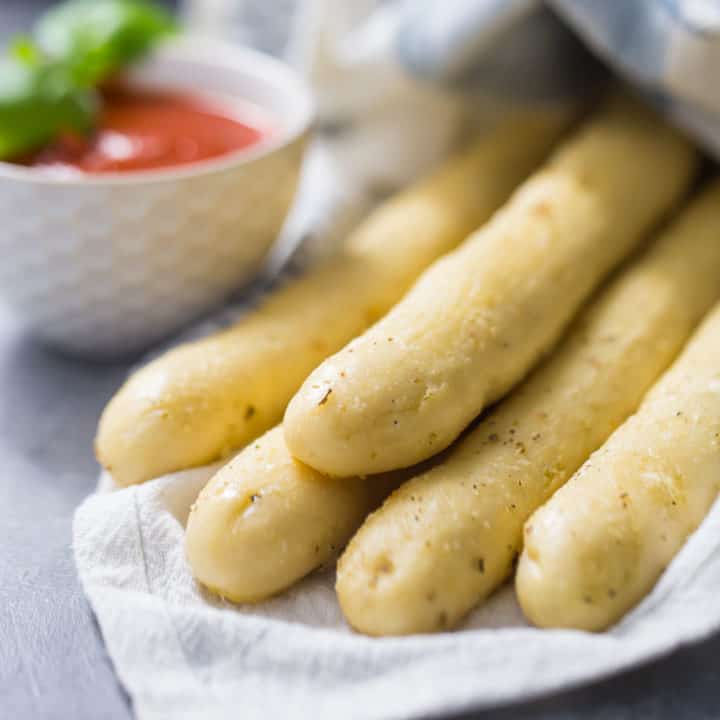
These soft Italian breadsticks are perfect with a bowl of soup or pasta! Pillow-y soft, easy to make, and even better than Olive Garden!
Hey there!
It's been a while since we last chatted. Sorry for the long absence! We had a death in the family and I've just been feeling like I need to spend time with my kiddos. But they're in school most of the day, so it's time for me to get back to baking.
For quite some time I've been working on getting the "Yeast Breads" category of my recipe index a little more robust. In recent months I've posted a delicious soft whole wheat bread that's perfect for sandwiches, a crusty French baguette recipe that can be topped in all sorts of fabulous ways, and an easy homemade croissant recipe that's simpler than anything you've ever seen anywhere else, guaranteed!
Then we had dinner at Olive Garden, and my kiddos fell in love with the breadsticks there. They really are out of this world! But I know as well as you do that homemade is always better!
I started developing the recipe for these soft Italian bread sticks weeks ago. After a lot of testing, tweaking, and re-testing, I finally think they are the best they can possibly be. They're so incredibly light and soft, like a pillow! They have a great yeasty flavor and they're drenched in the yummiest garlic butter.
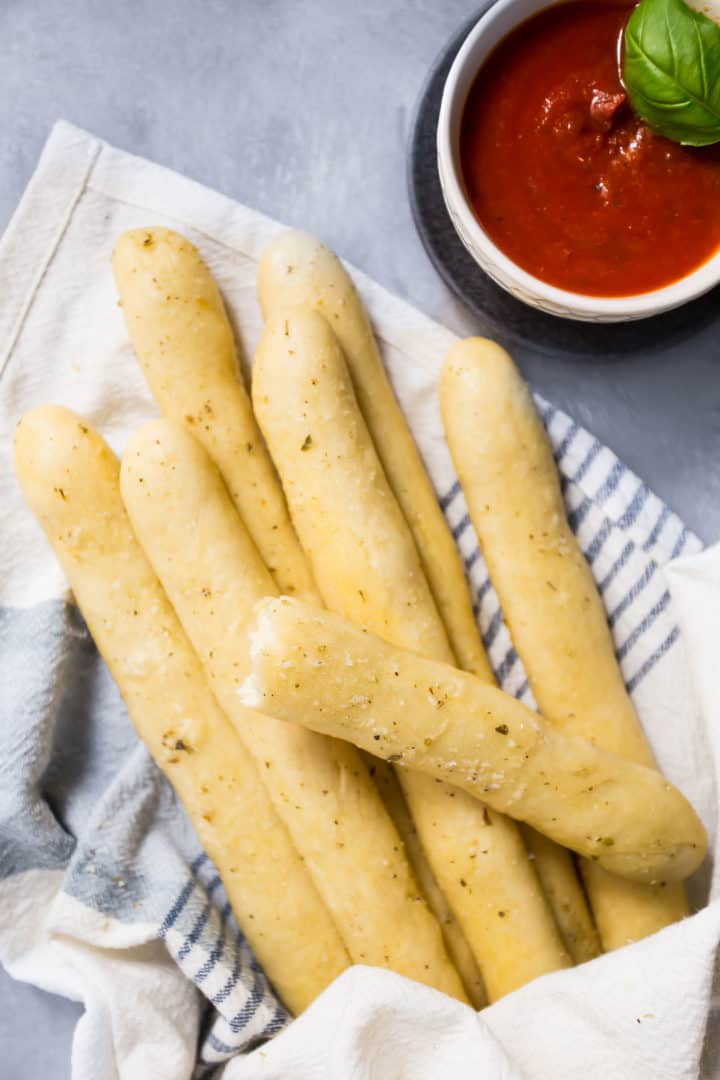
Serve these alongside of a garden salad, a hot bowl of soup, or a big plate of your favorite pasta dinner. You'll be amazed!
HOW TO MAKE OLIVE GARDEN BREADSTICKS AT HOME
To make these soft, fluffy breadsticks, start by placing a little sugar in the bottom of a large mixing bowl. Then pour in warm water. Make sure the water is warm, but not hot. It should be about the temperature of a baby's bath.
Sprinkle the yeast all over the surface of the water, and let it proof. After about 5 minutes, it should be fully dissolved and it should look kinda foamy. This is how you know your yeast is alive and growing. If it doesn't look foamy, your yeast is probably dead and you should start over. Make sure to check the expiration date on your yeast packet!
Once the yeast has proofed, add in the bread flour. Bread flour works best for this recipe because it will help the breadsticks to rise really high and fluffy. But if you don't keep bread flour on hand, you can substitute with regular all-purpose flour.
Work in the bread flour, olive oil, and salt until a dough forms. If it seems a bit sticky, add more flour (¼ cup at a time) until the dough pulls away cleanly from the sides of the bowl.
Now just oil the bowl (I like to use non-stick spray for this) and place the dough in to rest. Cover the bowl with plastic wrap, and allow the dough to rise for 30 minutes.
Once the dough has risen, punch it down and divide it into 16 equal portions. I like to use a kitchen scale to weigh out each portion- this way they'll look consistent and bake evenly.
Shape each ball of dough into a long rope, and place them on a parchment-lined baking sheet. Mist a sheet of plastic wrap liberally with non-stick spray, and lay it loosely over the unbaked breadsticks. They will need another 30 minutes to rise.
After 30 minutes, preheat your oven and brush the breakdsticks lightly with egg wash. This will help them to get a nice golden brown color as they bake.
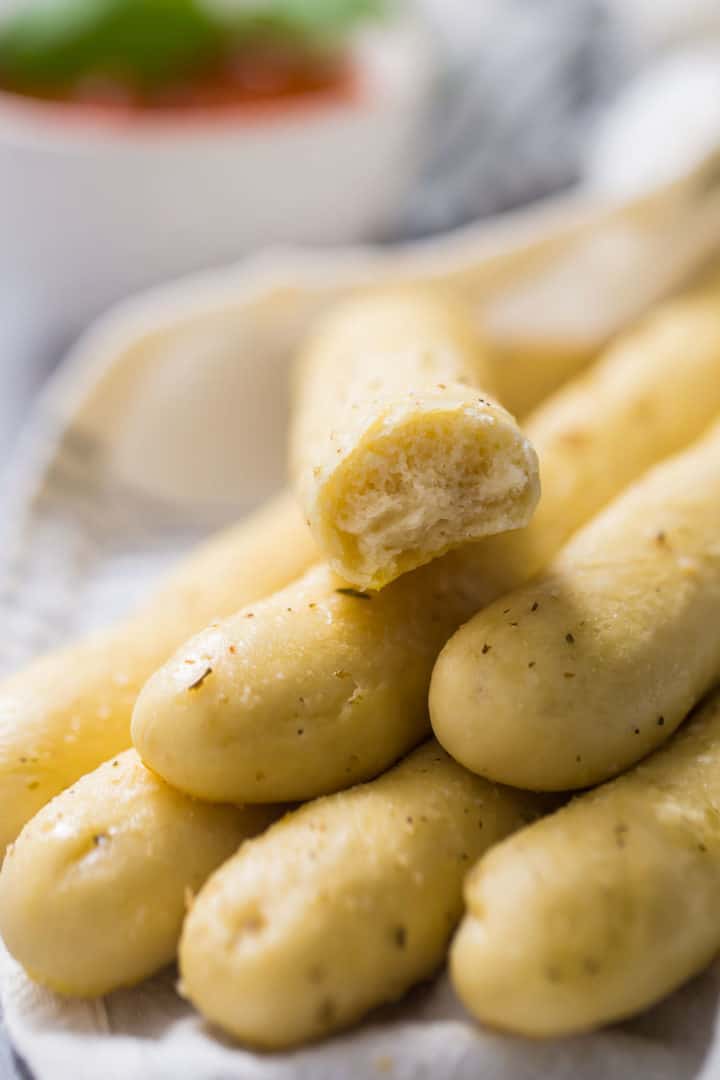
They only need about 12 to 14 minutes in the oven! They'll come out just barely golden around the edges, and so pillow-y soft. Brush them with a mixture of melted butter, salt, garlic powder, and Italian seasoning for a flavor that will knock your socks off.
HOW TO MAKE HOMEMADE BREADSTICKS AHEAD
If you're planning out a nice meal and want to get a jump on the prep work, there's an easy way to make this recipe ahead.
Make the dough, let it rise, and then shape it into long sticks. Place them on a parchment-lined baking sheet, and cover them with a sheet of plastic wrap that's been greased. Then refrigerate for up to 2 days.
Take the unbaked breadsticks out of the fridge about an hour and a half before you want to serve them. Allow them to come to room temperature, then let them rise (covered) for 30 minutes. Brush them with egg wash, bake, and bathe them in garlic butter just before serving.
WHAT TO SERVE WITH BREADSTICKS
There is no better accompaniment to a big bowl of soup than homemade bread. These soft Italian breadsticks are no exception. Make a big pot of tomato soup, and serve it with these breadsticks. Or broccoli cheese soup!
They're also great with a nice green salad. Or a big bowl of pasta. YUM!
HOW TO STORE LEFTOVER SOFT BREADSTICKS
If you have any leftover breadsticks, just slip them into a zip-top bag and pop them in the fridge. They'll last there for 5 days to a week.
Or you can freeze them! Just wrap them up tightly so they don't pick up any funky freezer odors. They'll last in the freezer for a month or two, and you can just thaw them at room temperature.
HOW TO REHEAT HOMEMADE BREADSTICKS
These homemade Olive Garden breadsticks are INCREDIBLE when they're fresh out of the oven. But they're darn good reheated too.
Just wrap them loosely in foil and place them in a warm oven (170 degrees F) for about 10 or 15 minutes, and they'll be soft and warm and soooo comforting!
If you're in search of the best kind of comfort food, look no further than these soft bread sticks! They're so soft and puffy, you'll absolutely love them!
As an amazon associate I earn from qualifying purchases.

Ingredients
- 2 teaspoons (8 g) sugar
- 1 ½ cups (354.88 g) warm water
- ¼ ounce (7.09 g) active dry yeast* , (1 packet)
- 3 cups (375 g) bread flour, (you may need as much as 3 ¾ cups)
- 3 tablespoons (42 g) extra virgin olive oil
- 1 teaspoon (6 g) kosher salt
- egg wash, (1 egg beaten with 1 to 2 teaspoons water)
- ¼ cup (56.75 g) unsalted butter, , melted
- ¼ teaspoon (1.5 g) kosher salt
- ¼ teaspoon (0.75 g) garlic powder
- ¼ teaspoon (0.5 g) Italian seasoning
Instructions
- Place the sugar in a large mixing bowl, and add the warm water and yeast. Set aside for 5 minutes, or until the yeast has dissolved and looks foamy.
- Add 3 cups of bread flour, the olive oil, and the salt, and mix on low speed until a stiff dough forms. (If the dough seems sticky, add up to ¾ cup additional flour (¼ cup at a time), until it pulls cleanly away from the sides of the bowl.)
- Knead until dough is smooth and elastic, about 10 minutes.
- Mist the bowl with non-stick spray, place the dough inside, and cover with plastic wrap.
- Allow the dough to rise for 30 minutes.
- Divide the dough into 16 equal portions, and shape each one into a rope (about 6 inches long), placing them on a parchment-lined baking sheet.
- Mist a sheet of plastic wrap with non-stick spray, place it loosely over the unbaked breadsticks, and allow them to rise for 30 minutes.
- Preheat the oven to 350 degrees F, and lightly brush the breadsticks with egg wash.
- Bake the breadsticks for 12 to 14 minutes, or until just beginning to turn golden at the tips.
- Stir the melted butter, salt, garlic powder, and Italian seasoning together, and brush the mixture over the warm breadsticks.


hi this reicupe is nice
These were great! I made them on a whim to go with lasagna soup. Will definitely be making again.
This recipe is a keeper. Recipe is easy to follow and the breadsticks always turn out good. I made mine with 50/50 milk and water instead of water only.
Awesome! Thanks so much for the positive feedback!
These are perfect, delicious, and a house favorite! I've made these so many times and each time they are 10/10. I follow the recipe as is except I usually only have all purpose flour on hand and I've never had an issue.
So great to know! Thanks so much Becky!
These are the bomb! They are so good. I added parmesan to the garlic butter.
I need assistance, please. Made these and taste was good but the rise was not enough. In fact it seemed they expanded sideways but not in thickness much at all. When I brushed the butter mixture on them after baking , they were not flat but certainly did not look like yours. I checked my yeast. It was good. I did have to add the extra flour that you mentioned. I kept them refrigerated, and covered in plastic wrap as directed when making early. I have such success with your bread recipes and I really want to try this one again. Thank you for any suggestions. *I followed all instructions and didn’t change anything.
These were so soft and delicious! My husband was raving about them all through our meal. Thanks so much for sharing this recipe!
My pleasure I'm so happy you liked it! Thank you for the 5-star review!
These are soooooo good.
These are the best breadsticks I’ve ever had! This recipe is definitely a keeper ❤️
Can you freeze the raw dough and make just ½ at a time. I know you can freeze the breadsticks after they have been made however, I don’t want them to dry o
Hi! The raw dough should keep for 2 weeks in the freezer. Good luck!
hi, can all purpose flour be substituted? if so, how would it affect the taste?
Hi there- it wouldn't affect the taste but it might affect the texture. If you use all-purpose flour, you could end up with more of a cakey result, as opposed to chewy and elastic. You might be able to overcome this by kneading it a little longer, until it passes the windowpane test. (Just type "windowpane test" into the search window at the top of this site, if you're not sure what that means.) Good luck!
I forgot to post my rating! Here it is!
Me & my family loved them!!! But I do want to suggest poking holes in the breadsticks before spreading the garlic flavor on them for next time. Also, I do want to suggest eating these with a pasta dish using this cheese sauce recipe. https://www.food.com/recipe/basic-cheese-sauce-425458
Thanks for the tip and for the positive review!
Made these last night and they were delicious!!! Will definitely be making them again. Also love that they are quicker than most rolls and bread so it's ok if I forget to plan ahead!
So happy you liked them Becky! Hope you guys are hanging in there ok!
Allie,
So very sorry for the loss of a family member. Hope your family is doing well. I cannot tell a lie......I was wondering where you've been and really missed seeing an email in my inbox from you. You are one of my favorite food bloggers and I look forward to your new posts. So glad you are back. Nothing perks me up more than being in the kitchen. Feeds the soul if you ask me. As for this post.......yeast breads in general are my least favorite as I haven't had the best of luck with them. I've mastered cinnamon rolls and it ends there. Sometimes my bread/dinner rolls come out and sometimes they don't. It's very frustrating. This looks like a simple, fun recipe to try so I just might take a stab at it. Thanks for sharing and I'm happy you are back!
Vicki: I can't thank you enough for the sweet message. It's so nice to know that someone is reading (and not just passing right on by) and looking forward to my posts. Sometimes I forget that! It's been a tough time but being in the kitchen definitely helps. Although sometimes I feel like I could do without all the picture-taking, video-making, and writing, lol! To be honest I was never all that confident when it comes to bread baking either, but lately I've been pushing myself and I feel like I'm getting better at it. This was actually the first time I fully developed my own bread recipe, without just adapting something from a cookbook or magazine, and I was really happy with the way it came out. The thing that has really made a difference for me was understanding about proofing. The first time I made these they were overproofed- they came out looking flat and sad. I learned that if you press your finger into the dough and it makes a dimple that doesn't bounce back out, they're done proofing and are ready for the next step. Hopefully this tip helps you too!