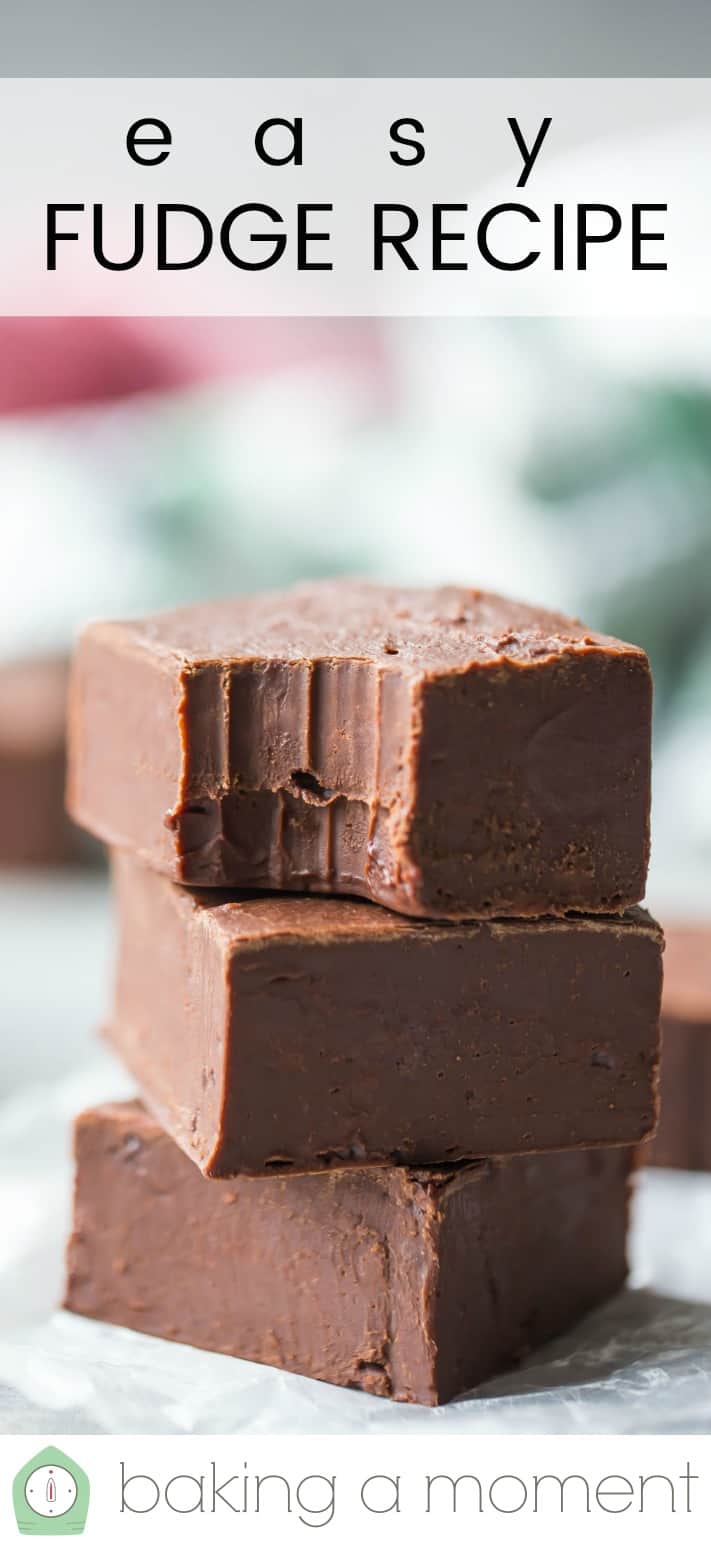
Easy Fudge Recipe
Easy homemade fudge recipe! Made with just 4 simple ingredients, in about 10 minutes. Rich, chocolate-y, and so silky-smooth. Perfect for the holidays!

Original publish date: December 18, 2018.
Easy fudge recipe! Hallelujah!
I absolutely love recipes like this for the holidays.
Things just get way too crazy at this time of year! Right? Running around, shopping, decorating, volunteering at the kids’ schools, wrapping, and keeping all those lists straight… it’s so much that it can really make it hard to enjoy the season.
This is meant to be the most wonderful time of the year. But as a mom, it can easily become the most stressful time of the year.
So a quick and easy recipe like this one can be a life-saver. Some sweet treat that you can whip up in just a few minutes with pantry staples, and have plenty to give to all those special people on your list. I’m talking the FedEx guy, the kids’ bus drivers, your hairdresser… all those people that help make your life easier in so many ways.
I make these kinds of homemade gifts every year, and I’ve got lots of recipes to prove it. If this one isn’t your thing, check out the “Gift-able” category of this site, where you’ll find cinnamon pecans, homemade marshmallows, muddy buddies, vanilla sugar, and so much more.
This year, I’m adding this easy fudge to the list. I’ve wanted to make this kind of recipe for so long. I’ve been seeing it around for pretty much all my life, but never had the chance to make it until now.
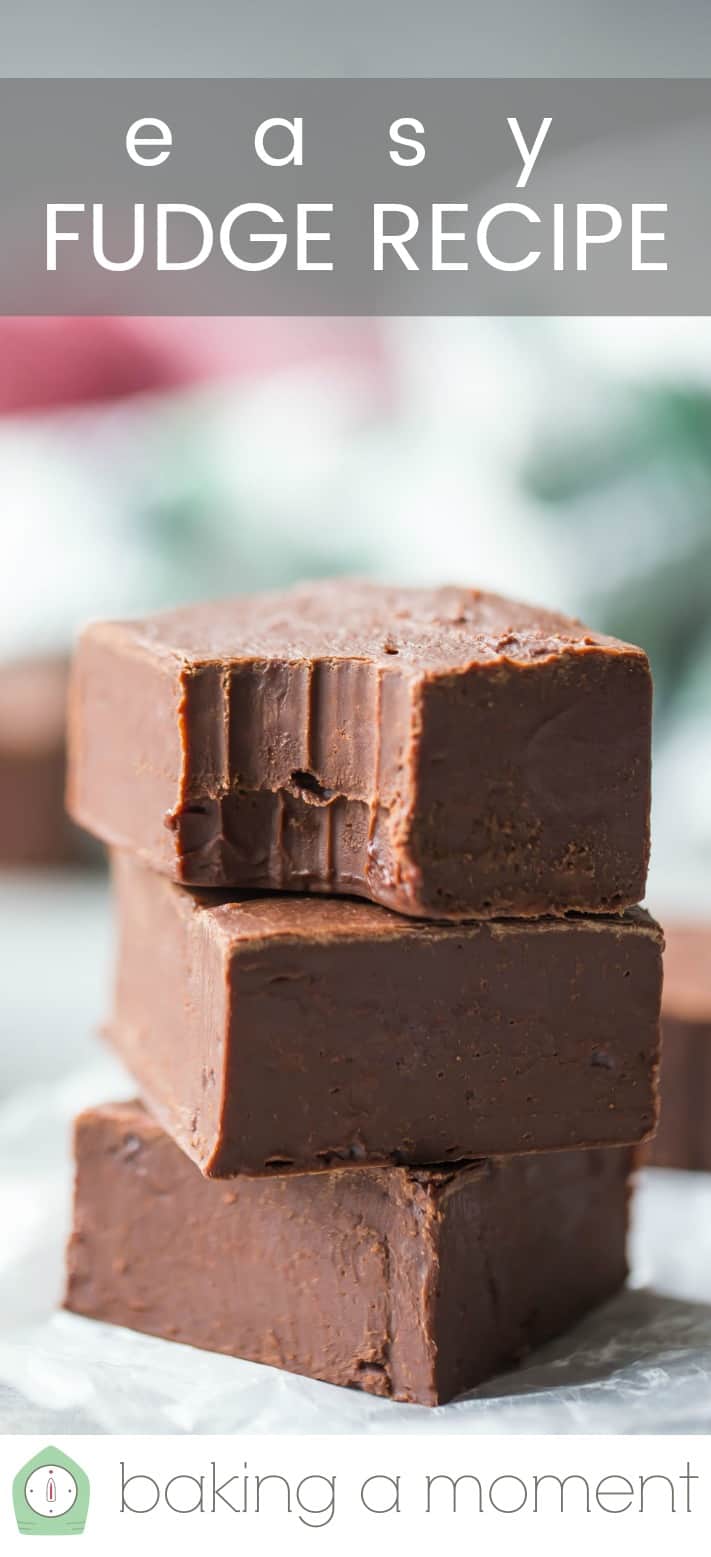
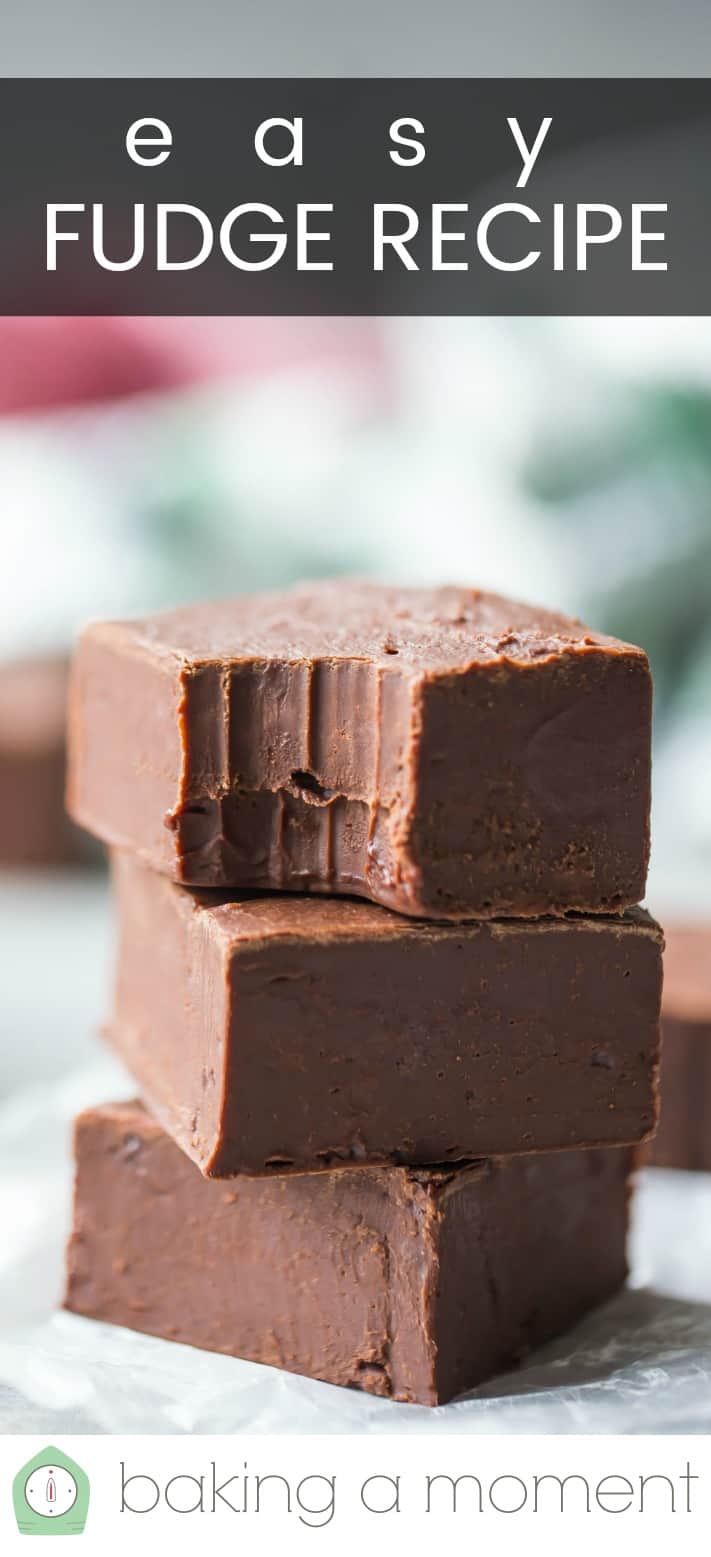
It’s so easy and so quick, and the result is divine. Silky and just the slightest bit chewy, with BIG chocolate flavor and a smooth-as-satin consistency that just melts on the tongue.
It’s practically fool-proof, but I did discover a few tricks along the way that will really guarantee the best result.
So read on to learn all about how to make the most delicious old-fashioned fudge!
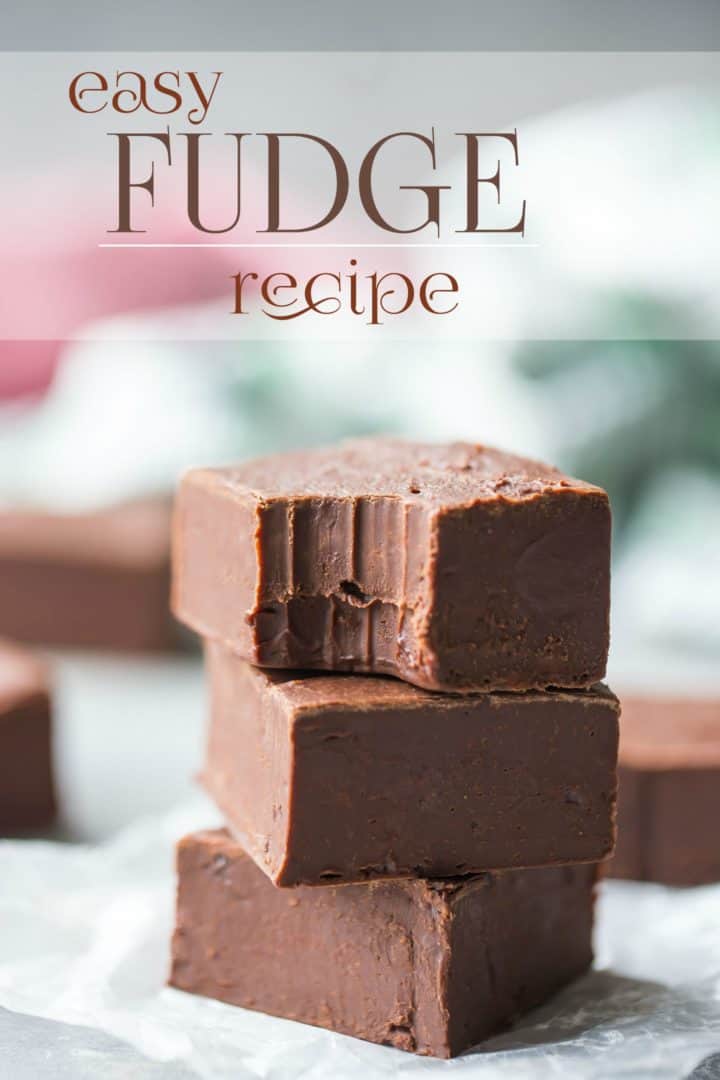
Table of Contents
- What is fudge?
- What’s great about this fudge recipe
- What does this fudge recipe taste like?
- Ingredients
- Special equipment
- How to make this easy fudge recipe
- How to serve fudge
- Expert tips
- A few more of my favorite candy recipes
What is fudge?
Fudge is a type of candy that’s usually made with butter, sugar, and milk, and can be flavored in all sorts of ways.
It’s usually molded in a pan or shaped into big slabs, then cut down into slices or blocks.
Traditionally, fudge is made by cooking all the ingredients to a very specific temperature, then whipping it as it cools to create a velvety-smooth texture.
But this recipe utilizes a special ingredient that way simplifies this process.
What’s great about this fudge recipe
- Tastes amazing: It’s very rich and chocolate-y!
- Few ingredients: You’ll only need 4 simple ingredients to make it.
- Easy to make: It only takes around 5 or 10 minutes of active time.
- Versatile: You can add different flavorings and add-ins to make something truly unique!
What does this fudge recipe taste like?
This is a recipe for chocolate fudge, so the end result is very chocolate-y!
It’s also sweet, creamy, and rich.
And there’s a little pinch of salt added, which balances the flavor in a really beautiful way.
Ingredients
This recipe has just 4 ingredients, so it’s as simple as can be. But just like with a lot of other simple recipes, the quality of the ingredients becomes even more important when there are fewer of them.
Chocolate
Chocolate is definitely the most important ingredient. What you choose to use will be important for 2 reasons: taste and texture.
Let’s talk about taste first. The first time I made this, I used semisweet chocolate. It was good, but I found the flavor to be a little on the sweeter side of what I typically prefer. If you like your treats extra sweet, then semisweet chocolate will be the way to go for you.
But if you prefer a stronger chocolate taste (like me!), then I would recommend using bittersweet chocolate, or a combination of both semisweet and bittersweet. My favorite, in the end, turned out to be an equal mix of semisweet and bittersweet chocolate.
Now on to texture. The first time I made this fudge, I used chocolate chips. Now I’m not saying you can’t use chips, but I am saying that I think bars are better.
You see, chips contain stabilizers that help them to keep their shape during the baking process. They really aren’t the best for melting.
I liked that first batch a lot, but for the creamiest, dreamiest homemade fudge ever, bars are the way to go. They melt so smoothly, and smooth fudge is the best fudge!
Condensed milk
Sweetened condensed milk is sold in 14-ounce cans. This ingredient will sweeten your fudge and give it that creamy, rich mouthfeel.
It’s made from whole milk, boiled down with sugar until thick.
The consistency is similar to caramel, but it’s not brown.
Make sure you’re buying condensed milk and not evaporated milk. Evaporated milk is similar, but it doesn’t have any sweetness to it.
Salt
Salt carries the flavors and intensifies them. The result won’t taste salty, but it will make everything so much more flavorful!
I like kosher salt best because it doesn’t have any additives (table salt usually contains iodine which can leave a bitter taste), so the flavor is pure. It’s also inexpensive and easy to find in a regular grocery store.
Vanilla
Vanilla extract adds a subtly sweet flavor without being at all sugary.
Special equipment
- Measuring cups and spoons: For measuring ingredients accurately. Follow this guide: How to Measure Ingredients for Baking.
- Pot: You’ll be cooking the fudge on the stovetop, in a large, heavy-bottomed pot.
- Silicone spatula: Reaches and incorporates any ingredients that might be hiding in the corners of the pot, and helps to get every bit of fudge out and into the pan!
- Parchment paper sheets: Prevents the fudge from sticking to the pan, and makes cleanup a snap!
- Pan: I’ve used a 9×9-inch pan here. You can use an 8×8-pan too, your fudge will just come out a little thicker.
- Cutting board and knife: For cutting the fudge into squares.
How to make this easy fudge recipe
As you can see in the video below, it’s really easy to make fudge.
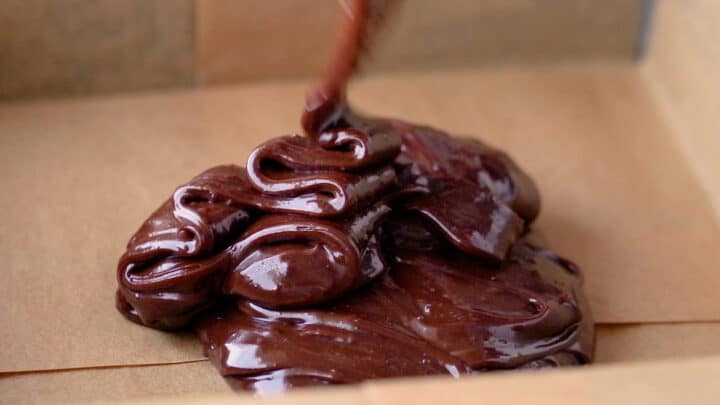
Step 1: Melt chocolate & condensed milk together
Start by placing your chopped chocolate, condensed milk, and salt in a large pot over low heat.
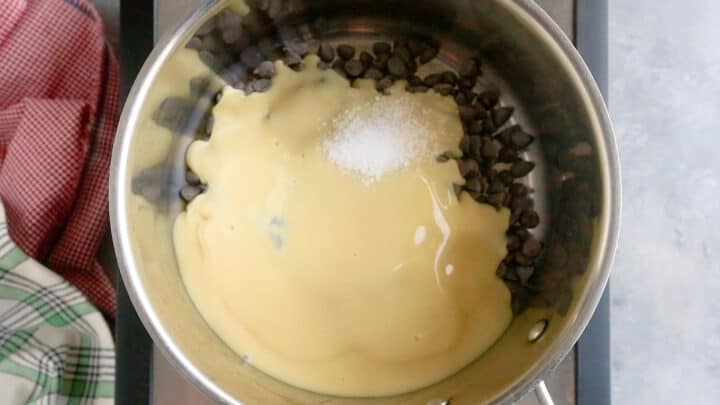
Stir everything together (constantly) as the chocolate melts.
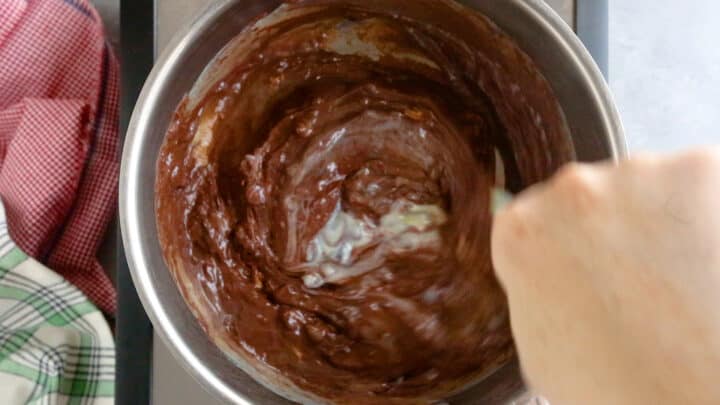
Step 2: Let it get thick
After a little while (the exact timing depends on how hot your burner is), you’ll notice the fudge starts to go thick and shiny.
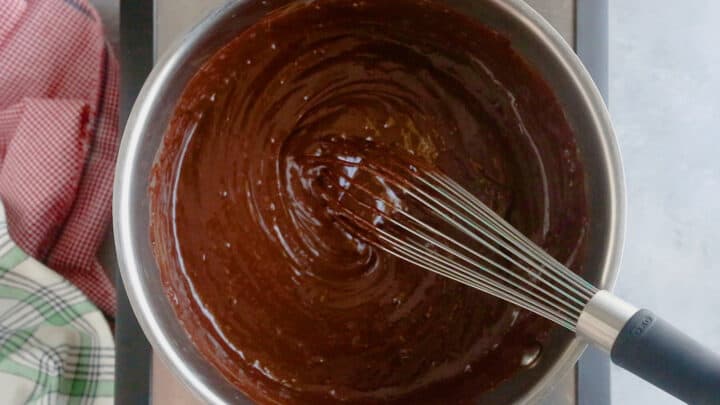
Once you see this happening, and your chocolate is completely melted as well, immediately take the pot off the heat and stir in the vanilla extract.
Step 3: Cool & cut
Pour the fudge into the parchment-lined pan while it’s still hot.
If you wait too long, it will harden in the pot!
Smooth it into an even layer, and allow it to cool and set up.
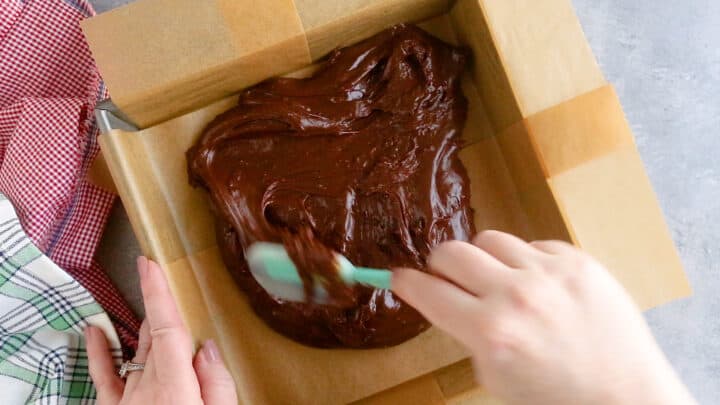
Then pull it out in one big slab by the edges of the parchment.
Then just pop it onto your cutting board, and slice it into blocks.
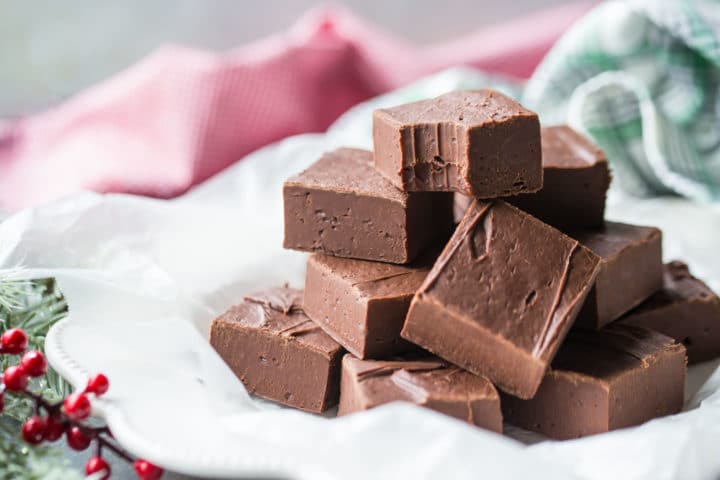
How to serve fudge
Stack squares of fudge on a pretty platter and display them prominently this holiday season! This way, they can tempt any passers-by and be popped into hungry mouths whenever the craving strikes.
Fudge is also fantastic on a cookie tray, as just that little extra-special offering.
And it works very well tied up in cello bags with a pretty ribbon and a cute gift tag. Who wouldn’t love to receive such a thoughtful homemade gift? Plus it’s naturally gluten-free.
Expert tips
Don’t cheap out: Using higher-quality chocolate not only yields a better flavor, it also makes the process easier and more foolproof. Premium chocolate baking bars, broken into small bits or chopped finely, melt more smoothly and evenly so your fudge-making session can be stress-free.
Stir like mad: If you really want the silkiest, creamiest, melt-on-your-tongue fudge ever, DON’T STOP STIRRING! I know you want to toss everything into a pot and walk away. That’s what I wanted! But resist that temptation, because if you dedicate just 5 minutes to stirring those ingredients together as they warm and melt, you will be rewarded in the best possible way.
Don’t take your eyes off it: As you stir, you’ll notice that the fudge starts to become stiff and shiny. This is the most critical point in the whole process! If you’re not paying close attention, you could miss it. Take your fudge off the heat too soon and it will never firm up. Too late and it will come out dry and crumbly. Watch the video below, so you can see what the consistency of the fudge should be before it’s removed from the heat. You should see a definite change in the texture of the fudge. It will go from a runny liquid to very stiff and very shiny.
Take its temperature: Candy making is all about temperature! The hotter the sugar becomes, the firmer it will be once it’s cool. Fudge is meant to be cooked to the soft ball stage, which is between 235 and 240 degrees F. Pop a digital thermometer into your fudge as it cooks, and as soon as it hits that magic number, it’s time to pour!
Microwave it: Yes, you can make homemade fudge in the microwave! Just follow the instructions above, but instead of cooking it in a pot on the stove, put it in a big glass bowl. Microwave it in 30-second increments, stirring after each. As soon as all the chocolate is melted and the mixture looks glossy and thick, transfer it to the pan and let it set up. Easy as can be!

If your fudge doesn’t set up firm enough to cut into blocks, it’s because you didn’t get it hot enough. It needs to be quite thick and very shiny when it goes into the pan. This happens at around the 235 degree F mark. Scrape the mixture out of the pan and back into the pot, and continue to cook it until it reaches this stage.
This issue is the result of cooking it too hot.
If the temperature of the mixture climbs above the 245 degree F mark, it’s getting into firm ball stage. This stage yields candy that is harder and drier.
Unfortunately, if your fudge gets too hot, there’s no way to salvage it. You’ll have to start over.
You can totally jazz this chocolate fudge up in all sorts of unique ways, and really make it your own.
Here are a few ideas for you:
-Add walnuts for chocolate walnut fudge
-Stir in a few tablespoons of peanut butter for chocolate peanut butter fudge
-Replace the vanilla with peppermint extract, for a wintry, minty peppermint chocolate fudge
-Stir in some mini-marshmallows and a handful of nuts, for rocky road
-Add an ounce or two of your favorite liqueur! Bailey’s, Kahluah, Frangelico, or Chambord would be amazing!
Fudge is perfect for holiday gift-giving because it makes a big batch that you can divvy up and tie with a bow. It also lasts a LONG time, so you don’t have to make it in a hurry and worry about it spoiling before the recipient has a chance to enjoy it.
Fudge is a kind of candy. Candies are are high in sugar and low in moisture, both of which help to prevent microbial growth.
So when you make a batch of homemade chocolate fudge, it’s likely to stay good for several weeks at least!
Keep your fudge in an airtight container, so it doesn’t dry out.
At room temperature, it will stay fresh for at least 2 weeks. In the fridge, it will keep for at least a month.
You can also freeze it- just wrap it really tightly so it doesn’t absorb any funky freezer odors. It will last in the freezer for at least 3 months.
If you make it in a 9×9-inch pan, this recipe yields 25 1 3/4-inch cubes. Each cube is one serving.
The nutritional info provided in the recipe card below is for 1/25th the whole batch.
A few more of my favorite candy recipes
This post contains affiliate sales links.

Easy Fudge Recipe
Ingredients
- 24 ouces chocolate, (2 bags of chips or 6 4-ounce bars, roughly chopped)
- 28 ounces (793.79 ml) sweetened condensed milk, (2 cans)
- 1/2 teaspoon (1 teaspoon) kosher salt
- 2 teaspoons vanilla extract
Instructions
- Lightly mist a 9×9-inch pan with non-stick spray, and line it with parchment.
- Place the chocolate, condensed milk, and salt in a large bowl over very low heat.
- Stir the mixture continuously, until all the chocolate has melted and the mixture is very thick and shiny (about 5 minutes; please view the video to see what the mixture should look like.)
- Remove from the heat and stir in the vanilla extract.
- Transfer the fudge to the prepared pan, smoothing it into an even layer.
- Allow it to cool and set (about 1 hour), before cutting into 25 squares.
Notes


Love simple recipes
I know right? Especially at this time of year!
waste of time. This recipe need to let people know approx how long to stir it for.. I stirred it till it was thick and velvety but it turned into a sticky mess. It even stuck to the non stick baking paper I used.
It’s pretty typical for candy to be sticky. Also it does say in the head notes that the fudge should be stirred for about 5 minutes, or until all the chocolate has melted and the mixture is thick and shiny. This is an approximation because different stoves will cook at different temperatures, and the kind of pot you’re using will also affect the cook time as well. It’s important to look out for that look and feel, and if you have any doubt about what that should look like, I did also provide a video to make it crystal clear.
I like the taste of orange along with chocolate, just a hint. I usually add orange extract to brownies along with instant coffee. The coffee really brings out the chocolate. Do you think this would work with fudge? Also, if I did this would I still add the vanilla? Thanks.
Absolutely! That sounds fantastic. You could replace the vanilla with orange, or use both. Totally up to you!
it seems like this recipe needs more condensed milk or butter. we made this fudge using unsweetened baking chocolate bar, 100% cacao. the fudge tastes like a dark chocolate candy bar–it’s not very sweet. it tastes like we melted down dark chocolate bars, added nuts, and then all we had was a big pan of dark chocolate bars. it’s not fudge at all. it’s also quite hard and not creamy.
what did we do wrong? did we use the wrong chocolate?
Hey Julie- so sorry to hear you had difficulty with the recipe. I would not recommend using unsweetened chocolate for this recipe. It will not be sweet enough. If you read my notes under the heading “Ingredients for Making Homemade Fudge,” you’ll find some recommendations there. Hope you have better luck next time!
So easy and soo delicious. I made it with walnuts. Yummy. Do you have an easy recipe for p-nut butter fudge? Thats my favorite. My brother used to make me a batch for Christmas every year. It was so good. I have the recipe bit doesnt come out like it did when he made it. I found him dead in his garage 7 yrs ago.. Have made his fudge every year and it doesn’t turn out like his
I’m so sorry to hear about your brother! I don’t have that recipe YET- but I do plan on making and posting it before the holidays this year. Stay tuned!
After 2 hours of sitting at room temperature, the fudge is still soft. Should i put it in the fridge to help it set? Thanks!
You can try that, but it sounds to me like it didn’t cook quite long enough.
Tried the recipe exactly as directed, using Ghirardelli 60% cacao bars. It never set up–it stayed too gooey & sticky to serve. After 2 hours at room temperature I tried putting it in the fridge for several hours, but it remained gooey.
I’m curious if others have had this experience with this recipe?
Jeff I’m sorry you had trouble. You really need to cook the fudge until you see it becoming stiff and shiny. If you put it into the pan before then, it will not set up properly. It’s a noticeable difference as you’re cooking and stirring. It can take anywhere from 2 minutes on up, depending how high the flame is on your stove.
This is the one I’ve always used after I found it AFTER I’d stopped making the Fantasy Fudge w the marshmallow cream for years! This one is sooooooooooooooooooo easy and rich and creamy and freezes awesomely!
So happy you like it Barbara! Thanks for the great feedback!
I made as directed for microwave oven, but after 1 hour in the fridge the bars are very soft still. Did I do something wrong? But taste delicious! (Soft as in still can’t get a smooth cut to pull pieces out of the pan) Help please, I love your recipes!
Hey DonnaLynn, so sorry to hear you had trouble. The fudge should already be thick and glossy before it goes into the pan. Once it hits the right temperature you should notice an immediate change. Maybe you didn’t cook it long enough?
This Recipe sound so easy to make. I just want to know if a person is lactose, and want. so to make this fudge. Please let me know of Substitutions.
Hey Anesia- I just googled “substitute for sweetened condensed milk.” Here are the search results: https://www.google.com/search?q=substitute+for+sweetened+condensed+milk&rlz=1C1GCEA_enUS832US832&oq=substitute+for+sweet&aqs=chrome.0.0j69i57j0l4.8631j1j7&sourceid=chrome&ie=UTF-8. Hopefully this is helpful!
just love this recipe ! So easy and fast. I used white chocolate added maple flavoring and walnuts.
This is for my husband for Valentines Day ?
Sounds delish! Happy Valentine’s to you and your husband!
Can you add pecans to the fudge? If so, where would you add them. The recipe sounds easy and delicious!
Hi Rose! I’m so happy you like it! Yes you can definitely add nuts and I honestly think you could do that at any point in the recipe. But if it were me I’d probably throw them in close to the end, that way you can be sure that all your chocolate is fully melted and everything is nice and smooth. Good luck and I hope you enjoy!
Looks so good! I am going to make this on Sunday.
Can I use Ghirardelli 60% Cacao & Ghirardelli Semi – Sweet Chips?
Could you melt the chocolate chips & mix in the Sweetened Condensed Milk in a glass bowl, over a boiling pan of water?
Thank you!
Merry Christmas & Happy New Year!
Hi Susan! You can definitely do that but as I had mentioned, I find that bars work better than chips. Good luck!
Thank you! I don’t have the bars & have spent way too much money, that we don’t have, to buy ingredients & a mixer, food processor & other needed baking items & gadgets. That’s what happens when you don’t bake or bake lot! I know, America’s Test Kitchen said “when baking, always use Ghirardelli Chocolate Chips, because they are made flatter for melting & melt better than the other chips.” Thank you for all of the recipes & tips & tricks! I have learned a lot & have noticed a difference in the things I have already fixed. Merry Christmas & Happy New Year!
They are really good! Definitely my go-to brand for sure. I hope you get lots of good use out of your new baking tools! Happy New Year!
I can’t wait to make this fudge with my daughters 🙂 It looks delicious and easy enough for us! My 7 year old read us a book last night about a family making fudge and a big mess in the kitchen 🙂 So that’s what we will do! Thanks for all the great tips and simple directions!
I love fudge- it’s an indulgent that I have to keep to the holidays or I’d eat it all the time! What a lovely simple recipe!
Love how easy this is to make! Such a perfect treat for the holidays!
This was the easiest fudge I’ve ever made! My family does not want me to give any away!!!
Really excited to try this! Do you think lightly coating a 9×9 silicone pan with cocoa powder would work instead of spraying and lining a metal pan? Thanks!
I haven’t tried that myself, but it sounds like it would work just fine. Good luck!
Simple and very good.
Very happy you liked, Geno! Thank you!