Perfect Tart Crust Recipe
As an amazon associate I earn from qualifying purchases.
Perfect Tart Crust: Buttery, just a little sweet, and tender as can be. This easy-to-make, basic dough will complement any filling!

Fall is in full swing now, my friend! Soon we will be knee-deep in pies and tarts!
I figured, why not get ahead of it and post one of the most valuable recipes in any good baker’s arsenal: Tart Crust!
I’ve been using this recipe for years, and it’s a component of many tart recipes on this website. Check out this Salted Honey Nut Tart, these Lemon Cheesecake Tarts, and this Rhubarb Tart, and you’ll see what I mean!
Tarts are fun to make, mainly because they’re so versatile. You can fill a tart crust in so many delicious ways!
But the pastry dough is step one. You want a recipe that’s easy to make, tender and a little crunchy, buttery, and not too sweet, to provide the perfect contrast. And this recipe is IT!

What is tart crust?
When you make a tart, the crust can be almost as important as the filling! You want to ensure that you have a sturdy base that provides a flavor contrast and a little texture.
This tart crust is definitely its own kind of thing. It is buttery, a little sweet, and has a shortbread-like mouthfeel.
It’s very different from pie crust. Pie crust, while buttery and not too sweet, tends to have a flaky texture, while tart crust is more like a cookie.
And honestly, the tart crust is WAY easier to make! This dough comes together in about 10 minutes flat.
You gotta love that!
Ingredients and Substitutions
Flour:
All-purpose flour is my go-to, but you can swap it out for any kind of whole-grain option if you like. You may need slightly less if you go that route.
A gluten-free flour blend that can sub 1:1 for regular flour should also work just fine, if you’d like to make a gluten-free tart crust.
Powdered Sugar:
Sugar adds sweetness (obvs!) but it also aids in browning and keeps things moist, since it’s hydrophilic.
I like powdered sugar for this recipe because it does something wonderful to the dough! My theory is that the small amount of cornstarch it contains provides a little extra structure without any gluten. So it yields a really silky, easy to work with dough that doesn’t bake up tough.
Salt:
Salt carries the flavors and intensifies them. The end result won’t taste salty, but it will make everything so much more flavorful!
I like kosher salt best because it doesn’t have any additives (table salt usually contains iodine and that can leave a bitter taste), so the flavor is pure, and it’s very inexpensive and easy to find.
Butter:
I like to use unsalted butter because it lets me control the amount of salt in the dish.
For a vegan or dairy free tart crust, use a plant-based butter that can substitute for dairy butter 1:1.
This recipe works best if you use cold butter.
Egg Yolk:
I recommend adding an egg yolk to this recipe. It adds richness and a bit of added structure. If you used the white too, the final result could be a little tough.
If you need to make an egg-free or vegan tart crust, try whisking a tablespoon of cornstarch together with 3 tablespoons of warm water.
Heavy Cream:
Cream moistens the dough and adds a rich flavor. There are certain flavor compounds that are only carried by fats, so higher fat foods like cream will really intensify the flavors of everything you make.
For a vegan substitution, try using coconut cream. Start with a can of unsweetened coconut milk, and chill it overnight in the fridge. Then, open the can and scoop off the solidified cream from the top, leaving the thin, watery liquid below. This can be whipped up just like dairy cream!
Vanilla:
Vanilla extract adds a subtly sweet flavor without being at all sugary.
For a more pronounced flavor, try using vanilla bean paste. You could also split a vanilla bean down the center lengthwise, scrape out the seeds, and add those.
- Almond extract
- Lemon extract or citrus zest
- Orange blossom water
- Coconut extract
- Cinnamon
Or anything else you have on hand!
How to make tart crust step by step
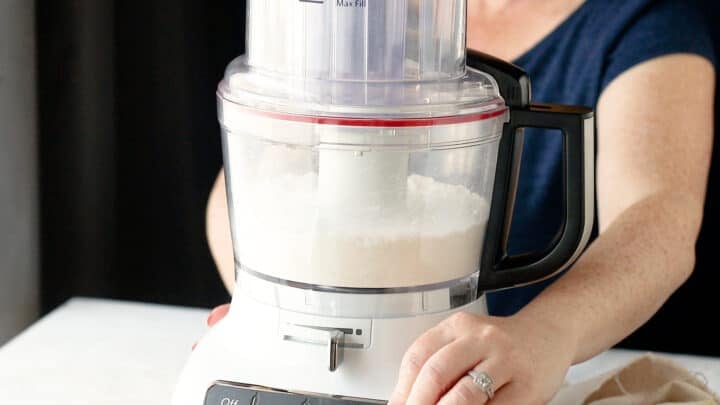
I like to make this tart crust recipe in the food processor, but if you don’t have one, that’s totally fine! It can also be made by hand in a stand mixer, or the old-fashioned way, with a lot of arm strength!
Start by combining the dry ingredients: flour, powdered sugar, and salt.

Just give the flour mixture a few quick pulses to get them combined.
Next, add the butter. Make sure it’s cold!
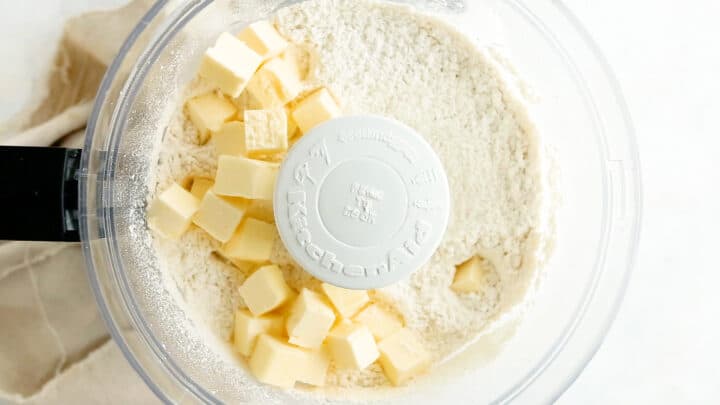
If you’re using a food processor, pulse it a few times until you have something that resembles a coarse meal.
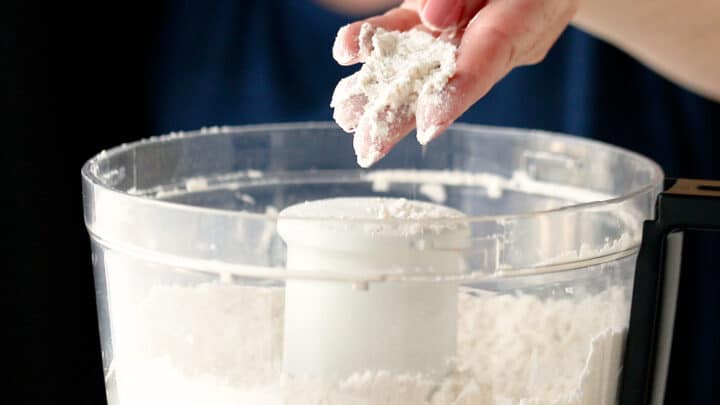
This can also be done with a stand mixer fitted with a paddle attachment on low speed or by hand with 2 knives (or one of my favorite tools: the pastry blender).
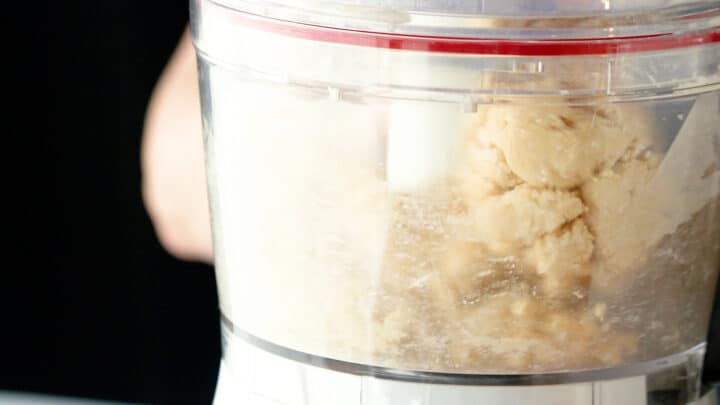
Once the butter is cut into the dry ingredients, you can add the liquids. An egg yolk and a little cream, plus a dash vanilla extract.
Pulse those in, and as soon as the dough has gathered itself into a ball, stop mixing. If the dough is overworked, the tart crust could come out tough and it could also shrink a lot as it bakes.
Wrap the pastry crust tightly in plastic wrap, and allow it to chill for about an hour in the fridge. This will help it to stiffen it up a little, and make it easier to roll out.
Frequently asked questions
What size pan can this tart crust recipe be baked in?
You can use this recipe for just about any size tart tin (within reason!).
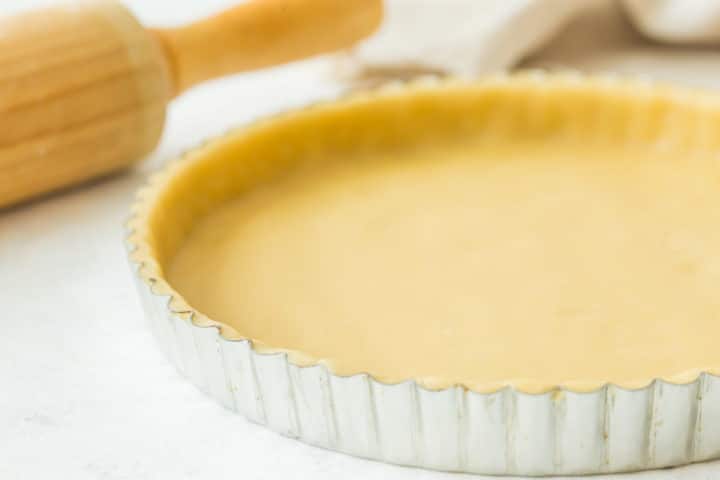
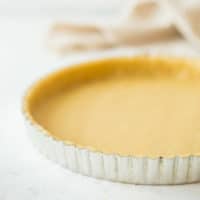
For the pictures and video you see here, I used a standard-sized 9-inch round tart pan with a removable bottom.
But it will also work with an 8-inch round pan, a rectangular tart pan, or even a set of 6 mini tarts.
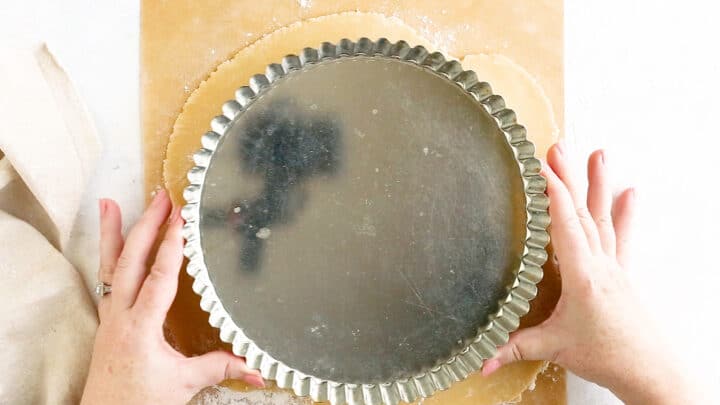
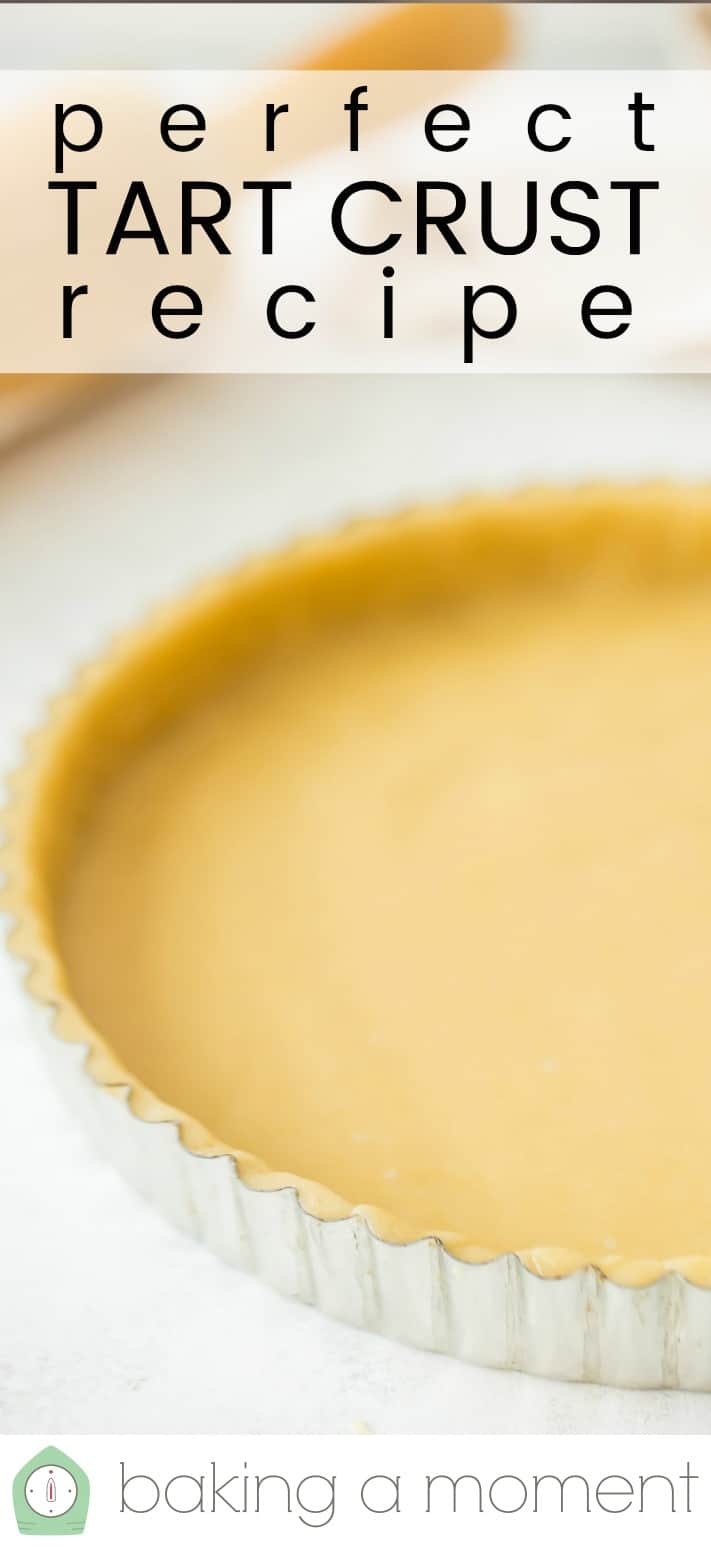
Just roll the dough out to just an inch or two wider than the diameter of your tart pan so that it can come all the way up the sides of the pan.
This is typically about 1/8-inch thick, but if it’s a little thicker or thinner, that’s totally ok!
How long should the tart crust bake?
It depends. If you have a tart recipe, follow it. Sometimes tarts are baked filled, and sometimes just the pastry shell is baked without the filling (this is called “blind baking).
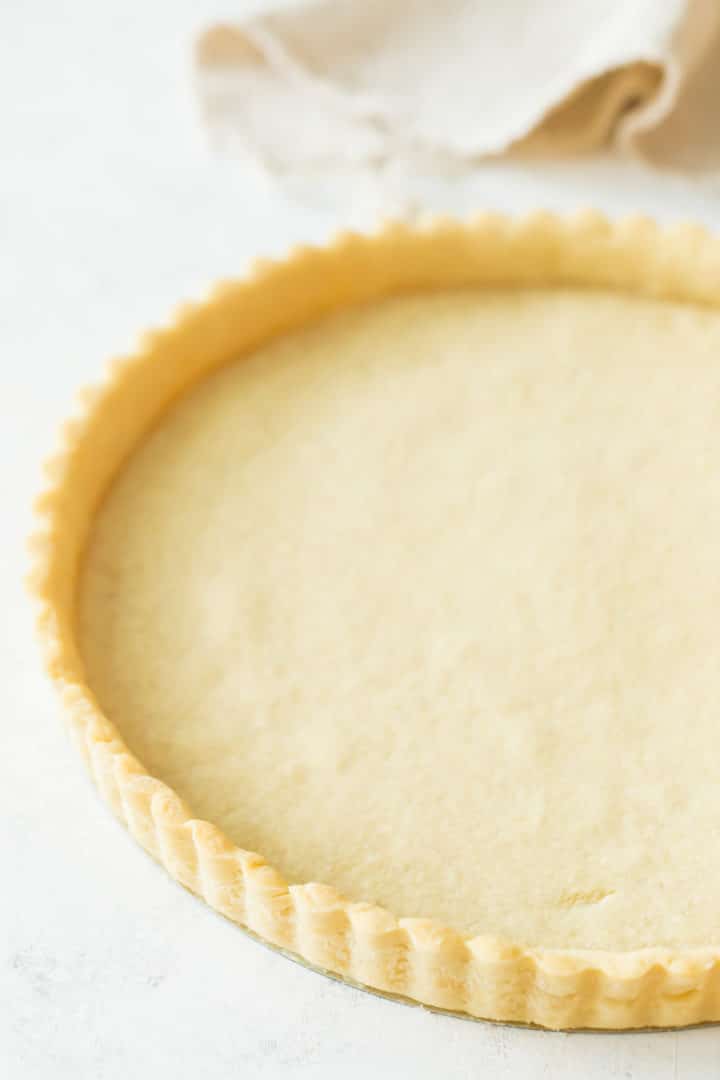
Just to give you an idea, the blind-baked tart shell you see here was baked for 20 minutes at 375 degrees F.
If you blind bake your crust, you might want to prick the bottom with the tines of a fork. This will prevent it from getting air trapped underneath and poofing up as it bakes. Sometimes it’s a good idea to place dry beans or pie weights in, too, for the same reason. I didn’t do either of these things for what you see in these pics, and it was totally fine, but if you’re finding this to be a problem for you, give these solutions a try!
Can this tart crust recipe be made ahead?
I would recommend making the sweet tart dough at least an hour ahead, so that it has time to stiffen up a little in the fridge.
If you chill it much longer than that, it might become a little too stiff to work with easily. Of course, this is an easy fix: just leave it at room temperature until it gets a little softer.
You can also pre-bake the shell (unfilled) if your tart recipe allows that. It will keep in a zip-top bag for a few days at room temperature, about a week in the fridge, and around a month or two in the freezer.
When you’re ready to assemble your tart, thaw the pre-baked crust at room temperature and fill it!
Expert tips
- Use cold butter. Cold butter results in a more tender crust. When the cold pastry hits the hot oven, steam is released, and that creates countless little air pockets that provide the loveliest texture!
- The heavy cream helps bind all of the ingredients together. Be sure to use cold heavy cream, not melted butter.
- Chill the dough for about an hour. This will make it easier to roll the dough out with a rolling pin and helps to prevent shrinking when baked.
- Place the chilled dough on a lightly floured surface. Sprinkle a bit of flour on the top and bottom of the tart crust disc. Carefully roll the dough out evenly. If it cracks, the dough is too cold from the fridge. Allow it to warm up a bit at room temperature before trying to roll it again.
- Or, roll out the dough between two sheets of parchment paper. This is my go-to method because it doesn’t require any additional flour, which can make the final result too dry or tough.
- Watch the video in the recipe card below to see my easy way to transfer the rolled out dough to the pan and trim away the excess!
- Once you have the crust transferred to the tart pan, chill it again before baking, so you’re sure to get that tender mouthfeel.
- You’ll know your tart crust is done baking when it’s set in the center and starting to turn a little golden around the edges.
Next time you’ve got the itch to make a beautiful tart, try this perfect tart crust recipe! It’s the perfect base to complement just about any filling!
This post contains affiliate sales links.
Perfect Tart Crust
Ingredients
- 1 1/2 cups (187.5 g) all-purpose flour
- 1/3 cup (40 g) powdered sugar
- 1/4 teaspoon (0.25 teaspoon) kosher salt
- 1/2 cup (115.77 g) (1 stick) unsalted butter, cold
- 1 large egg yolk
- 2 tablespoons (30 g) heavy cream
- 1/2 teaspoon (0.5 teaspoon) vanilla extract
Instructions
- Place the flour, sugar, and salt in the bowl of a food processor, stand mixer, or in a medium mixing bowl.
- Pulse/stir/cut in the butter with a pastry blender, until the mixture resembles coarse meal.
- Add the egg yolk, cream, and vanilla, and process/mix/stir until the dough gathers itself into a ball and pulls away cleanly from the sides of the bowl.
- Wrap the dough tightly in plastic wrap, and chill for 1 hour.
- On a lightly floured surface, roll the dough until it's an inch or two wider than your tart pan.
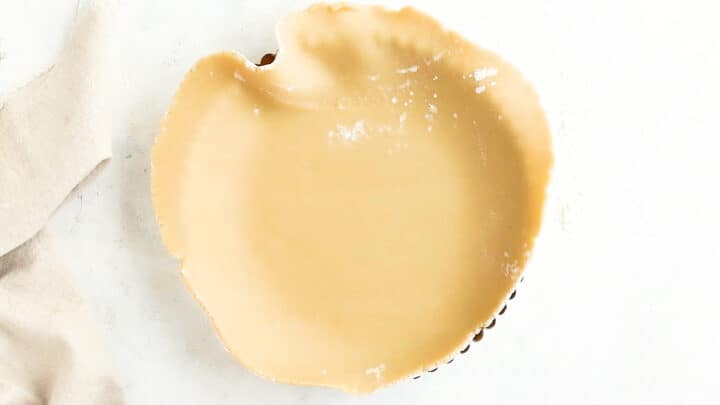
- Press the dough gently into the pan(s), trimming away any excess.
- Baking instructions will vary based on the filling you are using.*


Looks like an amazingly simple great tart crust. Looks so good! Will certainly try to make one very soon. Thank you sooooo much for sharing a great recipe ☺️
My pleasure Jess! Hope you enjoy!
The recipe is in desperate need of updates. It fails to include the temperature or a baking duration. So are we supposed to guess?
Hey there! This recipe is relatively newly uploaded so there’s really no need for any updates just yet. You can find the information you’re looking for under the heading “HOW LONG SHOULD THE TART CRUST BAKE?.”
?
Can this be made without the sugar and vanilla for a savory tart filling?
Absolutely! Good luck and enjoy!
I’m trying my hand at making my first tart and this looks like a great recipe! I’m horrible at making raditional pie crusts so I hope this will work out. I think I may be a little heavy handed with my mixing, so I’ll take your advice and be a little softer. Is there a way to make this a chocolate crust or do you have a recipe for one. Can I just add cocoa powder to it or will that change the texture? I’m eyeing a chocolate, raspberry filling for one, but I’ll need to convert the ingredients to American measurements. Any help appreciated to make this easier.
Hi Mary! I think you’ll find this tart crust is a lot more forgiving than a flaky pie crust. And I think there probably is a way to make a chocolate version, but I have not yet developed/tested out a recipe like that, so sadly I am unable to give you specifics as of right now. I can say that in my past experience, it’s usually not as simple as just adding cocoa, since the cocoa tends to make things a little drier but it does not swap out for flour in equal measure. If you decide to experiment, I’d love to hear how it all works out! Good luck!
I swapped out 1/2 cup flour with cocoa and it did need a few drops more cream, but came out so beautifully! Filled with mousse au chocolat and raspberries, definitely something I’ll do again.
Sounds fantastic Alez! Congrats on a job well done.
I used this recipe after my market did not have the almond paste my usual crust recipe requires. This recipe worked out, though I found the recipe directions tedious to work through. I never found the pan size, the baking temperature or baking time for blind baking so went with what l do for my almond paste crust and it worked just fine. I read through the text again the next day and found “9 inch tart pan” and saw Cook Time 20 min at the beginning information. The Total Time of 40 minutes excludes the requured 1 hour refrigeration time. This is a good recipe, but for me the directions were too lengthy and seemed scattered.
I want to try your recipe, the results look great. If I leave out the sugar; could this be used for savoury pies?
Hey Susan! If you’re looking to make a savory pie, I think you’d really like the pie crust recipe linked a few times above. This one is meant for tarts which are generally sweeter.
Can I substitute the heavy cream with whole milk?
Hey Liz! You’ll get the best result if you bake the recipe as written.
This is a near perfect crust. I thank you so much, easy to make, even easier to eat.
So happy you liked it! Thank you for the positive review!
This dough came together beautifully for me. The texture in hand was so amazing. I did stray from the directions slightly. Instead of making a dough disk to chill.
I rolled my dough out after mixing in food processor, between two pieces of parchment paper to the size diameter of my 9 inch tart pan, then I let the dough chill in the refrigerator for an hour.
After the hour was up, I took my dough out to let it come to room temperature While my oven is preheating to cook my tart crust. Once it came to room temperature Already in the size diameter I needed for my tart pan, I fitted the dough still cool to the touch into the pan, oven reached its 375 degree Fahrenheit temperature and I wrapped the edges in tinfoil and put it in the Oven as soon as possible while the tart dough is still very chilled to the touch but not exactly room temperature soft either.
My reason for trying it this way…. is to prevent the dough from shrinking in my tart pan as it bakes.
Here’s to hoping that method works.
So glad to hear the dough came together well for you Emmi! That chilling method sounds like a great idea!
I’ve been researching for some fun ideas for a dessert for a Christmas party and happened on this tart crust. I tested it out tonight and it was fantastic! My husband was skeptical, thinking he wouldn’t really like it, but he raved about how good it was. I ended up making mini pastries using a cupcake tin, filled them with a mascarpone cream filling, and topped with a few berries, and they were great! Thanks for a wonderful recipe!
That’s fantastic Rebekah! I’m so happy you and your husband liked it- sounds like he is a tough customer! Love your idea about how to fill the crust. Sound delicious and so pretty!
I NEED to make more tarts because tart crust is so dreeeeamy
What temperature do you needto cook this tart crust?
Hi Erica! Please check out the info listed under the heading “How Long Should the Tart Crust Bake.” Thanks!
This is a fantastic recipe! If you don’t have a good crust, your tart won’t turn out
Amazingly simple, great results, true classic.
Filled with some cranberry/orange relish leftover from Thanksgiving and dusted with sugar for a little extra sparkle, and I wish I had more cranberries stored away somewhere.
Thanks tons!
Sounds fantastic! I’m so glad it worked well for you!
Oooh a good tart crust recipe is so important to have! Thanks for sharing.
The baking master strikes again! What a perfect tart crust.
That looks amazing! My tart crusts always seem to melt away in the oven if I don’t use pie weights (and even a little bit when I do 🙁 ). Definitely going to try this recipe soon!
That’s interesting Merel! Hopefully this recipe brings you better luck with your tarts!