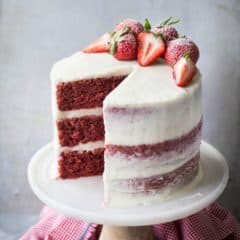
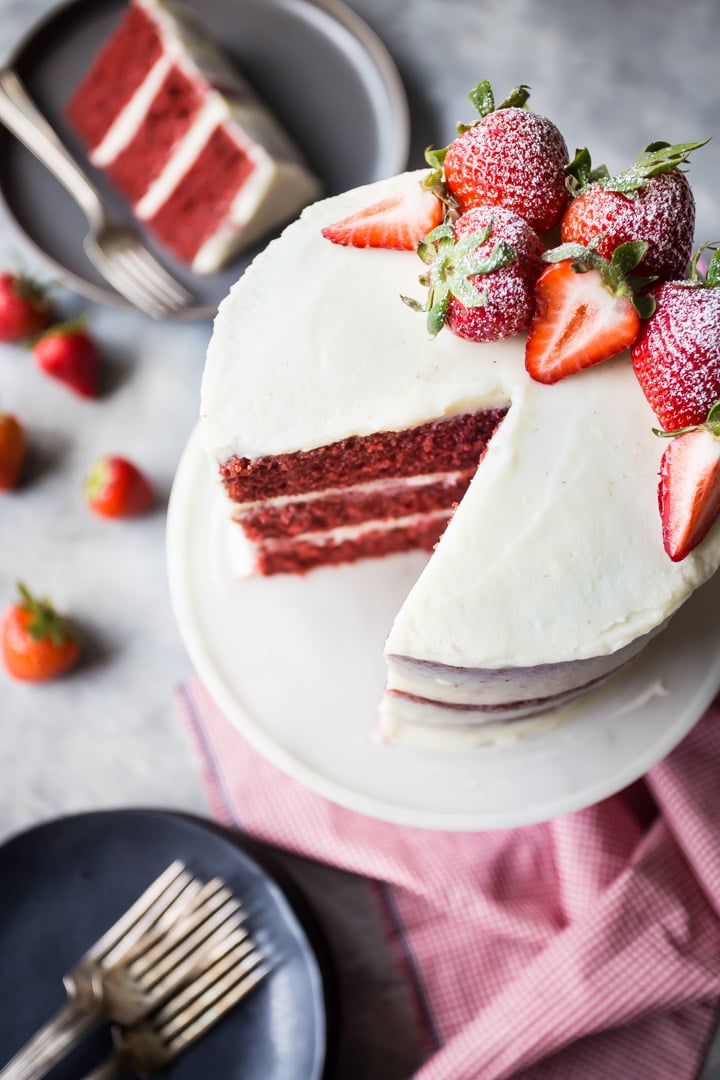
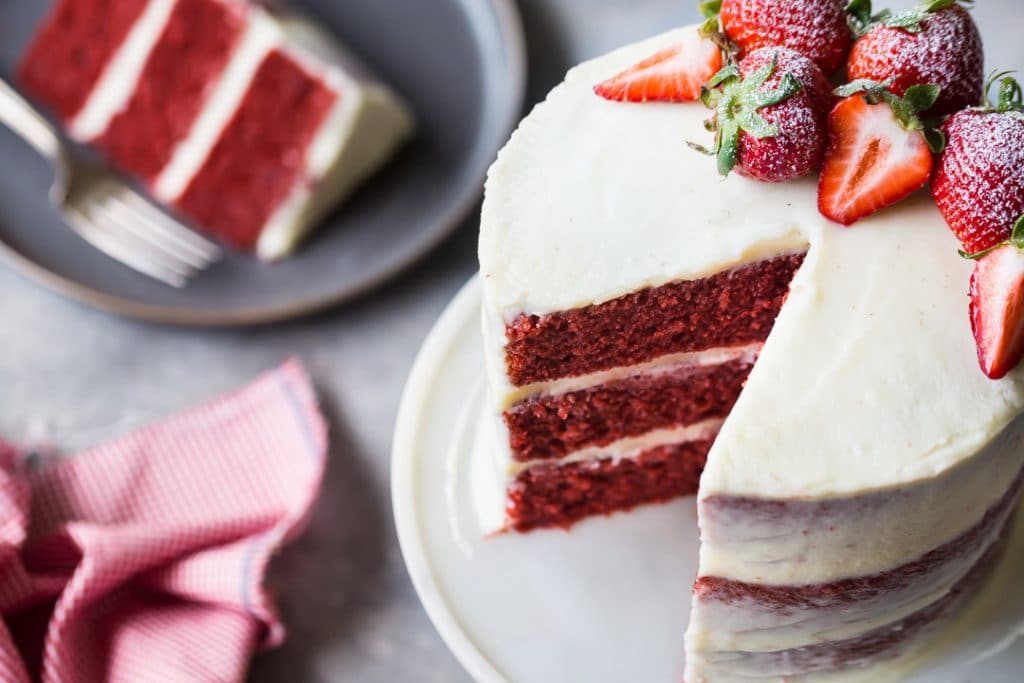
Red Velvet Cake with Cream Cheese Frosting
As an amazon associate I earn from qualifying purchases.
Make this classic Red Velvet Cake Recipe for your next celebration! Easy to make, with less than half the food coloring of other recipes.

Table of Contents
- Here's Why You'll Love This Recipe
- Ingredients You'll Need
- How To Make Red Velvet Cake
- More Red Velvet Recipes
- More Layer Cake Recipes
Red Velvet holds a special place in my heart. It's so moist, and the subtle cocoa and buttermilk flavors are so old-fashioned and comforting! I've heard a lot of people say that red velvet cake just tastes like plain cake tinted red, but that is not the case with this recipe at all.
The cocoa flavor really shines, and there's a subtle tang from the buttermilk. The cream cheese frosting plays off of that and adds sweetness. It complements all the flavors in the cake in the most delicious way!
Red velvet is an oil-based cake that gets its unique flavor from buttermilk, a touch of cocoa, and vinegar. It may sound like a crazy combination, but it's surprisingly delicious!
The buttermilk gives this layer cake a soft, creamy quality, and it's amazing how much chocolate flavor just two tablespoons of cocoa powder can bring. Vinegar enhances the buttermilk's subtle tanginess, and it also reacts with the baking soda to help the cake rise tall and fluffy.
There are lots of ways to adorn a red velvet cake, but my favorite by far is cream cheese icing. The way the cake and frosting flavors combine is just heavenly. For this layer cake recipe, I chose a traditional cream cheese frosting. You can read more about it here: Cream Cheese Frosting.
If you're looking for something a little different, here are a few good options:
- Swiss Meringue Buttercream
- American-Style Buttercream
- Chocolate Swiss Meringue Buttercream
- Whipped Cream Frosting
You can also cover this red velvet cake with fondant! It's perfect for that, and the bright white is gorgeous against the brilliant red cake.
Here's Why You'll Love This Recipe
- This cake is wonderfully moist, soft, and tender, with that signature velvety crumb everyone loves.
- It has the classic red velvet flavor, with just a hint of cocoa and a subtle tanginess that makes it so unique.
- Because it uses less food coloring than many recipes, the flavor stays balanced while still giving you that beautiful, festive color.
- The cream cheese frosting is rich, fluffy, and tangy, which makes it the perfect match for the delicate cake layers.
- It is a great choice for birthdays, holidays, Valentine's Day, and any occasion that calls for a really special dessert.
- Even better, it is simple to make from scratch, so you can create an impressive layer cake without an overly complicated process.
Ingredients You'll Need
The recipe card at the bottom of the post contains the full list with all of the amounts. Refer to that when you're cooking.
- All-purpose flour: Provides structure while keeping the crumb soft and tender.
- Granulated sugar: Sweetens the cake and helps create a moist texture.
- Unsweetened cocoa powder: Adds that subtle cocoa note that makes red velvet distinct.
- Baking soda: Helps the cake rise and keeps the texture light.
- Kosher salt: Balances the sweetness and enhances the flavor.
- Buttermilk: Adds tanginess and moisture, and contributes to the cake's tender crumb.
- Oil: Keeps the cake soft and moist for days.
- Egg whites: Add structure and help keep the crumb delicate and fine.
- Red food coloring: Gives the cake its iconic red hue.
- White vinegar: Works with the baking soda and adds a little brightness to the flavor.
- Vanilla extract: Rounds everything out with warm, classic flavor.
How To Make Red Velvet Cake
Step 1: Make the cake layers
Preheat the oven and prepare three 6-inch cake pans with non-stick spray and parchment rounds. This helps the cakes release cleanly and keeps the layers neat.
In a large bowl, whisk together the flour, sugar, cocoa powder, baking soda, and salt.
In a separate measuring cup or bowl, stir together the buttermilk, oil, egg whites, red food coloring, vinegar, and vanilla.
Add the wet ingredients to the dry ingredients and stir until the batter is smooth. Divide the batter evenly among the pans and bake until a toothpick in the center comes out clean.
Let the cake layers cool completely before frosting.
Step 2: Make the cream cheese frosting
Place the butter, cream cheese, lemon juice, and vanilla in a large mixing bowl and beat until smooth.
Scrape the bowl well, then add about half the powdered sugar and mix until combined. Scrape again, then add the remaining powdered sugar and the salt.
Mix until combined, then whip just until the frosting becomes fluffy and stiff. Once it reaches that stage, stop mixing and use it right away.
Step 3: Assemble the cake
Place one cake layer on a serving plate or cake stand and spread frosting over the top. Repeat with the second and third layers, then frost the top and sides of the cake.
To finish, use an offset spatula to smooth the frosting, or make soft swirls if you prefer a more relaxed look.
Helpful Tips and Tricks
- Measure carefully: Especially the flour and cocoa powder, so the cake stays soft and tender.
- Do not overmix: Stir the batter just until smooth to avoid a tough cake.
- Use parchment rounds: They make removing the cake layers much easier.
- Cool completely before frosting: Even slightly warm cake layers can melt the frosting.
- Use brick-style cream cheese: It gives the frosting better structure than spreadable cream cheese.
- Do not over-whip the frosting: As soon as it looks fluffy and stiff, stop mixing so it stays thick and stable.
- Frost immediately: This cream cheese frosting is easiest to work with right after whipping.
Can this cake be made in advance?
Totally! As a matter of fact, I think it's best that way.
Whenever I make a layer cake, I bake the layers at least a day before I plan to fill and frost them. Once they've cooled, wrap them tightly in plastic wrap and refrigerate. They'll stay good for several days to a week.
You can also freeze them. I often slip the wrapped cakes into a zip-top bag for added protection against freezer burn and funny freezer odors. They should last at least 2 weeks in the freezer, maybe even longer!
The cake layers are easiest to frost when they're cold. They're less crumbly that way. Sometimes I'll even frost them frozen and that makes the job so easy!
I hope you'll make this red velvet cake for your next celebration! It's sure to impress, with both its stunning good looks and rich, delicious flavor!
More Red Velvet Recipes
- Red Velvet Cupcakes
- Red Velvet Chocolate Chip Cookies
- Red Velvet Cheesecake
- Red Velvet Sugar Cookies
- Fourth of July Red Velvet Cheesecake Bars
- Red Velvet Cookie Dough Truffles
- Red Velvet Zebra Bundt Cake
- All-Natural Red Velvet Whoopie Pies
More Layer Cake Recipes
- Banana Pudding Layer Cake
- Moist Pumpkin Layer Cake
- Vanilla Malt Layer Cake with Cashews and Salted Caramel
- Carrot Cake with Cream Cheese Frosting
- Tiramisu Cake
- Vanilla Cake Recipe: Perfectly Moist and Delicate
- Funfetti Cake
- Orange Creamsicle Cake
- Hummingbird Cake
- Marble Cake
- Key Lime Cake
Ingredients
For the Red Velvet Cake:
- 2 ½ cups (312.5 g) all-purpose flour
- 1 ⅓ cups (266.67 g) granulated sugar
- 2 tablespoons (10 g) unsweetened cocoa powder
- 1 teaspoon (4 g) baking soda
- 1 teaspoon (6 g) kosher salt
- 1 ½ cups (360 g) buttermilk*
- 1 cup (224 g) oil
- 2 (66 g) large egg whites
- 1 tablespoon (15 g) red food coloring
- 1 teaspoon (5 g) white vinegar
- 1 teaspoon (4 g) vanilla extract
For the Cream Cheese Frosting:
- 1 cup (227 g) unsalted butter , (2 sticks), softened
- 8 ounces (226.8 g) cream cheese, , cold (the kind in a brick)
- 3 teaspoons (15 g) lemon juice
- 2 teaspoons (8 g) vanilla extract
- 5 cups (600 g) powdered sugar
- ⅛ teaspoon (0.75 g) kosher salt
Instructions
To Make the Red Velvet Cake:
- Preheat the oven to 350 degrees F, mist three 6-inch round cake pans** with non-stick spray, and line with circles cut from parchment.
- Place the flour, sugar, cocoa, baking soda, and salt in a large bowl and whisk to combine.
- Place the buttermilk, oil, egg whites, food coloring, vinegar, and vanilla in a large measuring cup, and stir together.
- Pour the liquid ingredients into the dry, and stir together until smooth (about 90 seconds to 2 minutes).
- Divide the batter equally between the three prepared pans.
- Bake until a toothpick inserted in the thickest part of the cake comes out clean (approximately 30 to 35 minutes).
- Cool completely, then fill and frost with cream cheese frosting.
To Make the Cream Cheese Frosting:
- Place the butter, cream cheese, lemon juice, and vanilla in a large mixing bowl, and beat on medium-low speed until smooth.
- Scrape the bottom and sides of the bowl with a silicone spatula, and add about half the powdered sugar.
- Stir in the powdered sugar until combined, then scrape the bottom and sides of the bowl again, and add the remaining powdered sugar and the salt.
- Stir together until combined, then turn the mixer up to medium-high speed and whip until the frosting is fluffy and stiff. (Be careful not to over-whip, or it could become runny. As soon as the frosting looks stiff, turn off the mixer and use the frosting immediately.)