Soft White Bread Recipe
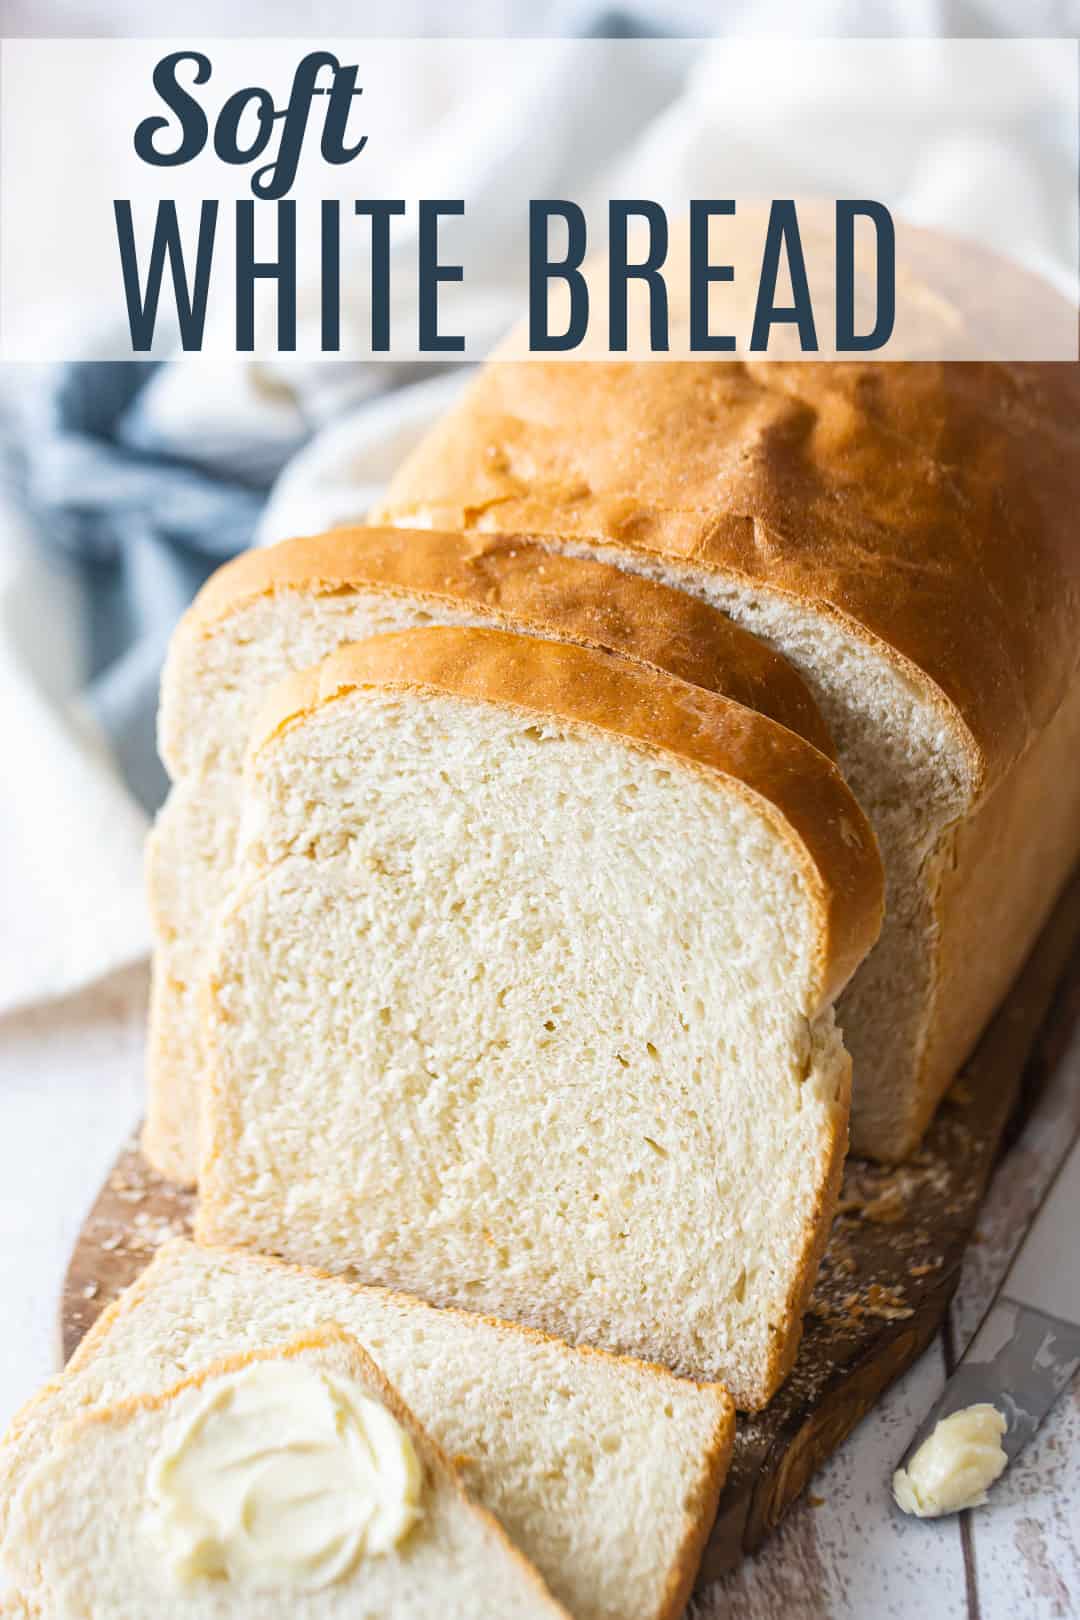
This pillowy soft white bread recipe will be your new favorite! Straightforward and easy to make, and it bakes up so soft and fluffy! A perfect sandwich bread.

Table of Contents
- Why you’ll love this white bread recipe
- White Bread Ingredients
- How to Make Homemade Soft White Bread
- Expert Tips
- Variations
- How to Serve
- Recipe FAQS
- How to Store
- How to Freeze the Dough
- Serving Size
- More homemade bread recipes you’ll enjoy
It’s a brand new year!
And I’m kicking it off with a basic recipe that you’ll love having in your back pocket: white bread!
I don’t know about you, but in my family, we go through A LOT of bread. It gets toasted at breakfast time, and made into sandwiches for lunch. We even eat it with our dinner a lot, buttered and served as sort of a side dish or appetizer.
We have several favorites, such as this soft whole wheat bread, crusty French baguette, and this brioche. They are all so good, but nothing is more versatile than a simple white loaf.
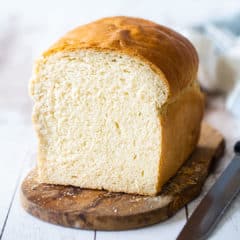
So today I’m sharing our favorite white loaf bread recipe.
This bread bakes up with a soft, fluffy texture and a taste that’s perfectly balanced. It really is the best sandwich bread out there, imho!
And best of all, the recipe couldn’t be easier to make! With just a handful of ingredients and a method that’s simple as can be, this white bread recipe is sure to be on heavy rotation in your kitchen.
Why you’ll love this white bread recipe
Freshness: When you make white bread at home, you can enjoy it at its freshest. There’s nothing quite like the aroma and taste of a warm loaf from the oven! You have complete control over the ingredients and can ensure your bread is free from the preservatives and additives commonly found in store-bought bread.
Customization: This great recipe allows you to customize it to suit your preferences. You can adjust the sweetness and saltiness or add ingredients like herbs, spices, or seeds to enhance the flavor. You can experiment and create a bread that suits your taste perfectly.
Quality Ingredients: You can choose high-quality ingredients when you make your own white bread. Choose organic flour, locally sourced ingredients, or specialty flours to create bread that meets your personal quality standards.
Nutritional Value: Homemade white bread can be a healthier alternative to store-bought varieties. You control the sugar, salt, and fats used in the recipe. Additionally, you can incorporate whole wheat or other nutritious flour to increase your bread’s fiber and nutrient content.
Cost-Effective: Making white bread at home can be more cost-effective in the long run. The initial investment in ingredients and equipment may seem higher, but you can produce multiple loaves for the same price as a single store-bought loaf. It can save you money, especially if you bake bread regularly.
White Bread Ingredients
Water
Water activates the yeast. Yeast is dormant until it comes into contact with warm water, which triggers fermentation. The water provides comfy environment for the yeast to feed on sugars and release carbon dioxide gas, causing the dough to rise.
When you dissolve the yeast, the water should be warm but not hot, like a baby’s bath. Aim for around 105 degrees F. If the water is too hot, it can kill the yeast.
Yeast
I prefer dry active yeast for bread baking. It allows a slow enough rise for the flavor to really develop, and it’s easy and convenient to buy and store.
Instant yeast is another option. If you go this route, you’ll only need 0.75x the amount, and you can cut the rise times down by 15 to 20 minutes.
Either way, be sure to check the expiration date on the packet and make sure it hasn’t past. If it has, the yeast could be dead and your bread won’t rise properly.
Sugar
Sugar is a food source for the yeast, providing it with the necessary fuel to grow and multiply.
Sugar adds sweetness (obvs!) but it also aids in browning and keeps things moist, since it’s hydrophilic (this means it loves water, in other words, it draws moisture in). Regular white sugar is fine, or sub for another type of sweetener if you like. As long as it swaps 1:1 for granulated sugar it should work.
Butter
Butter enhances bread’s flavor while also helping it to retain moisture.
It also aids in the golden brown finish.
I like to use unsalted butter because it lets me control the amount of salt in the dish. Different brands of butter can contain different amounts of salt, so this way you get a more consistent result.
For a vegan or dairy free frosting recipe, use a plant-based butter that can substitute for dairy butter 1:1.
Salt
Salt carries the flavors and intensifies them. The end result won’t taste salty, but it will make everything so much more flavorful! I like kosher salt best because it doesn’t have any additives (table salt usually contains iodine and that can leave a bitter taste), so the flavor is pure. It’s also inexpensive and easy to find in a regular grocery store.
Flour
Flour provides the protein content needed for gluten development, and the starch content necessary for a tender crumb.
Bread flour is my favorite for this recipe, because it has a higher protein content and therefore yields a strong crumb and a chewy texture.
If you don’t want to use bread flour, all-purpose flour will work. You may just have to knead it a little longer to develop the glutens needed for that chewy texture.
Special equipment
You don’t need any special equipment to make this recipe. Just a few standard kitchen tools:
- Mixing bowl: To make the dough
- Measuring cups & spoons: To measure the ingredients
- Plastic wrap: To cover the dough while it’s rising
- Non-stick spray: So the plastic doesn’t stick to the dough
- Loaf pan: To bake the bread in
- Wire rack: On which to cool the loaf after baking
How to Make Homemade Soft White Bread
Step 1: Proof the yeast
Start by proofing the yeast in a large bowl. Dissolve a little sugar in warm water, then sprinkle active dry yeast all over the surface.
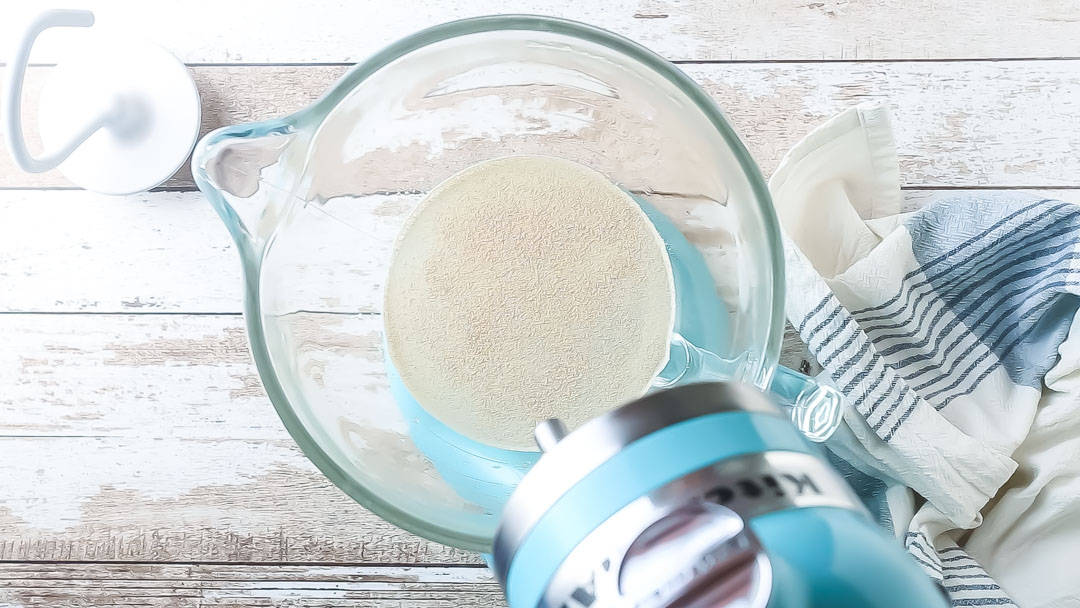
The water should be warm but not hot. Think of the temperature you’d make a baby’s bath: a little warmer than body temp. If the water is too hot, it could kill the yeast, and your bread won’t rise.
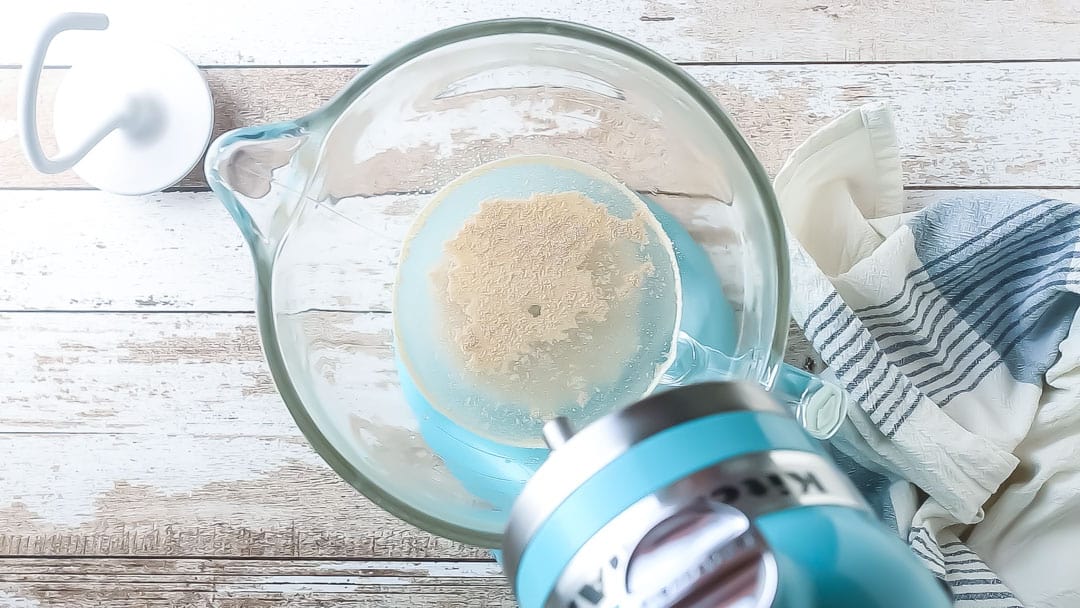
After about 5 minutes, the yeast mixture will have dissolved, and the mixture will look kinda foamy. This is how you know your yeast is working!
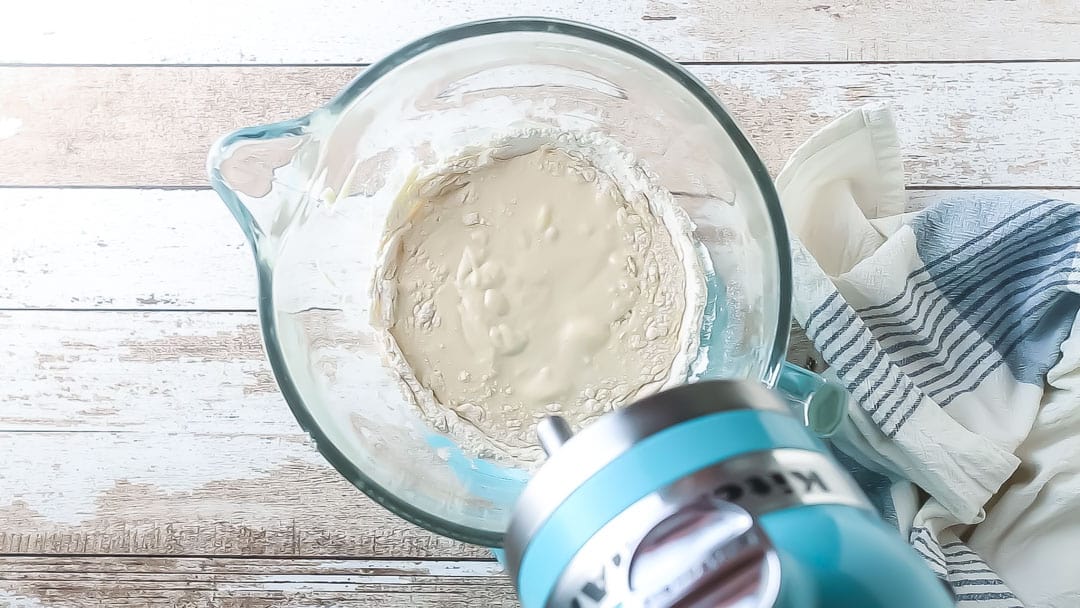
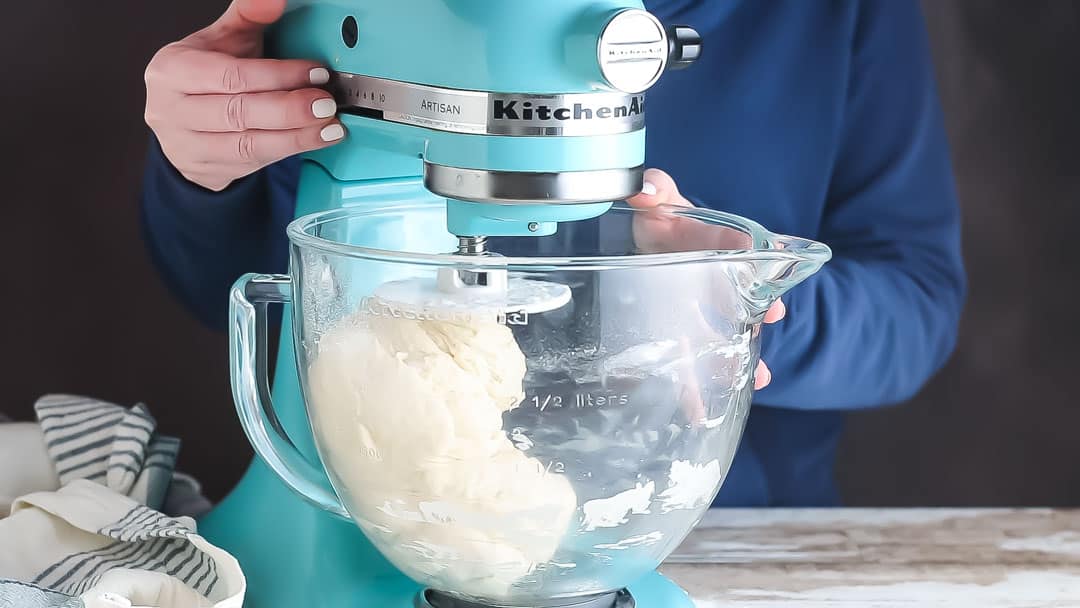
Step 2: Make the Dough
Mix in about 2 1/2 cups of the flour, along with the butter.
Once that’s all incorporated, knead in the salt and continue adding another 1 to 2 cups of flour, a little at a time.
When the dough gathers itself into a ball and pulls away from the sides of the bowl cleanly, you can stop adding flour. It should feel moist but not overly sticky.
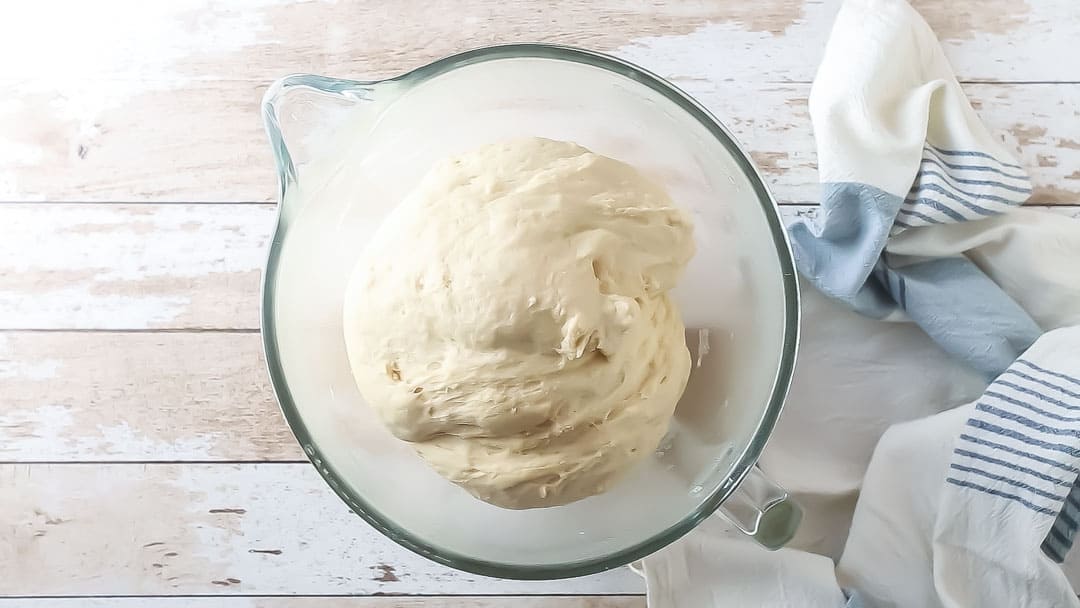
Step 3: Knead the dough & let it rise
Kneading the dough is especially important in this recipe.
It’s what creates that soft, pillowy, yet slightly chewy and elastic texture that’s so satisfying!
If you don’t knead the dough for long enough, your bread will be crumbly.
Now give it the windowpane test: Pinch off a little piece of dough and using your fingertips, stretch it gently from the center outward. You should be able to pull it tissue-thin without it tearing. It should be so thin you can see light passing through it, just like a windowpane.
Next just mist your bowl with a little non-stick spray, pop the dough back in, cover it lightly, and allow it to rise until it’s twice its original size.
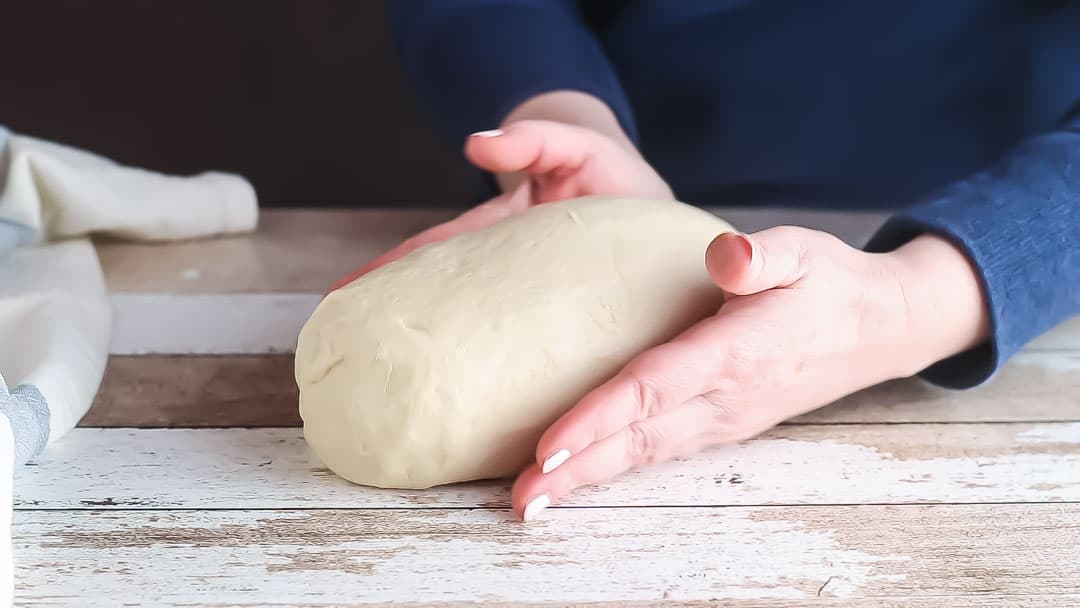
Step 5: Shape the loaf & let it rise
Once the dough has grown, punch it back down, releasing the air, and knead it a few times on a lightly floured surface, creating an elongated loaf shape.
Place the unbaked dough in a loaf pan and cover it with a sheet of plastic wrap misted with cooking spray.
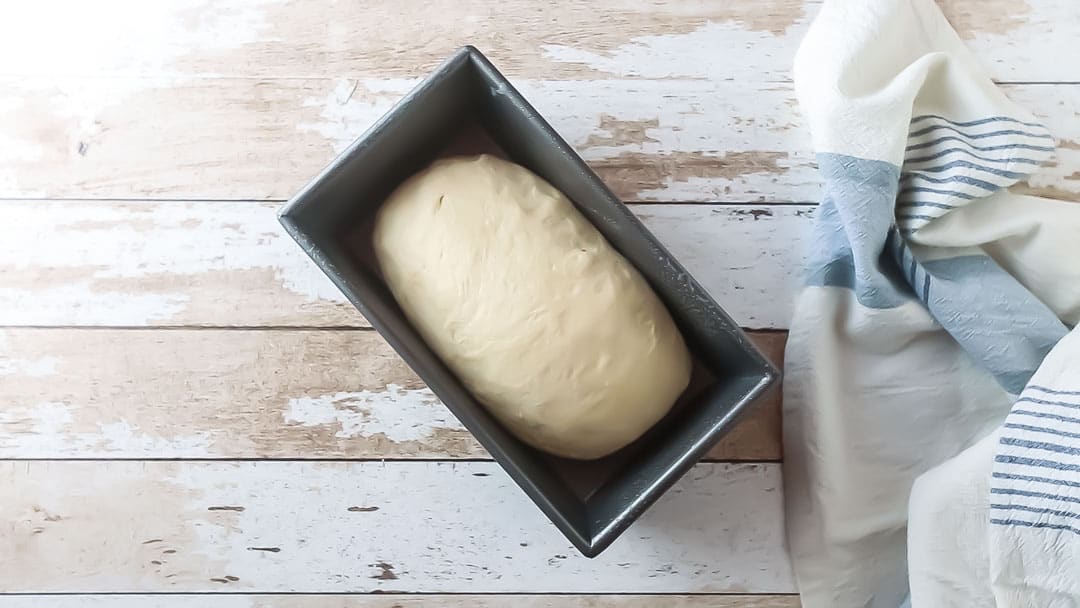
Allow the dough to rise a second time. You’ll know it’s ready to bake when it’s grown to twice its original size.
Step 7: Bake the bread
Bake your loaf in a preheated oven until it looks golden brown and puffy. You’ll know your bread is done baking when it feels light and makes a hollow sound when tapped.
Expert Tips
Measure accurately
Precise measurement can be so important in baking!
Be sure to follow this guideline when prepping your ingredients: How to Measure Ingredients for Baking.
Treat the yeast gently
When proofing the yeast, use warm water within the recommended temperature range (usually around 105-110°F or 40-43°C).
Water that is too hot can kill the yeast, while water that is too cold may take longer to activate.
Add a small amount of sugar to the warm water to help wake up the yeast.
Add the flour in gradually
When making bread, the amount of flour called for is only an estimate. It can vary based on several different factors.
You’ll probably need anywhere from 3 1/2 to 4 1/2 cups of flour to make this bread. Start with 2 1/2 cups and add more if the dough is too sticky. Once it gathers itself into a ball and pulls cleanly away from the sides of the bowl, stop adding flour.
Knead the dough well
Kneading develops the glutens, giving the bread structure and elasticity. This is what gives yeast breads that chewy, stretchy quality that’s so satisfying!
If you don’t knead the dough enough, your bread will come out crumbly.
Be sure to knead for at least 10 minutes, or until the dough passes the windowpane test. It should be smooth and elastic, and it should spring back when gently pressed.
This will ensure a well-risen, airy loaf that’s not too crumbly.
Allow proper rising time
The rise time can vary by quite a bit. Be sure to keep a close eye on it.
You’ll know it’s time to move on to the next step when the dough looks twice as big as it was when it started out.
If it doesn’t get enough time to rise, it will have a tight, gummy texture. If it rises for too long, the gluten structure will weaken and the bread won’t puff up as it bakes.
Either way, the bread will bake up smaller than it should, so just keep your eye on it and when it’s twice its original size, it’s time to move on to the next step.
Make overnight white bread
If you’d like to break up the prep a little bit, this recipe can be made as overnight soft white bread.
Once the loaf has been shaped, cover it with oiled plastic wrap and keep it in the fridge for up to 48 hours, or in the freezer for up to 2 weeks.
On the day you’d like to bake it, take it out, allow it to come to room temperature then rise to twice its original size, and go on with the recipe as usual from there.
Let it cool before slicing:
Allow the bread to cool on a wire rack before slicing. This helps it to stay moist and prevents it from becoming misshapen.
Cutting into warm bread can cause it to become gummy and dry.
Variations
Gluten-free white bread
A gluten-free flour blend that can sub 1:1 for all-purpose flour should work well here.
Dairy-free or vegan white bread
Swap in any kind of plant-based butter that can sub 1:1 for dairy butter.
Soft whole-grain bread
If you’d like to make a whole wheat version of this, click here for the specifics: Soft Whole Wheat Bread.
Customization
Feel free to adjust the sweetness and saltiness or add ingredients like herbs, spices, or seeds to enhance the flavor of your white bread.
Go ahead and experiment! Create a bread that suits your own tastes.
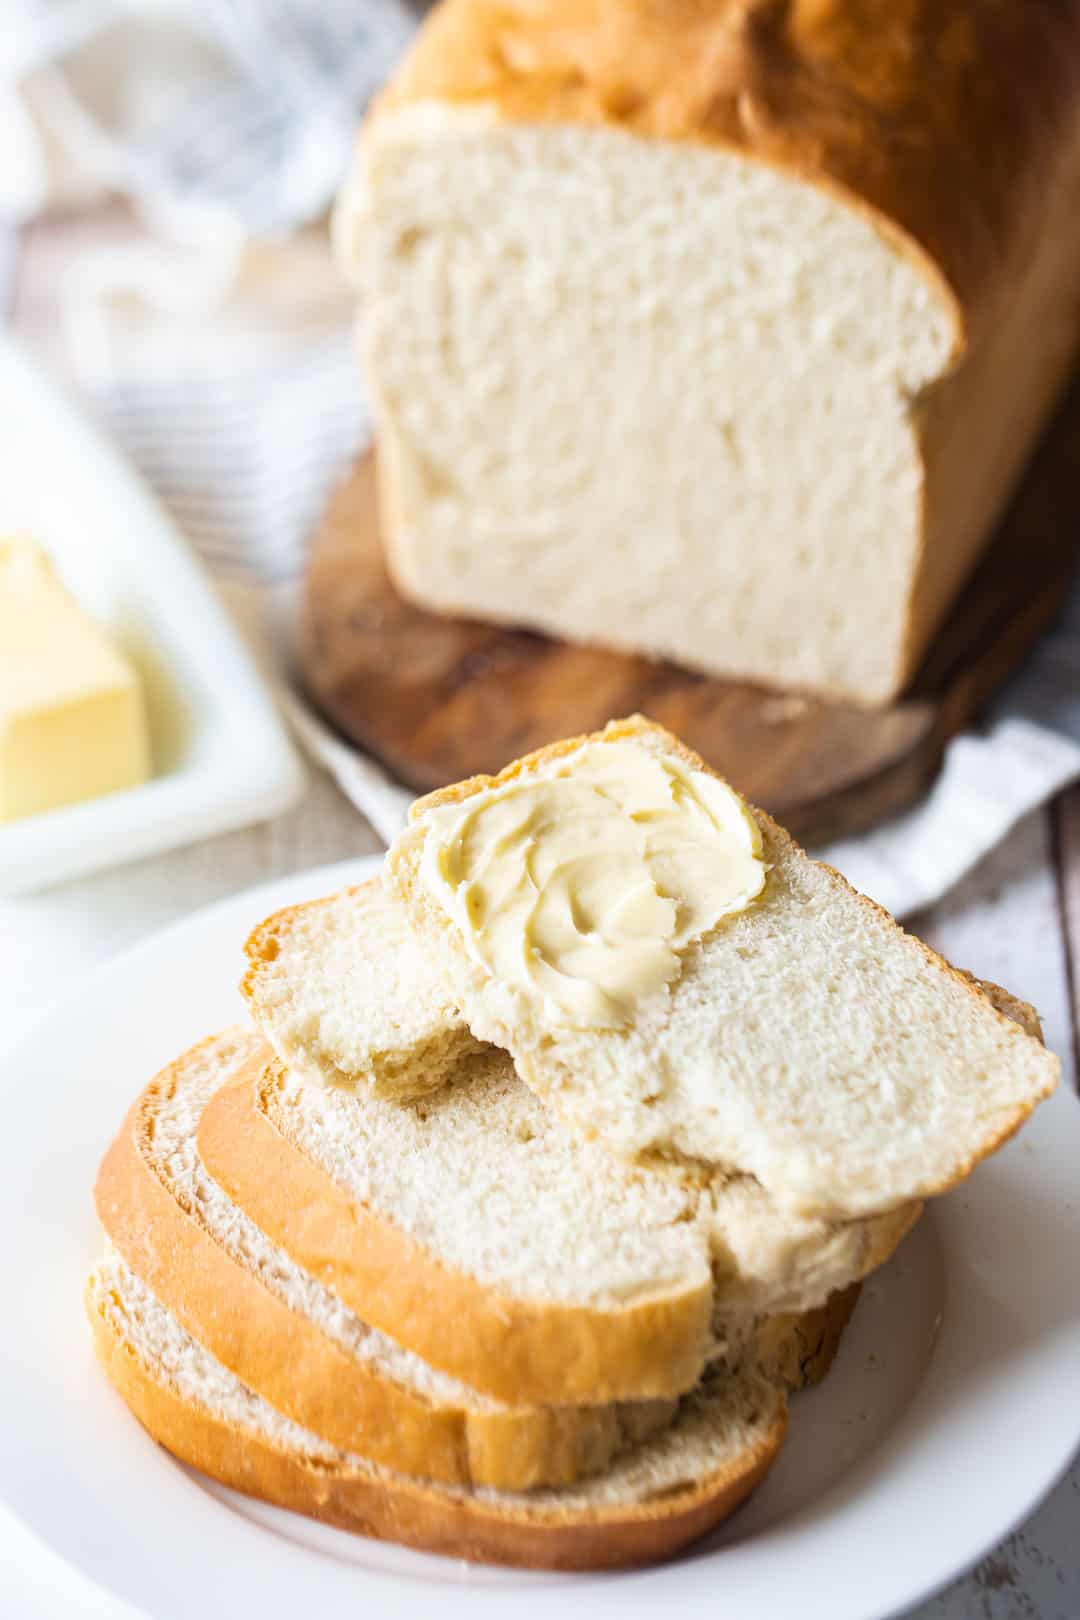
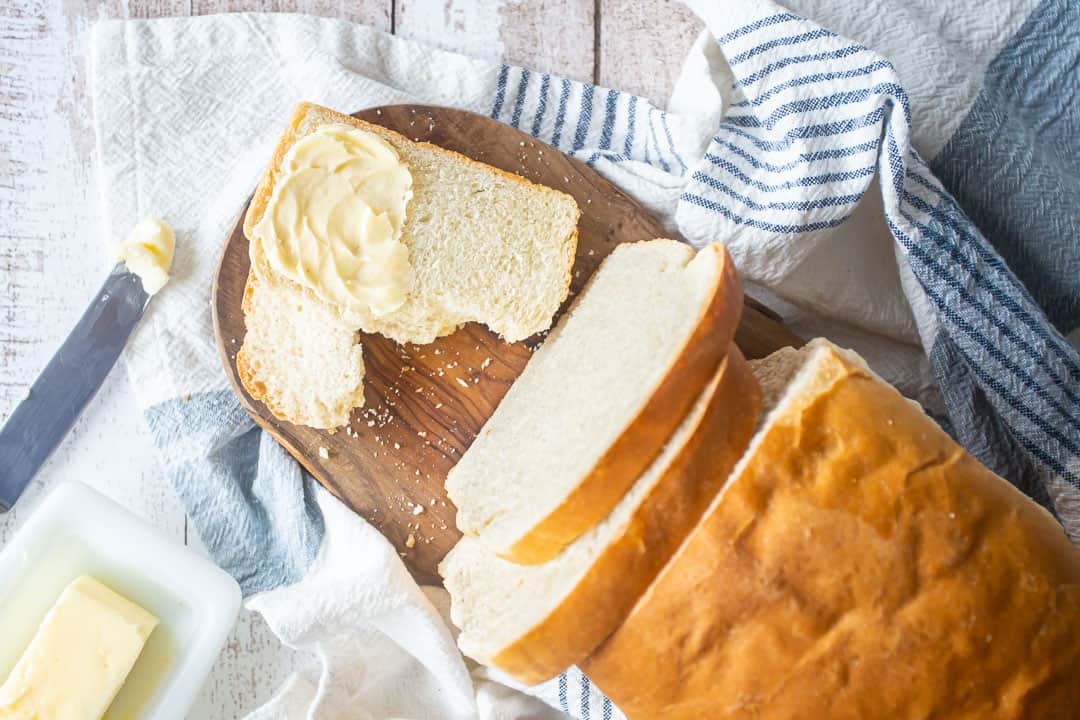
How to Serve
Freshly Sliced Loaf
Serve the bread as a classic loaf, sliced and ready to be enjoyed.
You can offer it as a side with meals or use it to make sandwiches or tartines.
Or make an out-of-this-world peanut butter and jelly sandwich!
Toast
Toast it up and try spreading it with soft butter and a little jam, marmalade, or apple butter. Or sprinkle it with cinnamon sugar to make cinnamon toast!
Enjoy it as a base for avocado toast, French toast, or bread pudding.
Sandwiches
This homemade white bread is perfect for sandwiches!
Layer it with your favorite fillings like deli meats, cheeses, veggies, pickles, spreads, and condiments.
You can make classic sandwiches like BLTs and club sandwiches or get creative with your unique combinations.
Croutons
Cut the bread into small cubes, toss them with olive oil, herbs, and spices, and bake until crispy. Use the croutons to top salads or soups for a crunch and flavor.
Recipe FAQS
Yes, you can leave the sugar out. Just be aware that the bread will need more time to rise because the yeast won’t have as much to feed off of.
You might also notice that the shelf life of the bread will be cut short. Bread made without sugar tends to go stale more quickly.
Yes, you can make this bread in a bread machine.
I use my stand mixer for almost everything, including bread making.
But if you prefer to use a bread machine, it should work well with this recipe.
If you don’t have either, that’s fine too! You can mix this white bread up and knead it by hand. It’s very easy to do!
Yes, you can! Making bread dough ahead can be a great way to save time.
This dough will keep for up to 48 hours in the fridge or 2 weeks in the freezer. Any longer than that, and the yeast will start to die off.
This recipe is not gluten-free, and I have not tested it as such, but if you have a gluten-free flour blend that subs 1:1 for regular flour, I think that would work well as a replacement for the all-purpose flour.
I recommend using King Arthur Flour Gluten-Free Measure for Measure, Bob’s Red Mill Gluten-Free All-Purpose Baking Flour, or Cup4Cup Multi-Purpose Gluten-Free Flour,
How to Store
This white bread will keep at room temperature for up to a week.
Just keep it tightly wrapped so it doesn’t dry out.
It will last around 2 weeks in the fridge, or in the freezer for 1 to 2 months.
How to Freeze the Dough
The raw dough can be frozen after its first rise.
Punch it down and place it in an airtight container. It will keep in the freezer for about 2 months. (Any longer than that can kill the yeast.)
Then thaw it to room temp, shape it, allow it to rise a second time, and bake it off.
Serving Size
This recipe makes one loaf of bread.
The nutritional info in the recipe card below is for one slice of bread, assuming that you slice the bread into 12 equal slices, as shown here.
If you want to make two loaves of bread, just double this recipe.
More homemade bread recipes you’ll enjoy
- Soft Homemade Dinner Rolls
- Soft Italian Breadsticks
- Easy Homemade Croissant Recipe
- Homemade Cinnamon Bread
As an amazon associate I earn from qualifying purchases.
Soft White Bread
Ingredients
- 1 1/2 cups (354.88 g) warm water
- 3 tablespoons (44.36 g) granulated sugar
- 1/4 ounce (7.09 g) active dry yeast*, (1 packet or about 2 teaspoons)
- 3 tablespoons (44.36 g) unsalted butter,, softened
- 3 3/4 cup (468.75 g) bread flour, (you may need as much as 4 1/2 cups)
- 3/4 teaspoon (3.7 g) salt
Instructions
- Place the warm water and sugar in a large bowl and sprinkle the yeast on top. Set aside for 5 minutes to allow the yeast to proof.
- Add the butter and 2 1/2 cups of the flour, and beat on medium speed for 3 minutes.
- Stir in an additional 1 to 2 cups of flour, along with the salt, a little at a time, mixing until the dough gathers itself into a ball and pulls away cleanly from the sides of the bowl.
- Continue to knead until the dough is smooth and elastic and it passes the windowpane test** (at least 10 minutes).
- Place the dough in a large greased bowl, and cover lightly with plastic wrap. Allow it to rise in a warm place until doubled in size (approx. 30 to 45 minutes).
- Lightly mist a 5-cup loaf pan with non-stick spray.
- Punch down the dough and shape it into a loaf.
- Place the dough in the prepared pan, cover it loosely with greased plastic wrap, and allow it to rise in a warm place until doubled in size (approx. 30 to 45 minutes).
- Preheat the oven to 350 degrees F.
- Uncover the dough and bake until puffy, golden, and light (approx. 40 to 45 minutes). It should make a hollow sound when tapped.


Easy to follow and makes great bread. Thank you.
Have made this bread 2x now. Very nice! The only change I made is to use olive oil instead of butter. Quite, light and tasty.
One more question — is kneading time still 10 min. when using my stand mixer for that process? TY once again for a response.
Yes!
Thank you for your prompt reply to.my questions.
Can I assume that ,when using instant yeast, I don’t need to proof it? Also, I’m new to bread baking and I need to know ,do you use the dough book for all of the kneading that needs to be done. TY for a response.
I would prove it anyway just to make sure it’s not dead. And you can use the dough hook or knead it by hand, whichever you prefer. Good luck!
What size pan should I use? It seems like my bread ends up to big and overflows or to small.
A 5-cup loaf pan. Good luck!
Can I use bread flour instead of all-purpose?
Yes!
I see you have information about leaving sugar out of the recipe. What about replacing with honey? Is that possible? How much?
Yes- honey can be substituted in equal measure. Enjoy!
I have made this bread 3 times now and although it is a wonderful bread i am unable to get the bread to stay together to make a sandwich with it . What could i be doing wrong ?It is sliceable just falls apart afterwards.
You need to knead it longer. YOu haven’t developed the glutens enough and that is why it is crumbly.
I am in the middle of the second rising (in the pan) when our power has gone out. It will be several hours before it’s back on. Is this going to mess up my bread?
Is your oven electric? If so then you might want to put it in the fridge to slow down the rise.
Can you sub solid coconut oil for the butter in this recipe.
I have not tried that so I’m afraid I can’t say for sure. Good luck!
This recipe is amazing. I made this by hand and it’s so easy. This is the fluffiest, most well-risen loaf I have ever made.
My bread tends to come out of the oven a funny shape- this means it’s not much good for sandwiches! However, this one tastes like it’s straight out of the store and is a lovely loaf shape.
I was a bit too eager to remove from the tin- I’d recommend leaving in the tin to fully cool if you can. When I tried to remove it too early I left some crust behind! ):
It’s all in the second prove and making sure your pan is well oiled/ greased. I’ve taken to using cooking oil. I might experiment with a glaze next time… Has anyone done this?
Thanks so much for this recipe, it’s perfect.
Thanx for advice keep on doing more
Can i use bread flour for this recipe?
Hello, I don’t usually post comments but I have to say this is the best and easiest bread recipe I have come across. I have had many failures at bread making but this was a total success and my family is asking for more! Love it!
What tempremature should I bake the bread in a fan forced oven