

Soft White Bread Recipe
As an amazon associate I earn from qualifying purchases.
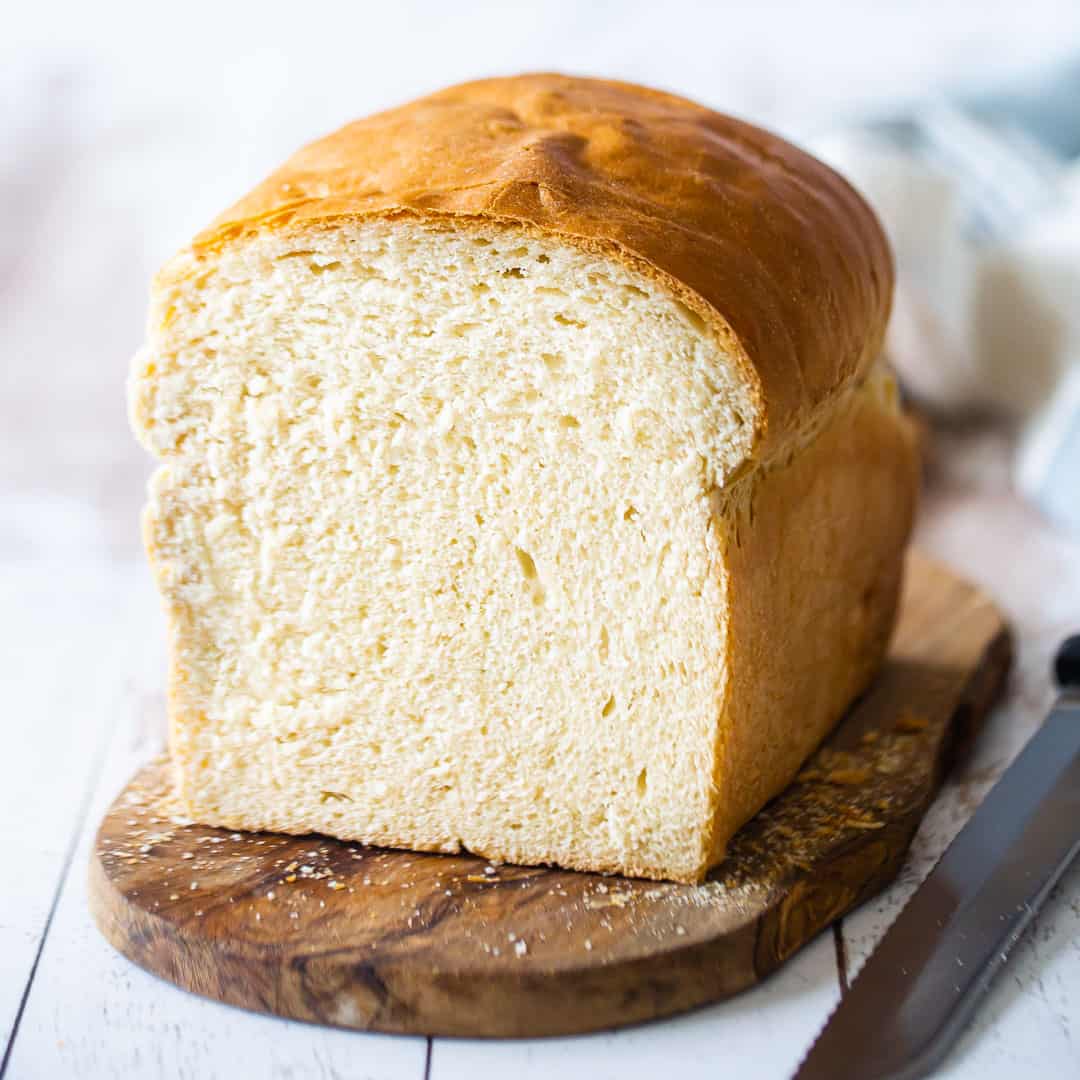
This pillowy Soft White Bread Recipe will be your new favorite! Straightforward and easy to make, and it bakes up so soft and fluffy! A perfect sandwich bread.
Featured Review
"I've been baking for years and this might be the best white bread recipe I've made. It took a lot of kneading to get the gluten to where I wanted it but it was worth the effort, it's a great loaf. Thank you for the recipe!" -Bella
★★★★★
I don't know about you, but in my family, we go through A LOT of bread. It gets toasted at breakfast time, and made into sandwiches for lunch. We even eat it with our dinner a lot, buttered and served as sort of a side dish or appetizer.
We have several favorites, such as this soft whole wheat bread, crusty French baguette, and this brioche. They are all so good, but nothing is more versatile than a simple white loaf.
So today I'm sharing our favorite white loaf bread recipe.
This bread bakes up with a soft, fluffy texture and a taste that's perfectly balanced. It really is the best sandwich bread out there, imho!
And best of all, the recipe couldn't be easier to make! With just a handful of ingredients and a method that's simple as can be, this white bread recipe is sure to be on heavy rotation in your kitchen.
Here's Why You'll Love This Recipe
- It is so fresh: When you make white bread at home, you can enjoy it at its freshest. There's nothing quite like the aroma and taste of a warm loaf from the oven! You have complete control over the ingredients and can ensure your bread is free from the preservatives and additives commonly found in store-bought bread.
- Customizable: This great recipe allows you to customize it to suit your preferences. You can adjust the sweetness and saltiness or add ingredients like herbs, spices, or seeds to enhance the flavor. You can experiment and create a bread that suits your taste perfectly.
- Quality Ingredients: You can choose high-quality ingredients when you make your own white bread. Choose organic flour, locally sourced ingredients, or specialty flours to create bread that meets your personal quality standards.
- Cost-Effective: Making white bread at home can be more cost-effective in the long run. The initial investment in ingredients and equipment may seem higher, but you can produce multiple loaves for the same price as a single store-bought loaf. It can save you money, especially if you bake bread regularly.
Ingredients You'll Need
The recipe card at the bottom of the post contains the full list with all of the amounts. Refer to that when you're cooking.
- Water: Water activates the yeast. Yeast is dormant until it comes into contact with warm water, which triggers fermentation. The water provides comfy environment for the yeast to feed on sugars and release carbon dioxide gas, causing the dough to rise. When you dissolve the yeast, the water should be warm but not hot, like a baby's bath. Aim for around 105 degrees F. If the water is too hot, it can kill the yeast.
- Yeast: I prefer dry active yeast for bread baking. It allows a slow enough rise for the flavor to really develop, and it's easy and convenient to buy and store. Instant yeast is another option. If you go this route, you'll only need 0.75x the amount, and you can cut the rise times down by 15 to 20 minutes. Either way, be sure to check the expiration date on the packet and make sure it hasn't past. If it has, the yeast could be dead and your bread won't rise properly.
- Sugar: Sugar is a food source for the yeast, providing it with the necessary fuel to grow and multiply. Sugar adds sweetness (obvs!) but it also aids in browning and keeps things moist, since it's hydrophilic (this means it loves water, in other words, it draws moisture in). Regular white sugar is fine, or sub for another type of sweetener if you like. As long as it swaps 1:1 for granulated sugar it should work.
- Butter: Butter enhances bread's flavor while also helping it to retain moisture. It also aids in the golden brown finish. I like to use unsalted butter because it lets me control the amount of salt in the dish. Different brands of butter can contain different amounts of salt, so this way you get a more consistent result. For a vegan or dairy free frosting recipe, use a plant-based butter that can substitute for dairy butter 1:1.
- Salt: Salt carries the flavors and intensifies them. The end result won't taste salty, but it will make everything so much more flavorful! I like kosher salt best because it doesn't have any additives (table salt usually contains iodine and that can leave a bitter taste), so the flavor is pure. It's also inexpensive and easy to find in a regular grocery store.
- Flour: Flour provides the protein content needed for gluten development, and the starch content necessary for a tender crumb. Bread flour is my favorite for this recipe, because it has a higher protein content and therefore yields a strong crumb and a chewy texture. If you don't want to use bread flour, all-purpose flour will work. You may just have to knead it a little longer to develop the glutens needed for that chewy texture.
Special Equipment
You don't need any special equipment to make this recipe. Just a few standard kitchen tools:
- Mixing bowl: To make the dough
- Measuring cups & spoons: To measure the ingredients
- Plastic wrap: To cover the dough while it's rising
- Non-stick spray: So the plastic doesn't stick to the dough
- Loaf pan: To bake the bread in
- Wire rack: On which to cool the loaf after baking
In Photos: How To Make Soft White Bread
Step 1: Proof Yeast
Start by proofing the yeast in a large bowl. Dissolve a little sugar in warm water, then sprinkle active dry yeast all over the surface.
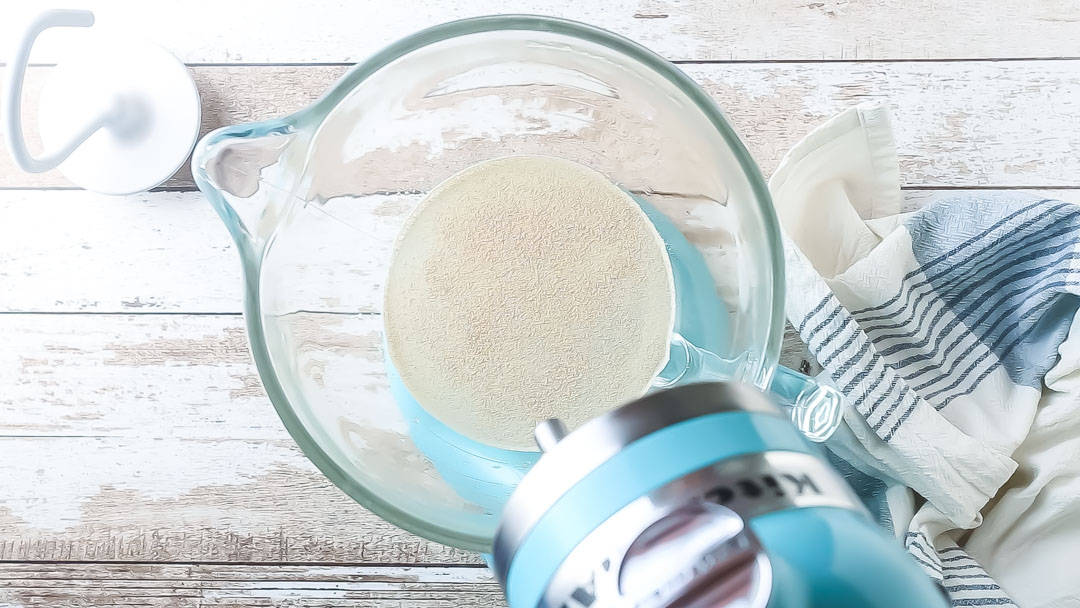
The water should be warm but not hot. Think of the temperature you'd make a baby's bath: a little warmer than body temp. If the water is too hot, it could kill the yeast, and your bread won't rise.
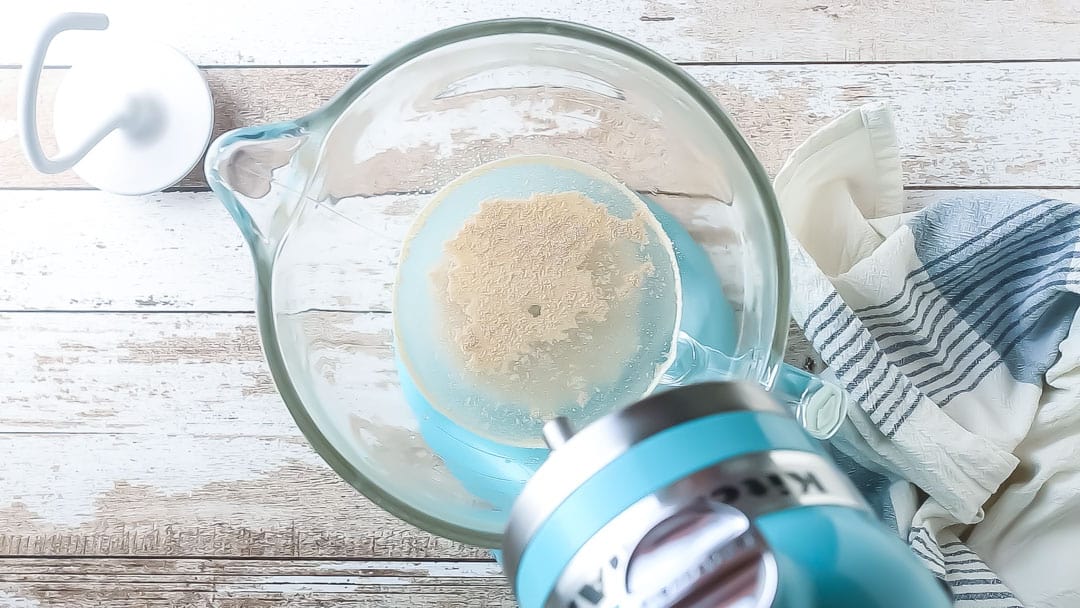
After about 5 minutes, the yeast mixture will have dissolved, and the mixture will look kinda foamy. This is how you know your yeast is working!
Step 2: Make Dough
Mix in about 2 ½ cups of the flour, along with the butter.
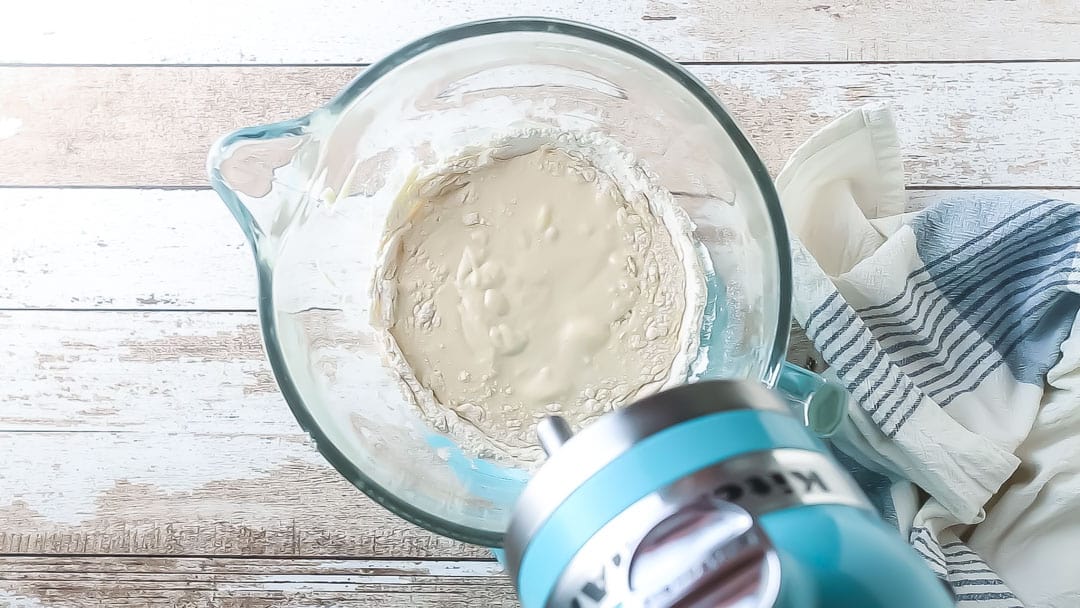
Once that's all incorporated, knead in the salt and continue adding another 1 to 2 cups of flour, a little at a time.
When the dough gathers itself into a ball and pulls away from the sides of the bowl cleanly, you can stop adding flour. It should feel moist but not overly sticky.
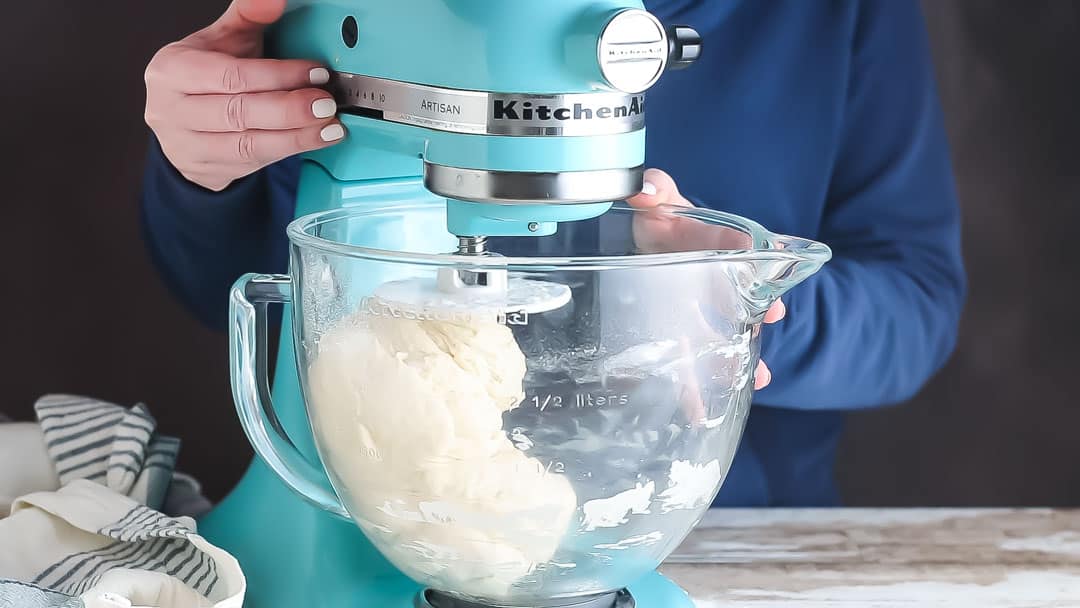
Step 3: Knead & Let Rise
Kneading the dough is especially important in this recipe.
It's what creates that soft, pillowy, yet slightly chewy and elastic texture that's so satisfying!
If you don't knead the dough for long enough, your bread will be crumbly.
Now give it the windowpane test: Pinch off a little piece of dough and using your fingertips, stretch it gently from the center outward. You should be able to pull it tissue-thin without it tearing. It should be so thin you can see light passing through it, just like a windowpane.
Next just mist your bowl with a little non-stick spray, pop the dough back in, cover it lightly, and allow it to rise until it's twice its original size.
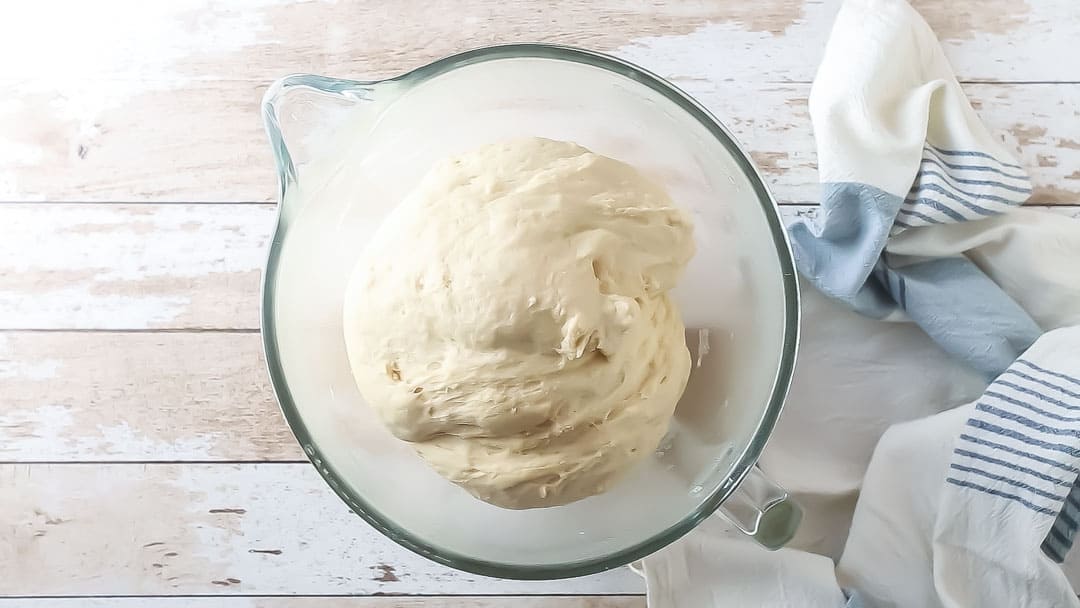
Step 5: Shape Loaf & Let Rise
Once the dough has grown, punch it back down, releasing the air, and knead it a few times on a lightly floured surface, creating an elongated loaf shape.
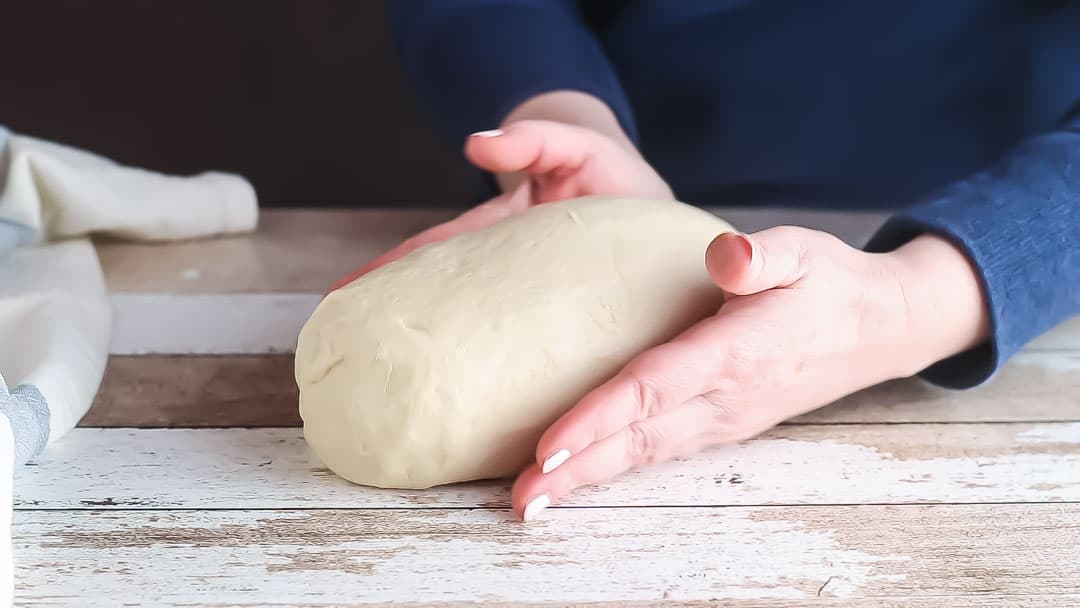
Place the unbaked dough in a loaf pan and cover it with a sheet of plastic wrap misted with cooking spray.
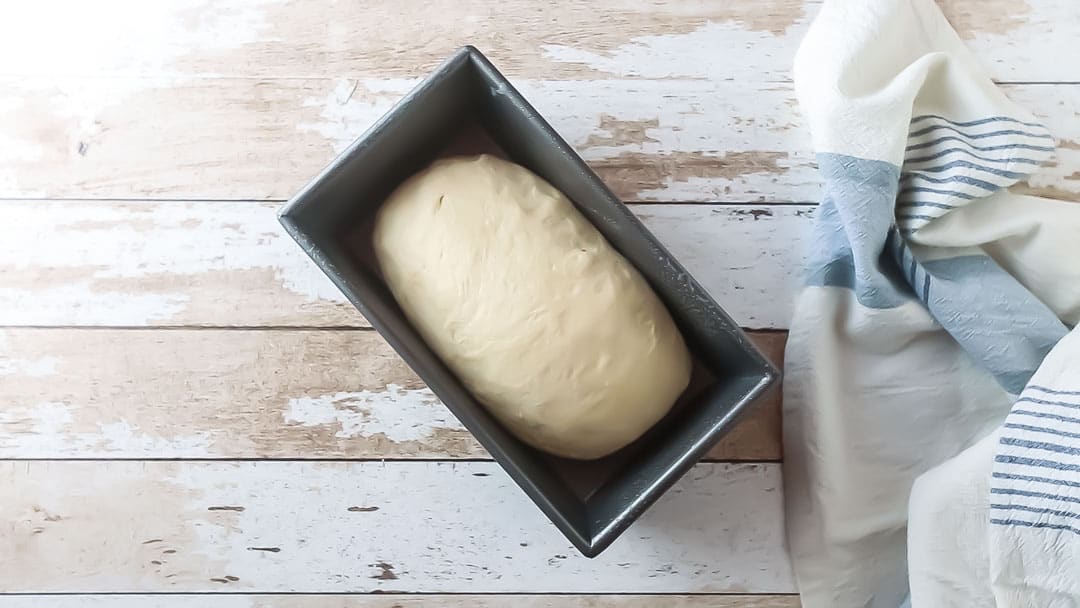
Allow the dough to rise a second time. You'll know it's ready to bake when it's grown to twice its original size.
Step 7: Bake
Bake your loaf in a preheated oven until it looks golden brown and puffy. You'll know your bread is done baking when it feels light and makes a hollow sound when tapped.
Helpful Tips and Tricks
- Measure accurately: Precise measurement can be so important in baking! Be sure to follow this guideline when prepping your ingredients: How to Measure Ingredients for Baking.
- Treat the yeast gently: When proofing the yeast, use warm water within the recommended temperature range (usually around 105-110°F or 40-43°C). Water that is too hot can kill the yeast, while water that is too cold may take longer to activate. Add a small amount of sugar to the warm water to help wake up the yeast.
- Add the flour in gradually: When making bread, the amount of flour called for is only an estimate. It can vary based on several different factors. You'll probably need anywhere from 3 ½ to 4 ½ cups of flour to make this bread. Start with 2 ½ cups and add more if the dough is too sticky. Once it gathers itself into a ball and pulls cleanly away from the sides of the bowl, stop adding flour.
- Knead the dough well: Kneading develops the glutens, giving the bread structure and elasticity. This is what gives yeast breads that chewy, stretchy quality that's so satisfying! If you don't knead the dough enough, your bread will come out crumbly. Be sure to knead for at least 10 minutes, or until the dough passes the windowpane test. It should be smooth and elastic, and it should spring back when gently pressed. This will ensure a well-risen, airy loaf that's not too crumbly.
- Allow proper rising time: The rise time can vary by quite a bit. Be sure to keep a close eye on it. You'll know it's time to move on to the next step when the dough looks twice as big as it was when it started out. If it doesn't get enough time to rise, it will have a tight, gummy texture. If it rises for too long, the gluten structure will weaken and the bread won't puff up as it bakes. Either way, the bread will bake up smaller than it should, so just keep your eye on it and when it's twice its original size, it's time to move on to the next step.
- Make overnight white bread: If you'd like to break up the prep a little bit, this recipe can be made as overnight soft white bread. Once the loaf has been shaped, cover it with oiled plastic wrap and keep it in the fridge for up to 48 hours, or in the freezer for up to 2 weeks. On the day you'd like to bake it, take it out, allow it to come to room temperature then rise to twice its original size, and go on with the recipe as usual from there.
- Let it cool before slicing: Allow the bread to cool on a wire rack before slicing. This helps it to stay moist and prevents it from becoming misshapen. Cutting into warm bread can cause it to become gummy and dry.
Variations & Customizations
- Gluten-free white bread: A gluten-free flour blend that can sub 1:1 for all-purpose flour should work well here.
- Dairy-free or vegan white bread: Swap in any kind of plant-based butter that can sub 1:1 for dairy butter.
- Soft whole-grain bread: If you'd like to make a whole wheat version of this, click here for the specifics: Soft Whole Wheat Bread.
- Adjust sweetness and saltiness: Feel free to adjust the sweetness and saltiness or add ingredients like herbs, spices, or seeds to enhance the flavor of your white bread.
- Go ahead and experiment! Create a bread that suits your own tastes.
How to Serve Soft White Bread
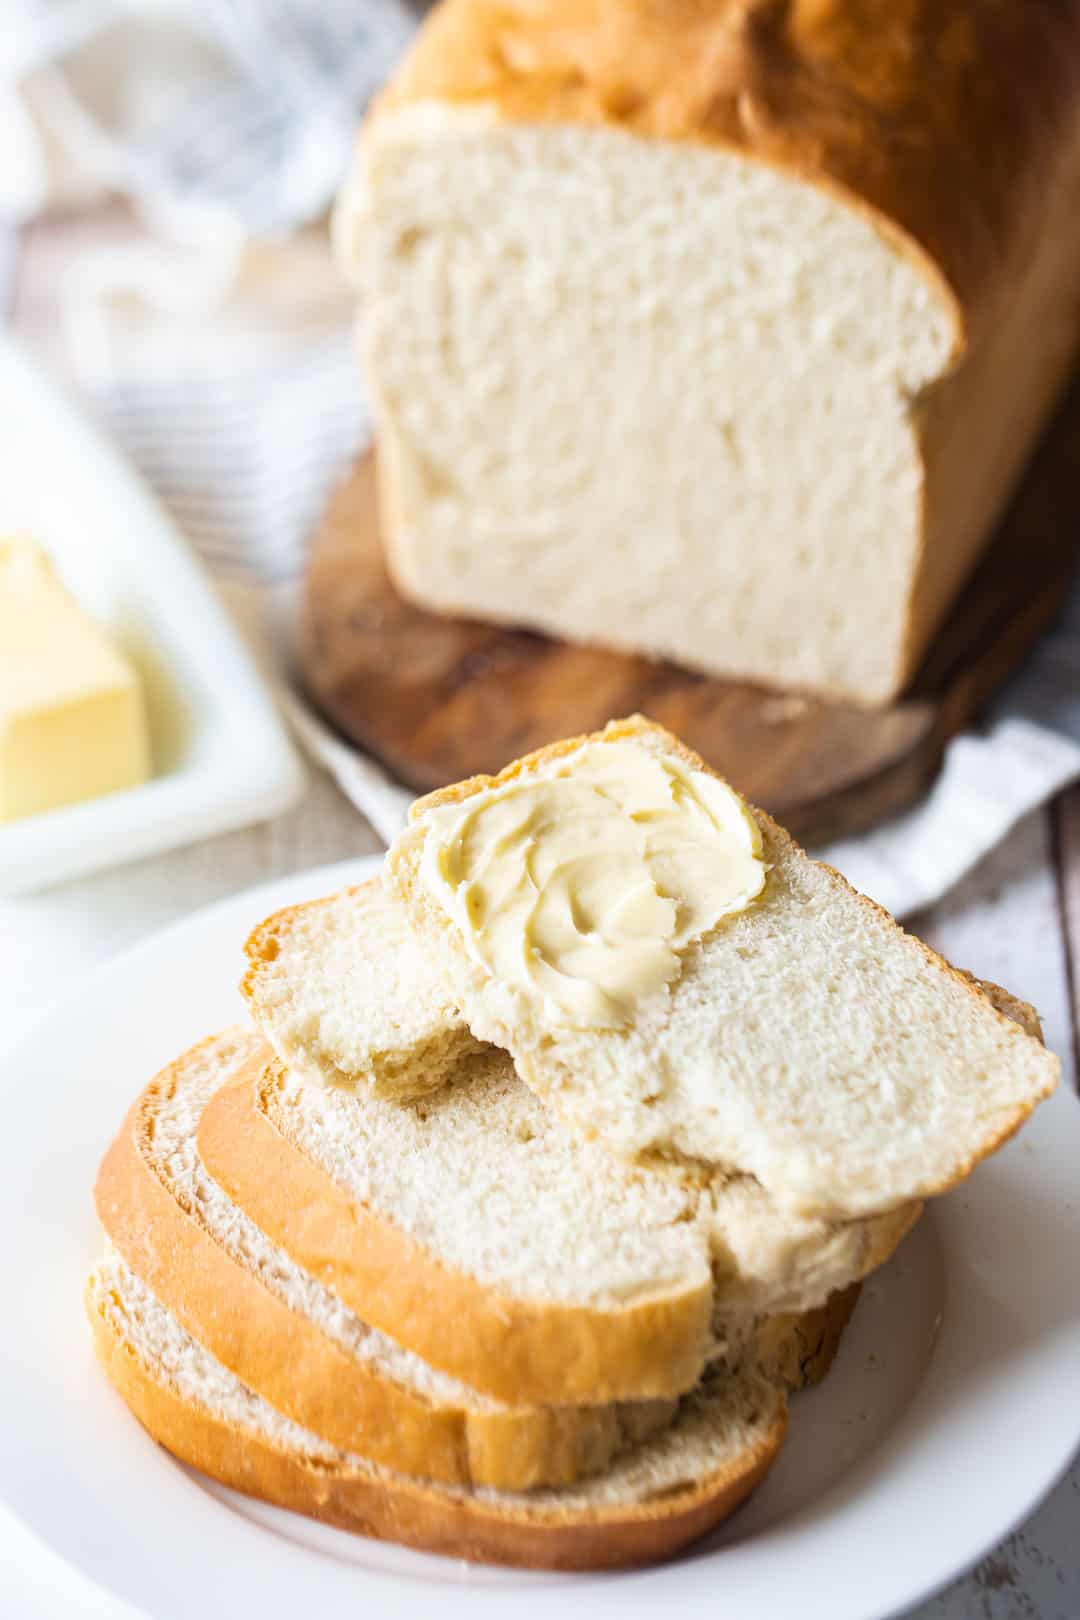
- Freshly Sliced Loaf: Serve the bread as a classic loaf, sliced and ready to be enjoyed. You can offer it as a side with meals or use it to make sandwiches or tartines. Or make an out-of-this-world peanut butter and jelly sandwich!
- Toast: Toast it up and try spreading it with soft butter and a little jam, marmalade, or apple butter. Or sprinkle it with cinnamon sugar to make cinnamon toast! Enjoy it as a base for avocado toast, French toast, or bread pudding.
- Sandwiches: This homemade white bread is perfect for sandwiches! Layer it with your favorite fillings like deli meats, cheeses, veggies, pickles, spreads, and condiments. You can make classic sandwiches like BLTs and club sandwiches or get creative with your unique combinations.
- Croutons: Cut the bread into small cubes, toss them with olive oil, herbs, and spices, and bake until crispy. Use the croutons to top salads or soups for a crunch and flavor.
Recipe FAQ
Yes, you can leave the sugar out. Just be aware that the bread will need more time to rise because the yeast won't have as much to feed off of.
You might also notice that the shelf life of the bread will be cut short. Bread made without sugar tends to go stale more quickly.
Yes, you can make this bread in a bread machine. I use my stand mixer for almost everything, including bread making. But if you prefer to use a bread machine, it should work well with this recipe. If you don't have either, that's fine too! You can mix this white bread up and knead it by hand. It's very easy to do!
Yes, you can! Making bread dough ahead can be a great way to save time.
This dough will keep for up to 48 hours in the fridge or 2 weeks in the freezer. Any longer than that, and the yeast will start to die off.
This recipe is not gluten-free, and I have not tested it as such, but if you have a gluten-free flour blend that subs 1:1 for regular flour, I think that would work well as a replacement for the all-purpose flour.
I recommend using King Arthur Flour Gluten-Free Measure for Measure, Bob's Red Mill Gluten-Free All-Purpose Baking Flour, or Cup4Cup Multi-Purpose Gluten-Free Flour,
How to Store
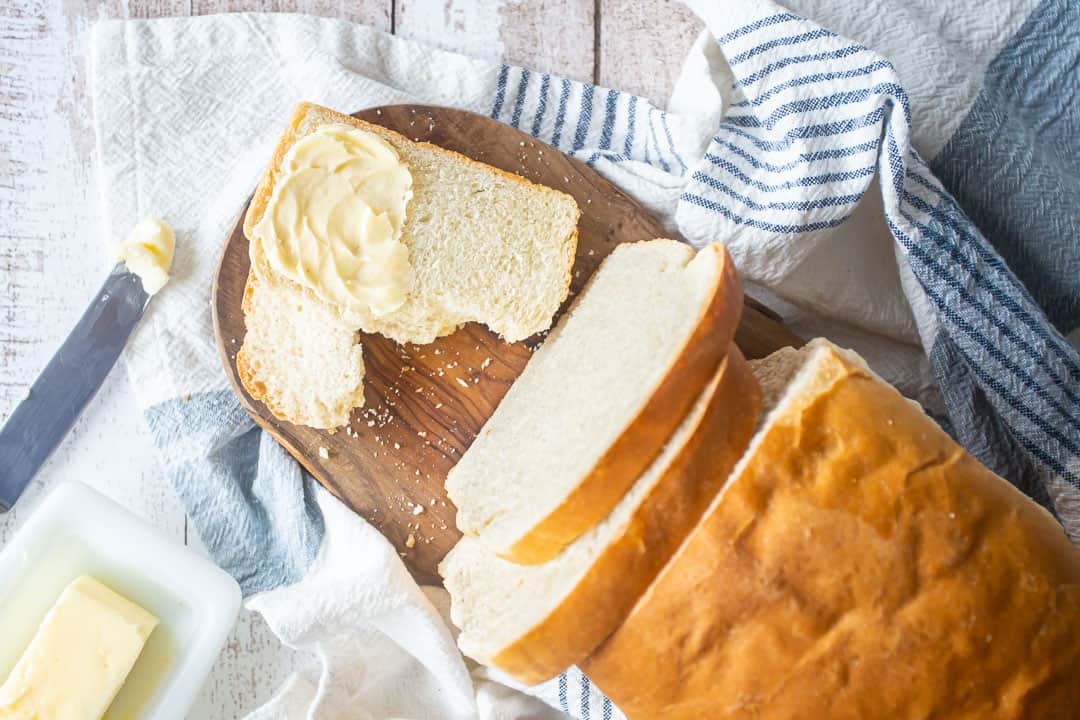
This white bread will keep at room temperature for up to a week. Just keep it tightly wrapped so it doesn't dry out. It will last around 2 weeks in the fridge, or in the freezer for 1 to 2 months.
How to Freeze the Dough
The raw dough can be frozen after its first rise.
Punch it down and place it in an airtight container. It will keep in the freezer for about 2 months. (Any longer than that can kill the yeast.) Then thaw it to room temp, shape it, allow it to rise a second time, and bake it off.
Ingredients
- 1 ½ cups (354.88 g) warm water
- 3 tablespoons (44.36 g) granulated sugar
- ¼ ounce (7.09 g) active dry yeast*, (1 packet or about 2 teaspoons)
- 3 tablespoons (44.36 g) unsalted butter,, softened
- 3 ¾ cup (468.75 g) bread flour, (you may need as much as 4 ½ cups)
- 1 teaspoon (3.7 g) salt
Instructions
- Place the warm water and sugar in a large bowl and sprinkle the yeast on top. Set aside for 5 minutes to allow the yeast to proof.
- Add the butter and 2 ½ cups of the flour, and beat on medium speed for 3 minutes.
- Stir in an additional 1 to 2 cups of flour, along with the salt, a little at a time, mixing until the dough gathers itself into a ball and pulls away cleanly from the sides of the bowl.
- Continue to knead until the dough is smooth and elastic and it passes the windowpane test** (at least 10 minutes).
- Place the dough in a large greased bowl, and cover lightly with plastic wrap. Allow it to rise in a warm place until doubled in size (approx. 30 to 45 minutes).
- Lightly mist a 5-cup loaf pan with non-stick spray.
- Punch down the dough and shape it into a loaf.
- Place the dough in the prepared pan, cover it loosely with greased plastic wrap, and allow it to rise in a warm place until doubled in size (approx. 30 to 45 minutes).
- Preheat the oven to 350 degrees F.
- Uncover the dough and bake until puffy, golden, and light (approx. 40 to 45 minutes). It should make a hollow sound when tapped.
Notes
Author

More Yeast Breads

Have a question about this recipe? Ask AI:
I made this bread today and it is delicious - just like my mother in law's! Amazingly she never used a recipe simply combined the ingredients to make the needed number of loaves. I was wondering is it possible to double or triple the recipe and if so would it be a simple multiple of ingredients?
Hey Allan! So glad you liked it. I think you should be able to double or triple without a problem. Just keep a couple of things in mind: <0l>
Good luck and take care!
Can I use whole milk instead of water?
This turned out fantastic! Could this dough be used to make cinnamon rolls as well?
I have not tried that but it seems like it could work? I usually just use this cinnamon roll recipe: https://bakingamoment.com/homemade-cinnamon-rolls/.
Loved this bread, great easy recipe. Works perfectly in the kitchenaid
Only challenge is that it made a huge loaf!
Next time I may reserve a quarter of the dough and make rolls!
Thanks for the feedback Curtis!
Can i use rapid rise yeast? If i do, do i let it rise twice and do i proof the yeast?
Hey there- here's a great article on how to swap instant for active dry yeast: https://www.thekitchn.com/whats-the-difference-between-active-dry-yeast-and-instant-yeast-54252.
I feel foolish asking this, but this recipe calls for a "5-cup loaf pan" and I don't know what size that is. An 8 by 4 is 4 cups, but an 8.5 by 4.5 is 6 cups. And I usually use a 9X5 pan!
Also, is this dough meant to be slack? I rated the hydration rate at 75%, which I found very high for a pan-baked bread, so I cut it down to 66% and it was still extremely sticky and barely manageable. I have problems with recipes that rely on my knowing what the dough is supposed to "feel like", as I'm still learning. Artisanal loaves give precise gram weights and percentages so you don't have to guess. The volume may shift based on your flour, but the weight remains the same. I came out with a passable loaf that tasted very nice but was dense and a little doughy in the mouth. I baked it to an internal temp of 195, so it was fully baked, and didn't feel doughy to the touch, until I chewed it. Underproofed? Overproofed/collapsed? It passed the windowpane test so I think it had developed enough gluten. I want to love this recipe, but I need more understanding. Thank you!
Loaf pans are most commonly 8x4 or 9x5 inches and they have approximately a 5-cup capacity. A slightly smaller or larger pan should not have a major impact on your final result. Be sure to note step 3 of the recipe, the amount of flour needed can vary quite a bit but the important thing is that the dough gathers itself into a ball and pulls away cleanly from the sides of the bowl. It may be a bit slack, you can see what it looks like in the picture where I'm shaping it before it goes into the pan. If it is too sticky to handle, you can knead in a little more flour or just flour your work surface and your hands to make it easier to work with. I would not recommend cutting back on the water as that is an important ingredient and if you change the recipe that significantly you are not going to get the proper result. If you prefer to weigh your ingredients you can click the "metric" button just below the list of ingredients. I hope this provides the understanding you're needing! Let me know if you have any other questions I can answer.
I made this incredible bread using the dough cycle on my bread machine and the proceeded to bake per your instructions. During the current pandemic, I ran out of butter, but used coconut oil. . . still delicious, light and airy. Thank you
That's so great to hear Zina! And good to know that coconut oil will work in a pinch. Thanks so much for sharing!
I'll be trying your recipe in the morning but I wish I had a piece of it right now!! I have a question...something I've never done is used honey in a bread recipe. I have a lot and I'm really low on sugar. Have you ever tried this and if so, does it change the texture of the bread? Thanks so much and thanks for the recipe! 🙂
Hey Marianne! I use honey in bread recipes all the time. It works beautifully! Go ahead and give it a try- I think you'll be very happy with the result. Good luck!
Ok! So being a bread lover! Being stuck home in these times! I've recently tried making bread. I've tried several different ones! This bread recipe is by far the best one I've tried! My house smells amazing! And actually smells like bread!! You wont be disappointed! Tip for slicing! Electric knife! Perfect slices!
Great tip Peter and thank you so much for the 5-star review!
I made it this morning. I divided the dough and got 2 loaves. My family absolutely loved the taste and soft texture! Thank you for posting this recipe. I will definitely make this very often.
From a 1st time bread maker because of cv-19
Aw, I'm so glad your family enjoyed it Alayne! Great job stepping out of your comfort zone. You'll be a pro before you know it!
In Step 4, do we knead the dough by hand for 10 minutes or still in the stand mixer? Thank you.
You can do it either way- however you like!
Lovely recipe for my first time baking bread. The second time I reduced the amount of sugar and increased the salt.
Would it work to add the pan of water in the oven (as you do for baguettes) to make the it crusty?
I have not tried that but it may work! Usually for this type of bread I'm after more of a soft texture so I can't say for sure but it's worth a try. So happy you were pleased overall. Thanks!
Can we use half of the sugar in yeast and half in dough
This recipe comes out amazing. Best white bread ever and does last a number of days. That is if you don’t eat it all right away! Thank you so much for sharing.
It's my pleasure Kelly! I'm so happy you enjoyed. Thank you so much for the 5-star rating!
Can this recipe be adapted to make two loaves?
As long as your mixer is big enough to hold it all, you can just double the recipe. Good luck!
I doubled the recipe though it's my first time making this one. I felt like the dough took up a lot of flour and rose quite a lot even after I put them in the oven. They got about 1 1/2 inches taller than I expected. It may be a combination of the sugar and low salt.
Anyway, I just finished mine and while they are taller than expected, the flavor and texture is really good. Will make again.
Very glad you were pleased! I love when it rises nice and tall like that!
Thank you for the response. I will give it a try today.
Does the crust come out crunchy at first when you take it out of the oven and eventually gets softer when it cools? Or it’s suppose to be soft to begin with? Mine came out with a crunchy crust. Is the 2nd kneading suppose to be 10mins as well? Trying to figure out if I missed a step, dough rose really well and It looks great. Still waiting to cool and will try it soon. Smells good! Thanks
Yes I have found that the crust does become softer as the bread sits. It's quite a thin crust, so it may feel very dry when it first comes out of the oven, but because it's so thin it isn't overly chewy. There is no 2nd kneading for this recipe. Hope you enjoy!
I’ve made bread in the past, but I absolutely loved the fluffy texture of this recipe! Had to made a second loaf right away lol
this looks yummy I well try this. Oh I can't wait to put butter on that warm soft delicious bread. thank you
You're welcome! I hope you enjoy!
Made the whole wheat bread came out great rose well, haven't tried this white bread as yet.
Wondered if you have an English muffin recipe that's as easy as the bread recipes.
Thanks
How long do you leave the loaf in the pan? Should I let it in there for a few minutes and then turn it out into a rack or something? What do you do?
Hi there! You should allow the bread to cool to a point where you're able to handle it without getting burned, then flip it out of the pan and allow it to cool the rest of the way on a wire rack. Hope that's helpful!
I have been trying different bread recipes, yet to try yours but always 1st rise is double in size but 2nd so so resulting in a heavy dense brittle loaf that has shrunk. What could be going wrong?
What recipe are you using? It's really hard for me to say without knowing anything about the recipe.
What temp should the water for the bread be?
This would be helpful
Thanks
Hey Suzan! The water should be warm but not hot. Just a little above body temperature, like a baby's bath. Somewhere in the neighborhood of 105 to 100 degrees F. Good luck!
Excellent recipe, the bread was soft, moist delicious. I'll be making another loaf very soon.